Hello everyone...✨
Hello to my dear Hivers and the dear community of artists #HiveDIY, as always very pleased and excited to be here again, showing you my work made with love and especially for you.
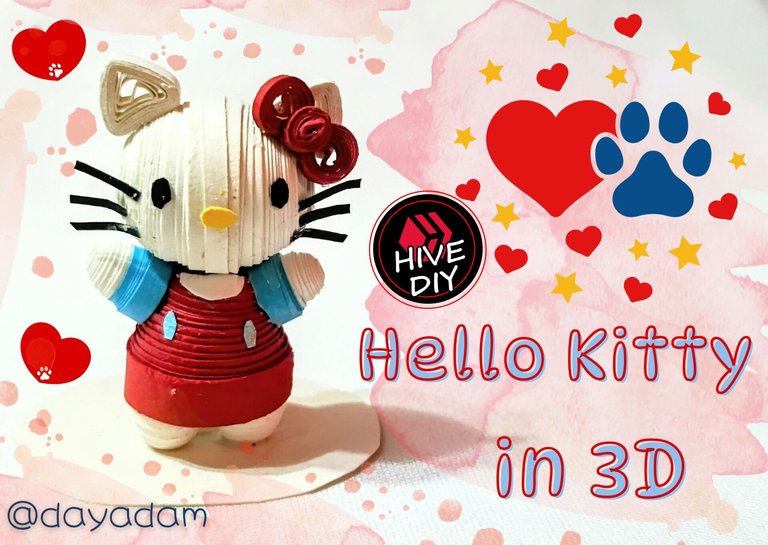
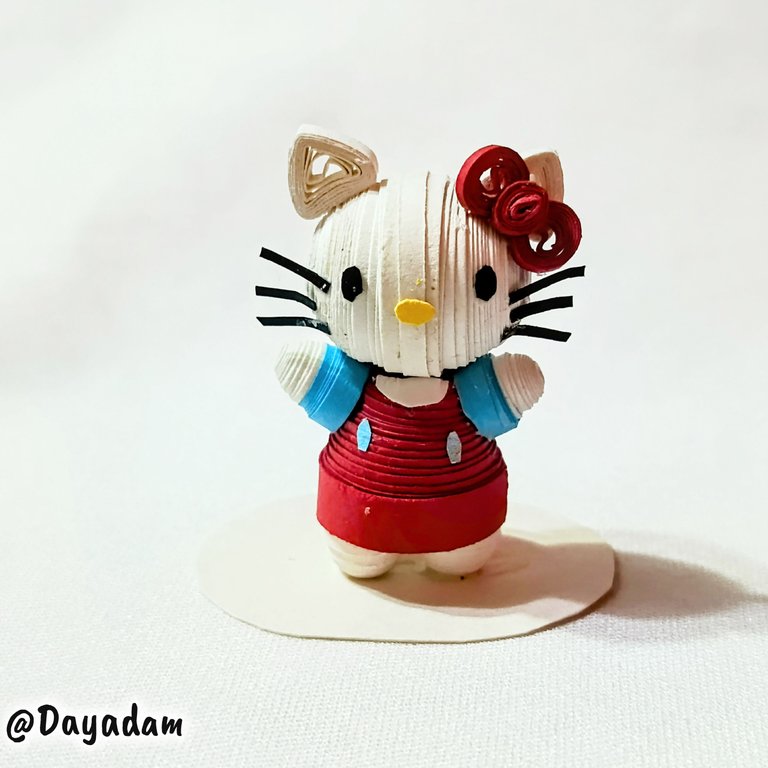
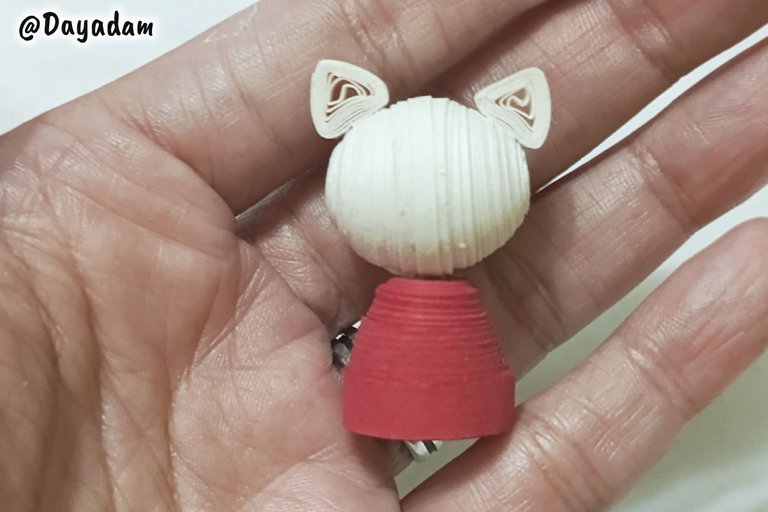
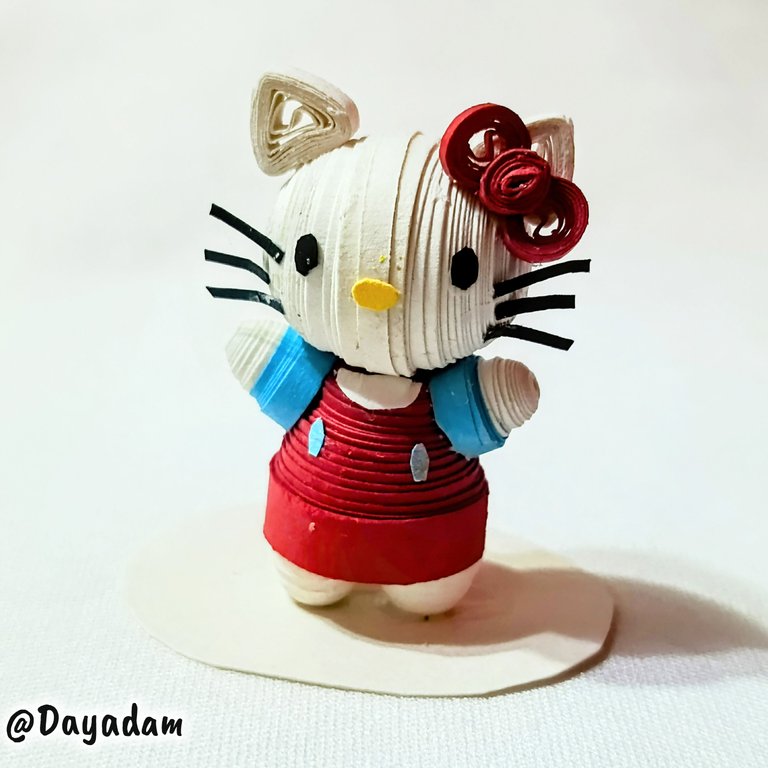
For today I leave you the end of the collection that I have been making of SANRIO characters, I decided to leave to culminate the main character the beautiful cat Hello Kitty, as a small 3D decorative figure in the quilling technique.
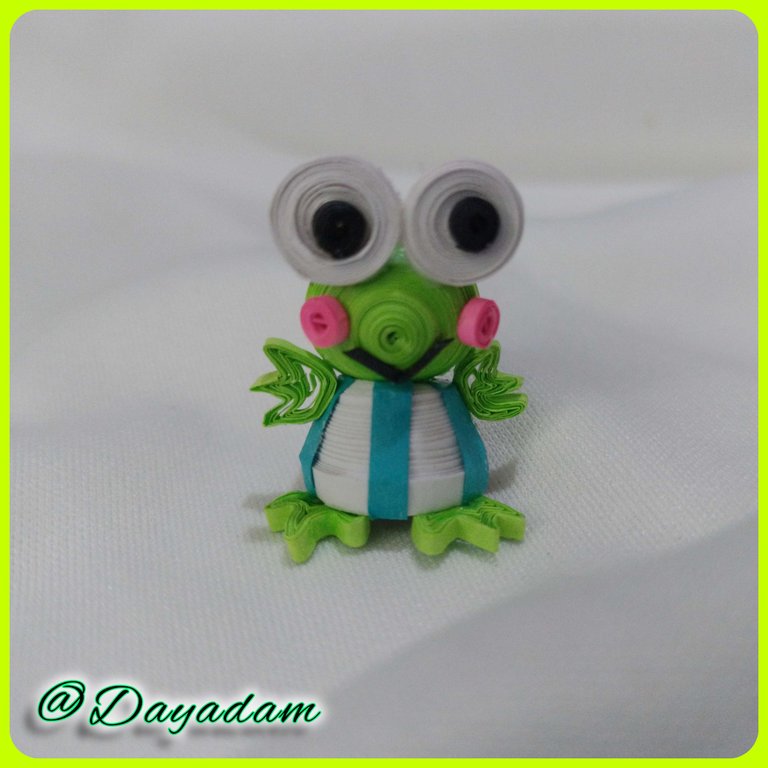
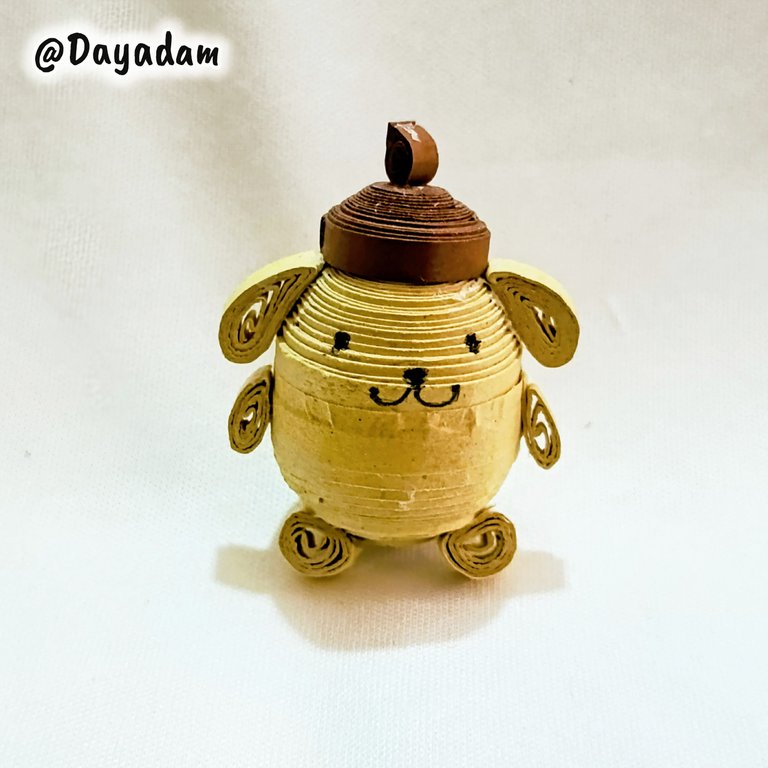
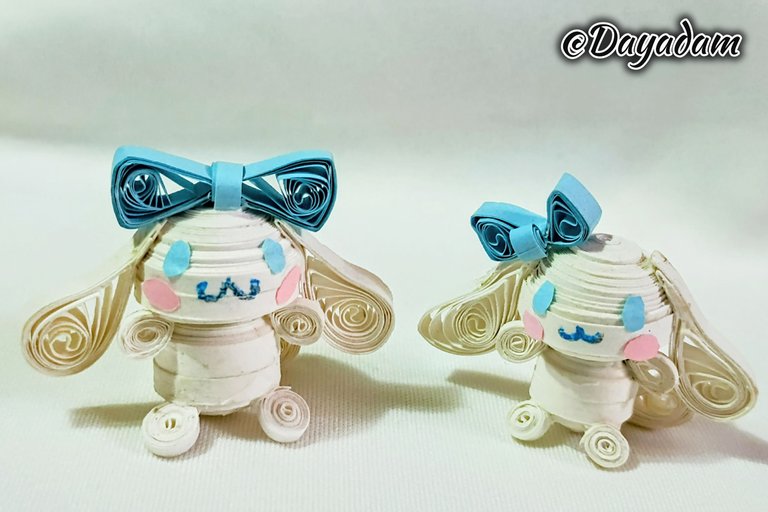
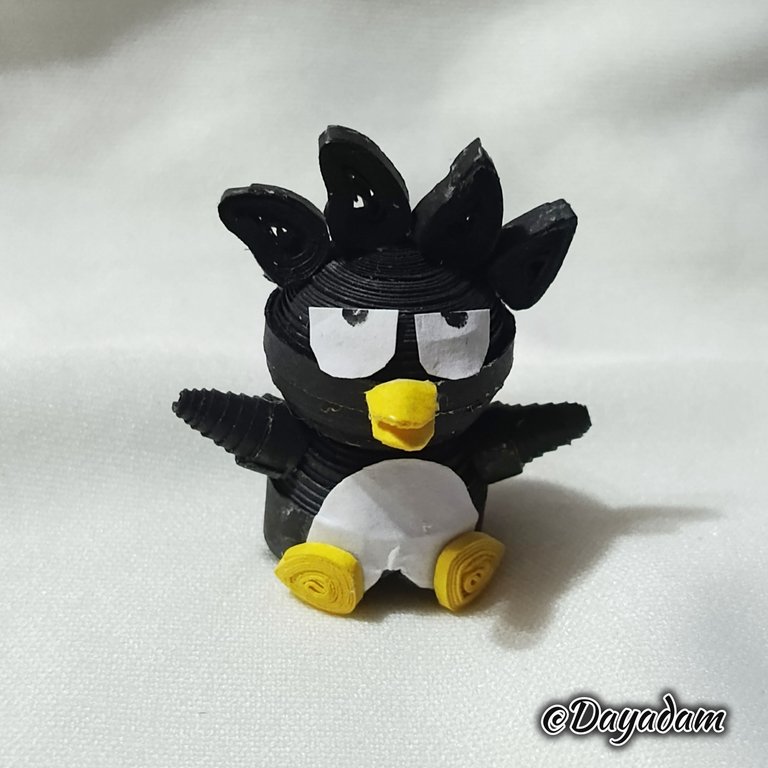
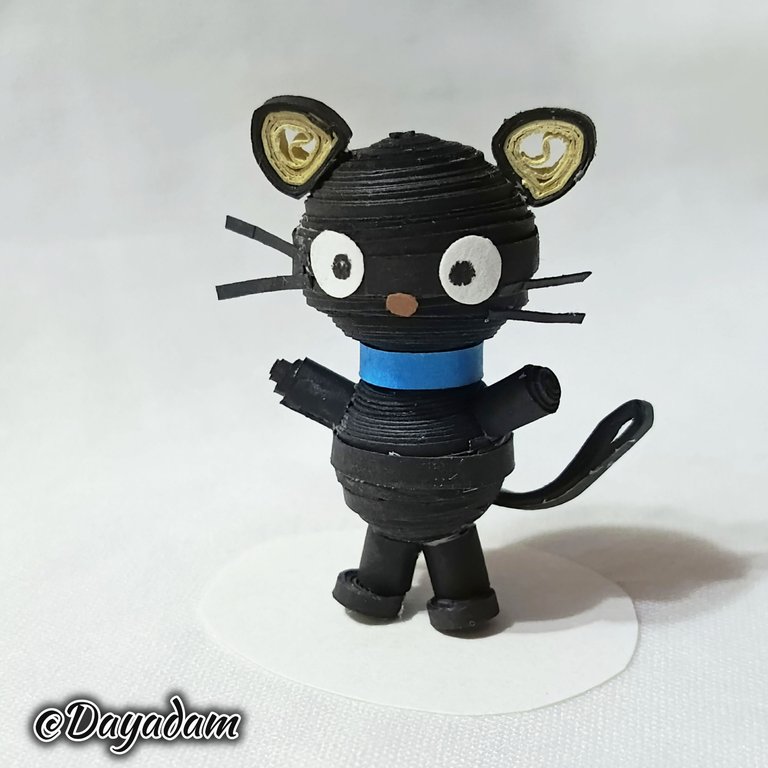
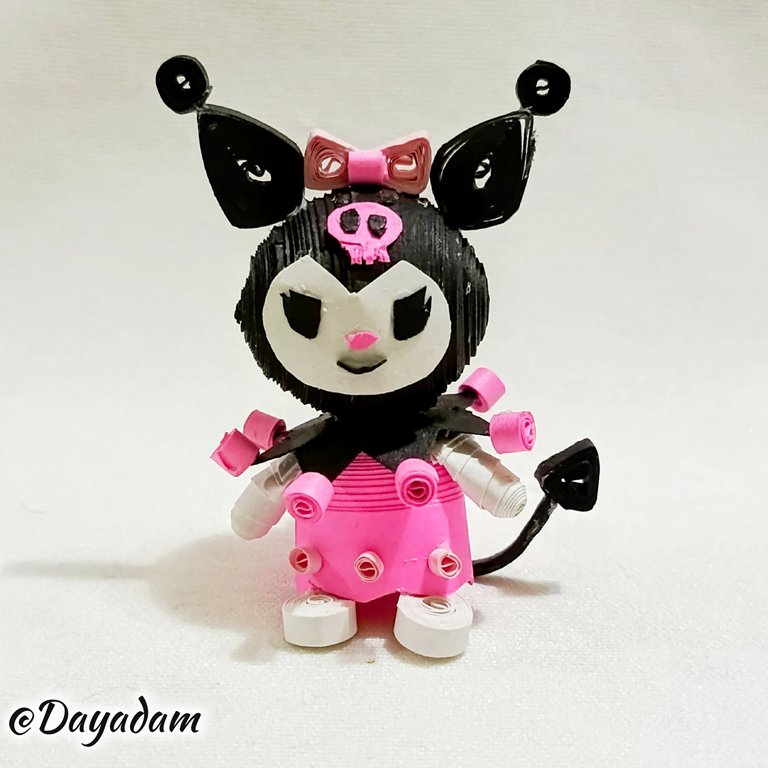
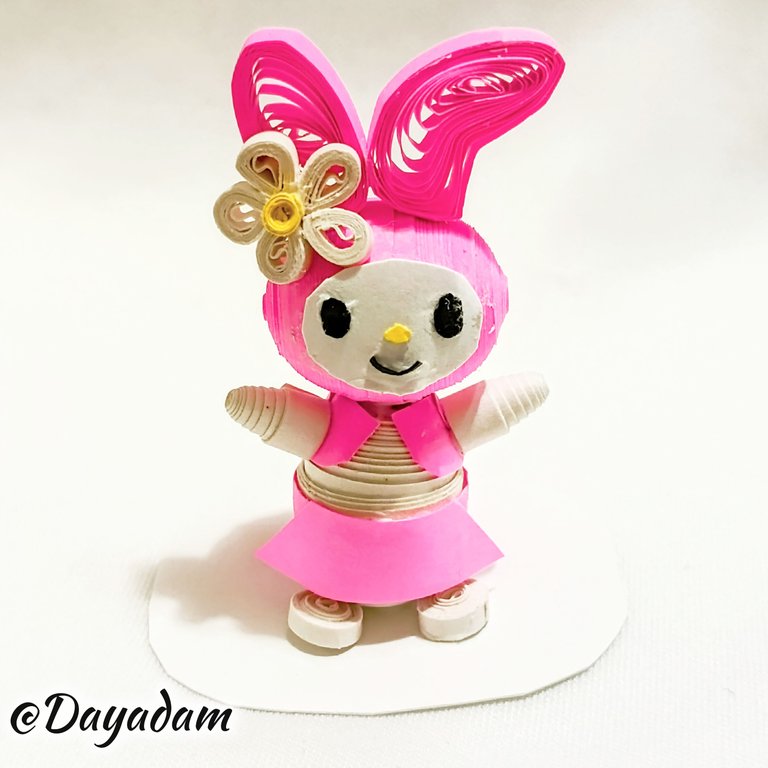
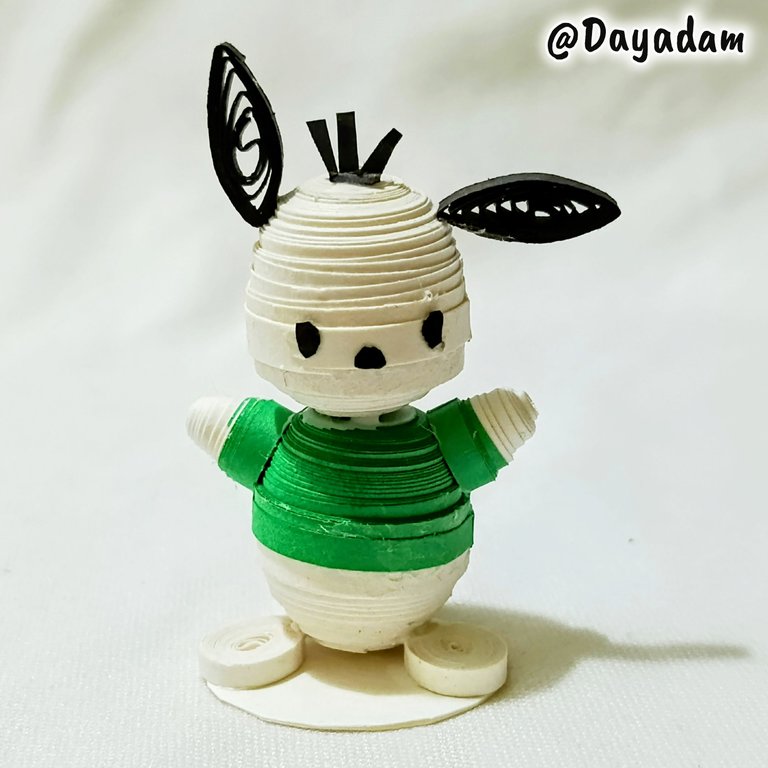
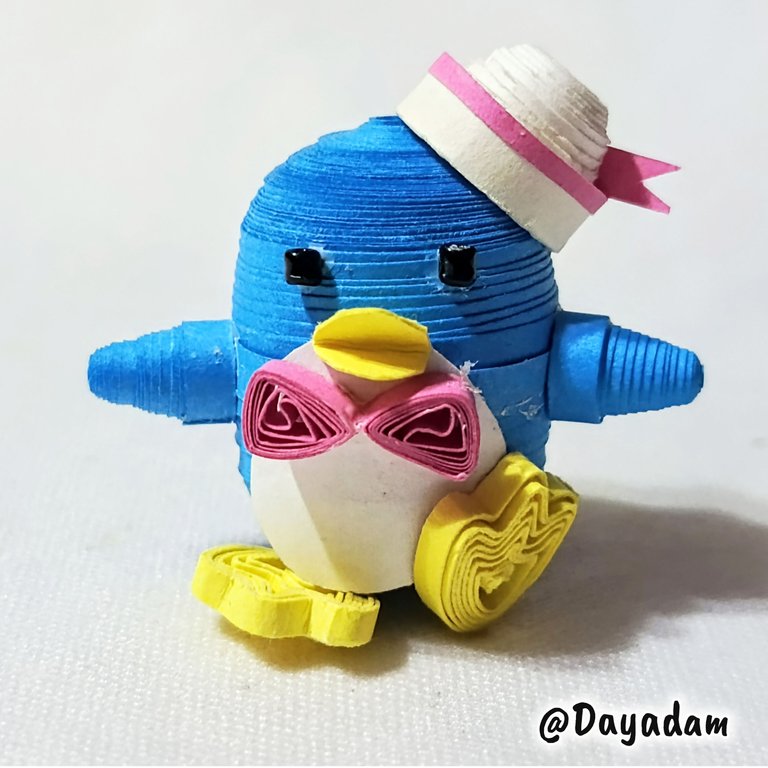
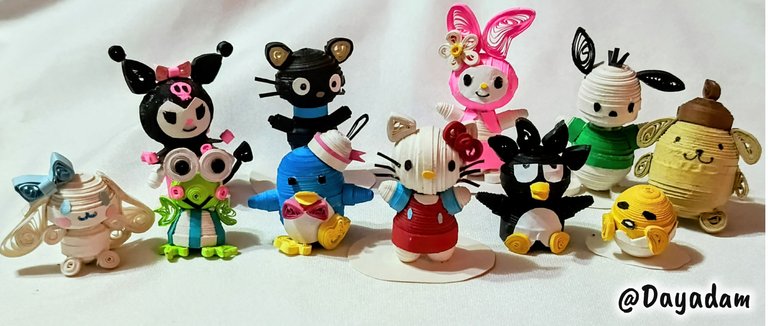
Here are all the other characters I made, so you can appreciate the creative process of each one of them;
Hoping you like it, I leave you my creative process:
Let's get started:😃

Hola a Todos...✨
Hola a mis queridos Hivers y a la querida comunidad de artistas #HiveDIY, como siempre muy complacida y emocionada de encontrarme por acá nuevamente, mostrándole mi trabajo hecho con mucho amor y especialmente para ustedes.
Para hoy les dejo el final de la colección que he venido realizando de los personajes de SANRIO, decidí dejar para culminar a la personaje principal la bella gatita Hello Kitty, como una pequeña figura decorativa en 3D en la técnica de quilling.
Por acá les dejo todos los demás personajes que realicé, para que aprecien el proceso de creativo de cada uno de ellos;
Esperando que sea de su agrado, les dejo mi proceso creativo:
Comencemos:😃

• Cintas de quilling.
• Aguja de quilling.
• Plantilla para moldear círculos.
• Trozos de Cartulinas.
• Pincel.
• Pega blanca extra fuerte (de carpintería).
• Tijera.
- Quilling ribbons.
- Quilling needle.
- Template to mold circles.
- Pieces of cardboard.
- Brush.
- Extra strong white glue (carpentry glue).
- Scissors.

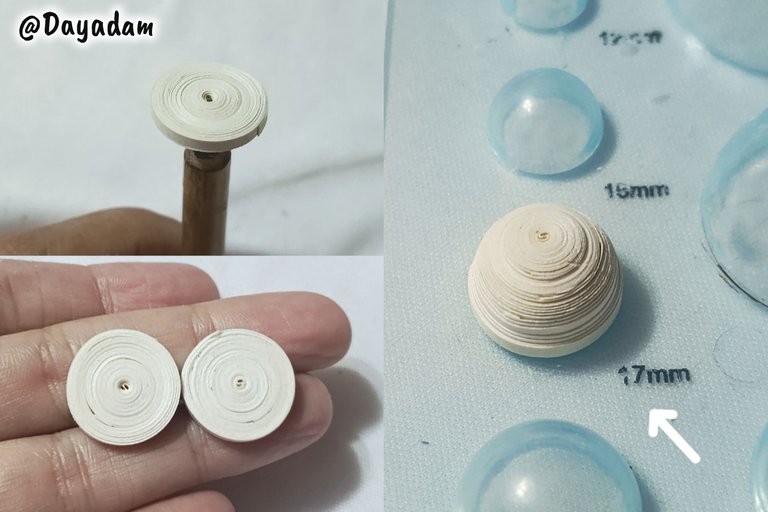
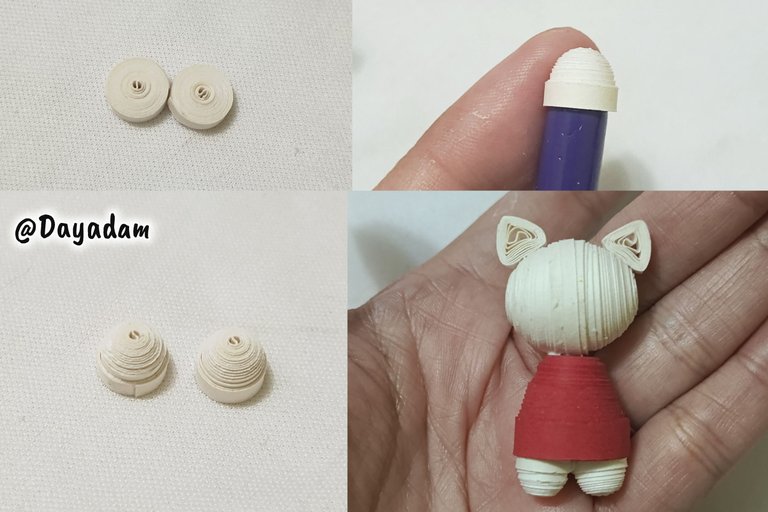
- We start taking quilling tape 3 mm wide white, with the needle we will roll all the tape until the end of it sealed with extra strong white glue and remove the needle, get a closed circle will need two of the same.
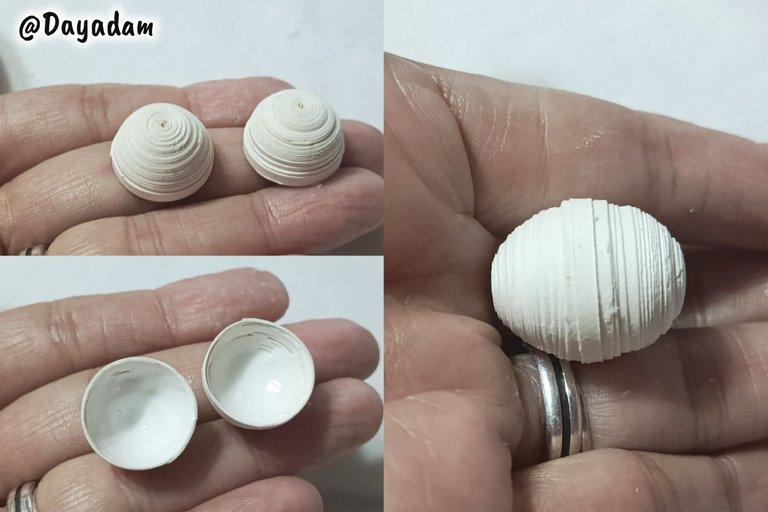
- These circles will mold them in a template to mold circles in the measure number 17 mm, we take out of the mold, apply extra strong white glue on the inside to prevent them from moving or deforming, then proceed to join both by passing a white ribbon through the middle. This will be the head of the character.
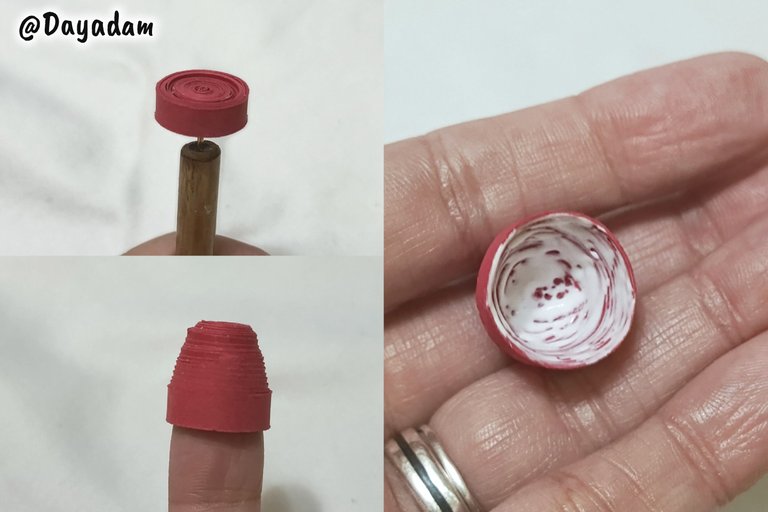
- To make the body or dress of the character, we will roll with the needle a piece of red ribbon 5 mm wide, we will get a closed circle this we will raise it a little with the finger to form a kind of cone, and we will apply glue on the inside.

• Comenzamos tomando cinta para quilling de 3 mm de ancho de color blanco, con la aguja vamos a enrollar toda la cinta hasta llegar al final de la misma sellamos con pega blanca extra fuerte y sacamos de la aguja, obtendremos un círculo cerrado necesitaremos dos iguales.
• Estos círculos los moldearemos en una plantilla para moldear círculos en la medida número 17 mm, sacamos del molde, aplicamos pega blanca extra fuerte por su parte interna para evitar que las mismas se muevan o se deformen, luego procedemos a unir ambas pasando una cinta blanca por el medio. Esta será la cabeza del personaje.
• Para realizar el cuerpo o vestido del personaje, enrollaremos con la aguja un trozo de cinta de color rojo de 5 mm de ancho, vamos a obtener un círculo cerrado este lo subiremos un poco con el dedo para formar una especie de cono, y aplicaremos pega en su parte interna.
- To make the ears we will make 2 small open white circles, which we will mold in the shape of a triangle, we will glue them on the top of the head on both sides.
- At this point we proceed to join the head of the dress.
- For the legs we will make 2 closed circles of white color, which we will mold with the tip of a brush or some other object, apply glue on the inside and glue under the dress.
• Para hacer las orejas realizaremos dos pequeños círculos abiertos de color blanco, los cuales moldearemos en forma de triángulo, los pegaremos en la parte de arriba de la cabeza en ambos lados.
• En este punto procedemos a unir la cabeza del vestido.
• Para las patitas realizaremos dos círculos cerrados de color blanco, los cuales moldearemos con la punta de un pincel o algún otro objeto, aplicamos pega por su parte interna y pegamos debajo del vestido.
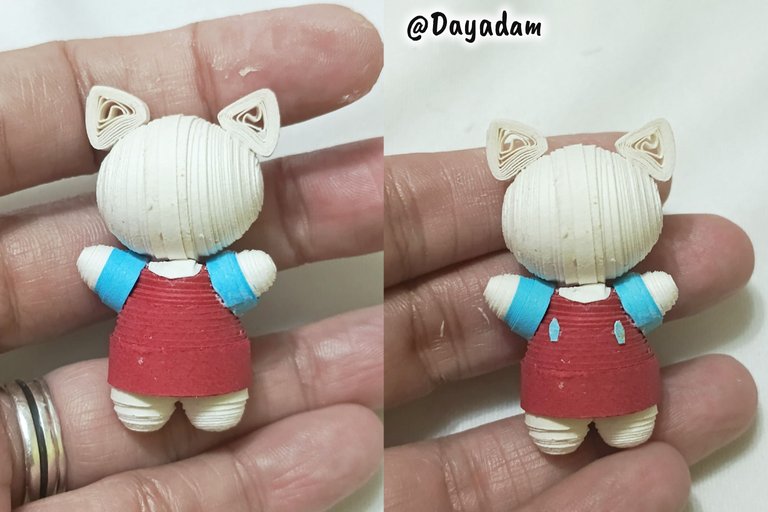
- To make the arms I made two closed circles with blue and white ribbon, I made a combined circle to give it the resemblance of a sleeve and a hand, once ready I removed a little with the tip of a brush, applied glue on the inside and glued to the sides of the dress.
- I made some details with small pieces of cardboard, I glued them to the dress.
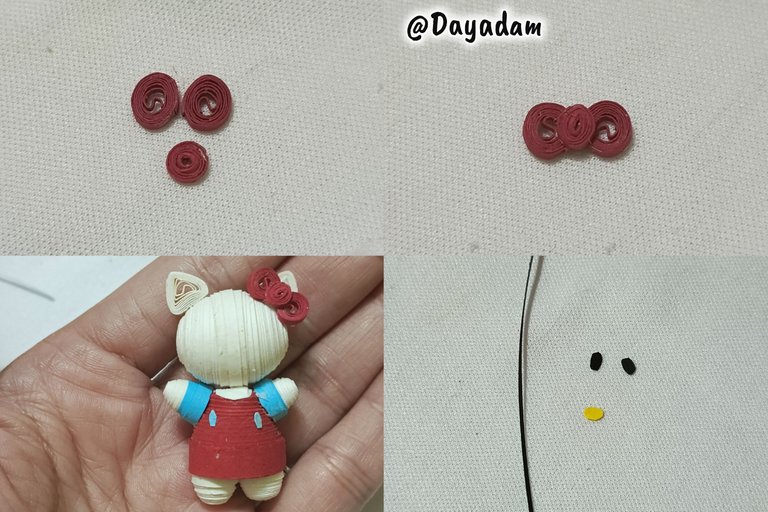
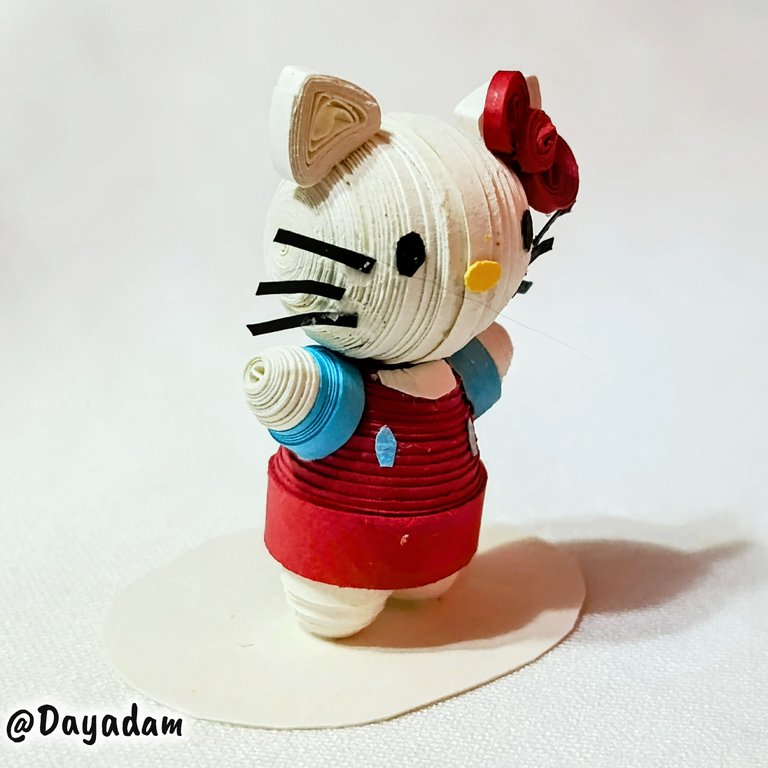
- I made 2 small open circles and a closed one in red to make a bow, I molded them as you can see in the picture, I glued it to one side of one of the ears of the character.
- Finally, cut out pieces of cardboard, the eyes, nose and whiskers, glue them on Hello Kitty's face.
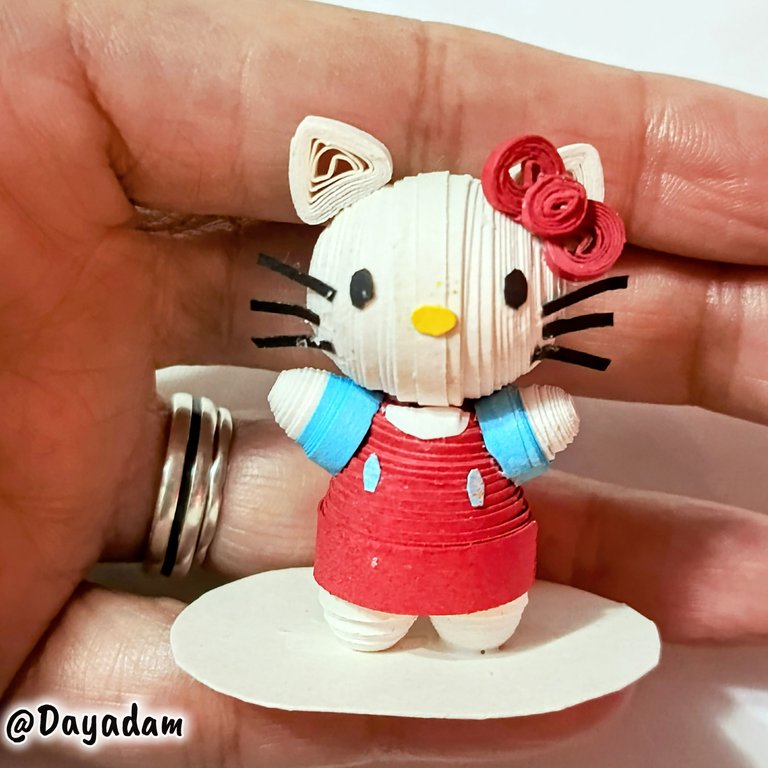
This way I finished this collection of SANRIO characters, with the emblematic and cute kitty Hello Kitty, in the quilling technique.
• Para realizar los brazos realicé dos círculos cerrados con cinta de color azul y blanco, lleve a cabo un círculo combinado para darle semejanza de una manga y una mano, una vez listo saqué un poco con la punta de un pincel, apliqué pega por su parte interna y pegué a los lados del vestido.
• Realicé algunos detalles con pequeños trozos de cartulina, los pegue del vestido.
• Realicé 2 pequeños círculos abiertos y uno cerrado de color rojo para realizar un lazo, los moldee tal y como pueden ver en la imagen, lo pegué a un lado de una de las orejas del personaje.
• Para finalizar recorte de trozos de cartulina, los ojos, nariz y bigotes, pegue en la cara de Hello Kitty.
De esta manera finalice esta colección de personajes de SANRIO, con la emblemática y tierna gatita Hello Kitty, en la técnica de técnica de quilling.

What did you think, did you like it?
I hope you did, I hope you liked my explanation, procedure and photos, I made them with love for you.
"Let out that muse that inspires you, and let your imagination fly".
Thank you all, see you next time ✨.
¿Que les pareció, les gustó?
Espero que sí, que les haya gustado mi explicación, procedimiento y fotos, los hice con mucho cariño por y para ustedes.
"Deja salir esa musa que te inspira, y deja volar tu imaginación".
Gracias a todos, nos vemos en la próxima✨

All photos used in this post are of my authorship and have been taken on my personal cell phone a Redmi 9T, edited in InShot and Canva
Banner and separator made by me in Canva
Translated with the help of DeepL
Todas las fotos usadas en este post son de mi autoría y han sido sacadas en mi celular personal un Redmi 9T, editadas en InShot y Canva
Banner y separador hecho por mí en Canva
Traducido con la ayuda de DeepL
Posted Using INLEO


A buena hora que haces a la Reina de Sanrio... Hello Kitty es mi personaje preferido, amo todo lo que se crea con ella, quisiera tener más dinero para tener más cosas de ella.
Siempre tengo problemas cuando la veo en piñatas y veo que sus ojos no tienen la distancia perfecta, y es que si están mal colocados, no es Hello Kitty. Este arte tuyo se ve genial y lo amo, pura belleza.
Gracias amiga, pues deje de última a la reina, a mi también me encanta Hello Kitty, de echo tengo una colección de peluches que adquirir en Macdonald y recuerdo que estaba embarazada, imagínate casi 24 años tienen. Trate de hacerla lo más semejante y bueno creo que lo conseguí, tu comentario me llena de mucha gratitud 💖
!LUV
Waooo que belleza querida @dayadam, te quedo demasiado linda tienes un excelente talento para desarrollar esta técnica. Saludos 🤗
Muchísimas gracias mi corazón, un placer leer tu bonito comentario.
!LADY
Hermosa pieza y hermosa colección, hiciste algo hermoso aquí.
!discovery 30
Gracias mi cielo, por tu apoyo, valoración y bonito comentario a mi trabajo, me alegra un mundo que te haya gustado 🤎
!LUV
!HUG
This post was shared and voted inside the discord by the curators team of discovery-it
Join our Community and follow our Curation Trail
Discovery-it is also a Witness, vote for us here
Delegate to us for passive income. Check our 80% fee-back Program
Thanks @discovery-it 💕
Demasiada linda 😍 mi favorita
Gracias mi corazón 💞
!PIZZA
@dayadam, sorry! You need more to stake more $PIZZA to use this command.
The minimum requirement is 20.0 PIZZA staked.
More $PIZZA is available from Hive-Engine or Tribaldex
@dayadam Hola cariño, saludos , otra bella y magnìfica creaciòn hecha por tus màgicas manos, sobre el icònico personaje de Sanrio Hello Kitty, realmente bello... un fuerte abrazo.
Gracias por tus palabras amigo 🙂
!HUG
Amo tu colección amiga, que lindos se verían en una repisa.
Gracias reina, van para una repisa de mi hija, se los hice a ella, ya está nadando en muñequitos 😅💕
!LADY
Just like your other creative work, your hello kitty look very cute and adorable 😍
I love your work process as well, it's neat and easy to follow. !DIY
Thank you so much for your kind words about my work, I'm glad you liked it. 💕
It's my pleasure 😊
Thanks for the support @hivepakistan ✨💖
Hey, I found your content in TOP CONTENT feed on r/blogger.
Dropping some upvote love for your marketing efforts of hive on reddit.
!PAKX
View or trade
PAKXtokens.Use !PAKX command if you hold enough balance to call for a @pakx vote on worthy posts! More details available on PAKX Blog.
Thanks @pakx ✨
Thank you for your support and appreciation for my work. It fills me with gratitude. Greetings and blessings @dlmmqb ✨
https://x.com/Darcy1387/status/1934301060891336838?t=qHU8a1ITZLnvb43k2SF58w&s=19
https://www.reddit.com/r/handmade/comments/1lc66t1/hello_kitty_in_3d_quilling_technique/
This post has been shared on Reddit by @dayadam through the HivePosh initiative.
Thanks @redditposh ✨
Qué belleza!!! Hay magia en esas tirillas de papel. Tienes un toque único.
Muchísimas gracias mi linda por tu bonito comentario. Bendiciones 💖
A ti amiga. Toda la luz creativa te acompañe siempre
Amen amen y amen...💝
¡AMO CON FURIA TU ERA SANRIO DAYA BELLA!, un solo personaje de Sanrio ya es mucho love pero ver cómo tu colección crece inspira un sentimiento muy especial; me gustó muchísimo el detalle que el sentido del papel en el caso de Hello Kitty es diferente en la cabeza, hace que la nariz se vea muy linda. Todo esta hermosamente explicado y maquetado, que buen proyecto 😻 💝 🔥
Mil gracias preciosa, realmente muy complacida con tus hermosas palabras hacia mi trabajo. Me gratifica muchísimo de verdad que te haya gustado, tú eres una artesana con todos los hierros, y en todos los sentidos de la palabra 💖
Super te quedó genial 😊👌😊 me encanta
https://www.reddit.com/r/sanrio/comments/1qo1r6h/hello_kitty_in_3d_quilling/
This post has been shared on Reddit by @chacald.dcymt through the HivePosh initiative.