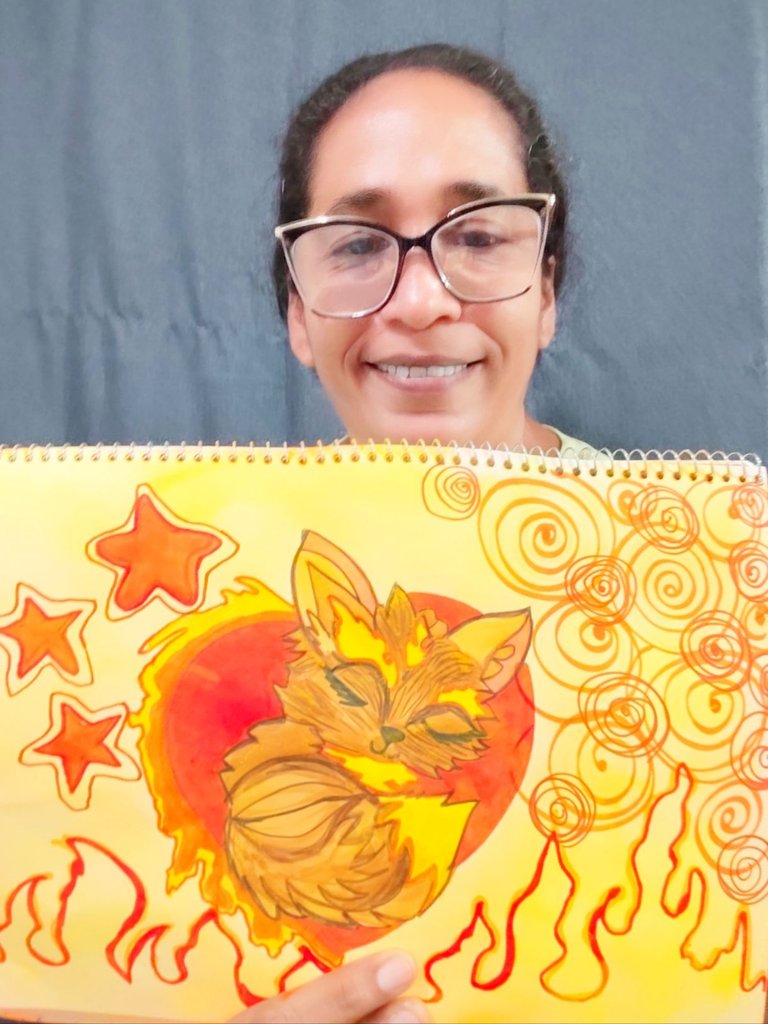
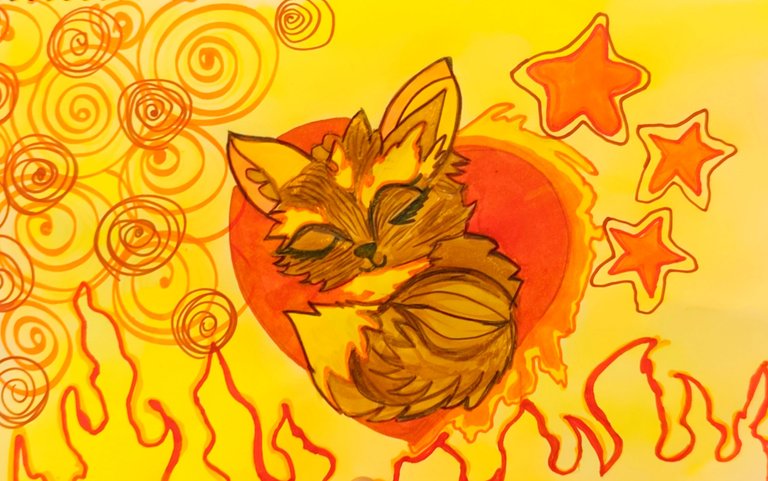
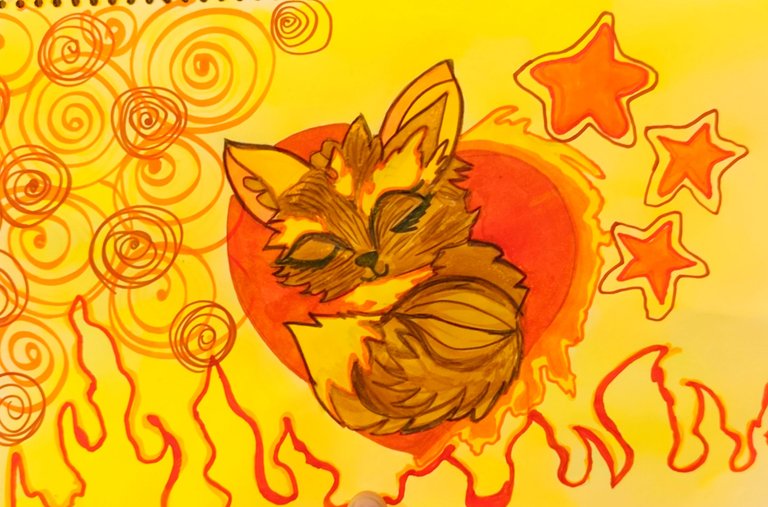
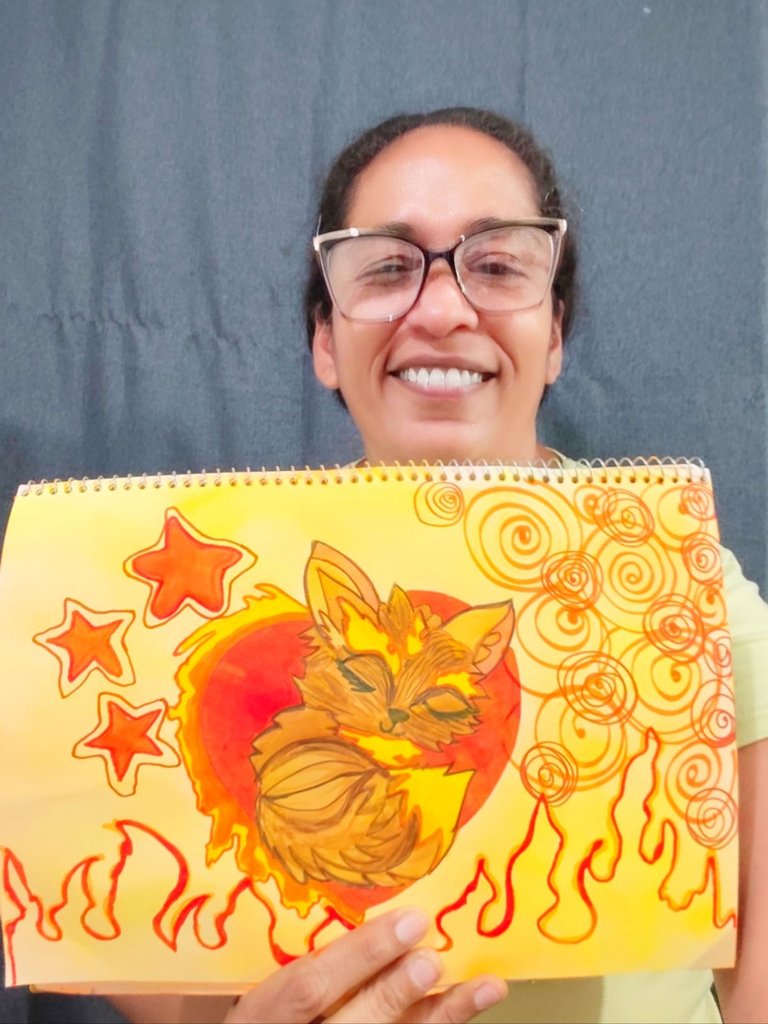
[Eng-Esp].- 🦊 Fanart for Holozing-Drawing of infurno.🦊 // 🦊Fanart para Holozing-Dibujo de infurno.🦊
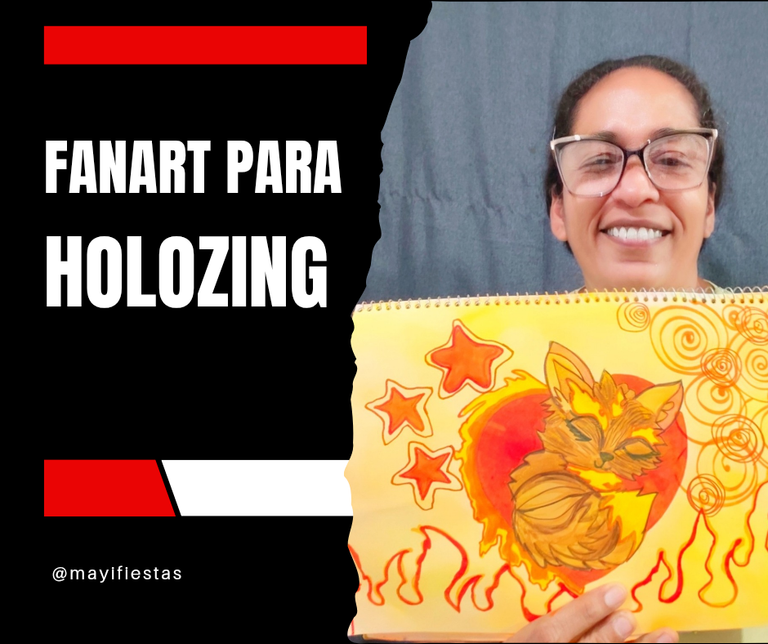
Happy weekend to all #holozing game lovers today we are back to bring you some fanart, this time I made you a drawing of infurno, made with crayon pencil, markers and colors.
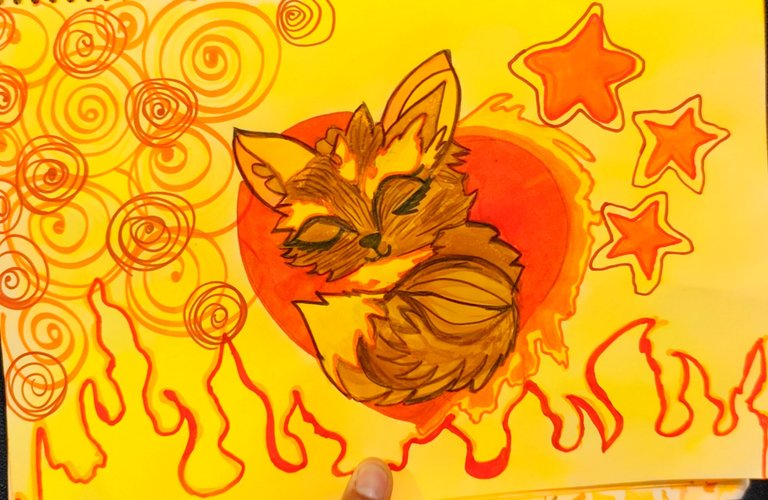
We did the character in shades of orange, yellow and red, and we gave it intensity with the use of neon pigments that make this drawing something colorful and beautiful.
🦊 MATERIALS 🦊
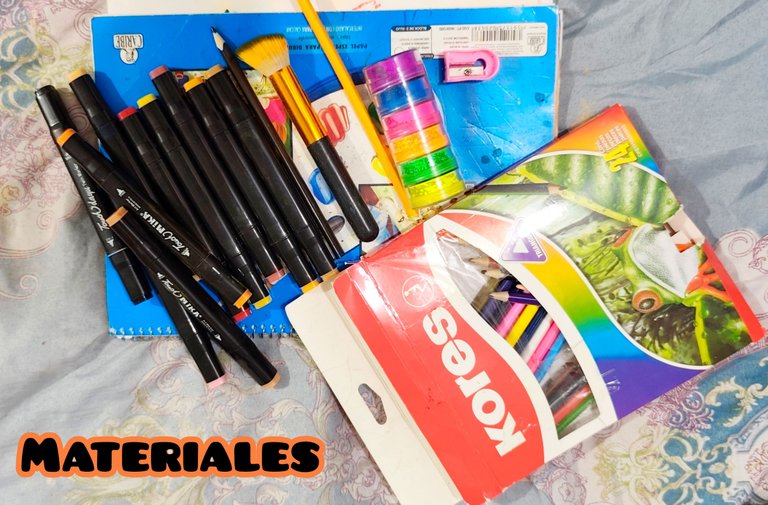
🦊 Drawing pad.
🦊 Markers.
🦊 Colored pencils.
🦊 Neon pigments.
🦊 Crayon pencils.
🦊 Eraser.
🦊 Pencil sharpener.
🦊 Brush.
STEP BY STEP 🦊
🦊 STEP 1:
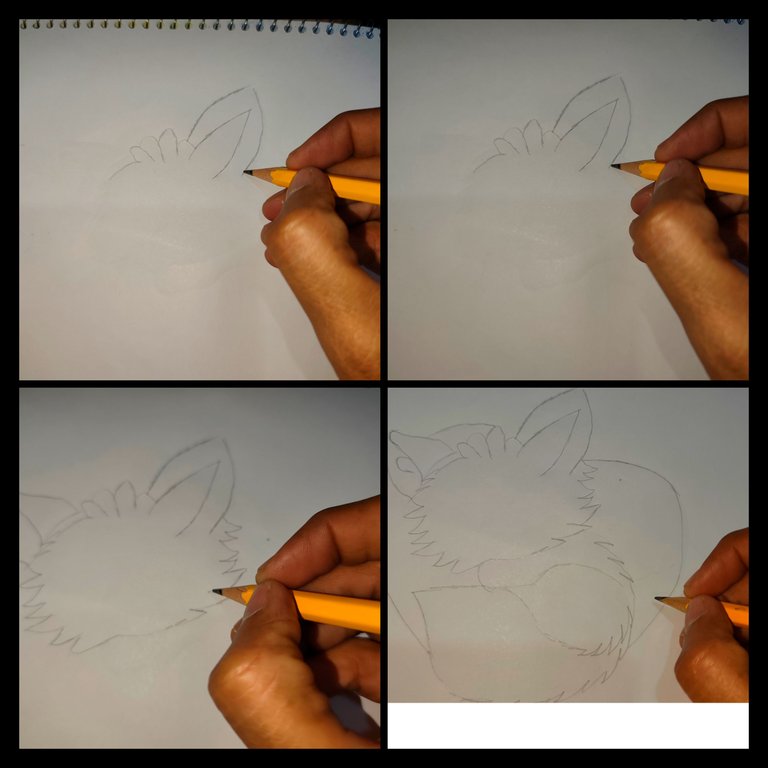
First of all he took the crayon pencil, and on the pad I start the infurno drawing, giving small strokes as a sketch, which later gave me the possibility to make corrections.
🦊 STEP 2:
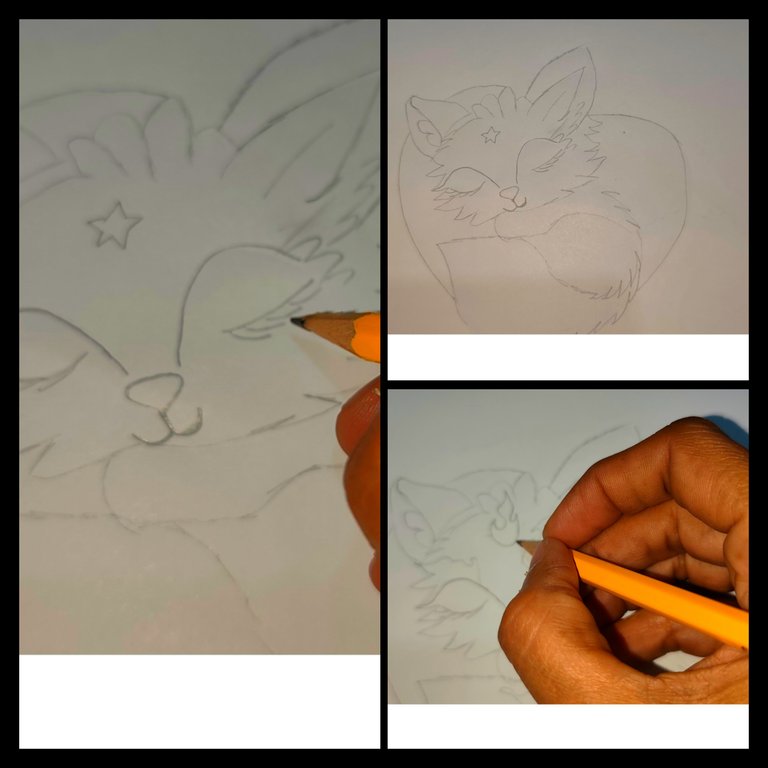
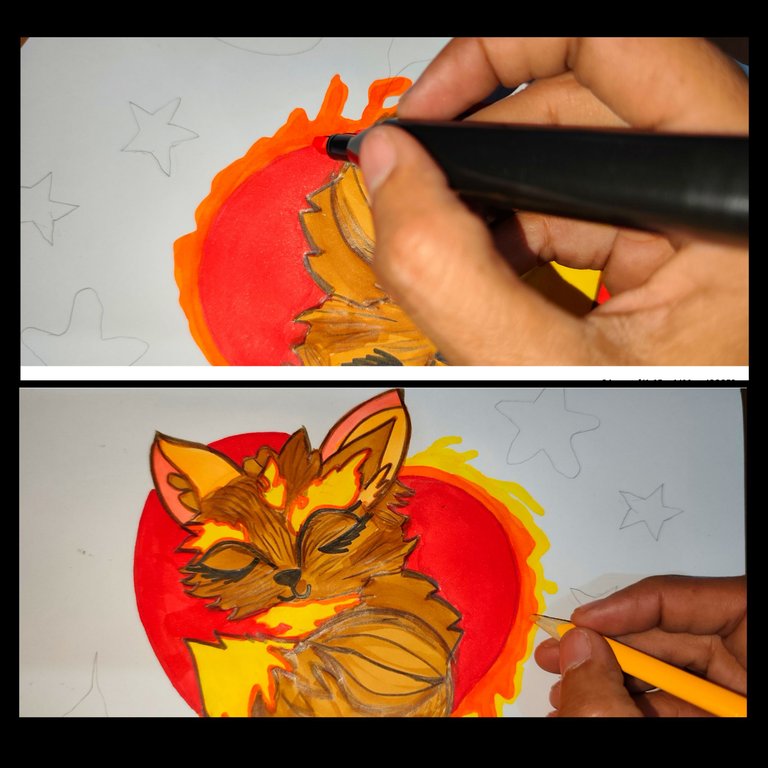
Now I gave him the features of the character's face, this time I made him asleep, with his eyes closed, and first I had drawn a star, and I changed it for the symbol of fire, as well as other details including a heart that surrounds my character.
🦊 STEP 3:
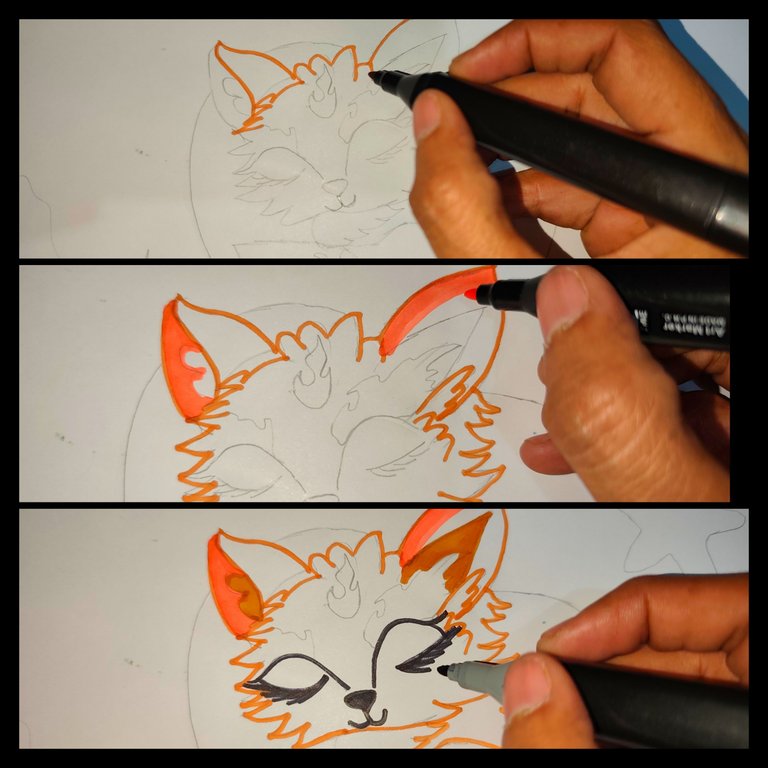
Let's give color to the drawing, I start by outlining the character, then in different shades of brown I outline and then fill in some parts.
Then with the black marker, I draw the eyes, nose and mouth of the character.
🦊 STEP 4:
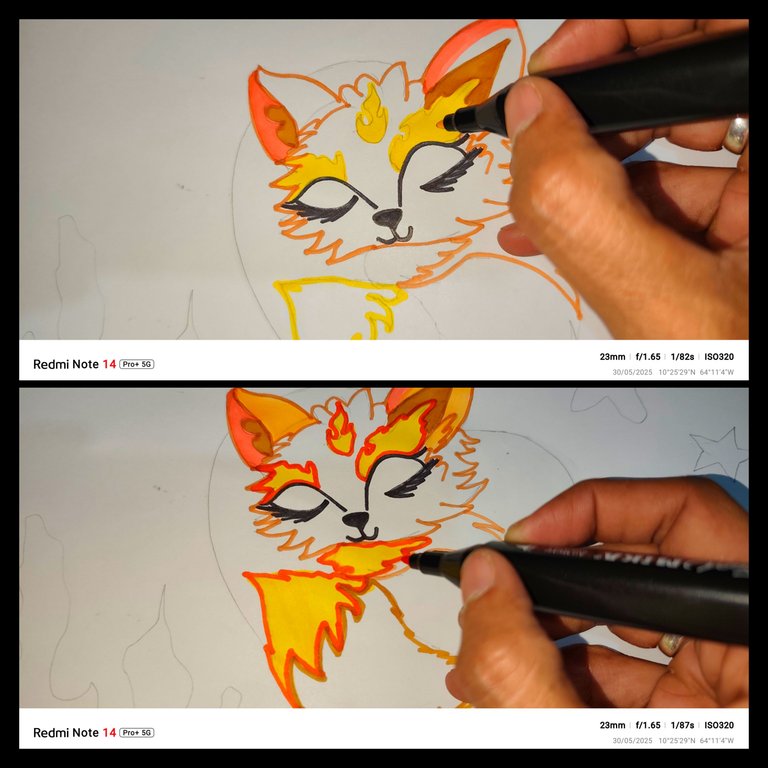
Now with the yellow marker I fill in the parts of the drawing that are fire, and outline with the bright orange marker.
🦊STEP 5:
Now with the light brown marker he filled in the character and with the darker brown marker we make the character's fur.
🦊 STEP 6:

With the red marker, first outline the heart and then fill in.
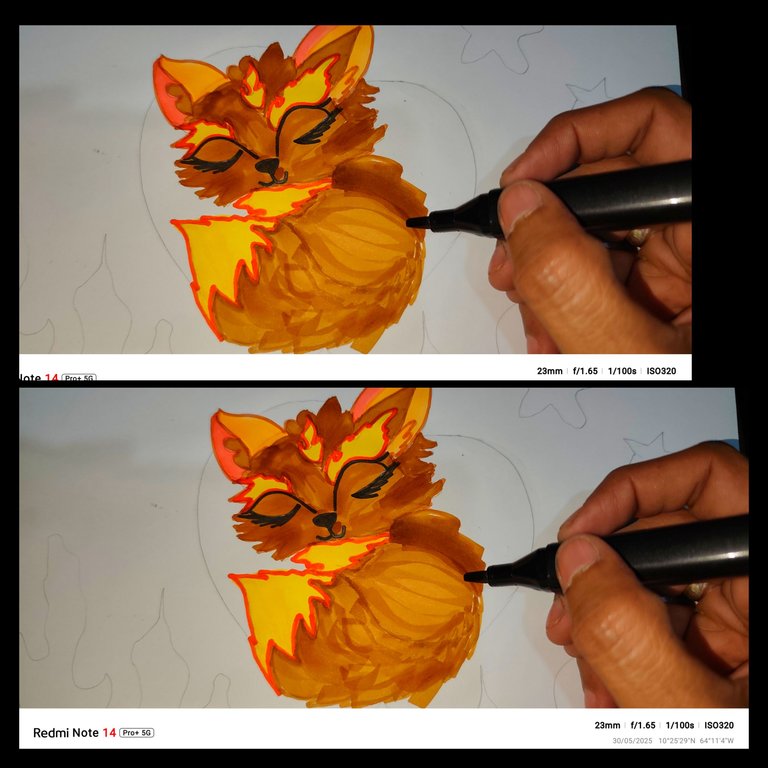
🦊 STEP 7:
We continue to give him more details, so I take the brown pencil and draw some little hairs of the character.
🦊 STEP 8:
With the bright orange marker we draw flames around one side of the heart, when we finish drawing the flames with the yellow marker and with the colored pencil we shade them.
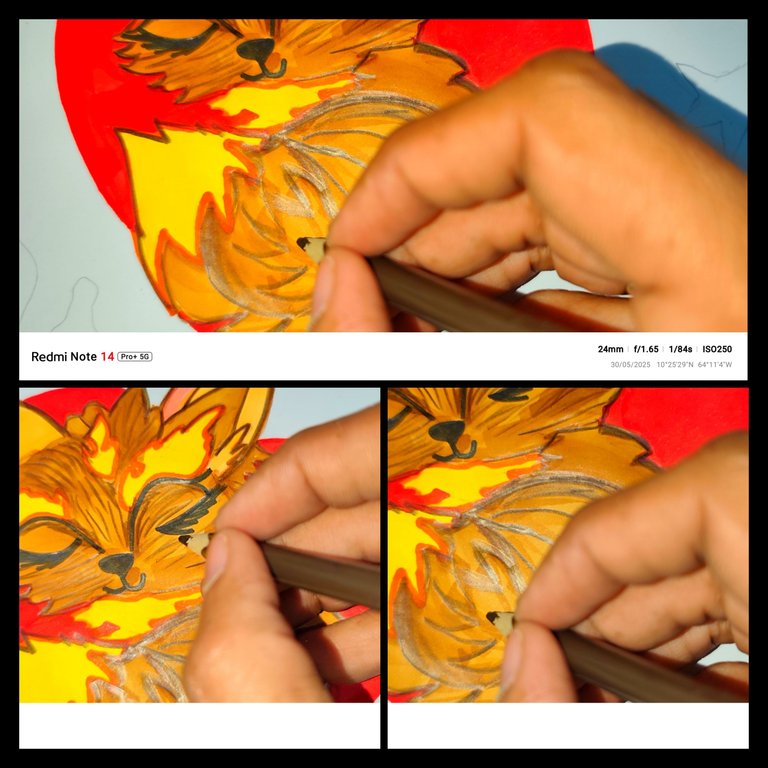
🦊 STEP 9:

Now with the brush he applied the orange pigment around the drawing and applied the first layer, then applied the yellow pigment and blended.
🦊 STEP 10:
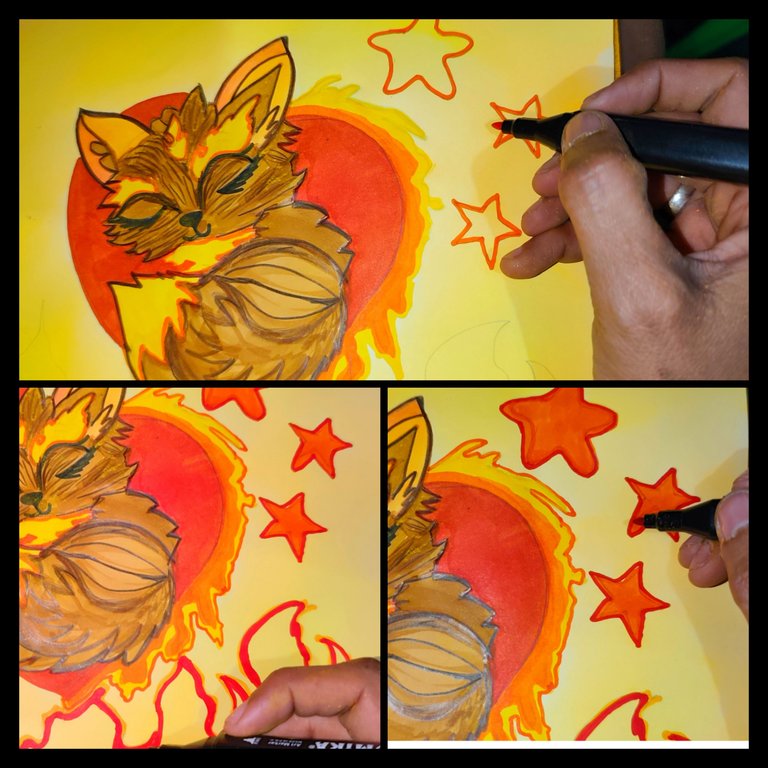
Now with the orange marker we draw the stars and outline the line of fire along the edge to the bottom.
🦊 STEP 11:
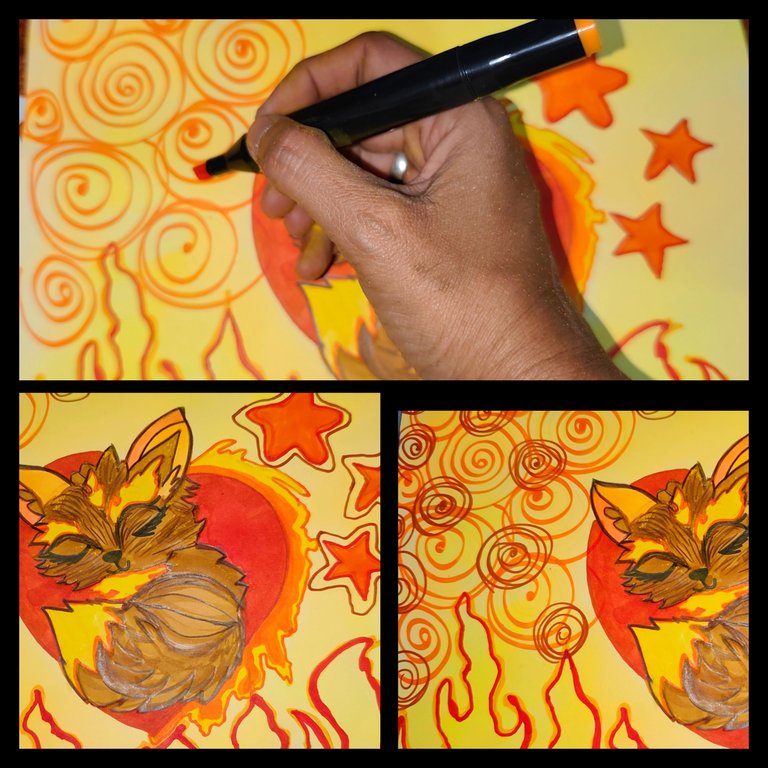
On one of the edges I draw spirals of different sizes in different shades of orange and brown.
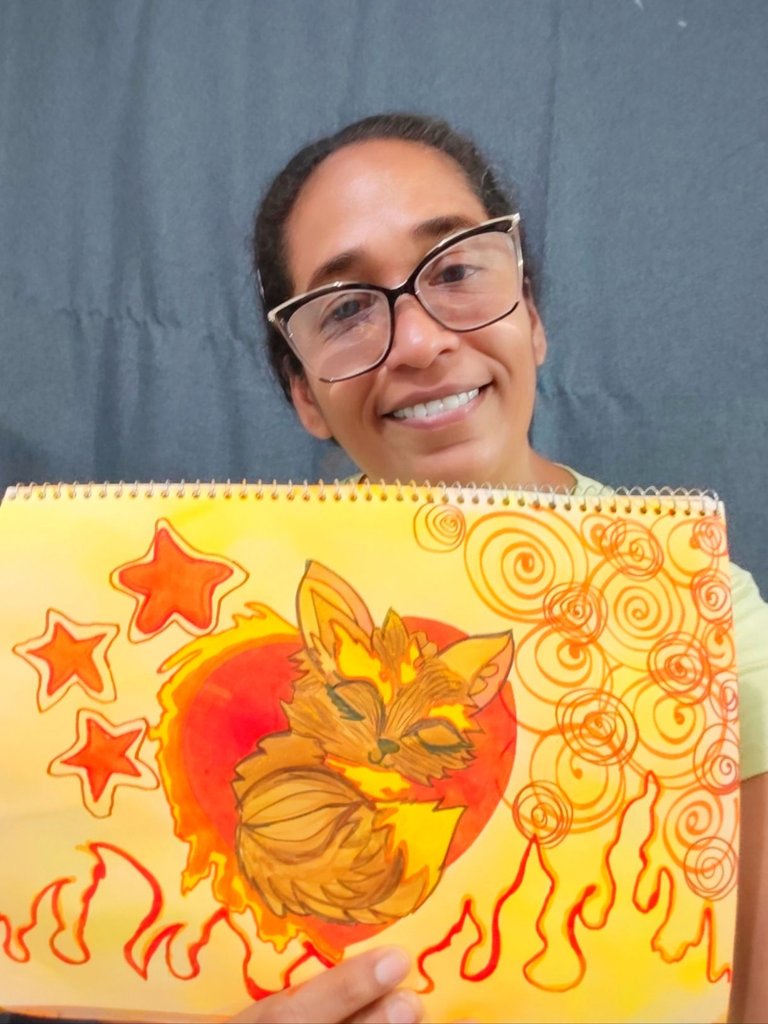
🦊FINAL PHOTOS🦊


🦊 CRÉDITS 🦊
All pictures were taken with my Xiaomi redmi phone and are my property, I used polish and canvas and Deepl translator.


Feliz fin de semana para todos los amantes del juego #holozing hoy regresamos para traerle un poco de fanart, en esta ocasión les hice un dibujo de infurno, realizado con lápiz de creyón, marcadores y colores.
El personaje lo hicimos en tonos naranja, amarillo y rojos, y le dimos intensidad con el uso de unos Pigmentos neones que hacen de este dibujo algo vistoso y bonito.
🦊 MATERIALES 🦊
🦊 Block de dibujo.
🦊 Marcadores.
🦊 Lápices de colores.
🦊 Pigmentos neones.
🦊 Lápiz de creyón.
🦊 Goma de borrar.
🦊 Sacapuntas.
🦊 Pincel.
🦊PASO A PASO🦊
🦊 PASO 1:
Primero que nada tomó el lápiz de creyón, y en el block doy inicio al dibujo de infurno, dando trazos pequeños a modo de bosquejo, que luego me dieron la posibilidad de hacer correcciones.
🦊 PASO 2:
Ahora pase a darle los rasgos del rostro del personaje, en esta ocasión lo hice dormido, con los ojos cerrados, y primero le había dibujado una estrella, y lo cambié para el símbolo del fuego, así como otros detalles entre ellos un corazón que envuelve a mi personaje.
🦊 PASO 3:
Vamos ahora a darle color al dibujo, inicio delineando el personaje, luego en diferentes tonos de marrón voy delineando y posteriormente rellenando algunas partes.
Luego con el marcador negro, dibujo los ojos, nariz y boca del personaje.
🦊 PASO 4:
Ahora con el marcador amarillo relleno las partes del dibujo que son fuego, y delineamos con el marcador naranja fuerte.
🦊PASO 5:
Ahora con el marcador marrón claro rellenó el personaje y con el marcador marrón más oscuro hacemos el pelaje del personaje.
🦊 PASO 6:
Con el marcador rojo, primero delineamos el corazón y después rellenamos.
🦊 PASO 7:
Seguimos dándole más detalles, así que tomo el lápiz de color marrón y dibujo algunos pelitos del personaje.
🦊 PASO 8:
Con el marcador naranja fuerte dibujamos llamas alrededor de uno de los lados del corazón, al terminar el dibujo las llamas con el marcador amarillo y con el lápiz de color sombreamos.
🦊 PASO 9:
Ahora con la brocha aplicó el Pigmento de color naranja al rededor del dibujo y damos la primera capa, luego aplicó el Pigmento amarillo y difumino.
🦊 PASO 10:
Ahora con el marcador naranja dibujamos las estrellas y delineamos la línea de fuego por el borde a abajo.
🦊 PASO 11:
En uno de los bordes dibujo espirales de diferentes tamaños en tonos diferentes de naranja y marrón.
🦊 FOTOS FINALES 🦊
🦊 CRÉDITOS 🦊
Todas las fotografías fueron tomadas con mi teléfono Xiaomi redmi y son de mi propiedad, utilice el programa polish y canvas y el traductor Deepl.
Posted Using INLEO
0
0
0.000
https://x.com/Mayelin2021/status/1928584653058834629?t=0f-JX-OIzfXD77kp3bYLZQ&s=19
Hola amiga, caramba no sabía que con marcadores se pudieran realizar dibujos como obra de arte, bueno no es el marcador es la mano jeje