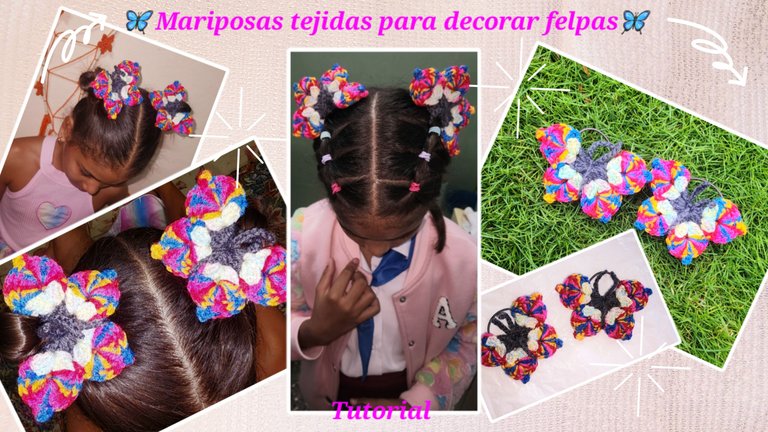
🦋 Mariposas tejidas para decorar felpas 🦋
Linda tarde les deseo a todos los amigos creativos de esta comunidad, del mundo entero y a todos los amantes de las manualidades. Espero y deseo que se encuentren muy bien, por mi parte estoy feliz y agradecida con Dios por un nuevo despertar para mi familia y para mí. Como siempre digo eso es lo más importante de mi vida, ellos, mi familia hermosa 💖.
Hoy estuve creando unas mariposas 🦋 para adornar felpas que estén sencillas, sin ningún adorno. Mi sobrina tiene muchas así, que casi no usa y yo quise darle un estilo bien bonito y colorido, así que mejor opción para el diseño que unas lindas mariposas 🦋.
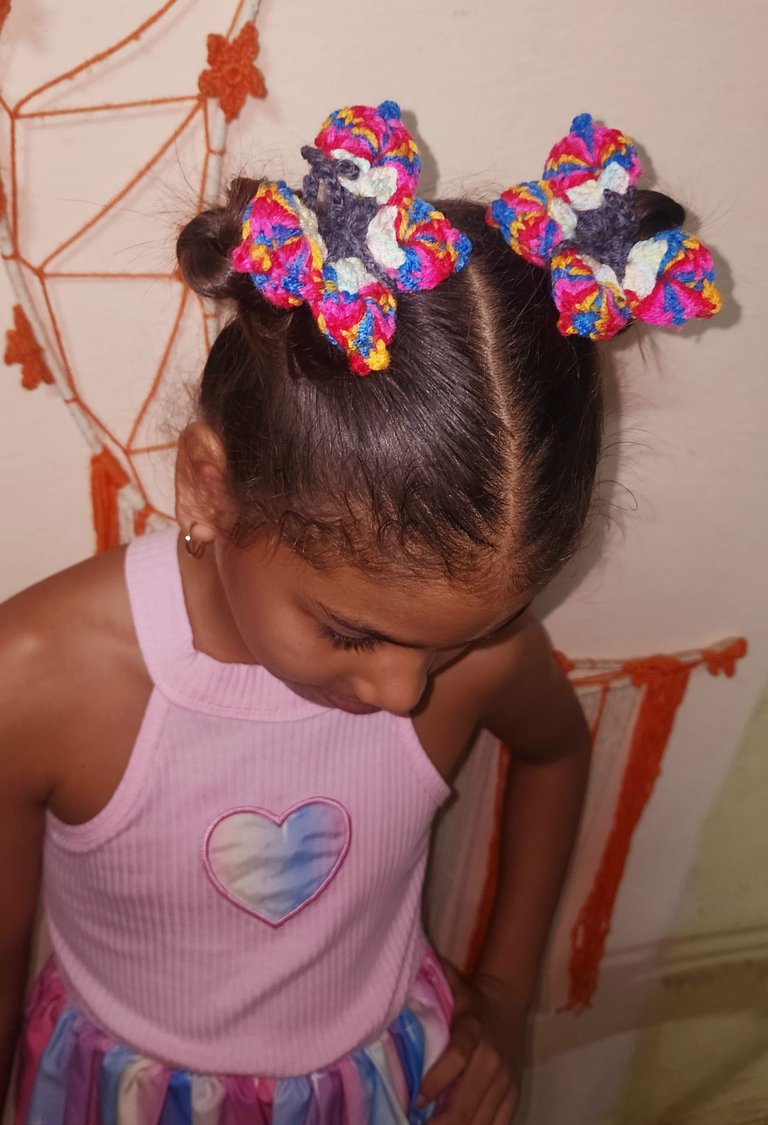
Estuve utilizando tres tonos de hilo, dos de los hilos tienen varios tonos de colores, me gustó mucho usarlos en esta ocasión para que se vieran bien llamativas las felpas y resaltaran mucho las que serían las alas de las mariposas 🦋. Creo que es una buena manera para decorar no solo felpas, también podemos usarlas en cintillos, como colgantes, adornos en cualquier lugar porque se ven tan bonitas que lucen en múltiples lugares.
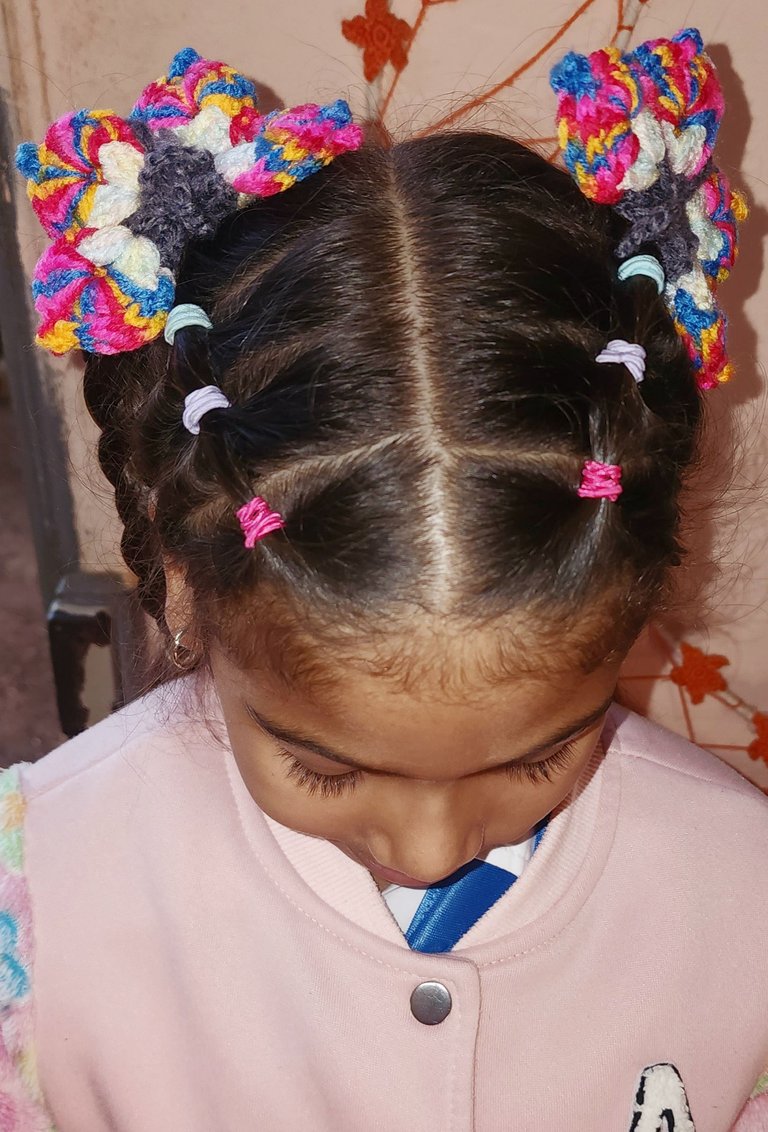
A mi sobrina le encantaron y rápido me dejó peinarla para que luciera sus nuevas felpas y poder compartir estas fotos con todos ustedes. Ya les muestro el paso a paso de como las realicé.
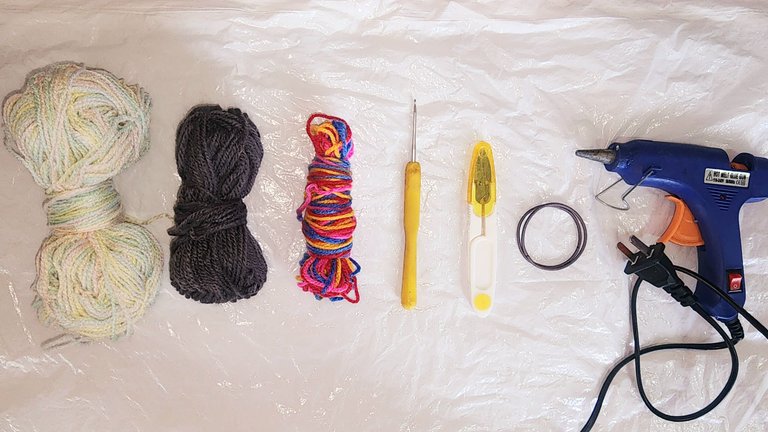
🦋 Materiales 🦋
- Lana de tres colores.
- Agujeta.
- Tijera.
- Un par de felpas.
- Silicona.
🦋 Paso a paso 🦋
V1- Comenzamos con anillo mágico, subimos 3 cadenas y dentro hacemos 2 puntos altos, hacemos dos cadenas al aire y hacemos dentro del anillo 3 puntos altos, hacemos dos cadenas al aire y seguimos haciendo esta secuencia hasta tenerla por 8 veces. Cerramos el anillo, pero no tanto, que quede un pequeño agujero.
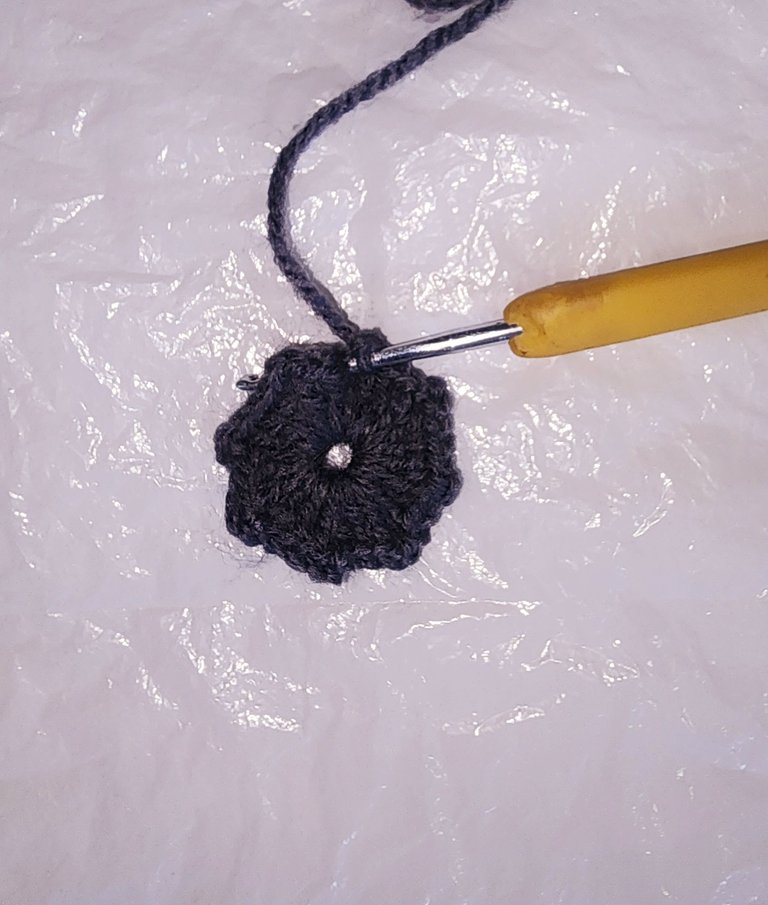
V2- Vamos a subir tres cadenas y haremos secuencias de 3 puntos altos + 3 cadenas + 3 puntos altos en cada uno de los agujeros. Haremos esta secuencia por 8 veces.
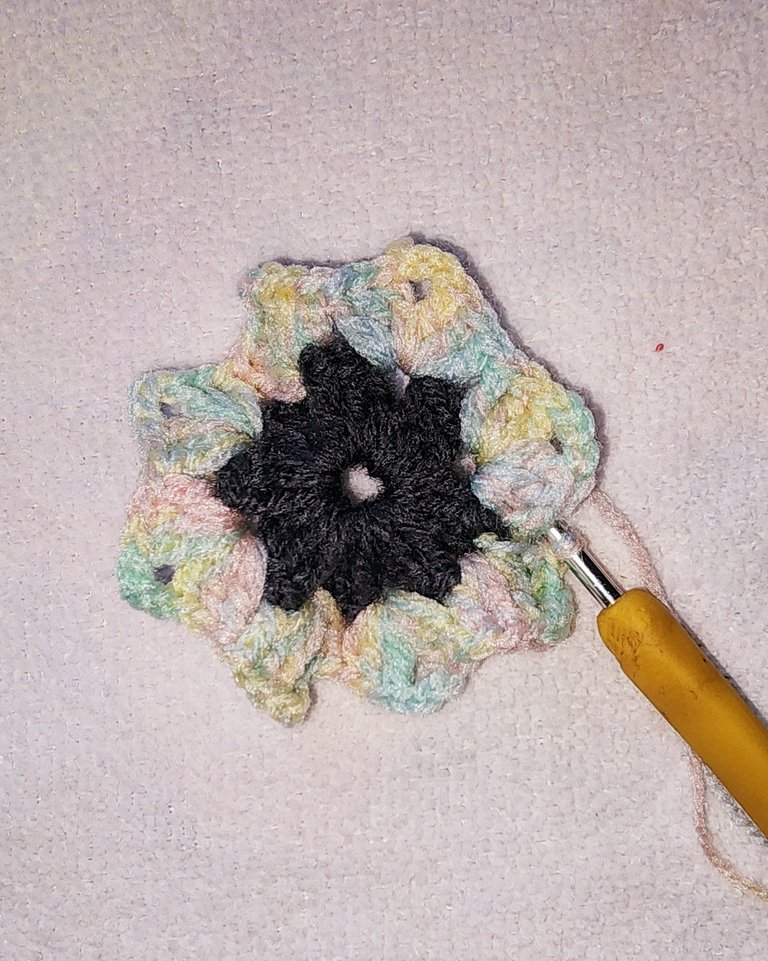
V3- Comenzamos haciendo 1 punto bajo en el primer agujero, en el siguiente vamos a realizar 6 puntos altos, subimos tres cadenas, hacemos punto deslizado en la primera cadena de esas tres y hacemos 6 puntos altos más, en el siguiente agujero hacemos 1 punto bajo y mantenemos esa secuencia hasta el final de la vuelta. Cortamos hilo y escondemos.
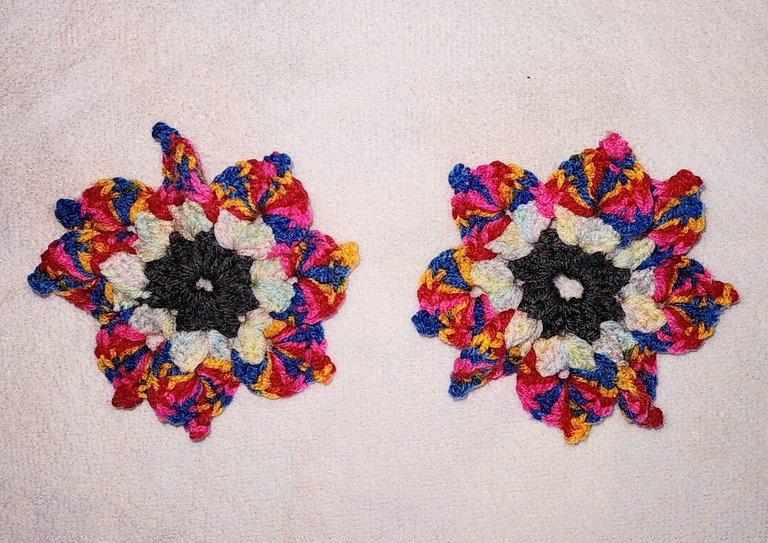
Debemos realizar dos flores iguales.
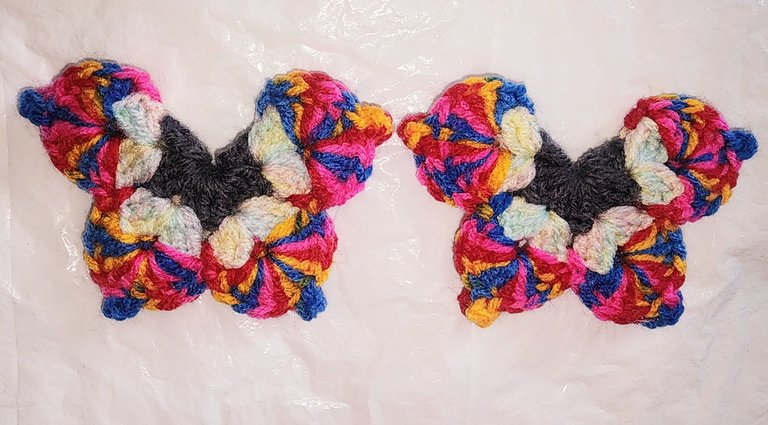
Luego de tener terminada estás bonita flor vamos a doblarla de esta manera y pegarla con silicona por toda la orilla.
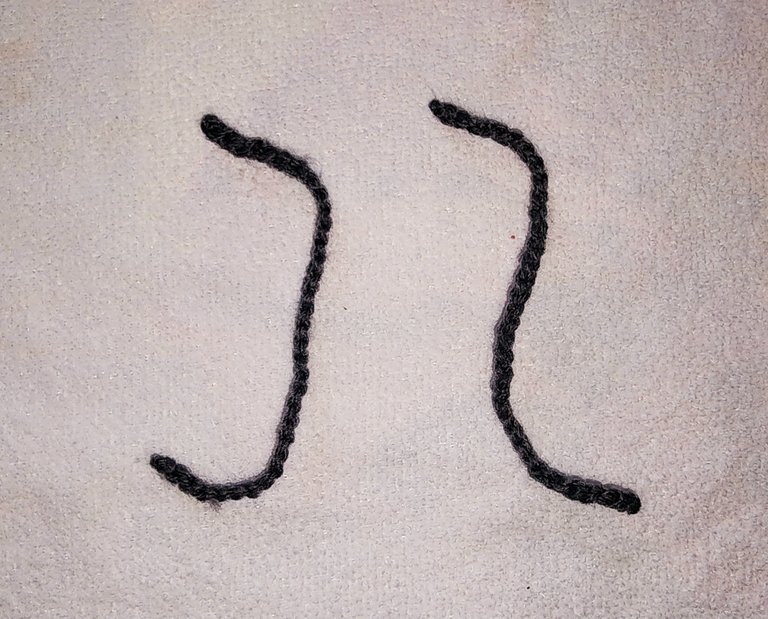
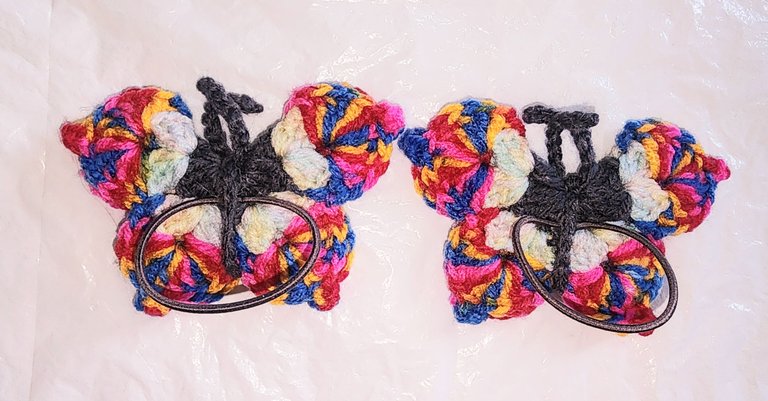
Luego vamos a realizar 35 cadenas y amarrarla de esta manera simulando que son las antenas de las mariposas. Antes de amarrar las cadenas vamos a introducir las felpas. Pegamos las felpas a la parte trasera de las mariposas de esta manera.
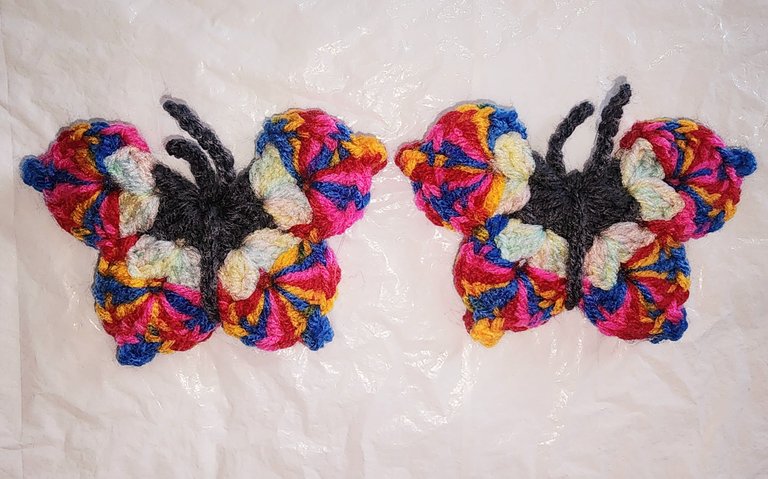
Y listo amigos, así nos queda terminada esta bonita decoración en felpas para nuestras princesas.
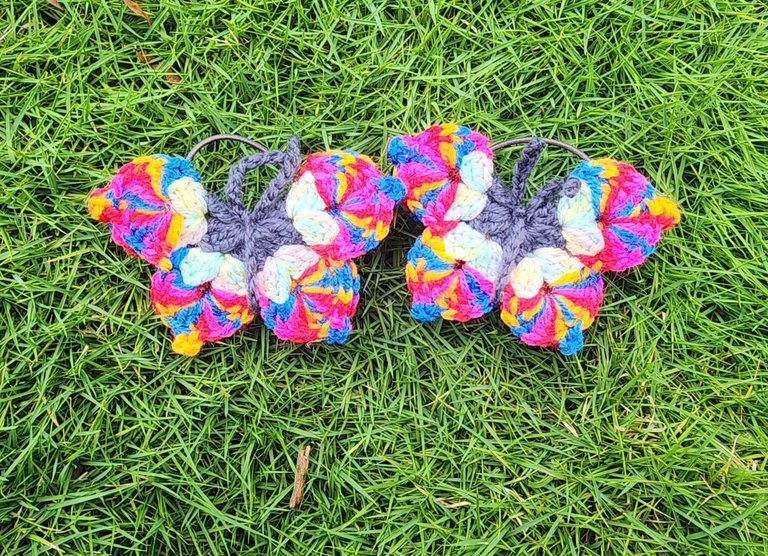
Quedan muy bonitas, coloridas, son muy económicas y fáciles de realizar. Ya tienes una nueva manera de decorar los moños de tus pequeñas.

Espero les guste, los leo en los comentarios. Para mí siempre es un placer poder compartir mis proyectos con todos ustedes.
Hasta una nueva publicación, bendiciones miles, abrazos virtuales para todos 🤗.
🦋 English 🦋
I wish a nice afternoon to all the creative friends of this community, of the whole world and to all the craft lovers. I hope and wish you are feeling great, for my part I am happy and thankful to God for a new awakening for my family and me. As I always say that's the most important thing in my life, them, my beautiful family 💖.
Today I was creating some butterflies 🦋 to decorate plushes that are plain, without any embellishment. My niece has many like this, that she hardly uses and I wanted to give it a nice and colorful style, so what better choice for the design than some cute butterflies 🦋.
I was using three shades of yarn, two of the yarns have various shades of colors, I really liked to use them on this occasion to make the plush look very striking and highlight the wings of the butterflies 🦋. I think it is a good way to decorate not only plushes, we can also use them in headbands, as pendants, ornaments anywhere because they look so pretty that they look in multiple places.
My niece loved them and quickly let me do her hair so she could wear her new plushes and share these photos with all of you. I'll show you the step by step of how I made them.
🦋 Materials 🦋
- Three-color wool.
- Needle.
- Scissors.
- A pair of plush.
- Silicone.
🦋 Step by step 🦋
V1- We start with magic ring, we go up 3 chains and inside we make 2 high stitches, we make two chains in the air and we make inside the ring 3 high stitches, we make two chains in the air and we keep doing this sequence until we have it for 8 times. Close the ring, but not so much that there is a small hole.
V2- We will go up three chains and we will make sequences of 3 high stitches + 3 chains + 3 high stitches in each of the holes. We will do this sequence for 8 times.
V3- We start by making 1 single crochet in the first hole, in the next hole we will make 6 double crochets, we go up three chains, we make a slip stitch in the first chain of those three and we make 6 more double crochets, in the next hole we make 1 single crochet and we keep that sequence until the end of the round. Cut yarn and hide.
We must make two identical flowers.
After you have finished this beautiful flower we are going to fold it in this way and glue it with silicone all around the edge.
Then we are going to make 35 chains and tie them in this way simulating that they are the antennas of the butterflies. Before tying the chains we are going to introduce the felts. We glue the felts to the back of the butterflies in this way.
And that's it, our friends, this is the end of this beautiful decoration for our princesses.
They are very pretty, colorful, very economical and easy to make. Now you have a new way to decorate the bows of your little ones.
I hope you like it, I'll read you in the comments. For me it is always a pleasure to share my projects with all of you.
Until a new publication, thousands of blessings, virtual hugs to all 🤗.
Recursos empleados
| RECURSO / RESOURCE | FUENTE / SOURCE |
|---|---|
| Edición / Edition: | @yunacrochet |
| Imágenes / Pictures: | Samsung Galaxy s22 Ultra |
| Translated / Traducción: | Deepl Translate by @noakmilo |
Posted Using INLEO
Que lindas te quedaron, le quedan preciosas en el cabello, se ve fácil el proceso, bendiciones miles. 🥰
Gracias amiga, si son muy fáciles de realizar y rápidas. A mi sobrina le gustaron mucho. Bendiciones 🤗 😘.
!discovery 35
Thanks you. Blessings 😘.
This post was shared and voted inside the discord by the curators team of discovery-it
Join our Community and follow our Curation Trail
Discovery-it is also a Witness, vote for us here
Delegate to us for passive income. Check our 80% fee-back Program
Thanks you very much. Blessings 😘.
Thanks you very much. I feel really lucky.
¡Felicidades! Esta publicación obtuvo upvote y fue compartido por @la-colmena, un proyecto de Curación Manual para la comunidad hispana de Hive que cuenta con el respaldo de @curie.
Si te gusta el trabajo que hacemos, te invitamos a darle tu voto a este comentario y a votar como testigo por La Colmena.
Si quieres saber más sobre nuestro proyecto, te invitamos a acompañarnos en nuestro servidor de Discord.
Muchas gracias 🤗.
Preciosas.
!LADY
View or trade
LOHtokens.@maylink, you successfully shared 0.1000 LOH with @yunacrochet and you earned 0.1000 LOH as tips. (1/2 calls)
Use !LADY command to share LOH! More details available in this post.
Muchas gracias amiga. Bendiciones 🤗.
Muy bonito trabajo, y le quedaron preciosas a la modelo!
Si aún no lo has hecho te invito a revisar y apoyar la propuesta de INLEO aquí.
Traducción al español aquí. Tu apoyo es valioso.
Muchas gracias 🤗.
Preciosas tus mariposas
Muchas gracias amiga 🤗. Bendiciones 🤗.