👝 Bolso tejido para mi hermana mayor 👝

Linda tarde les deseo a todos los amigos creativos de esta comunidad, del mundo entero y a todos los amantes de las manualidades. Deseo y espero como siempre que se encuentren bien, yo por mi parte, me encuentro muy agradecida y feliz con Dios por un nuevo despertar para mi familia y para mí.
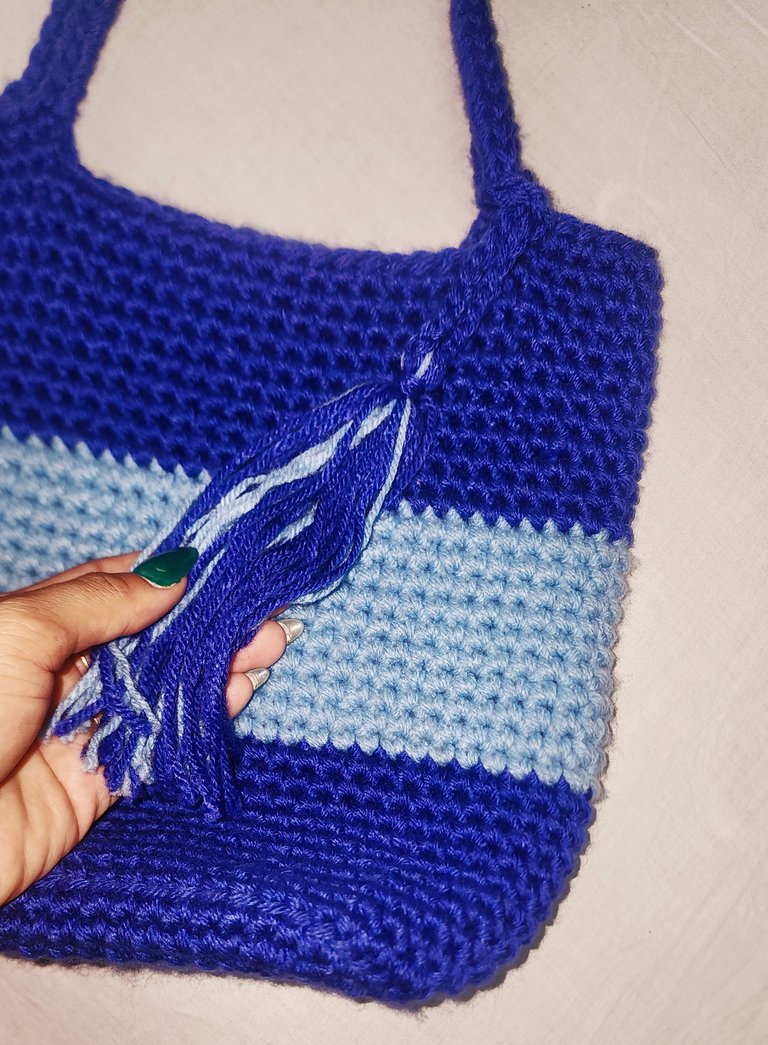
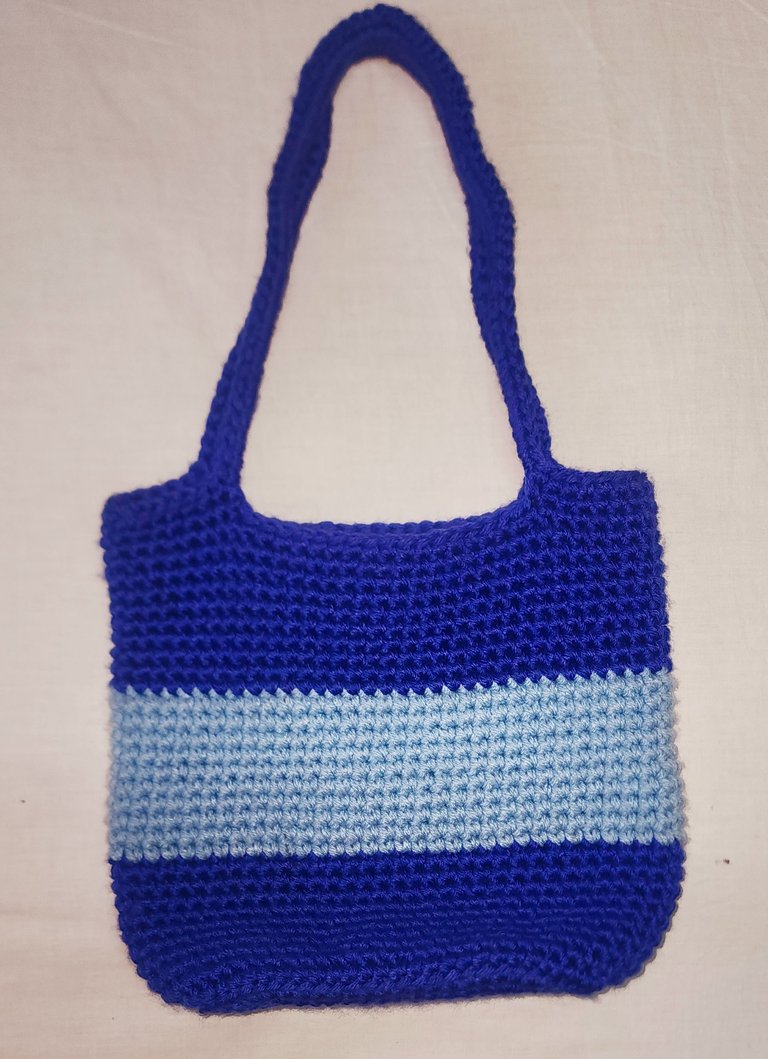
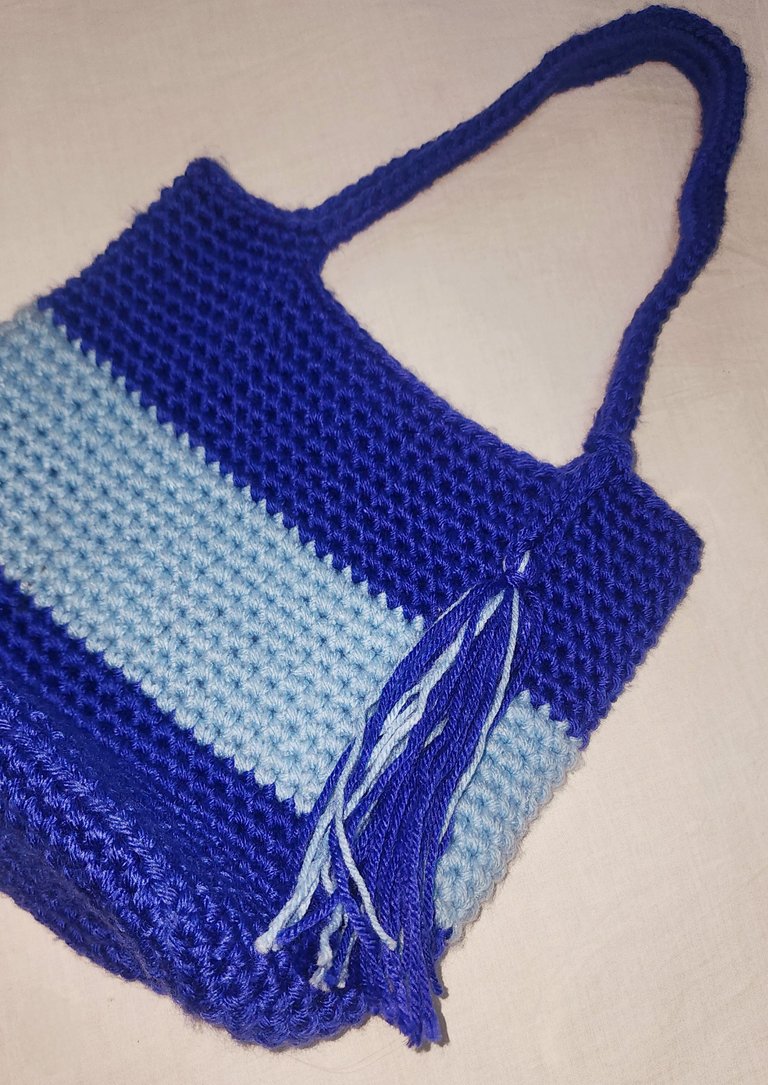
Hace unos días le comencé a hacer un bolso tejido completamente a crochet a mi hermana mayor. Su color preferido es el azul, así que utilicé ese color en el bolso. Me gustó mucho combinar el azul oscuro con el azul claro, de esta manera resaltan muchísimo los dos tonos de azul. Amé como siempre el resultado y mi hermana quedó encantada con esta sorpresa que le tenía preparada.
Hoy quiero compartir con ustedes el tutorial de cómo realicé este bonito bolso tejido a crochet para todos los que aman los tejidos. Así que sin más preámbulos les muestro el paso a paso.
👝 Materiales 👝
- Lana de color azul oscuro y azul claro.
- Agujeta.
- Tijera
👝 Paso a paso 👝
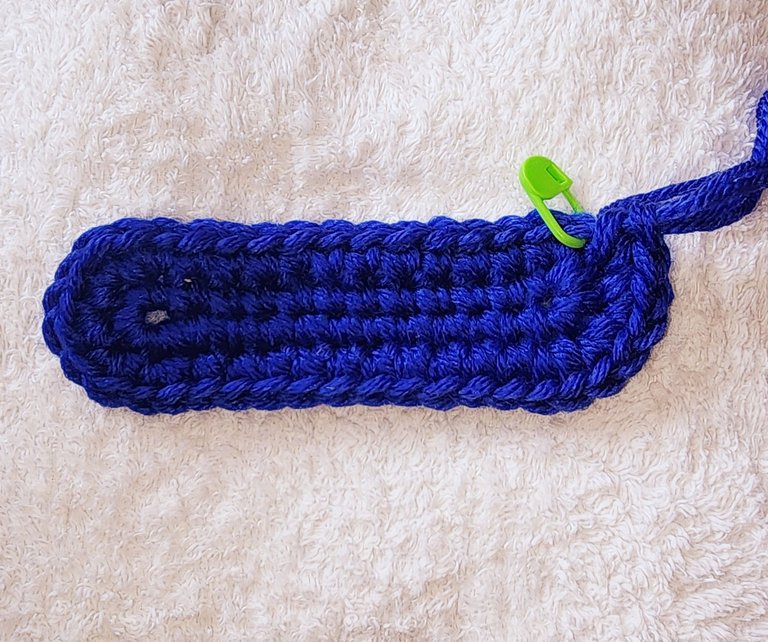
V1- Comenzamos haciendo 12 cadenetas con verde oscuro, luego hago una cadeneta más, en esa no en la anterior hago 1 punto bajo, y hago en las 6 siguientes, 6 puntos bajos más, en el punto que me queda hago 5 puntos bajos y me vuelvo haciendo 6 puntos bajos y en el mismo punto que comencé hago 4 puntos bajos que serían 5 con el que ya hice.
(SIEMPRE MARCO ESE PRIMER PUNTO)

V2- Ahora hago en ese primer punto un aumento. En los próximos 10 puntos hago punto bajo en cada punto, en los 5 puntos siguientes un aumento en cada uno, en los próximos 6 puntos un punto bajo y en los 4 siguientes un aumento en cada uno que con el que ya hice serían 5 aumentos.
V3- En el primer punto hago un aumento, en los siguientes 11 puntos hago un punto bajo en cada punto, ahora hago secuencia 5 veces de 1 punto bajo + 1 aumento, en los siguientes 10 puntos hago 10 puntos bajos y hago 4 secuencias de un aumento + 1 punto bajo.

V4- En el primer punto hago 1 punto bajo, en el siguiente 1 aumento, en el próximo 1 punto bajo, en los siguientes 10 puntos un punto bajo en cada uno, ahora hago secuencia de 1 punto bajo + 1 aumento + 1 punto bajo por 5 veces, hago 10 puntos bajos más en los próximos 10 puntos y hago secuencias de 1 punto bajo + 1 aumento por 4 veces.

V5- Hacemos 1 aumento +16 pb+1aumento + 2pb+1aumento + 6pb +1aumento +2pb+1aumento +16 pb+1aumento +2pb+1aumento +6pb+1aumento +2pb.
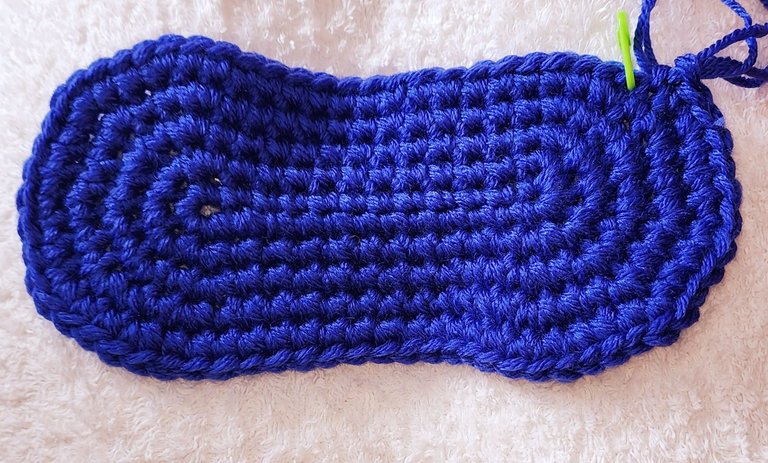
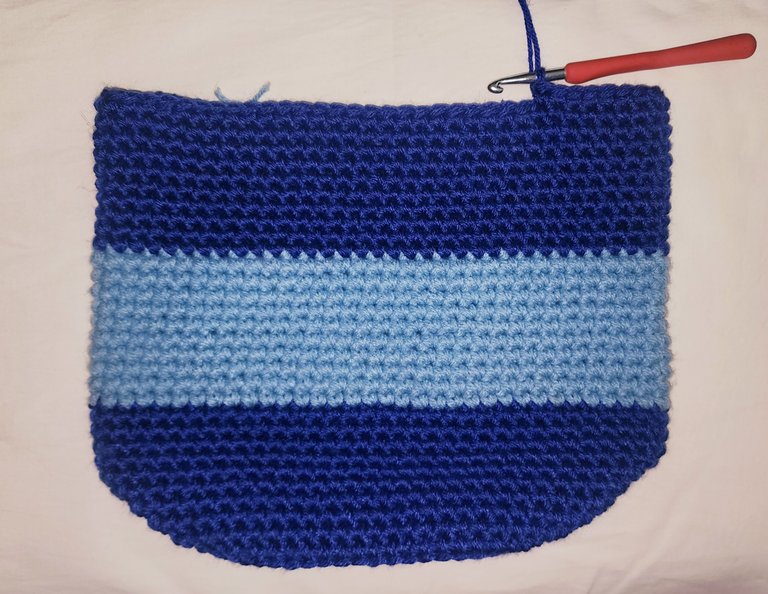
V6- Ahora tomando solo la hebra trasera y hacemos un punto bajo en cada punto, quedando un total de 68 puntos bajos.
V7- Vamos a realizar estos 68 pb sin aumentos ni disminuciones, tomando solo la hebra trasera.
V8- V16- Vamos a hacer estos 68 pb sin aumentos ni disminuciones.
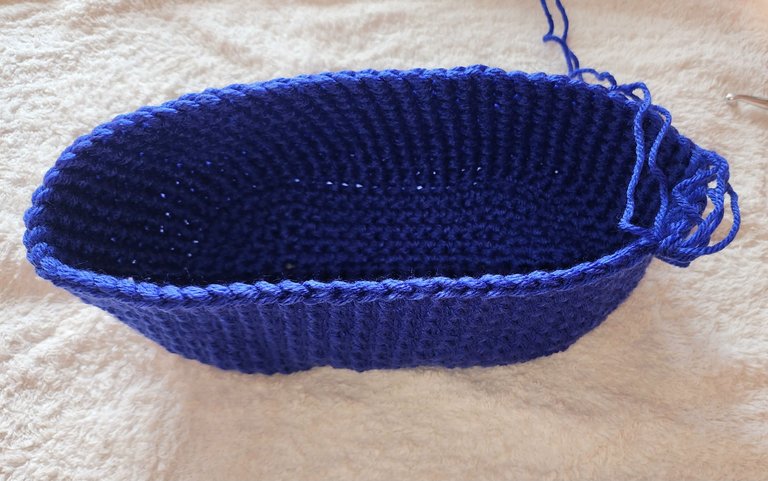
V17- V27- Cambiando al hilo color azul claro, vamos a realizar estos 68 pb sin aumentos ni disminuciones.

V28- V38- Cambiando al hilo color azul oscuro, vamos a realizar estos 68 pb sin aumentos ni disminuciones.
V39- Ahora vamos a medir bien el centro y las esquinas del bolso porque ahora vamos a realizar 16 pb, dejamos 18 pb sin tejer, pero hacemos 50 cadenas, realizamos 16 pb más y dejamos sin tejer 18 pb, hacemos 50 cadenas mas y cerramos con punto deslizado en el primer pb que realizamos.
Estos 18 pb nos deben quedar así es en mismo centro del bolso.
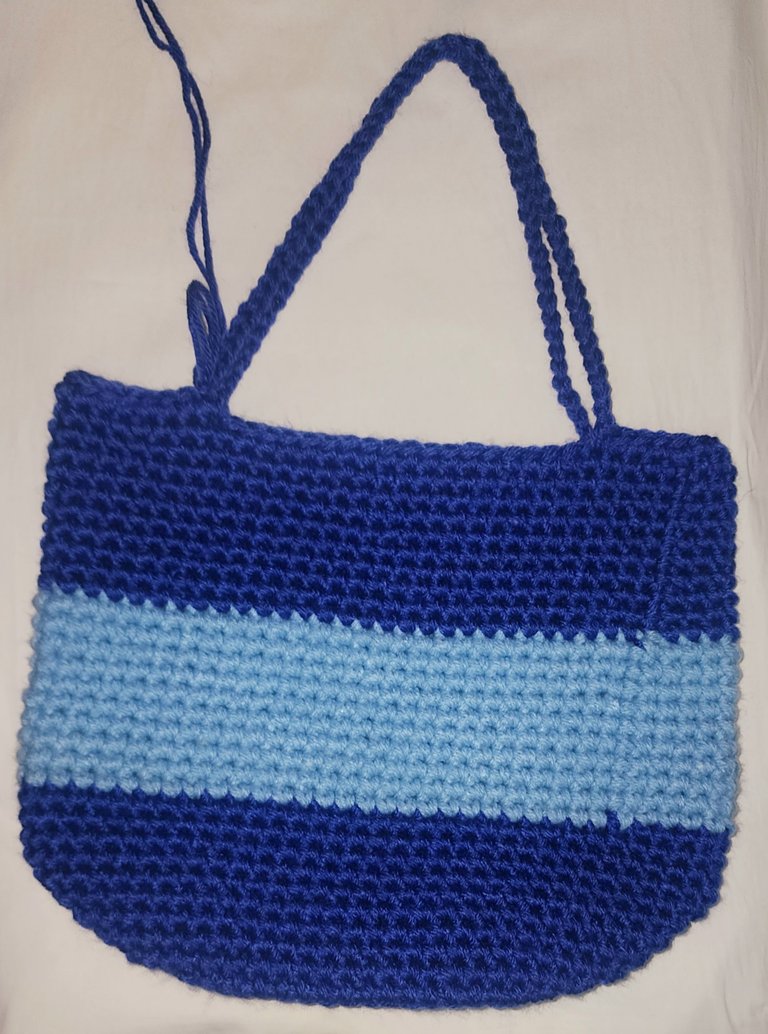
V40- Ahora vamos a realizar 16 pb, vamos a ahora seguir haciendo ob por toda la cadena, realizamos 16 pb más y puntos bajos por toda la itra cadena, cerramos con punto deslizado y listo.
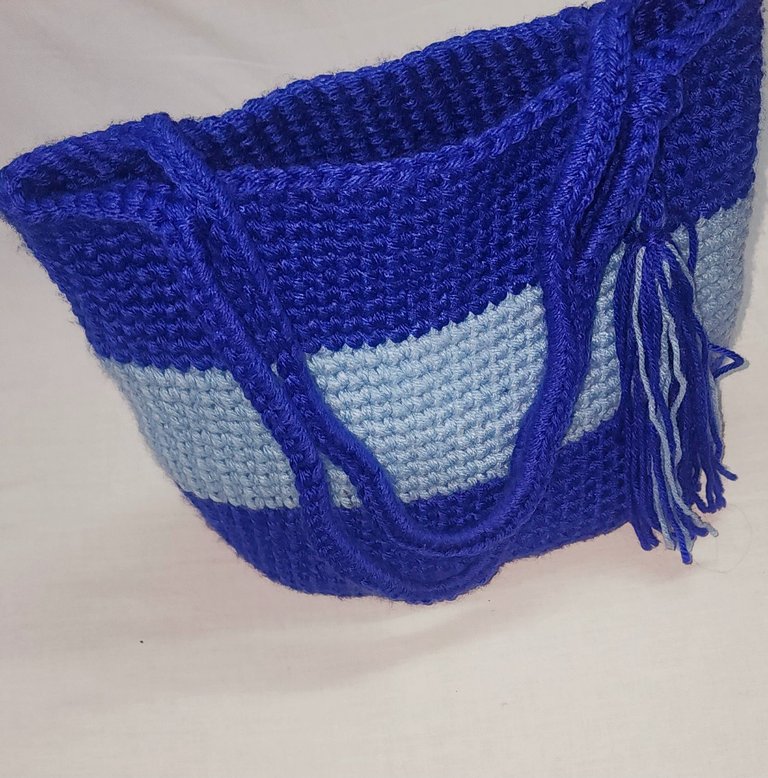
Quise agregarle un detalle para que se viera más bonito, le hice un pompón utilizando los dos tonos de azules y listo así de bonito y elegante queda este bolso tejido completamente a crochet.

Yo como siempre quedé enamorada, mi hermana también. A ustedes qué les pareció? Se atreverían a realizar uno? Los leo en los comentarios. Bendiciones miles, abrazos virtuales y hasta una nueva publicación.


👝 English 👝
I wish all the creative friends of this community, of the whole world and all the craft lovers a nice afternoon. I wish and hope as always that you are well, I for my part, I am very grateful and happy with God for a new awakening for my family and me.
A few days ago I started to make a crochet bag for my older sister. Her favorite color is blue, so I used that color in the bag. I really liked to combine the dark blue with the light blue, this way the two shades of blue stand out a lot. I loved as always the result and my sister was delighted with this surprise I had prepared for her.
Today I want to share with you the tutorial of how I made this beautiful crocheted bag for all of you who love knitting. So without further ado I show you the step by step.
👝 Materials 👝
- Dark blue and light blue wool.
- Needle.
- Scissors.
👝 Step by step 👝
V1- We start by making 12 chain stitches with dark green, then I make one more chain stitch, in that one not in the previous one I make 1 single crochet, and I make in the next 6, 6 more single crochets, in the remaining stitch I make 5 single crochets and I go back making 6 single crochets and in the same stitch I started I make 4 single crochets that would be 5 with the one I already made.
(I ALWAYS MARK THAT FIRST Stitch)
V2- Now I make in that first stitch one increase. In the next 10 stitches I knit a single crochet in each stitch, in the next 5 stitches an increase in each stitch, in the next 6 stitches a single crochet and in the next 4 stitches an increase in each stitch that with the one I already knitted would be 5 increases.
V3- In the first stitch I make an increase, in the next 11 stitches I make a single decrease in each stitch, now I make a sequence 5 times of 1 decrease + 1 increase, in the next 10 stitches I make 10 decrease stitches and I make 4 sequences of 1 increase + 1 decrease stitch.
V4- In the first stitch I make 1 low stitch, in the next 1 increase, in the next 1 low stitch, in the next 10 stitches one low stitch in each stitch, now I make sequence of 1 low stitch + 1 increase + 1 low stitch for 5 times, I make 10 more low stitches in the next 10 stitches and make sequences of 1 low stitch + 1 increase for 4 times.
V5- We make 1 increase +16 bp+1increase + 2bp+1increase + 6bp +1increase +2bp+1increase +16 bp+1increase +2bp+1increase +6bp+1increase +2bp.
V6- Now taking only the back strand and knit one single crochet in each stitch, leaving a total of 68 single crochets.
V7- We are going to make these 68 sts without increases or decreases, taking only the back strand.
V8- V16- We are going to make these 68 stitches without increases or decreases.
V17- V27- Changing to the light blue yarn, we are going to make these 68 sts without increases or decreases.
V28- V38- Changing to dark blue yarn, we are going to make these 68 sts without increases or decreases.
V39- Now we are going to measure well the center and the corners of the bag because now we are going to make 16 sts, we leave 18 sts without knitting, but we make 50 chains, we make 16 more sts and leave 18 sts without knitting, we make 50 more chains and we close with slip stitch in the first stitch we made.
These 18 stitches should be in the center of the bag.
V40- Now we are going to knit 16 sts, we are going to continue knitting ob through the whole chain, we knit 16 more sts and slip stitches through the whole chain, we close with slip stitch and that's it.
I wanted to add a detail to make it look nicer, I made a pompom using the two shades of blue and that's how beautiful and elegant this crochet knitted bag looks.
As always I was in love, my sister was too. What do you think? Would you dare to make one? I'll read you in the comments. Thousands of blessings, virtual hugs and until a new publication.
Recursos empleados
| RECURSO / RESOURCE | FUENTE / SOURCE |
|---|---|
| Edición / Edition: | @yunacrochet |
| Imágenes / Pictures: | Samsung Galaxy s22 Ultra |
| Translated / Traducción: | Deepl Translate by @noakmilo |
Posted Using INLEO
Que precioso te quedó, me encantó 😍, ya llegaron mis agujetas y estoy en proceso de aprendizaje 😄. Ya se hacer las cadenetas y el punto bajo, estoy en los aumentos y disminuciones, pero poco a poco. Saludos 🤗
Muchas gracias amiga 🤗. Que bueno! Me alegro muchísimo que ya tengas tus agujetas en manos, se que crearás cosas preciosas también. Lo que necesites para aprender me puedes escribir cuando desees y con todo placer te contaré de lo que sé. Bendiciones miles amiga 🤗🥰😊.
Claro cuando tenga dudas te pregunto 🥰
https://www.reddit.com/r/Brochet/comments/1l1lhfy/crochet_knitted_bag/
This post has been shared on Reddit by @yale95reyra through the HivePosh initiative.
Congratulations @yunacrochet! You have completed the following achievement on the Hive blockchain And have been rewarded with New badge(s)
Your next target is to reach 60 posts.
You can view your badges on your board and compare yourself to others in the Ranking
If you no longer want to receive notifications, reply to this comment with the word
STOPCheck out our last posts:
Thanks you very much 🤗
You can do it @yunacrochet! Keep pushing yourself and reaching for the stars on Hive.
Your bag looks so gorgeous and colourful. You created such an amazing design. Great work and thanks for sharing.
selected by @ibbtammy
Precioso, me gusta el color que elegiste 🤗
Muchas gracias amiga. Bendiciones 😊.
!discovery 25
Thanks you.
This post was shared and voted inside the discord by the curators team of discovery-it
Join our Community and follow our Curation Trail
Discovery-it is also a Witness, vote for us here
Delegate to us for passive income. Check our 80% fee-back Program
Thanks you very much 🤗. Blessings 😘.
Te quedo super lindo❣️. Bendiciones..
Muchas gracias amiga. Bendiciones 🤗.