I begin my Jewelry Displays with this Creation - Comienzo mis Exhibidores de Bisutería, con esta Creación

One of my favorite crafts is making jewelry. I like combining materials, colors, techniques, styles, etc., and whenever I can, I've shared my creative process with you. I really enjoy making jewelry for my daughters and myself, and it's ideal to be able to make them as gifts for friends.
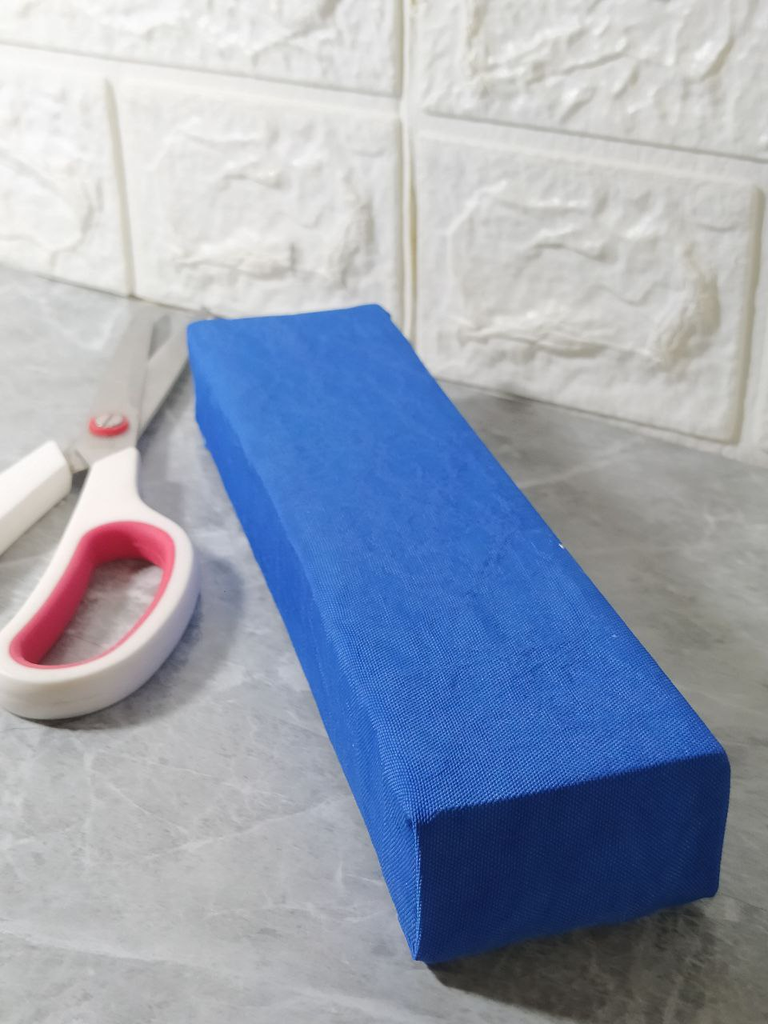
I have several displays in mind for my creations, some to store and preserve these accessories, and others to show off in my posts and on social media. To start, I decided to make this Necklace Display model, using this blue fabric. I fell in love with it because it will really make the necklaces pop, and it's ideal for displaying these products. I invite you to follow this post, where I'll tell you how I made it.
Una de mis manualidades preferidas es realizar Bisutería, me gusta combinar materiales, colores, técnicas, estilos, etc. y cada vez que he podido les he compartido mi proceso creativo para realizarlas. Me gusta muchísimo realizar bisutería para mis hijas, para mí y es ideal poder hacerlas para regalar a amigas.
Tengo en mente varios exhibidores de mis creaciones, algunos para poder guardar y preservar estos accesorios, y otros para mostrarlos en mis publicaciones y en RRSS. Para empezar decidí realizar este modelo de Exhibidor de Collares, con esta tela azul que me enamoré de ella ya que hará resaltar mucho los collares, y es ideal para mostrar estos productos. Te invito a seguir en esta publicación, donde te contaré cómo lo realicé.

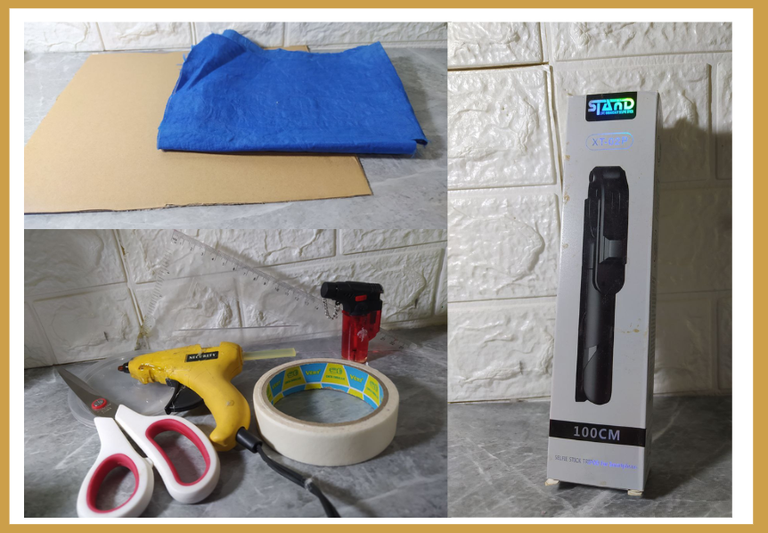
- Recycled cardboard
- Recycled cardboard box
- Fabric scrap
- Scissors, box cutter, hot glue gun, and adhesive tape
- Ruler and pen
- Tinder box
- Cartón reciclado
- Caja de cartón reciclado
- Retazo de tela
- Tijera, cúter, pistola de silicón caliente y tirro
- Regla y bolígrafo
- Yesquero

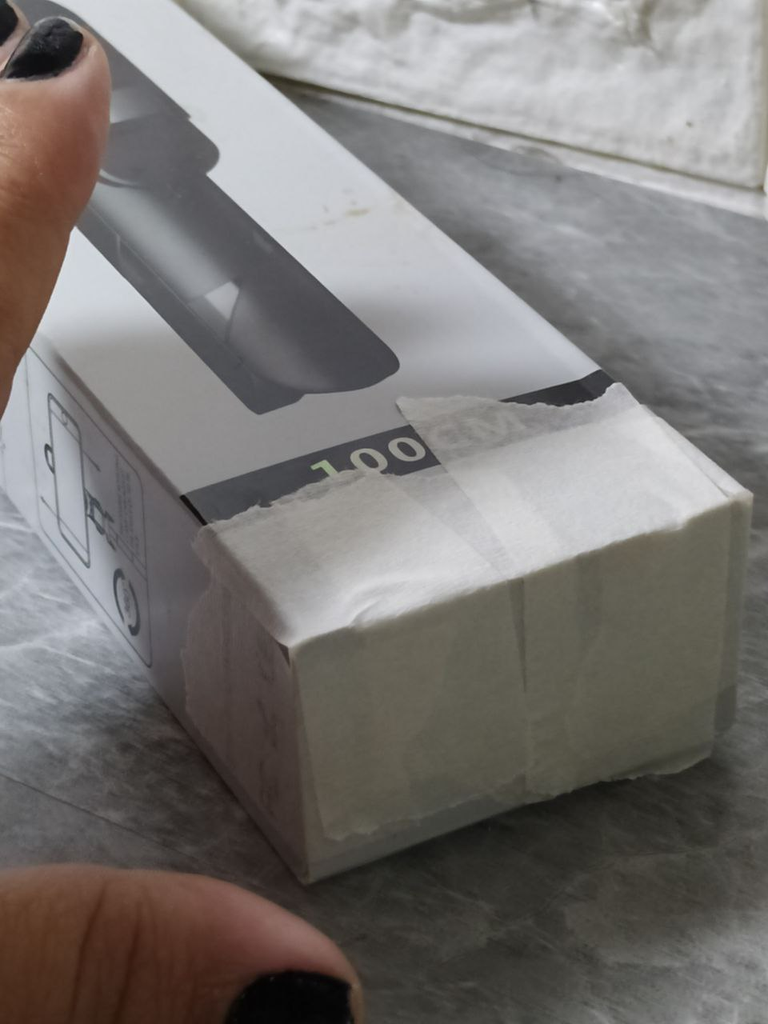
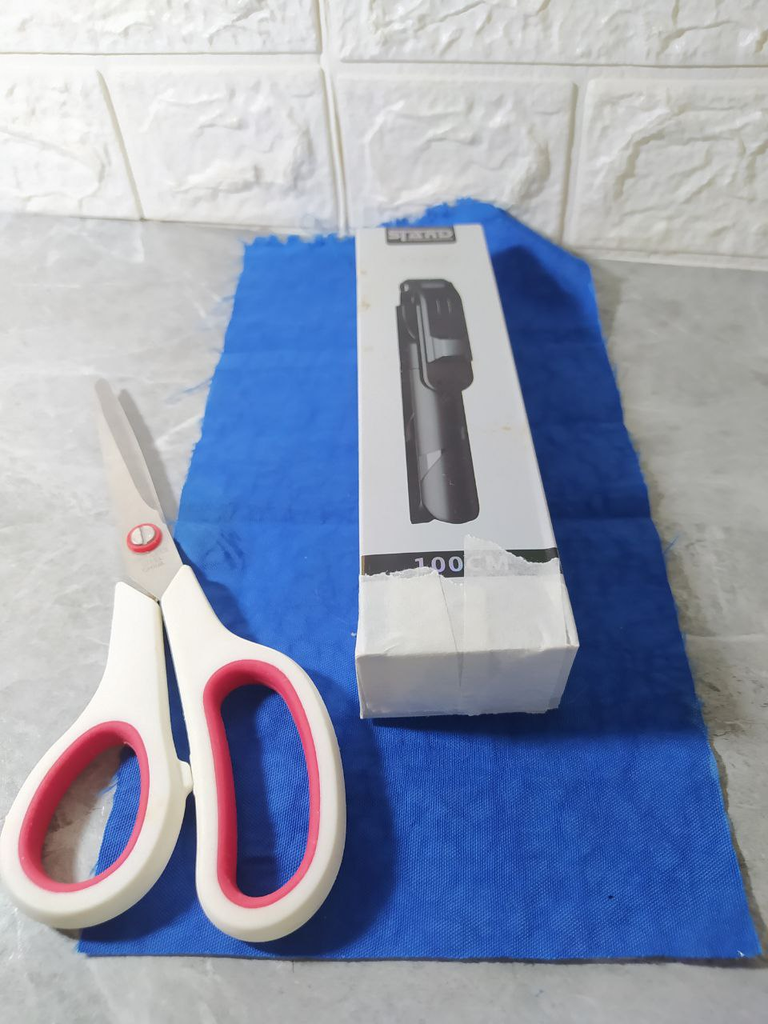
I used a tripod box I bought a while back, but you can use any you have or even make your own. This will serve as the base for the Necklace Display. Using duct tape or masking tape, I sealed the ends well to make the base more stable.
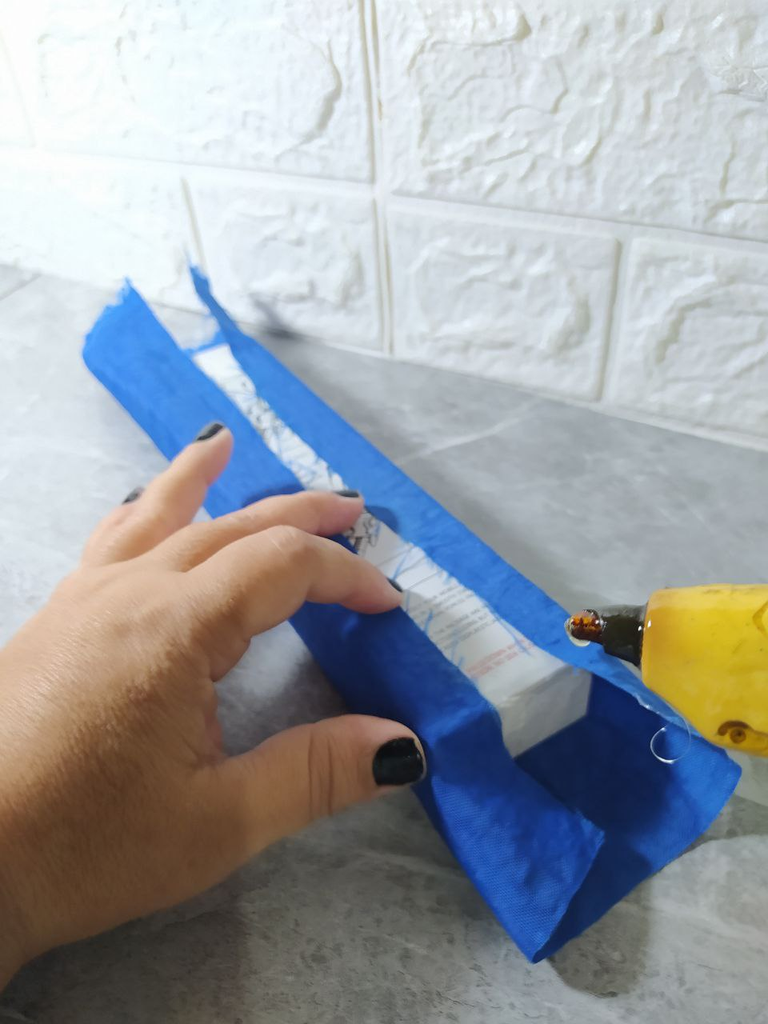
Then, I covered this base with a piece of fabric, using a hot glue gun.
Utilicé una caja de un trípode que compré hace un tiempo, pero puedes usar la que tengas o incluso realizar tu misma una caja, ésta servirá como base para el Exhibidor de Collares. Con el tirro o cinta adhesiva de papel, sellé bien los extremos para darle más firmeza a la base.
Luego, con un trozo de tela forré esta base, utilizando para esto la pistola de silicón caliente.
 |  |  |  |
|---|
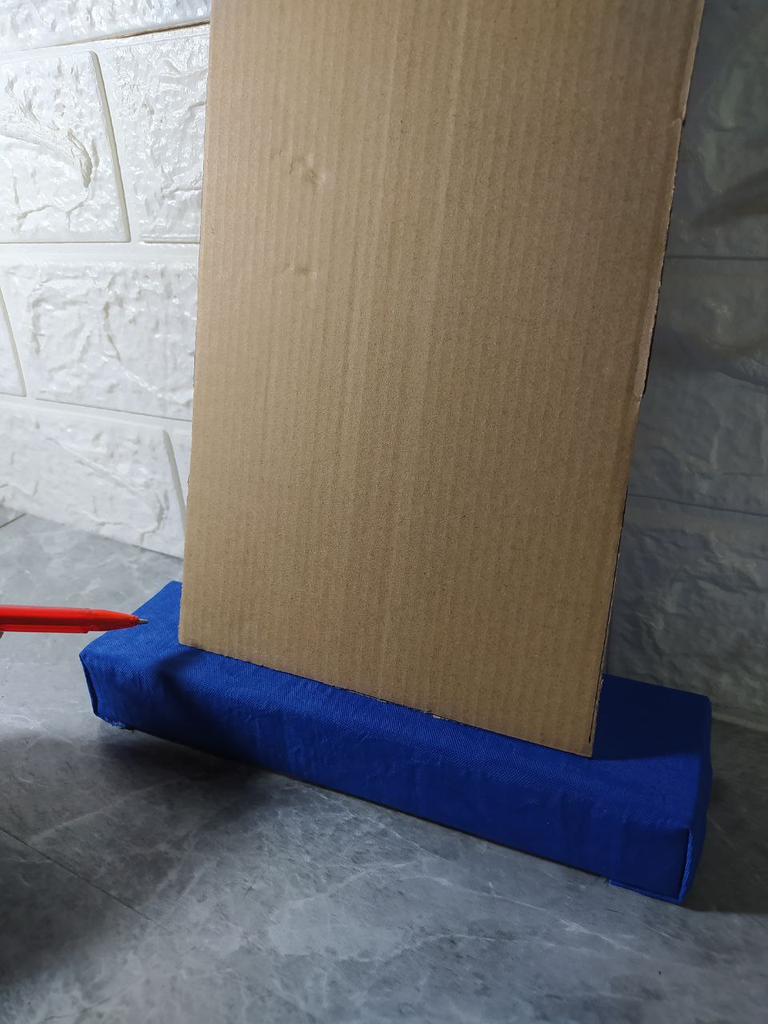
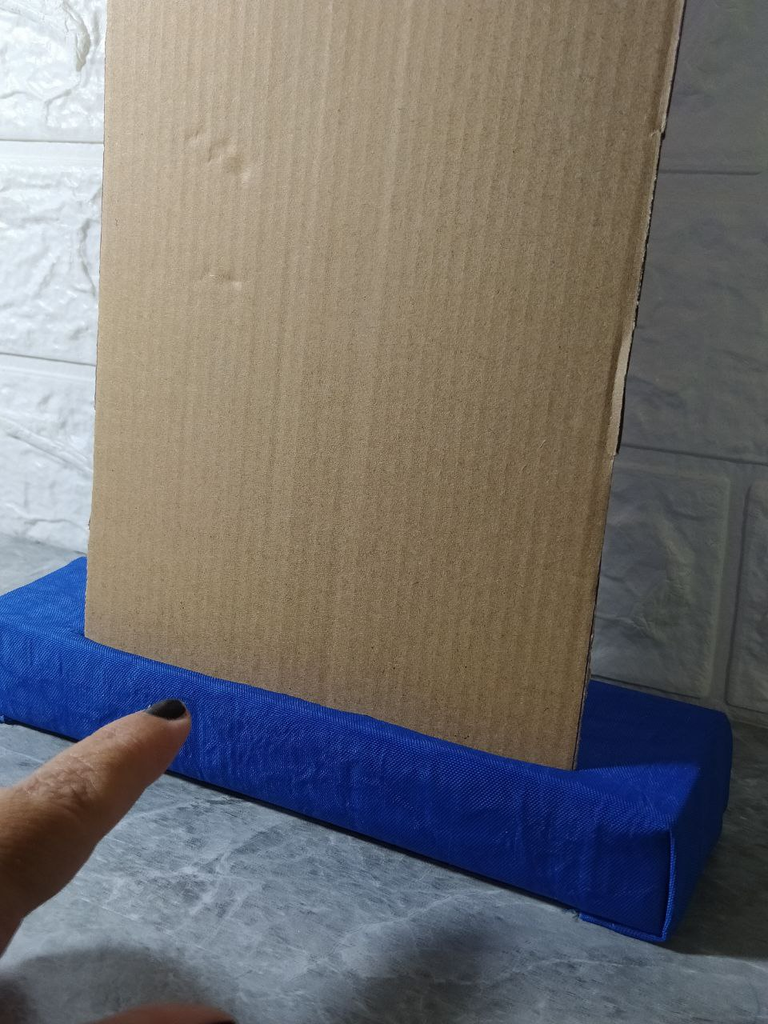
You can see that with a little patience and a lot of care, you can achieve a very neat finish. Now for the body of the display, I also used a piece of recycled cardboard, and the size reference was that it needed to be slightly narrower than the base I made previously, and about 22 cm high, but this can also be varied to suit your taste.
I would place the top on the base, but not in the center, but rather toward the front. This is so that when it is attached, it has a slight angle and will stand on its own, without needing any other support. So, I marked it with the ruler and pen, and cut it with a utility knife.
Puedes ver que con algo de paciencia y mucho cuidado se puede lograr un acabado muy prolijo. Ahora para el cuerpo del Exhibidor, utilicé un trozo de cartón reciclado también, y la referencia del tamaño era que necesitaba que fuese algo más angosta que la base que hice anteriormente, y de altura unos 22cms aprox. pero esto también puede variar a nuestro gusto.
Ubicaría la parte superior en la base, pero no en el propio centro, sino hacia la parte frontal, esto es para que al fijarlo tenga algo de inclinación y se sostenga solo con esa inclinación, sin necesitar ningún otro soporte. Así que, la marco con la regla y el bolígrafo, y la corté con un cúter.
 |  |  |  |
|---|
Here you can see how I tested it to see if my idea worked, and indeed everything stays securely fastened.
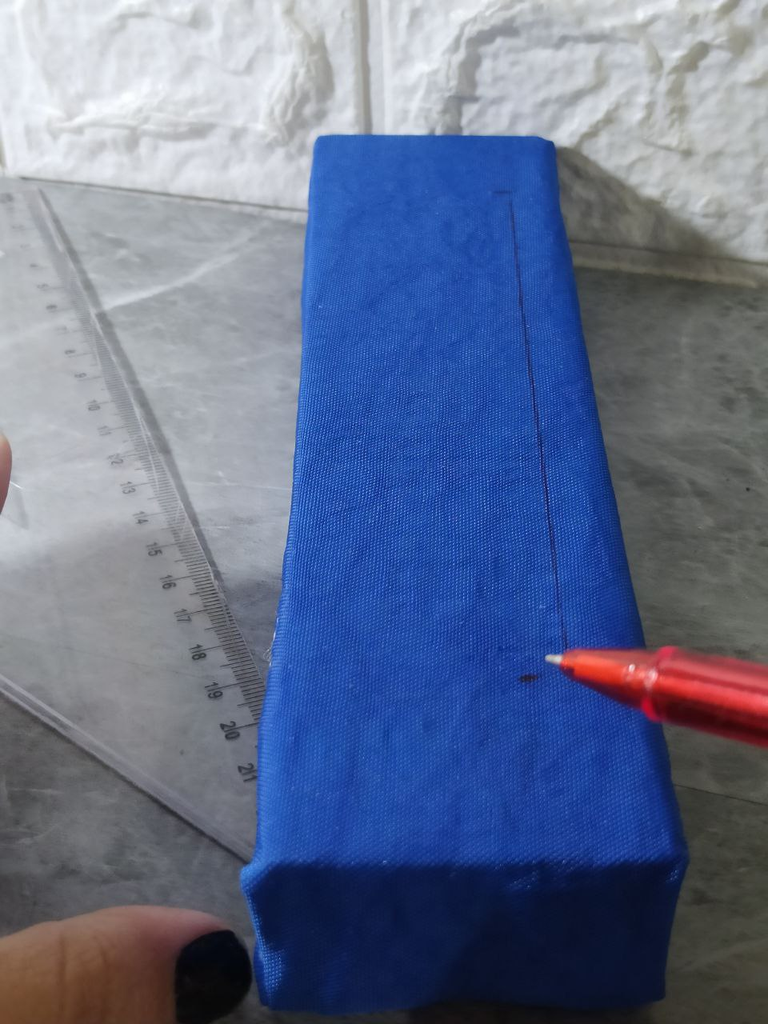
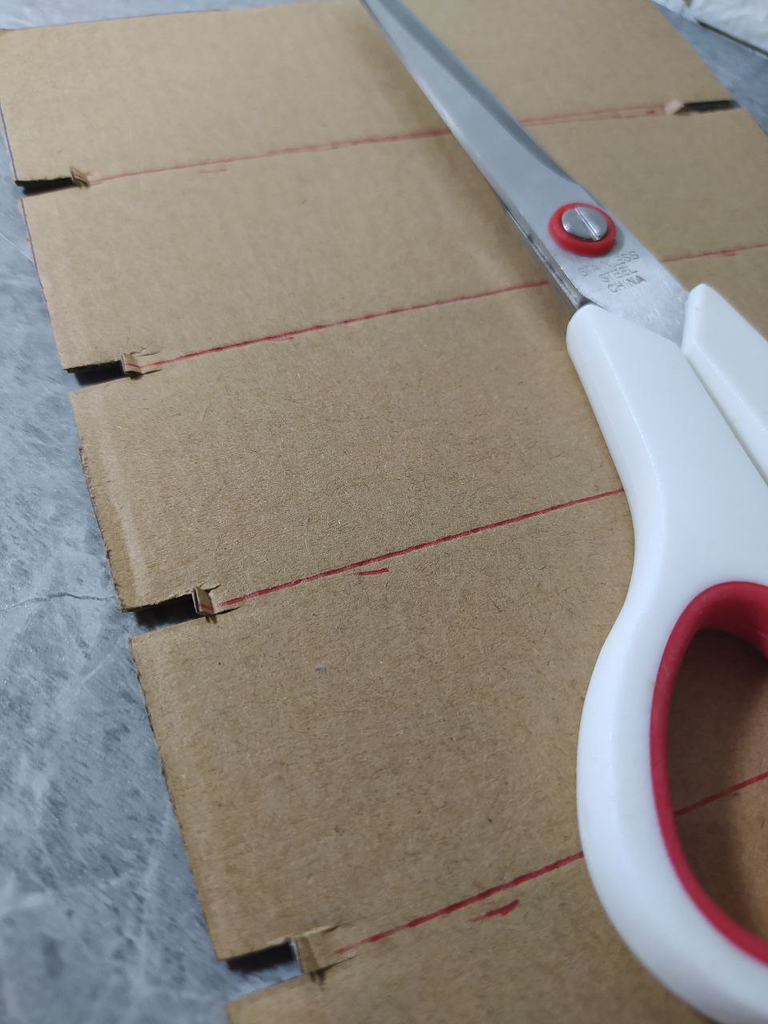
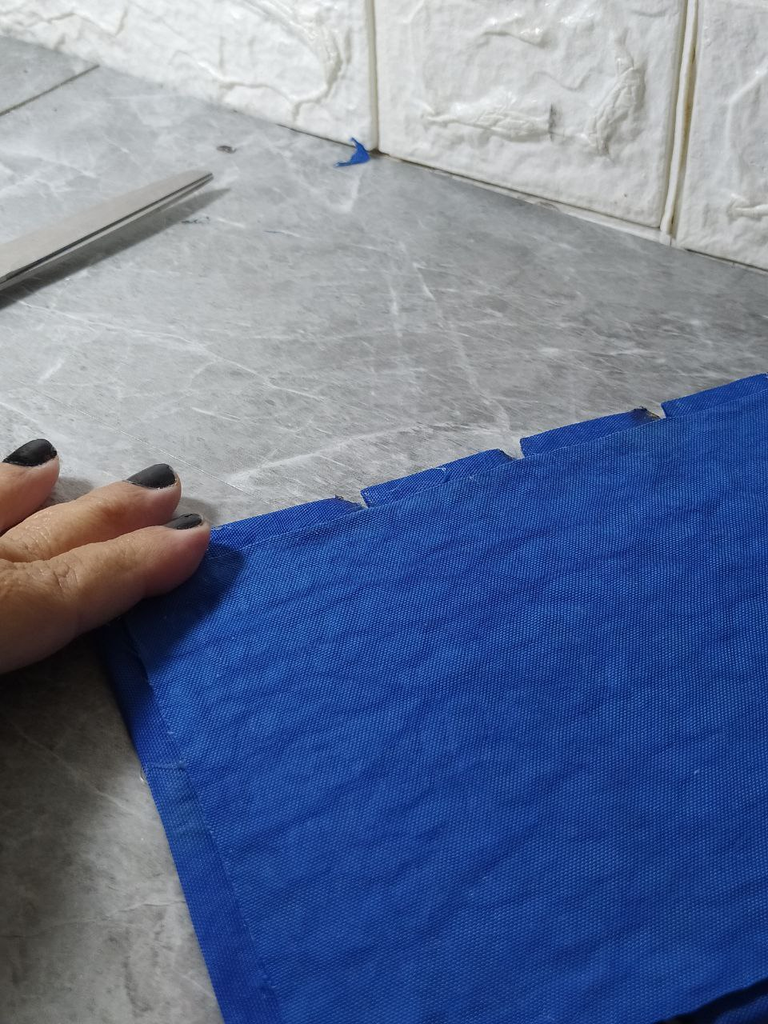
Okay, now I'm going to draw four lines, each 4 cm apart (this can be varied to suit your taste). I cut a space at each end of those lines where the collars would be held. And I proceeded to cover everything with the hot glue gun.
Aquí puedes ver que fui probando a ver si mi concepto servía, y efectivamente se queda bien sujeto todo.
Bueno, ahora voy a trazar 4 líneas a las cuales les di 4cms de separación, pero esto puede variar a nuestro gusto, corté en cada extremo de esas líneas un espacio donde se sostendrían los collares. Y procedí a forrar todo con la pistola de silicón caliente.
 |  |  |  |
|---|
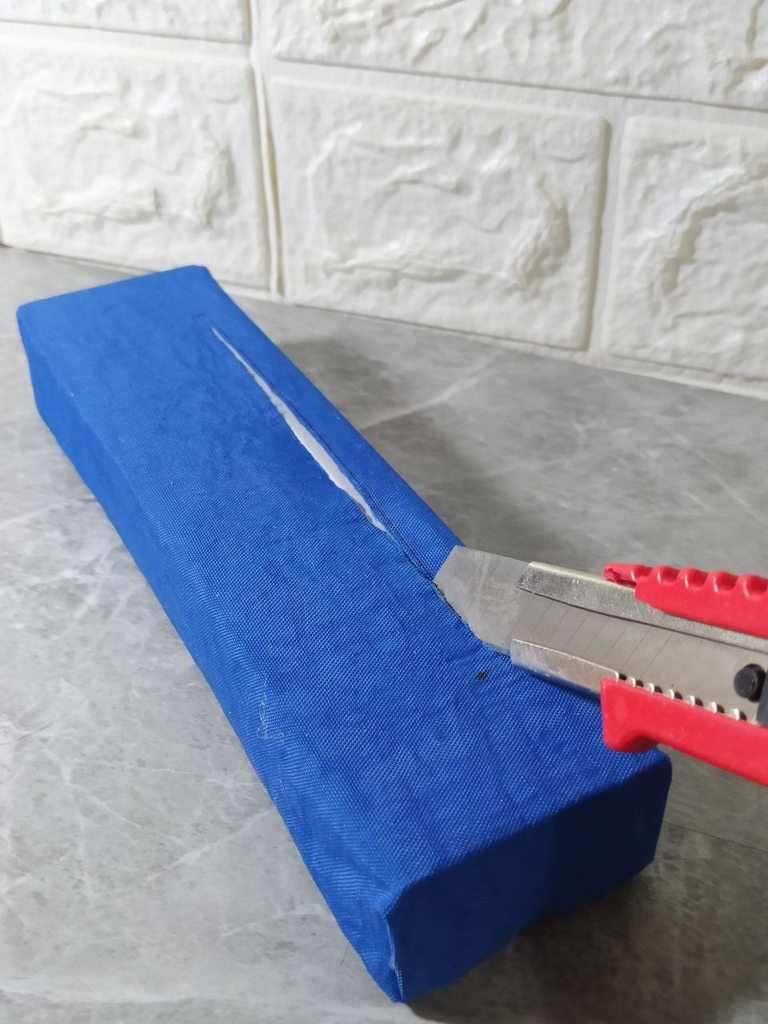
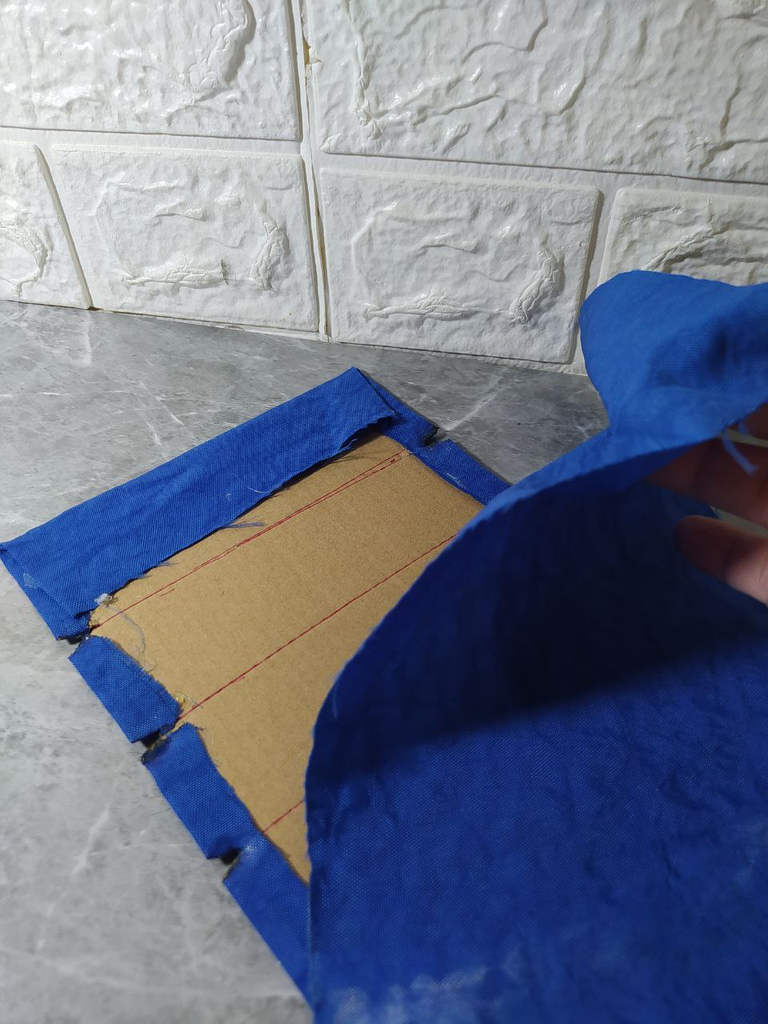
Following the marked lines, I'm going to cut out the spaces I made in the previous step on the already glued fabric, and with the lighter, I apply a little heat to seal those spaces. This was done very well since the fabric I used is synthetic, meaning it has a lot of plastic in its composition and seals very well with heat.
Orientándome con las líneas marcadas, voy a cortar sobre la tela ya pegada esos espacios que hice en el paso anterior, y con el yesquero aplico un poco de calor para que se sellen esos espacios, lo cual se hizo muy bien ya que la tela que utilicé es sintética, es decir que tiene mucha cantidad de plástico en su constitución y se sella muy bien al calor.
 |  |  |
|---|
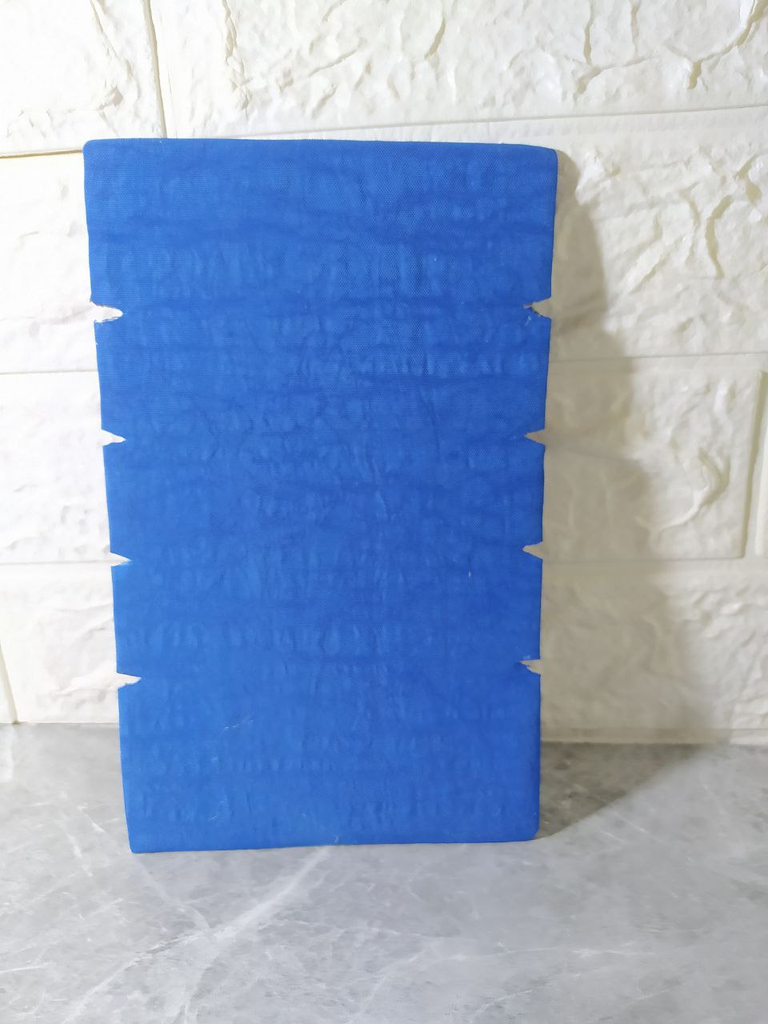
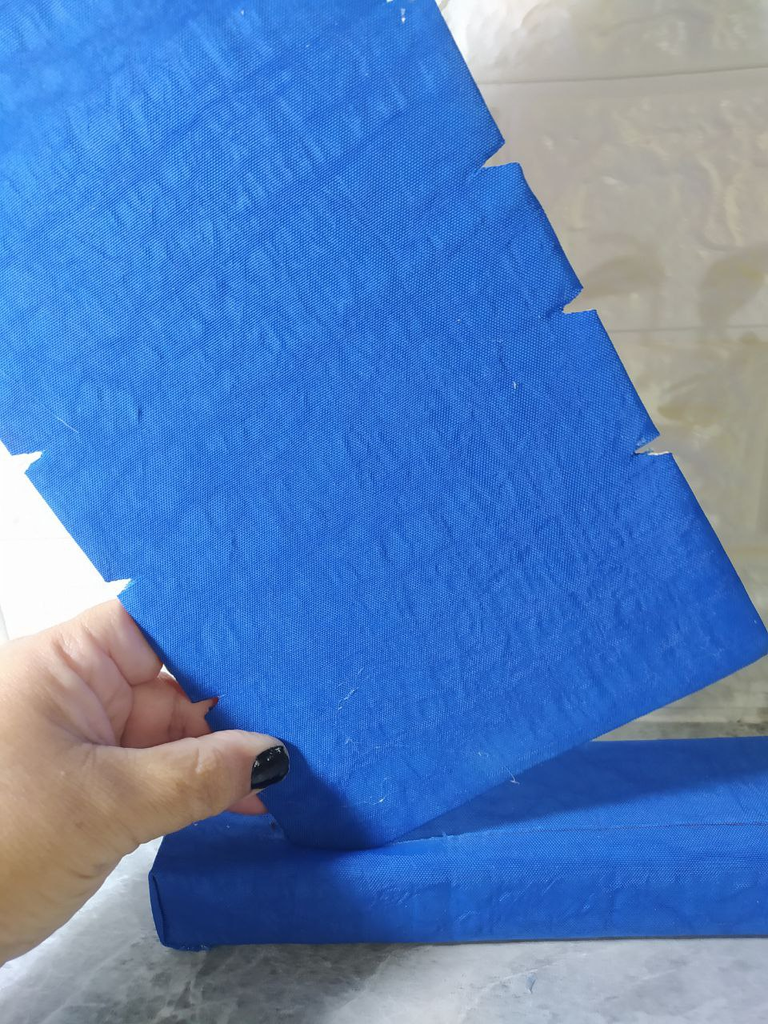
Now I can cover the back with another piece of fabric, being careful to get very neatly around the edges or ends.
And with these two pieces ready, I can join them together just as I did in the test, and I can also apply some hot glue, although I didn't do this because I wanted to be able to disassemble them whenever I wanted.
Ahora ya puedo forrar la parte de atrás con otro trozo de tela, con cuidado de llegar a los bordes o extremos de forma muy prolija.
Y con estas dos piezas listas, puedo unir tal como había hecho en la prueba y también puedo colocar algo de silicón caliente, aunque no lo hice ya que quería que se pudiese desarmar cuando lo deseara.
 |  |  |
|---|
I loved the final result more than I had imagined, the blue color really highlights the colors of the necklaces, of these 4 you could identify that I made the first one in one of my posts, I loved seeing them displayed in this new aid for my creations.
El resultado final me encantó más de lo que lo había imaginado, el color azul realmente resalta los colores de los collares, de estos 4 pudieran identificar que el primero lo hice en uno de mis post, me encantó verlos exhibidos en este nuevo auxiliar para mis creaciones.
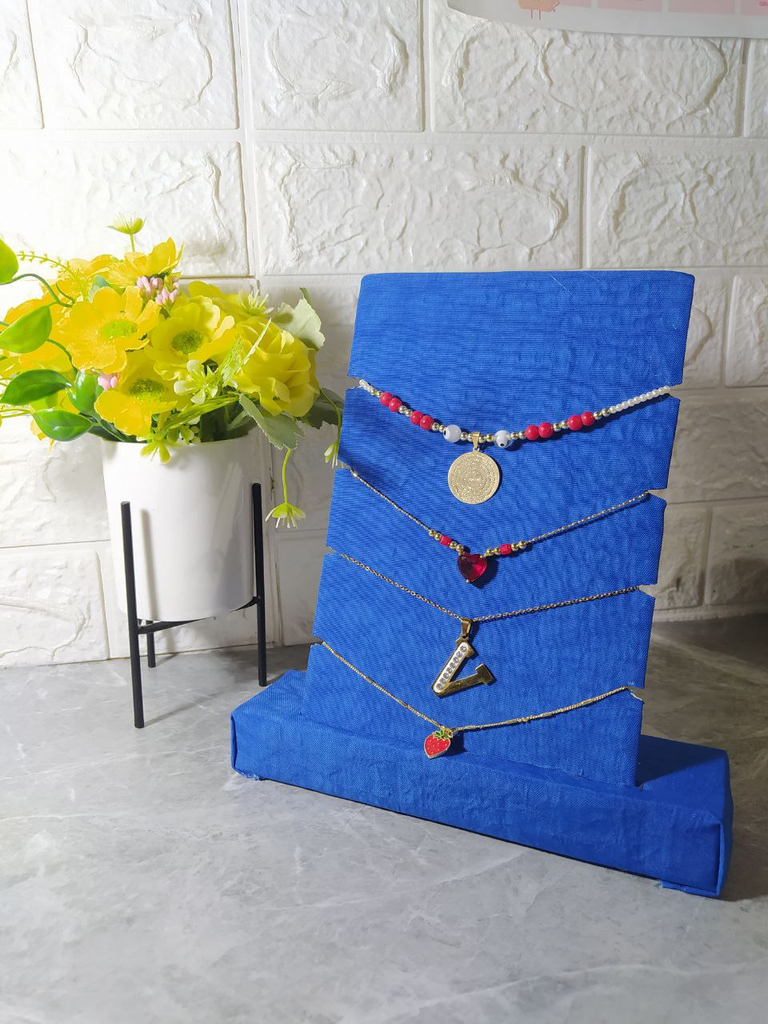
I think I could add more cutouts to this Necklace Display to make even more use of it. I could even make some holes in the top to hold earrings.
This is the first one I've made, and I already have more ideas in mind. Now I can display my creations in this beautiful accessory.
Creo que pudiera agregar más cortes en este mismo Exhibidor de Collares, para aprovecharlo aún más. Incluso en la parte superior pudiera hacer unas perforaciones para colocar zarcilla también.
Este es el primero que hago, y ya tengo más ideas en la mente. Ahora podré exhibir mis creaciones en este accesorio tan bello.

I hope you enjoyed it. I'll continue sharing my ideas with you. If you have any, please write to me in the comments, and I'll be happy to let my imagination run wild.
Deseo que les haya gustado, seguiré compartiendo con uds. mis ideas, si es el caso que quieren alguno me escriben en comentarios y con gusto pondré mi imaginación a volar.

I took the photos with my phone Redmi Note 8
Apps I used:
Canva Pro for Cover, Collage and Banners
I used Deepl Translator
My social networks:
Discord: YennysYaneth#0189
Twitter: @yennysferm
Instagram: @yennysyaneth
Las fotos las tomé con mi teléfono Redmi Note 8
Apps que utilicé:
Canva Pro para la Portada, Collage y Banners
Utilicé el Traductor Deepl
Mi redes sociales:
Discord: YennysYaneth#0189
Twitter: @yennysferm
Instagram: @yennysyaneth
Posted Using INLEO
As always, you're doing a wonderful job. A great idea for organizing our accessories ourselves. Thanks for sharing your excellent step-by-step instructions.
selected by @dayadam
Chama pero es que esto te quedó genial qué idea maravillosa, y una manera muy bonita de organizar nuestros accesorios, y de igual manera también nos sirve como mostradores a la hora de un emprendimiento, para poder el producto.
!discovery 35
This post was shared and voted inside the discord by the curators team of discovery-it
Join our Community and follow our Curation Trail
Discovery-it is also a Witness, vote for us here
Delegate to us for passive income. Check our 80% fee-back Program
¿ᴺᵉᶜᵉˢᶦᵗᵃˢ ᴴᴮᴰ? ᵀᵉ ˡᵒ ᵖʳᵉˢᵗᵃᵐᵒˢ ᶜᵒⁿ @ruta.loans
Es un trabajo estupendo amiga <3 Muy prolijo.
Este post ha sido votado y curado por el equipo Hive Argentina | Participa en nuestro Trail de curación.
Únete a nuestro Trail Aquí.
Puedes hacerlo también en nuestros enlaces preconfigurados de Hivesigner:
| 10 HP | 25 HP | 50 HP | 100 HP | 250 HP | 500 HP | 1000 HP | 1500 HP | 2000 HP |
Está genial el exhibidor, porque también lo puedes tener en casa y encontrar más rápido el que te quieras poner, y la idea de colocar arriba para los zarcillos está bien también, así en un solo accesorio colocas muchas más piezas.
Este post fue curado por el equipo de @tattooworld.
[Unete a nuestro Trail]
https://hive.vote/dash.php?i=1&trail=tattooworld
You can also use our preconfigured Hivesigner links:
| 10 HP | 25 HP | 50 HP | 100 HP | 250 HP | 500 HP | 1000 HP | 1500 HP | 2000 HP |
Quedó muy bonito, muy buena idea para exhibir nuestros accesorios 🤗
https://www.instagram.com/p/DKuffy6uzDC/?igsh=b2o0MXRrcHZzemd2
This is pretty and the blue fabric made everything pop out beautiful. This is such a great way to recycle used cardboards and make them useful again. Thank you for sharing this process with us.
Amiga que buen tutorial , te quedó hermoso y excelente para la exhibición de los collares , resaltan mucho con ese color azul 💙
Genial el organizador. Saludos.
https://www.reddit.com/r/BloggersCommunity/comments/1os7vk4/i_begin_my_jewelry_displays_with_this_creation/
This post has been shared on Reddit by @yennysferm71 through the HivePosh initiative.