Diy: Hechicera oscura en limpiapipas, concurso de arte Splinterlands semana 374. (ESP/ENG)
Feliz y bendecido martes comunidad Hivediy, sean bienvenidos a mi espacio creativo, espero se encuentren bien disfrutando de estas navidades en unión familiar, por aquí sigo activada en las manualidades, y en esta oportunidad les quiero compartir mi participación en el concurso de arte Splinterlands semanal, que por cierto esta figura se ha convertido en mi favorita hasta el momento.
Happy and blessed Tuesday Hivediy community, welcome to my creative space. I hope you are all well and enjoying this Christmas season with your families. I'm still active here with crafts, and this time I want to share my entry in the weekly Splinterlands art contest. By the way, this figure has become my favorite so far.

Les comparto mi participación en el concurso de arte Splinterlands semana 374, me inspiré en la carta de la Hechicera oscura, una dama muy poderosa siendo así la reina de la magia, está Hechicera lleva un vestido en color negro un sombrero y va encima de su escoba, me llamó la atención que su piel es morada así que fue todo un reto buscar el color perfecto para su piel ya que la mayoría de los limpiapipas eran morados oscuro.
I'm sharing my entry for the Splinterlands art contest, week 374. I was inspired by the Dark Sorceress card, a very powerful lady, the queen of magic. This Sorceress wears a black dress and hat and rides her broom. I was struck by the fact that her skin is purple, so finding the perfect color for it was quite a challenge, since most of the pipe cleaners were dark purple.
.png)
Dark Enchantress
Por suerte encontré el color justo de su piel y me puse manos a la obra, pues me tocó ver la imágen varias veces para tener en mente una idea de como iba a comenzar a realizar la figura, y la verdad solo queda confiar en el proceso, puede que algunos detalles no queden a la primera como imaginas, lo bueno es que el limpiapipas se puede retirar y sustituir por otro, en fin quedé encantada con el resultado, así que comienzo con los materiales y el paso a paso.
Luckily, I found the right skin tone and got to work. I had to look at the image several times to get an idea of how I was going to start making the figure, and honestly, you just have to trust the process. Some details might not come out the way you imagine on the first try, but the good thing is that the pipe cleaner can be removed and replaced with another one. Anyway, I was delighted with the result, so let's start with the materials and the step-by-step instructions.
.gif)

| Materiales | Materials |
|---|---|
| Limpiapipas negro, naranja | Black and orange pipe cleaners |
| Limpiapipas morado, blanco | Purple and white pipe cleaners |
| Limpiapipas dorado, rojo | Gold pipe cleaner, red |
| Silicón, tijera | Silicone, scissors |
| Papel aluminio | aluminum foil |
| Palillo, algodón | Toothpick, cotton |

Paso a paso / Step by step
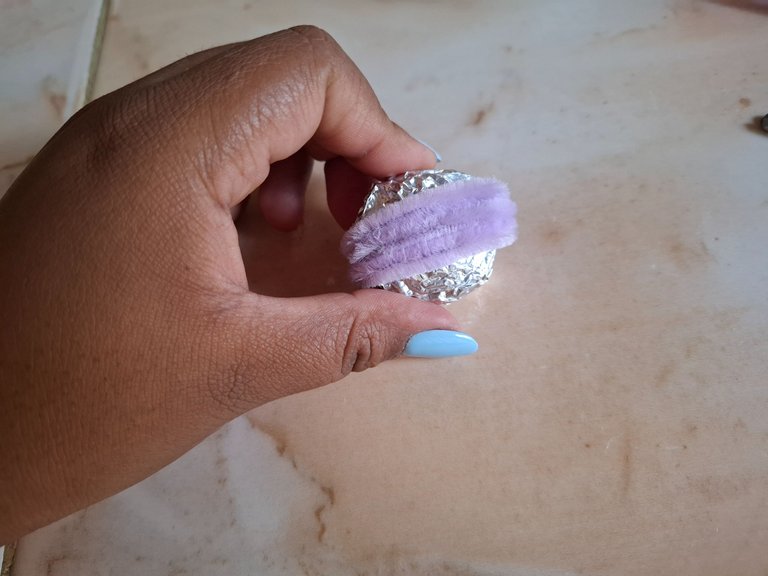
El primer paso que voy a realizar será formar la base para la cara y torso utilizando papel aluminio relleno de algodón, luego seleccionamos los limpiapipas color morado y comenzamos a cubrir el rostro hasta alcanzar su totalidad.
The first step I will take is to form the base for the face and torso using aluminum foil filled with cotton, then we select the purple pipe cleaners and begin to cover the face until it is completely covered.
 |  |
|---|
 |  |
|---|
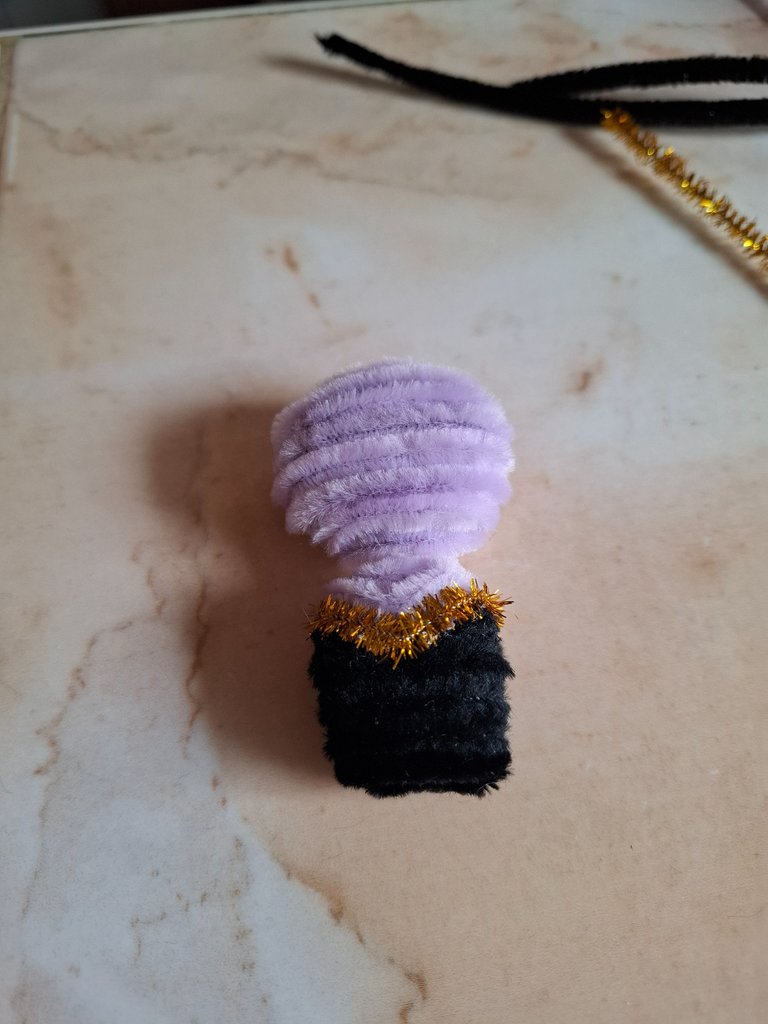
Luego voy a tomar la pieza más pequeña que es el torso y comenzamos a cubrir con limpiapipas morado en la parte superior y en la parte inferior limpiapipas color negro, será parte de la ropa, el limpiapipas dorado lo voy a colocar en el borde de la camisa.
Next, I'm going to take the smallest piece, which is the torso, and start covering it with purple pipe cleaners on the top and black pipe cleaners on the bottom; this will be part of the clothing. I'm going to place the gold pipe cleaner on the edge of the shirt.
 |  |
|---|
 |  |
|---|
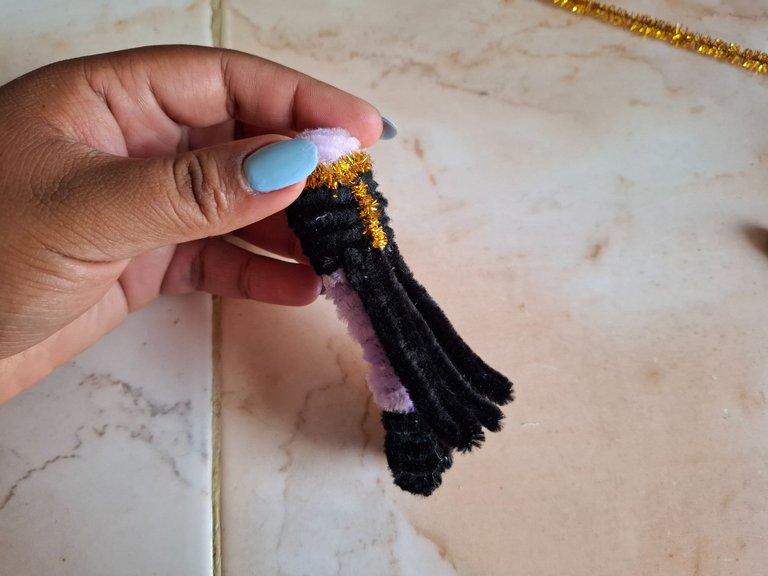
Luego voy a realizar las piernas, deben ser largas ya que la figura se mantendrá sentada, realicé los zapatos en color negro, ahora voy a comenzar a formar la falda, solo debes cortar el limpiapipas en el tamaño que desees y doblamos a la mitad, en la parte trasera debe quedar larga y en la parte delantera más corta.
Next, I'm going to make the legs. They need to be long since the figure will be sitting. I made the shoes in black. Now I'm going to start making the skirt. You just need to cut the pipe cleaner to the desired size and fold it in half. The back should be long, and the front shorter.
 |  |  |
|---|
 |  |
|---|
Luego vamos a realizar el cabello en color blanco, debemos ondular los limpiapipas antes, unimos las piezas con silicón, el siguiente paso es realizar el sombrero, unimos dos mitad de limpiapipas y al rededor pegamos una parte en forma circular, luego cubrimos con limpiapipas negro hasta lograr obtener la forma.
Next, we'll make the hair in white. We need to curl the pipe cleaners first, then join the pieces with silicone. The next step is to make the hat. We join two halves of pipe cleaners and glue a circular piece around them, then cover it with black pipe cleaners until we get the shape.
 |  |
|---|
 |  |
|---|
Pegamos sobre el cabello y con foami color turquesa realizamos la decoración más limpiapipas dorado, para la escoba de la Hechicera voy a tomar un palillo de madera y voy a cubrir con mecatillo, en la punta voy a colocar en limpiapipas color naranja y rojo tal cual como se ve en la imagen.
We glued it onto the hair and with turquoise foam we made the decoration plus gold pipe cleaners, for the Witch's broom I'm going to take a wooden stick and cover it with twine, at the tip I'm going to place orange and red pipe cleaners just as seen in the image.
 |  |  |
|---|
Por último realicé su rostro, sus ojitos en foami negro, colocamos una pegatina brillante color rojo en la frente, la boca la realicé con limpiapipas morado, y dos orejas que deben ser puntiagudas, luego voy a doblar las piernas de forma que quede sentada sobre la escoba, pero está no la vamos a pegar así que quedará como un accesorio.
Finally, I made her face, her eyes in black foam, we placed a shiny red sticker on her forehead, I made the mouth with purple pipe cleaners, and two ears that should be pointed, then I'm going to bend the legs so that she sits on the broom, but we're not going to glue it on so it will remain as an accessory.
 |  |
|---|
 |  |
|---|
Y listo, de esta forma terminé a la Hechicera oscura que por cierto me encantó como quedó de coqueta, como les digo se trata de confiar en el proceso, estoy muy contenta con el resultado espero les guste, muchísimas gracias por el apoyo y por visitar mi publicación, nos vemos en una próxima oportunidad con más ideas creativas.
And that's it! This is how I finished the Dark Sorceress, who I absolutely loved how charming she turned out. As I said, it's all about trusting the process. I'm very happy with the result and I hope you like it. Thank you so much for your support and for visiting my post. See you next time with more creative ideas!


Más del resultado final:
More on the final result:


Contenido original. - original content.
Los separadores y banner fueron realizados en Canva. - The dividers and banner were made in Canva.
Fotografías tomadas con mi Samsung A55. - Photographs taken with my Samsung A55.
Gif creado desde Giphy / Gif created from Giphy
Traducción de: Google traductor - Translation of: Google translator.
Posted Using INLEO
¡Felicidades! Esta publicación obtuvo upvote y fue compartido por @la-colmena, un proyecto de Curación Manual para la comunidad hispana de Hive que cuenta con el respaldo de @curie.
Si te gusta el trabajo que hacemos, te invitamos a darle tu voto a este comentario y a votar como testigo por Curie.
Si quieres saber más sobre nuestro proyecto, te invitamos a acompañarnos en nuestro servidor de Discord.
Muchas gracias 🫂
Bellísima está Hechicera, te felicito por el proceso y los acabados
Muchísimas gracias por el apoyo 🥹
Esta es de mis cartas favoritas, te quedó muy linda 😊
Muchas gracias 🫶🏽 saludos
Thanks for sharing! - @cieliss

Muchas gracias por el apoyo 🫶🏼
https://www.reddit.com/r/crafting/comments/1ribvwx/hice_una_hechicera_con_limpiapipas/
This post has been shared on Reddit by @marile21 through the HivePosh initiative.