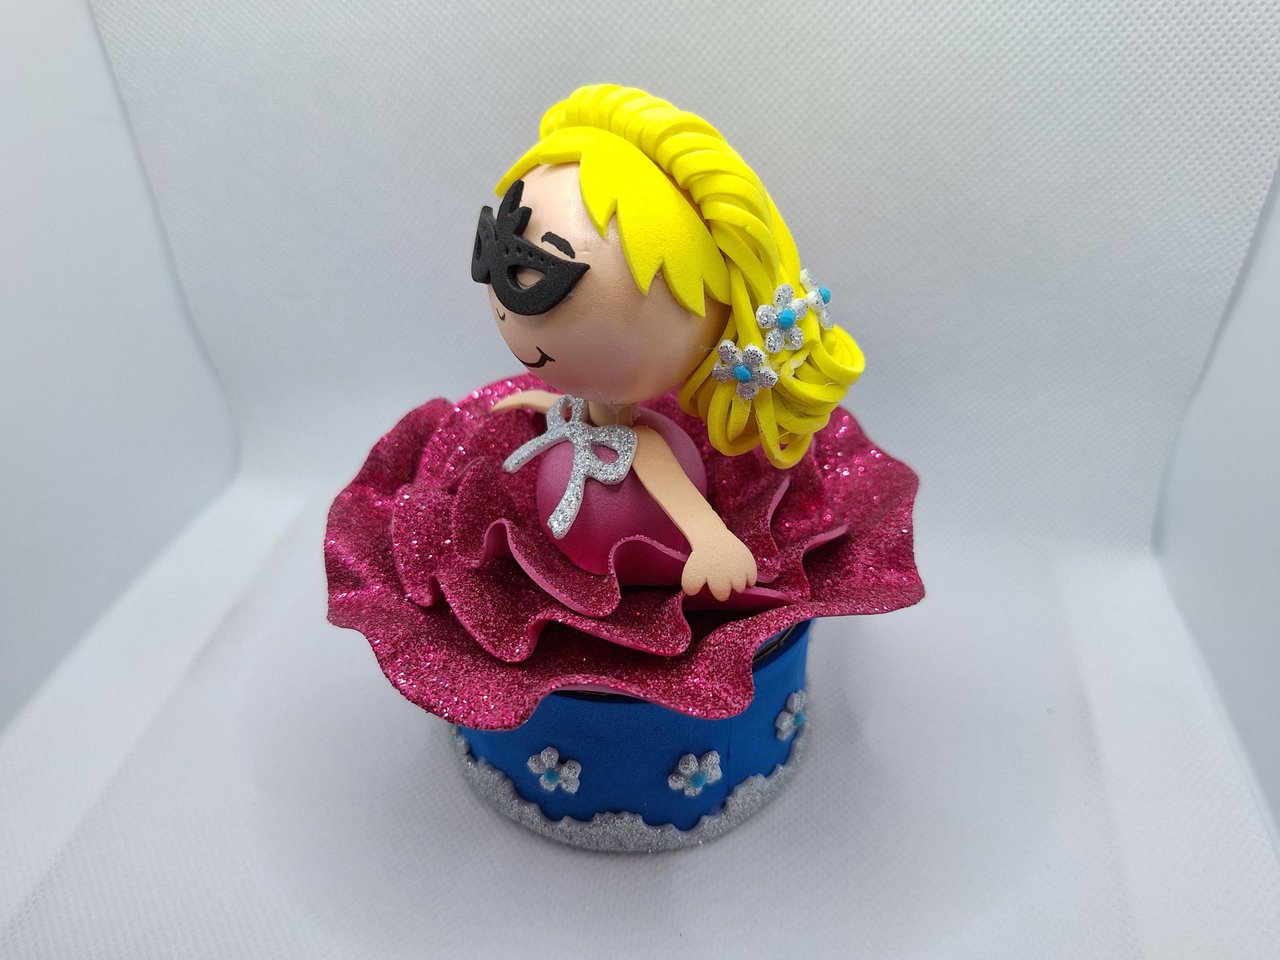
[EN-ES] DIY: Ballerina-shaped jewelry box // Joyero en forma de bailarina.
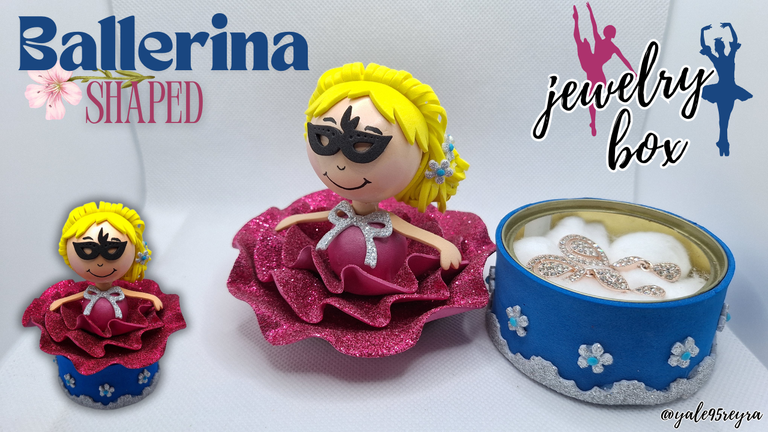
Hello, dear craft lovers, here I bring you a new tutorial where I show you how to make a jewelry box in the shape of a ballerina. It is not very common to have this shape, which makes it unique and at the same time fun. I'm sure we all have some jewelry or small object that we keep and we want to avoid misplacing it among the other things. Therefore, this can be the solution to create a jewelry box with the shape we want using recycled and inexpensive materials.
This one particularly has the shape of a ballerina so that the beautiful flights of the dress adorn the lid of the container, but it does not mean that you do it exactly the same, you can take the idea and create a totally different one. You'll see that it's not difficult at all. The fun is to invent new characters giving free rein to your imagination and you will be making a work of art that will not only serve to store small objects, but will beautify any corner where you place it. Below, I show you all the materials I used and the step by step of the creative process.
Hola, queridos amantes de las manualidades, aquí les traigo un nuevo tutorial donde les enseño cómo confeccionar un joyero con forma de bailarina. No es muy habitual que tenga esta forma, lo que lo hace único y a la vez divertido. Estoy segura de que todos tenemos alguna joya u objeto pequeño que guardamos y queremos evitar que se extravíe entre las demás cosas. Por lo tanto, esta puede ser la solución para crear un joyero con la forma que deseemos utilizando materiales reciclados y económicos.
Este particularmente tiene forma de bailarina para que los hermosos vuelos del vestido adornen la tapa del envase, pero no quiere decir que lo hagas exactamente igual, puedes tomar la idea y crear uno totalmente diferente. Verán que no es para nada difícil. Lo divertido es inventar nuevos personajes dándole riendas sueltas a la imaginación y estarás haciendo una obra de arte que no solo te servirá para guardar pequeños objetos, sino que embellecerá cualquier rincón donde lo coloques. A continuación, te muestro todos los materiales que utilicé y el paso a paso del proceso creativo.
💃Materials // Materiales💃

- 1 small can / 1 lata pequeña
- 2 polyfoam balls / 2 bolas de poliespuma
- silicone / silicona
- ruler / regla
- scissors / tijera
- foami of various colors / foami de varios colores
- flower-shaped punching machine / ponchadora con forma de flores
- beads /perlas
- black marker / marcador negro
- dies / troqueles
💃Step by step // Paso a paso💃
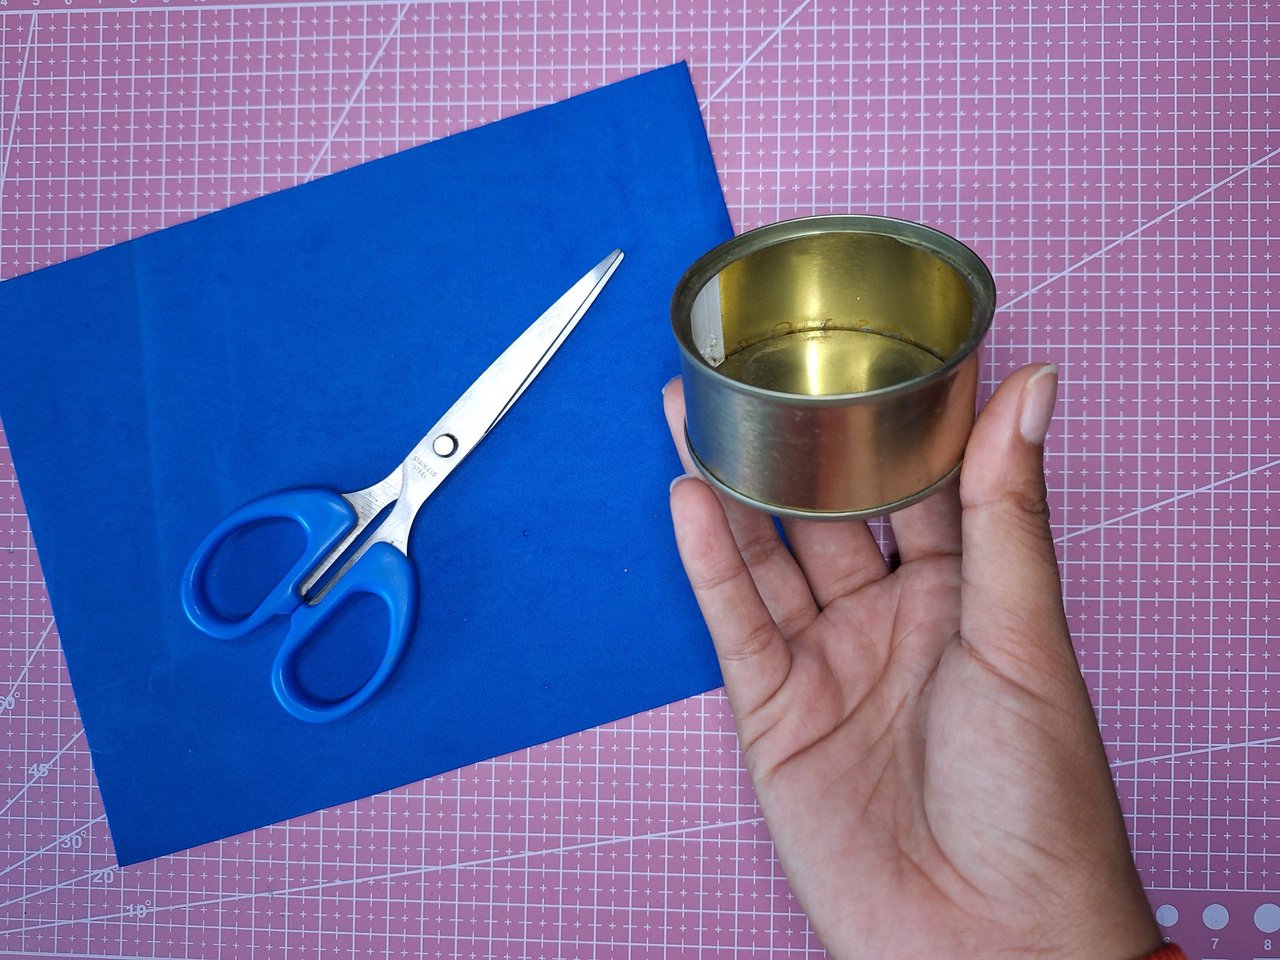 | 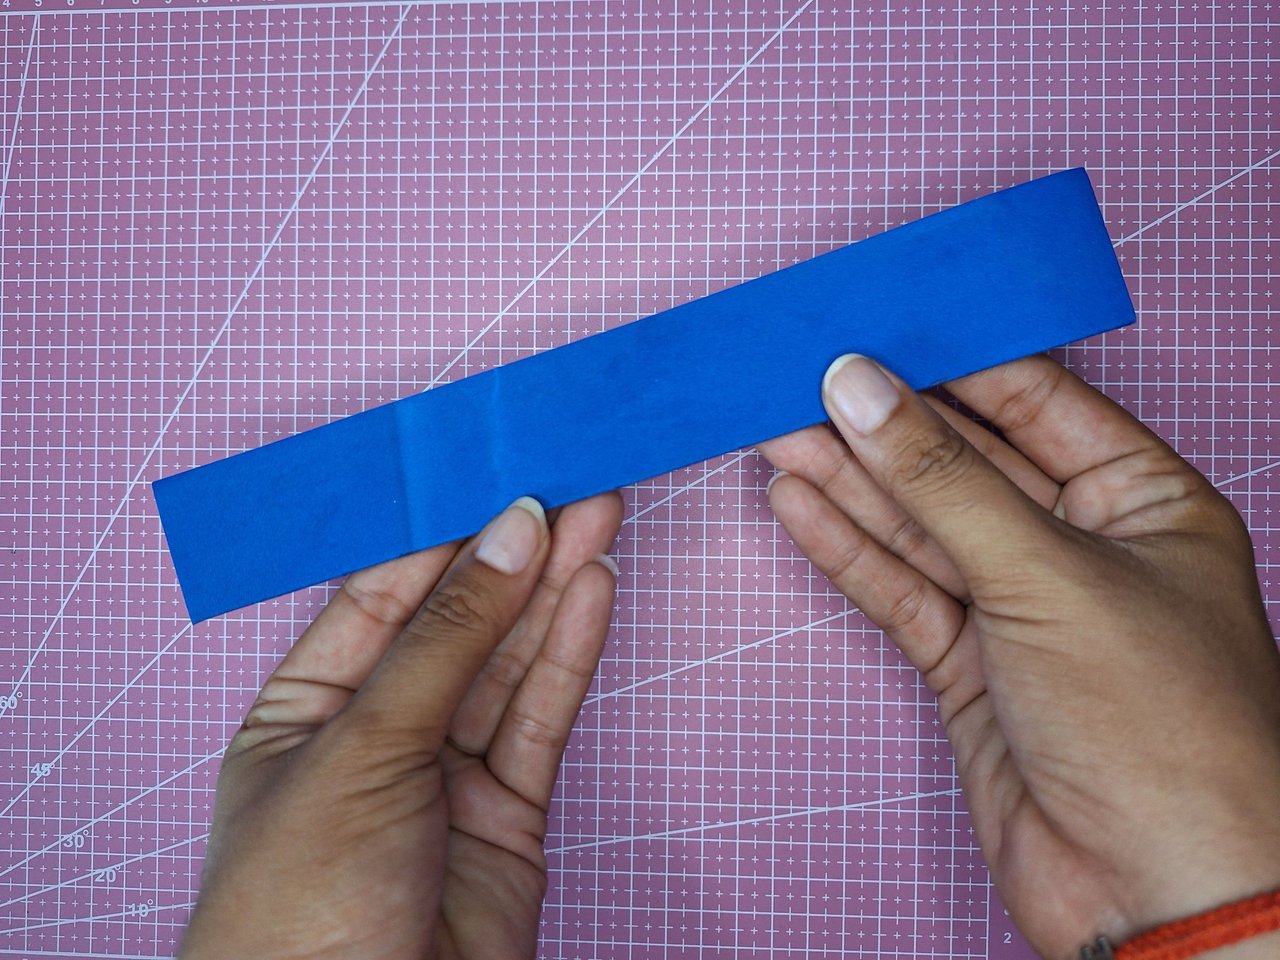 | 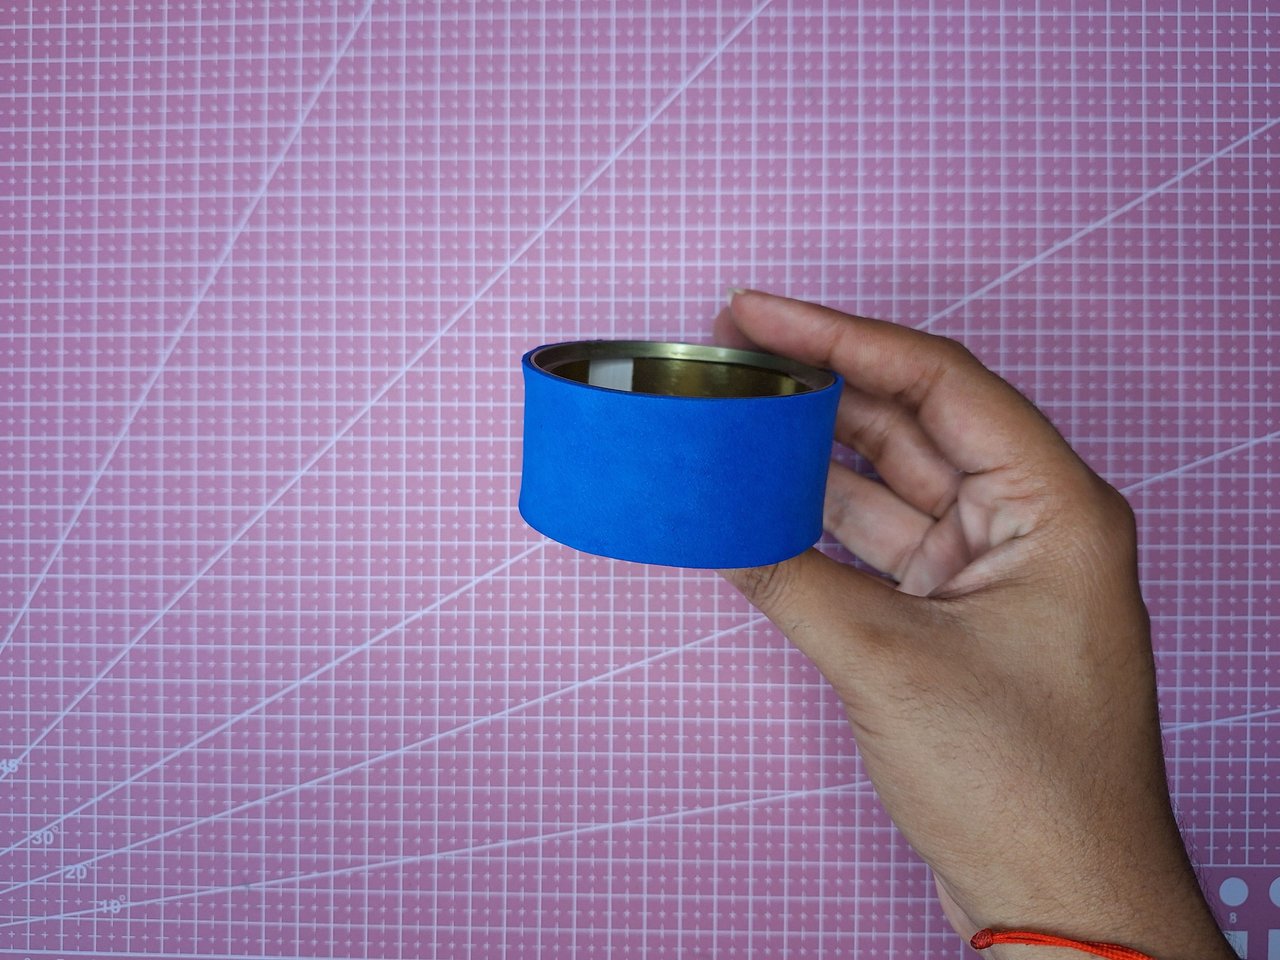 |
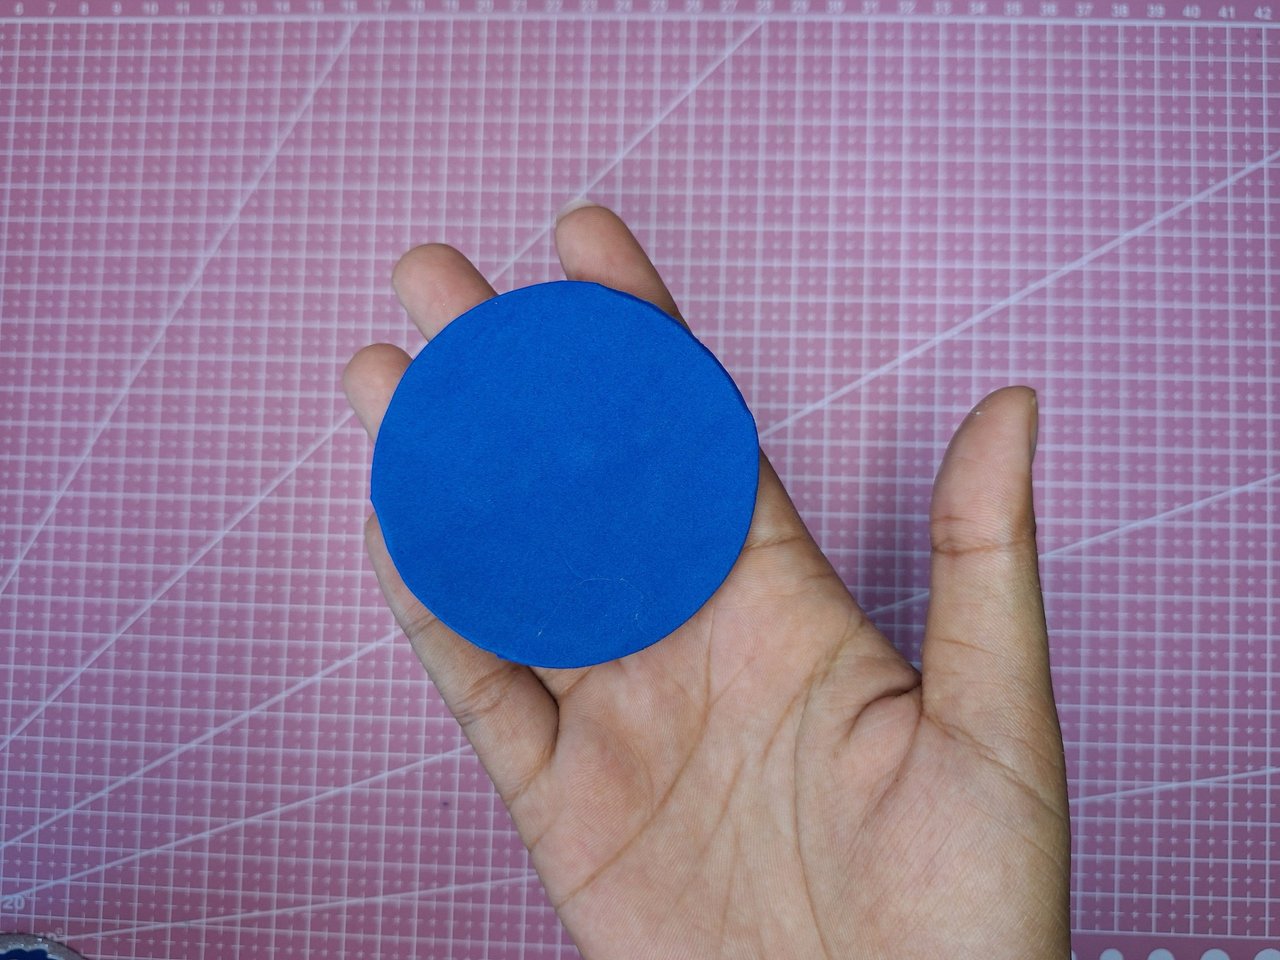
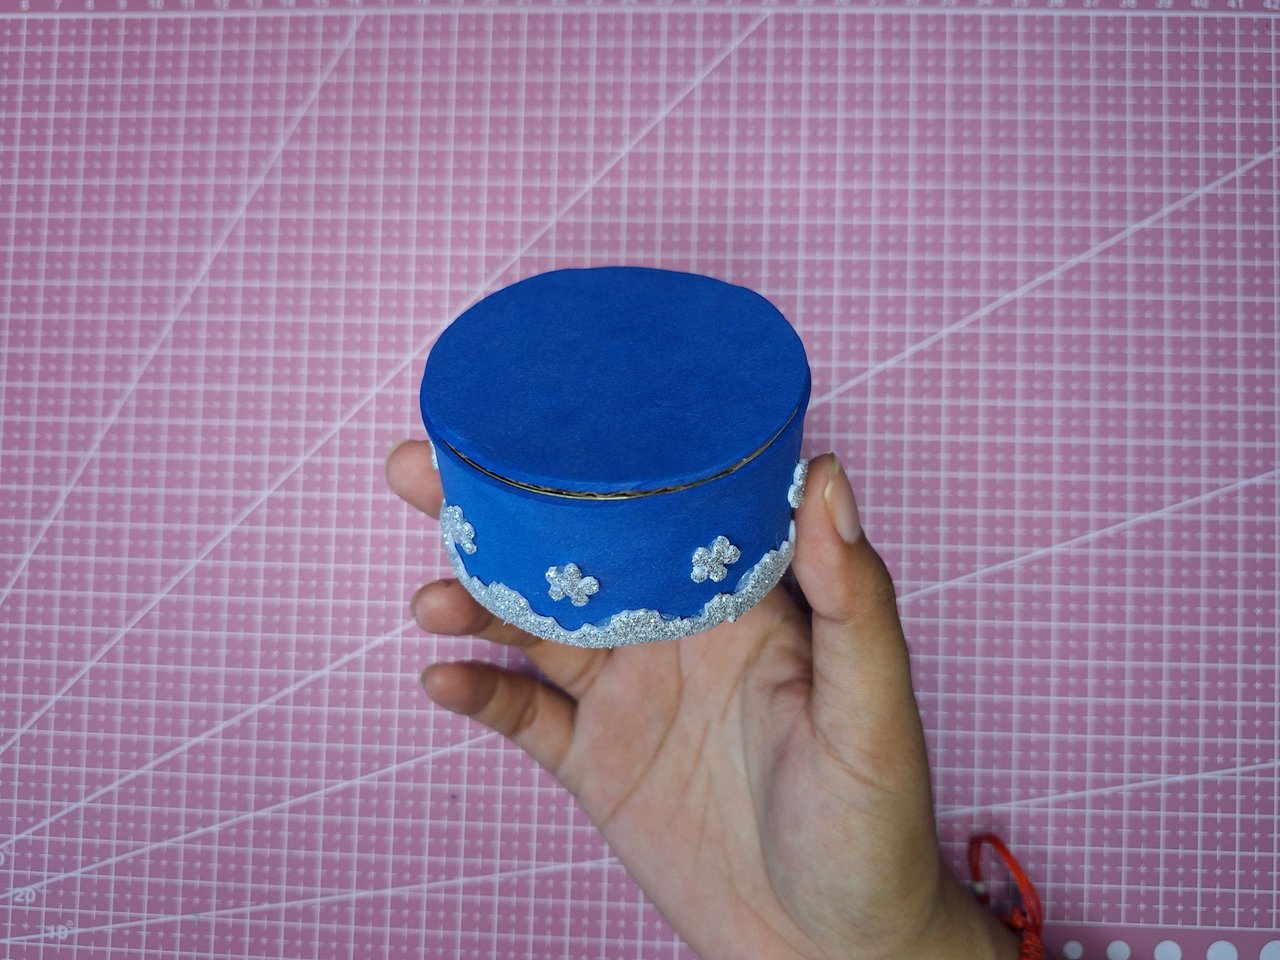
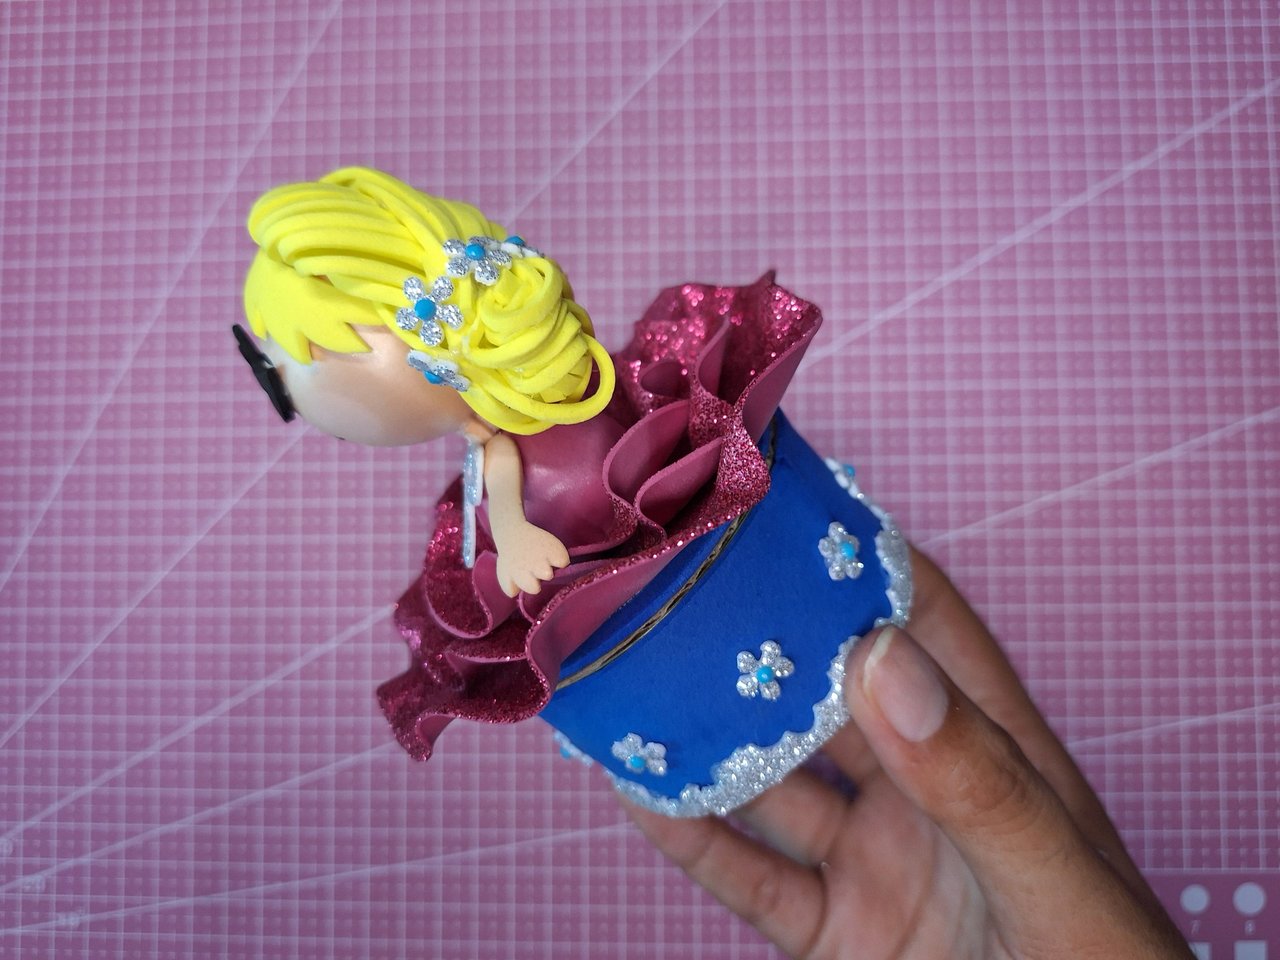
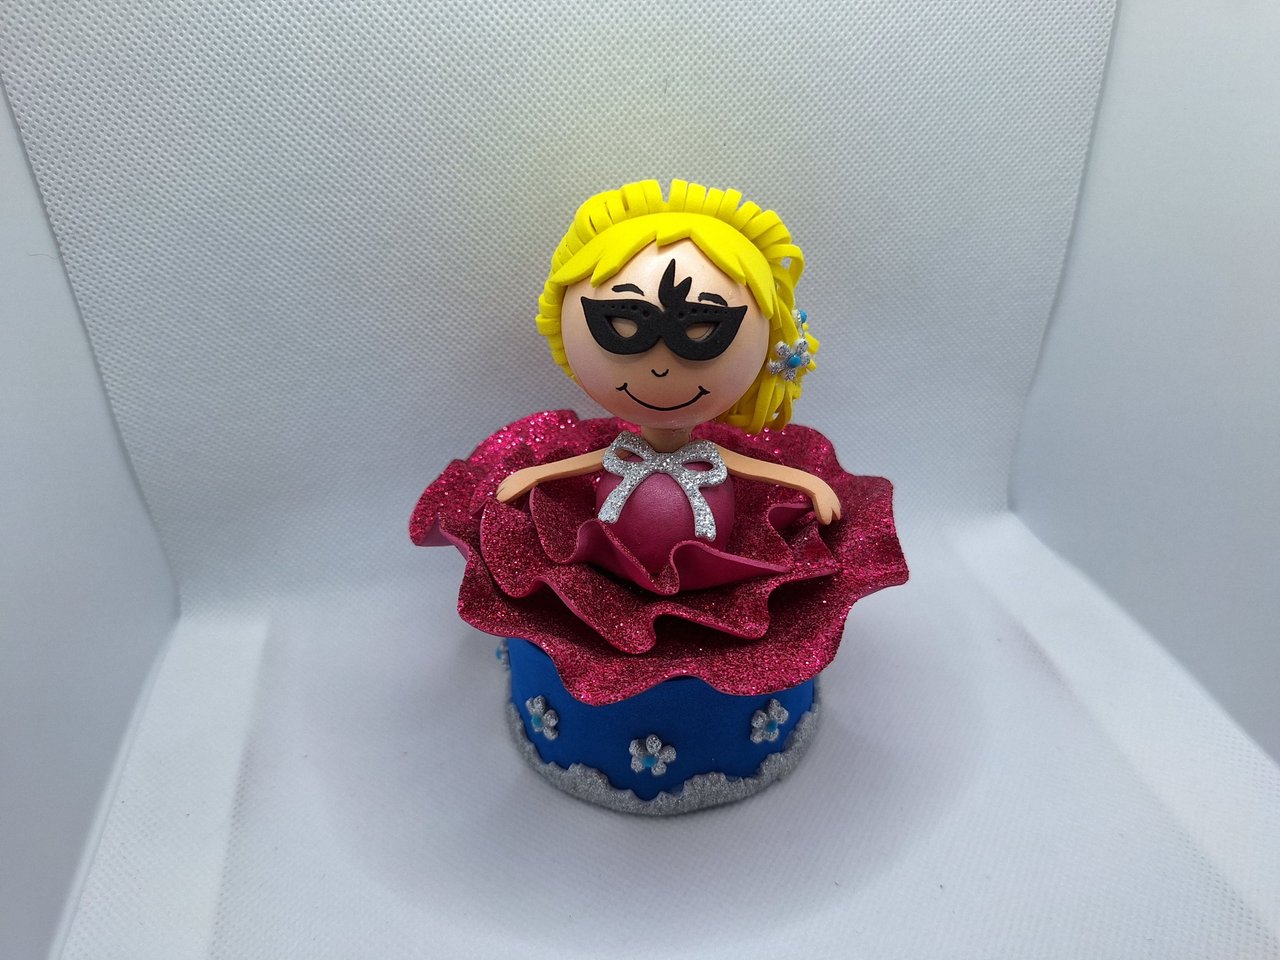
The first thing I did was to take the measurements of the can I used for the base of the jewelry box. I marked and cut out a blue foami ribbon with the exact measurements and then glued it all around the can. You can do it with the colors you prefer.
Lo primero que hice fue tomar las medidas de la lata que utilicé para la base del joyero. Marqué y recorté un listón de foami de color azul con las medidas exactas para luego pegarlo por todo el contorno de la lata. Puedes hacerlo con los colores que prefieras.
 |  |  |
 | 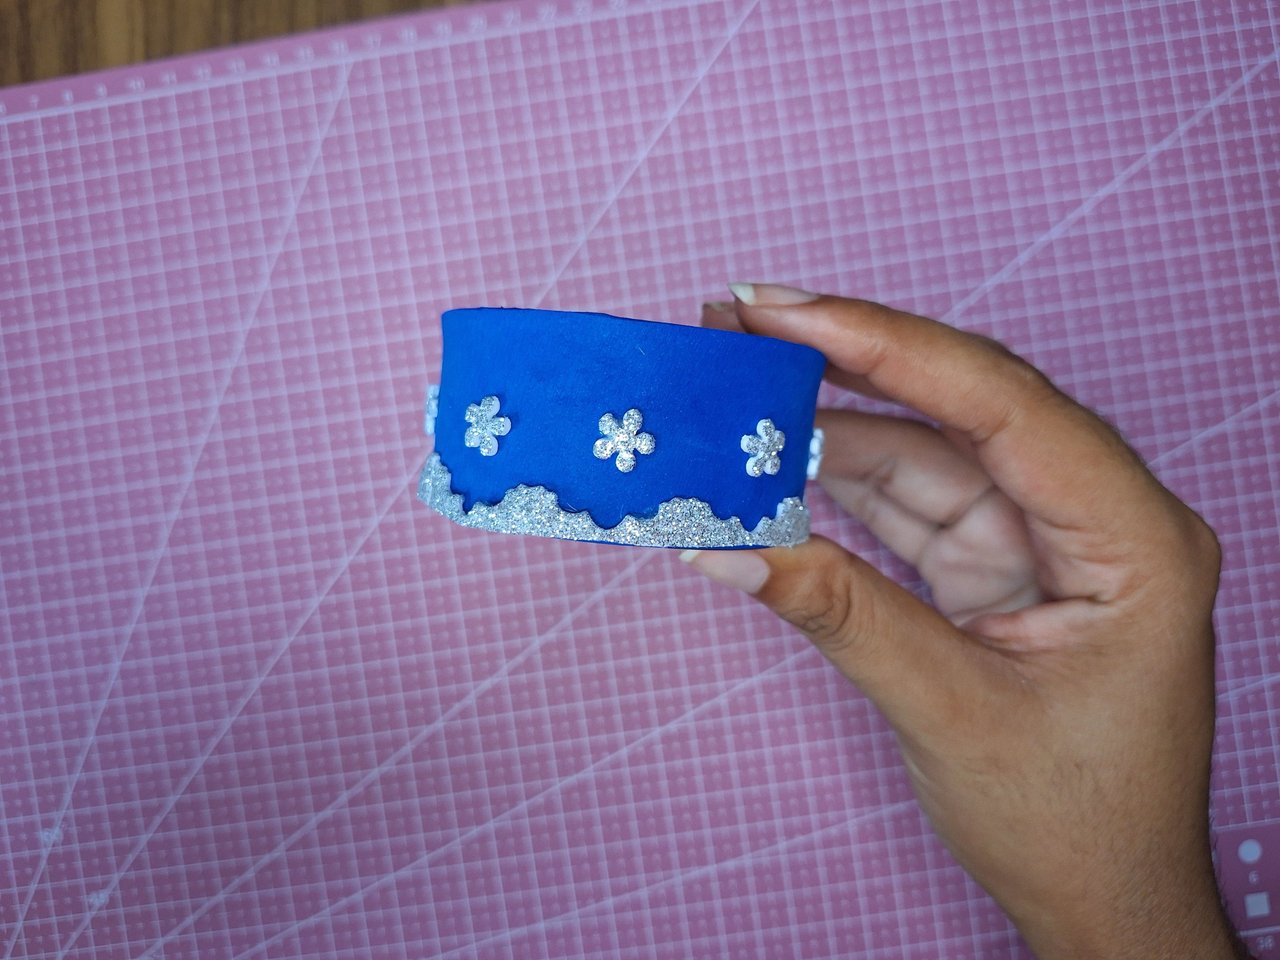 |
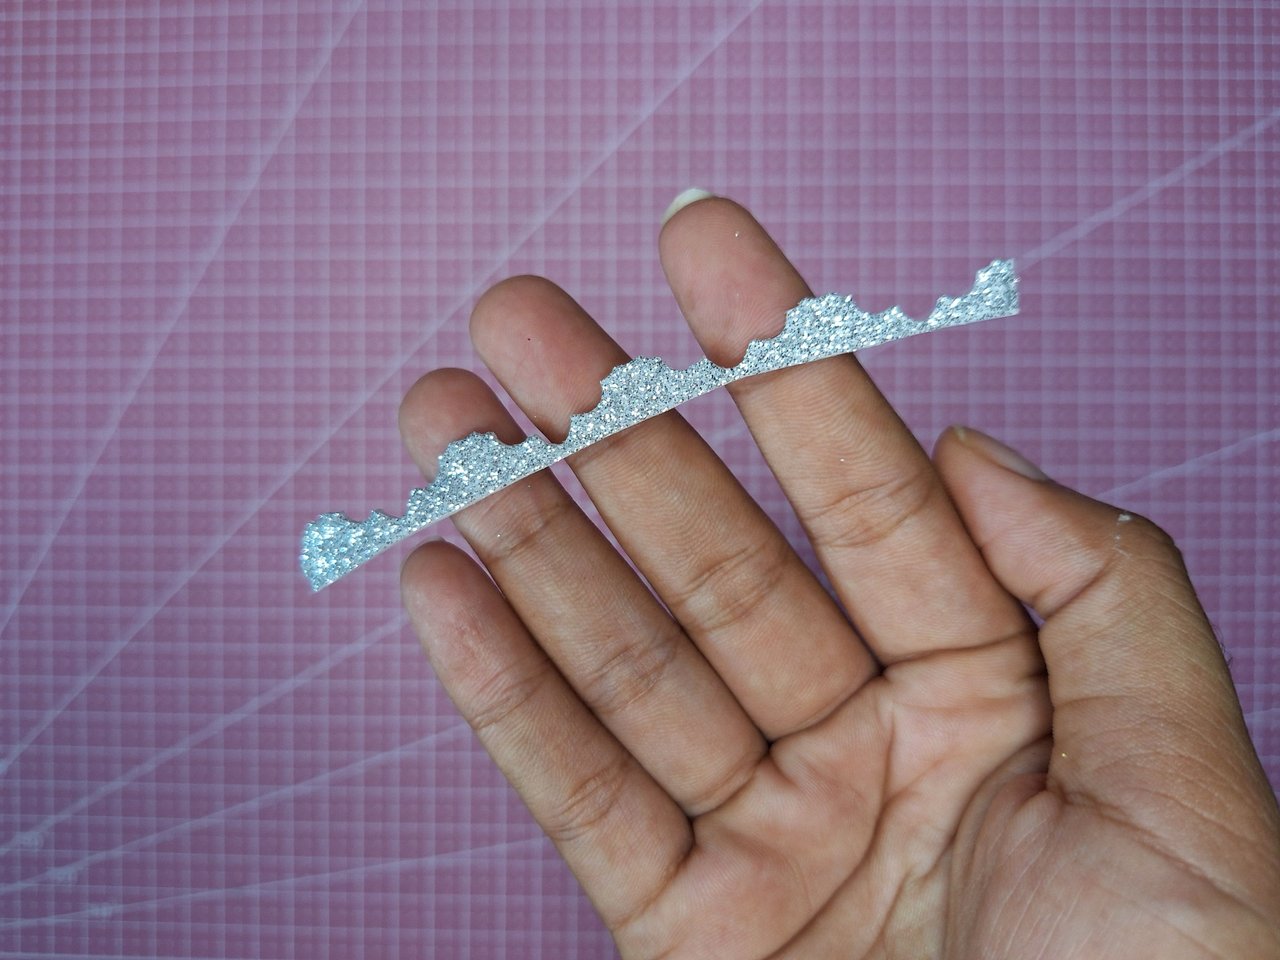
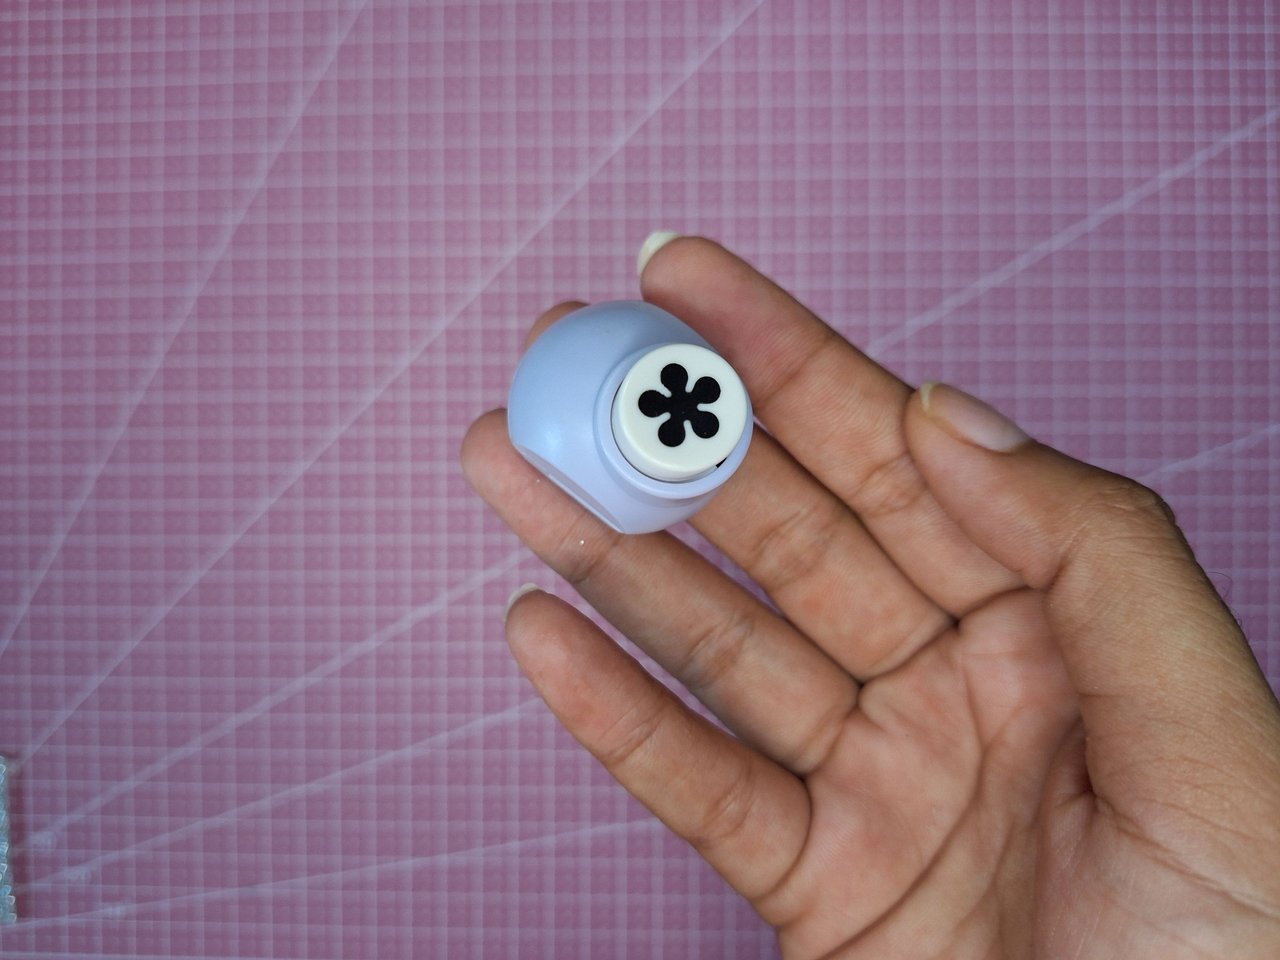
To decorate the jewelry box, I made a decorative ribbon that I would glue on the lower part and with a punching machine in the shape of small flowers, I made several that I glued leaving two cm of separation in the central part.
Para decorar el joyero, hice como una cinta decorativa que pegaría en la parte inferior y con una ponchadora con forma de flores pequeñas, hice varias que pequé dejando dos cm de separación en la parte central.
 |  |
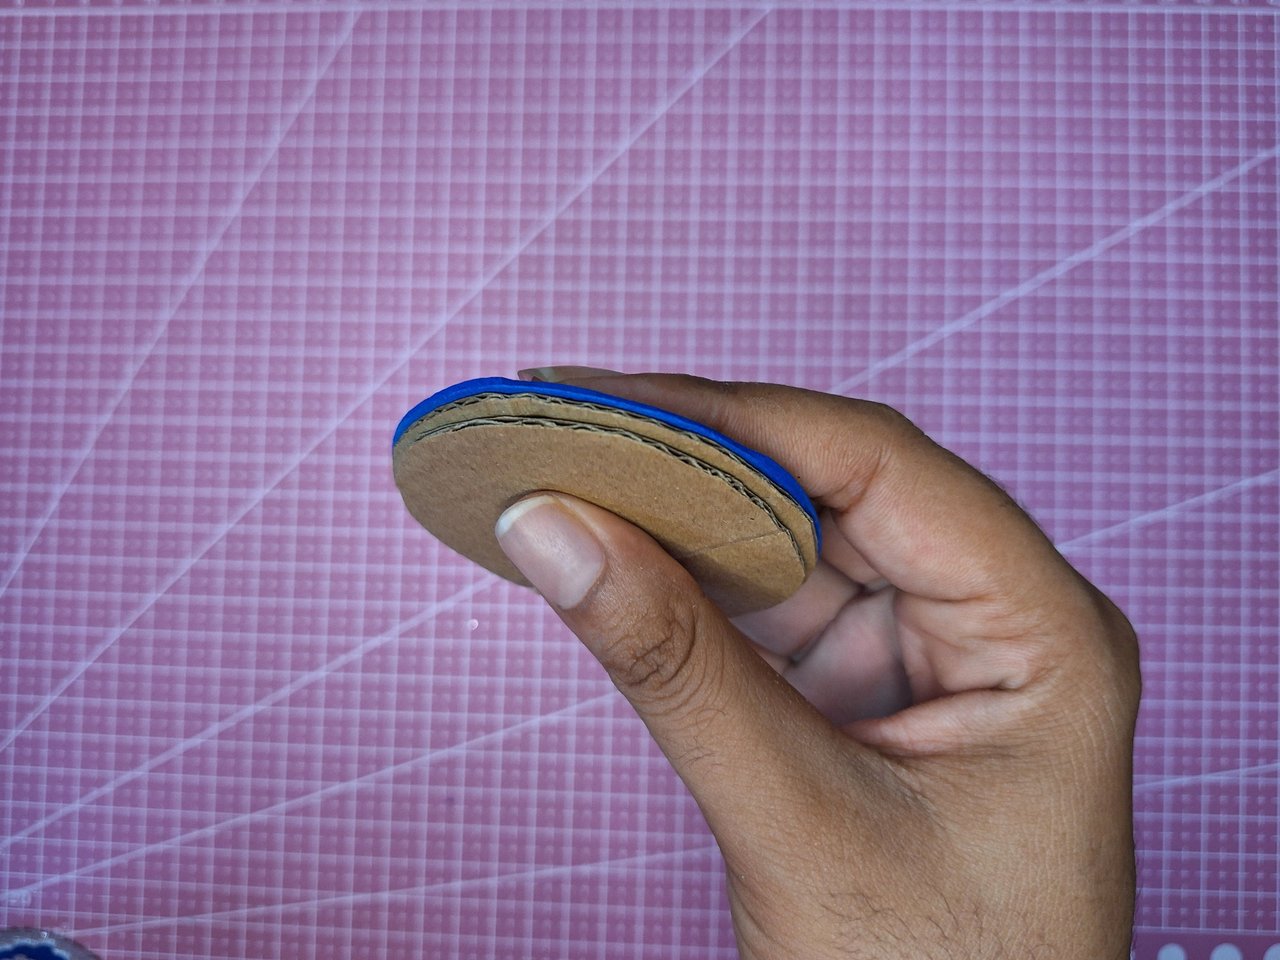 |  |
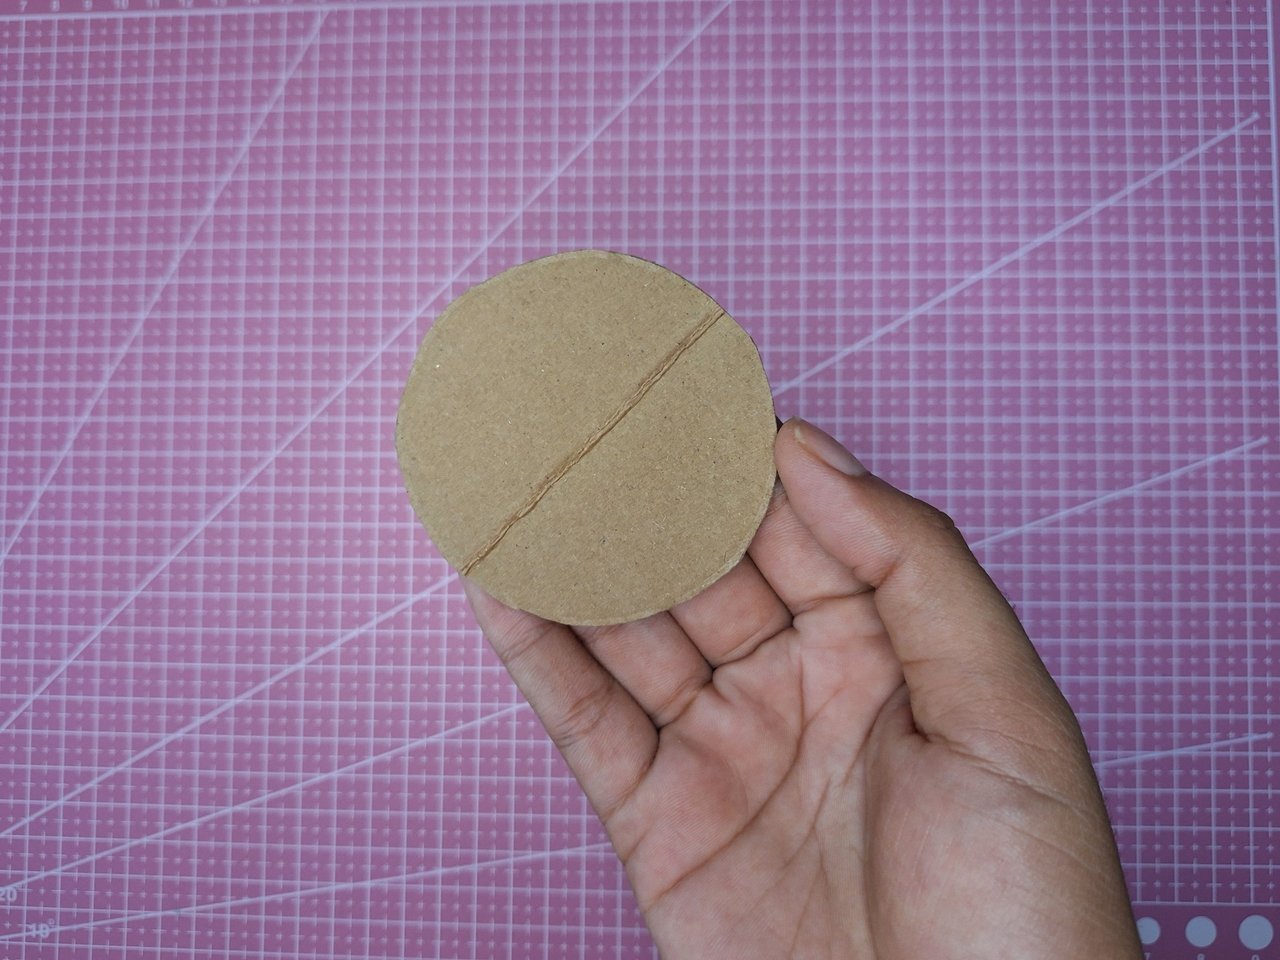
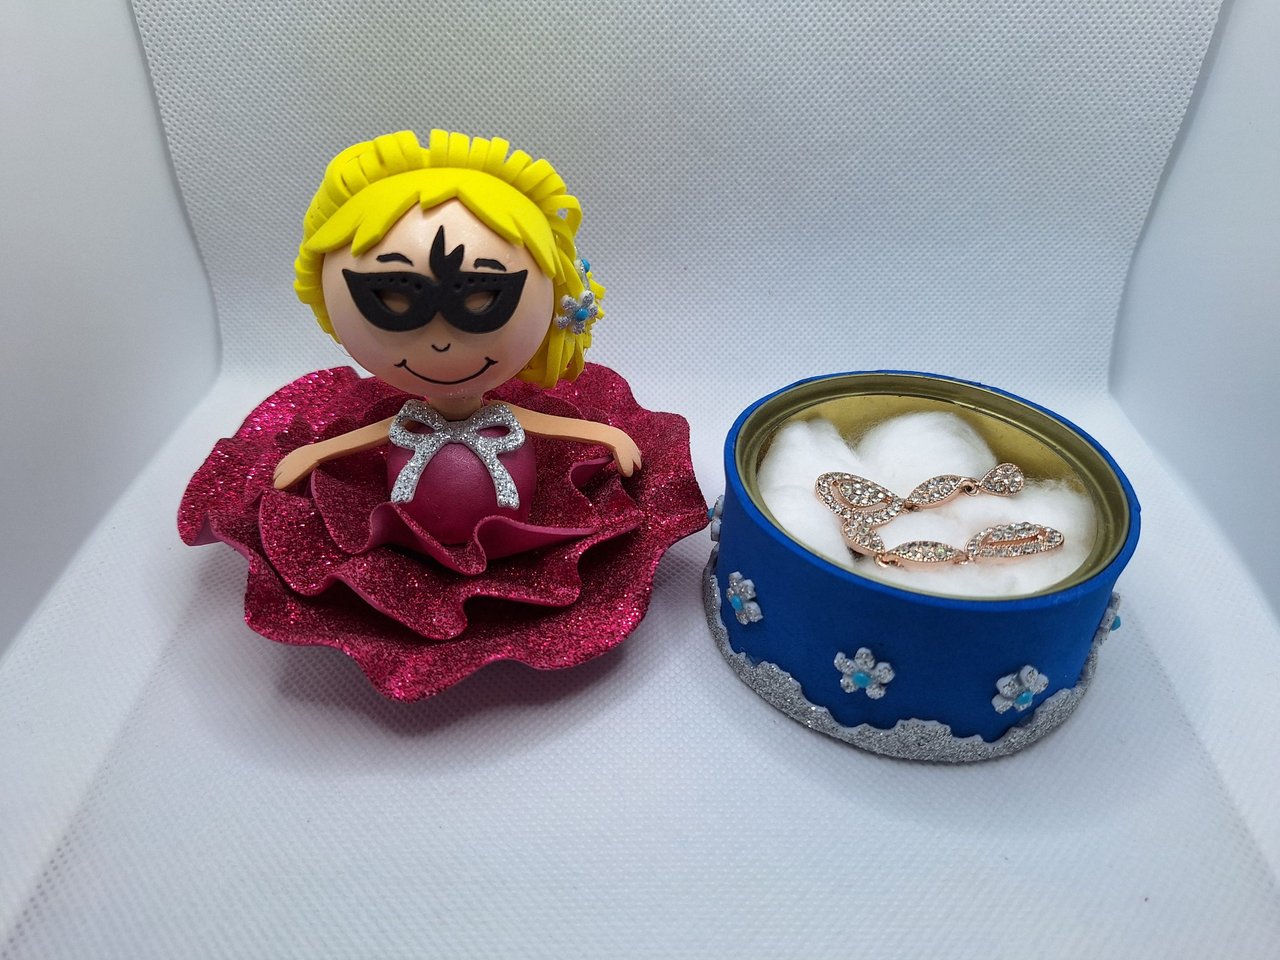
To make the lid, I cut a circle of cardboard with the same size as the diameter of the can's circumference so that it would fit exactly. In the same way, I made a circle of blue foami that I glued to the cardboard on the top and, on the other side, I glued another circle, a little smaller so that it would be just with the edge of the can. This would allow the lid not to come off.
Para hacer la tapa corté un círculo de cartón con la misma medida del diámetro de la circunferencia de la lata para que quedara exacta. De igual forma, hice un círculo de foami de color azul que pegué al cartón por la parte superior y, por el otro lado, pegué otro círculo, un poquito más pequeño para que quedara justo con el filo de la lata. Esto permitiría que no se saliera la tapa.
 |  |
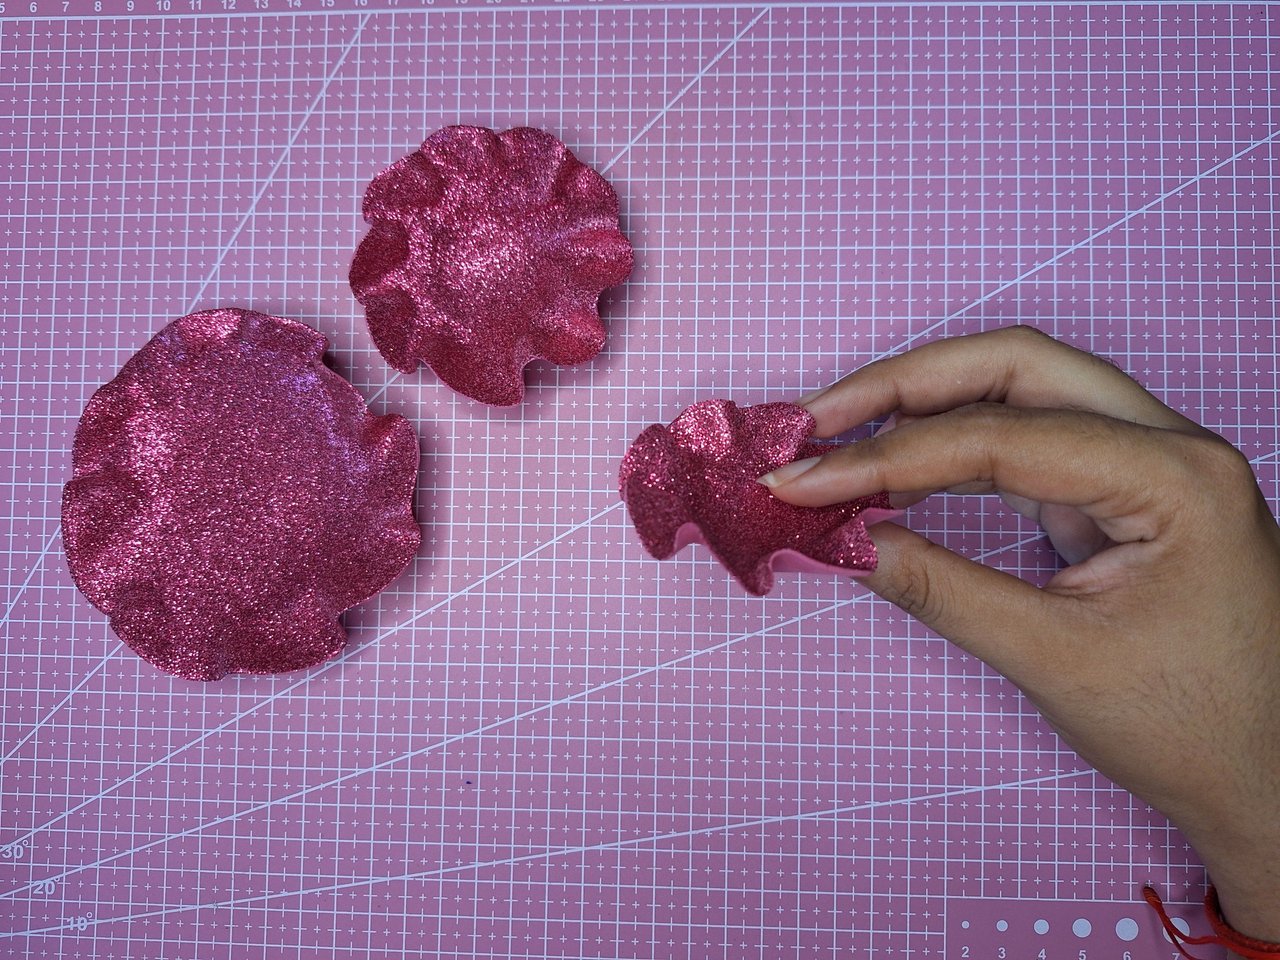 | 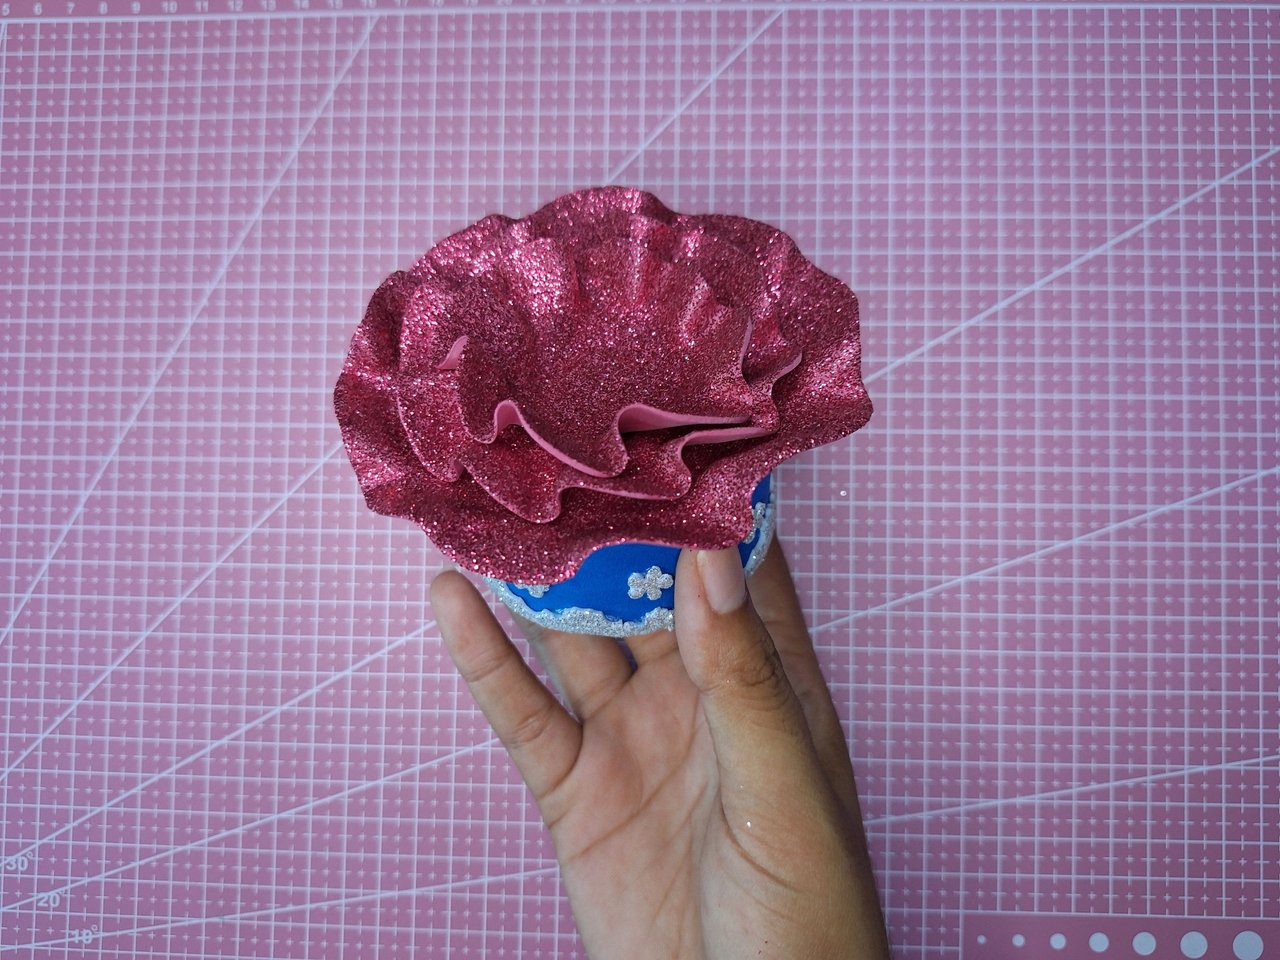 |
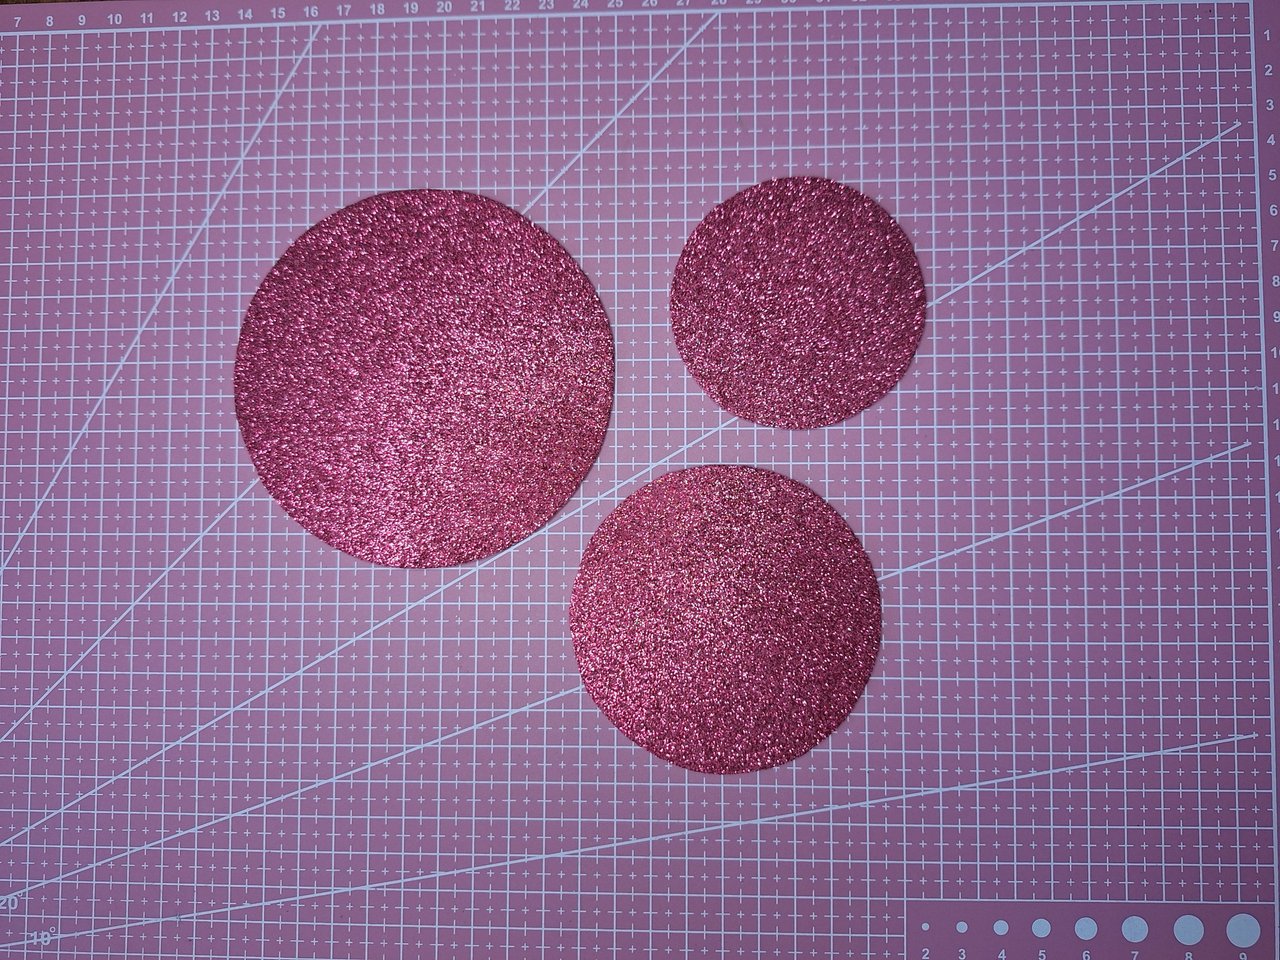
With pink frosted foami, I made three circles of different sizes, to which I deformed the entire edge by applying heat; in this way I would create the waves of the dress. Then I glued the three layers of the dress on top of the jewelry box lid.
Con foami rosa escarchado, hice tres círculos de tamaños diferentes, a los cuales les fui deformando todo el borde aplicando calor; de esta forma crearía las ondas del vestido. Luego pegué las tres capas del vestido encima de la tapa del joyero.
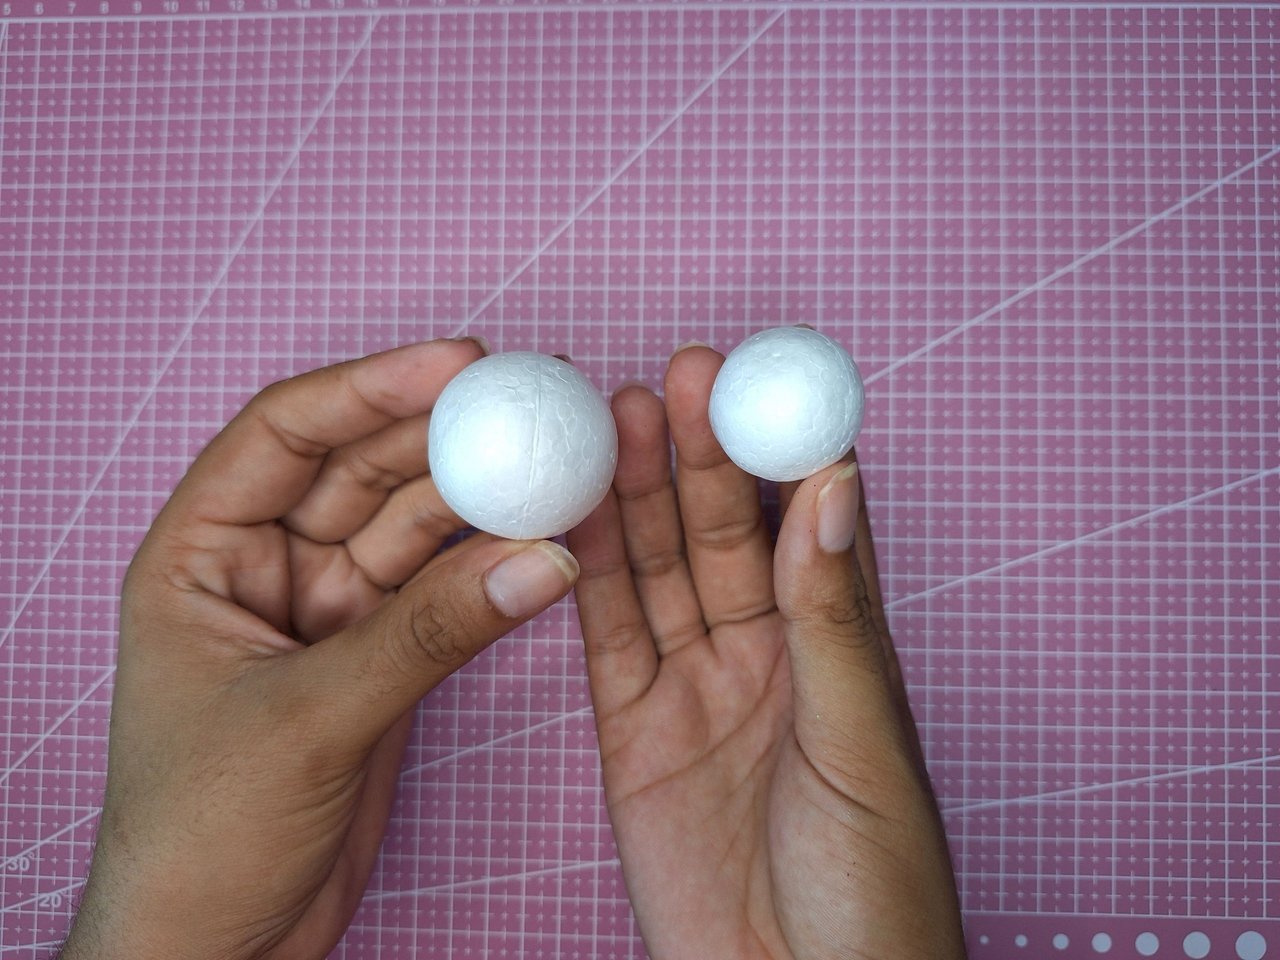 |  | 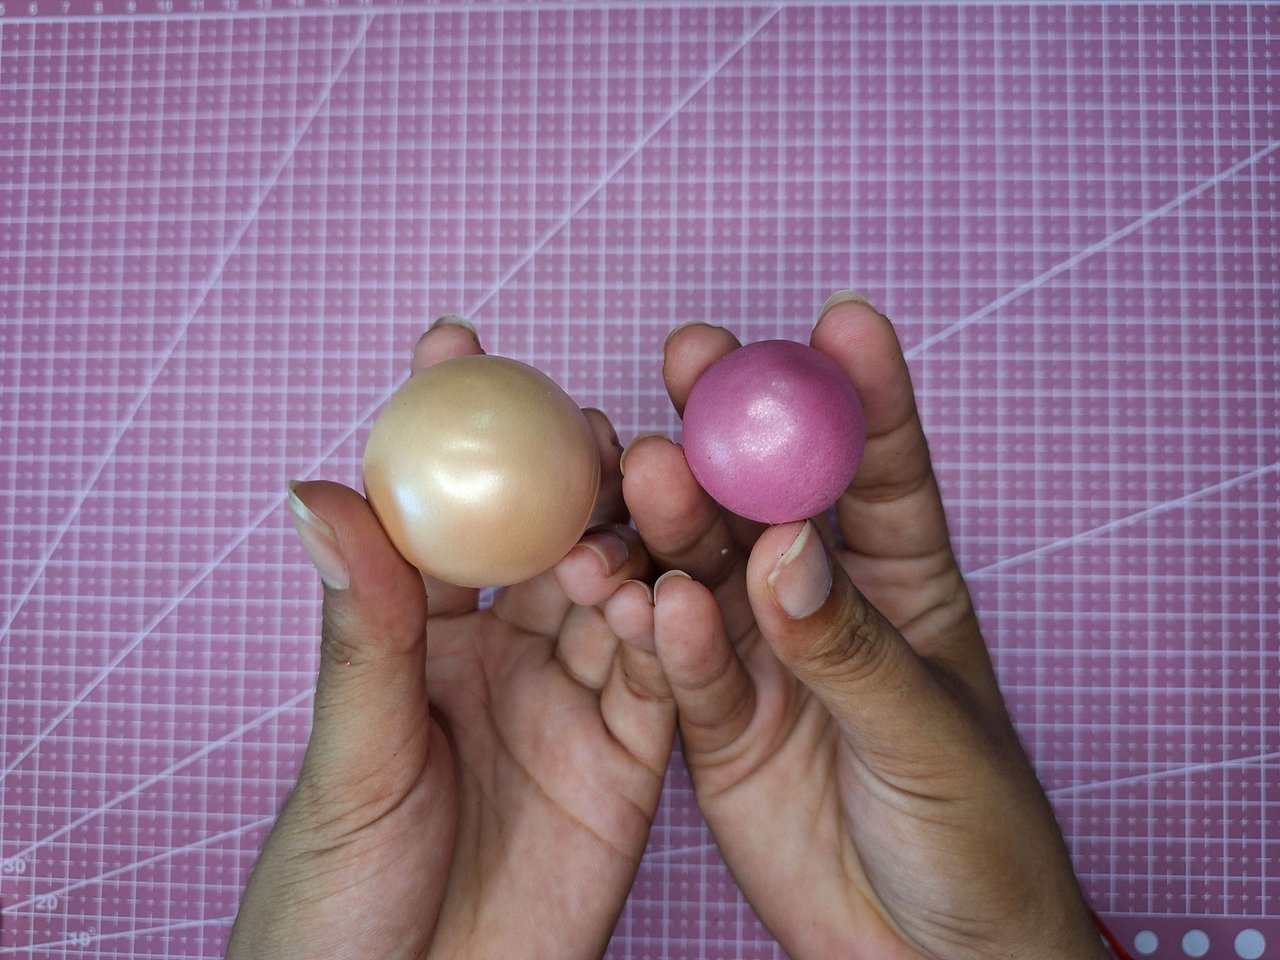 |
I lined the two polyfoam balls with skin-colored foami for the face and pink for the upper part of the dress. I made them by thermoforming the foami with the help of a domestic iron.
Las dos bolas de poliespuma las forré con foami color piel para la cara y rosa para la parte superior del vestido. Los hice termoformando el foami con ayuda de una plancha doméstica.
 |  |  |
 |  |
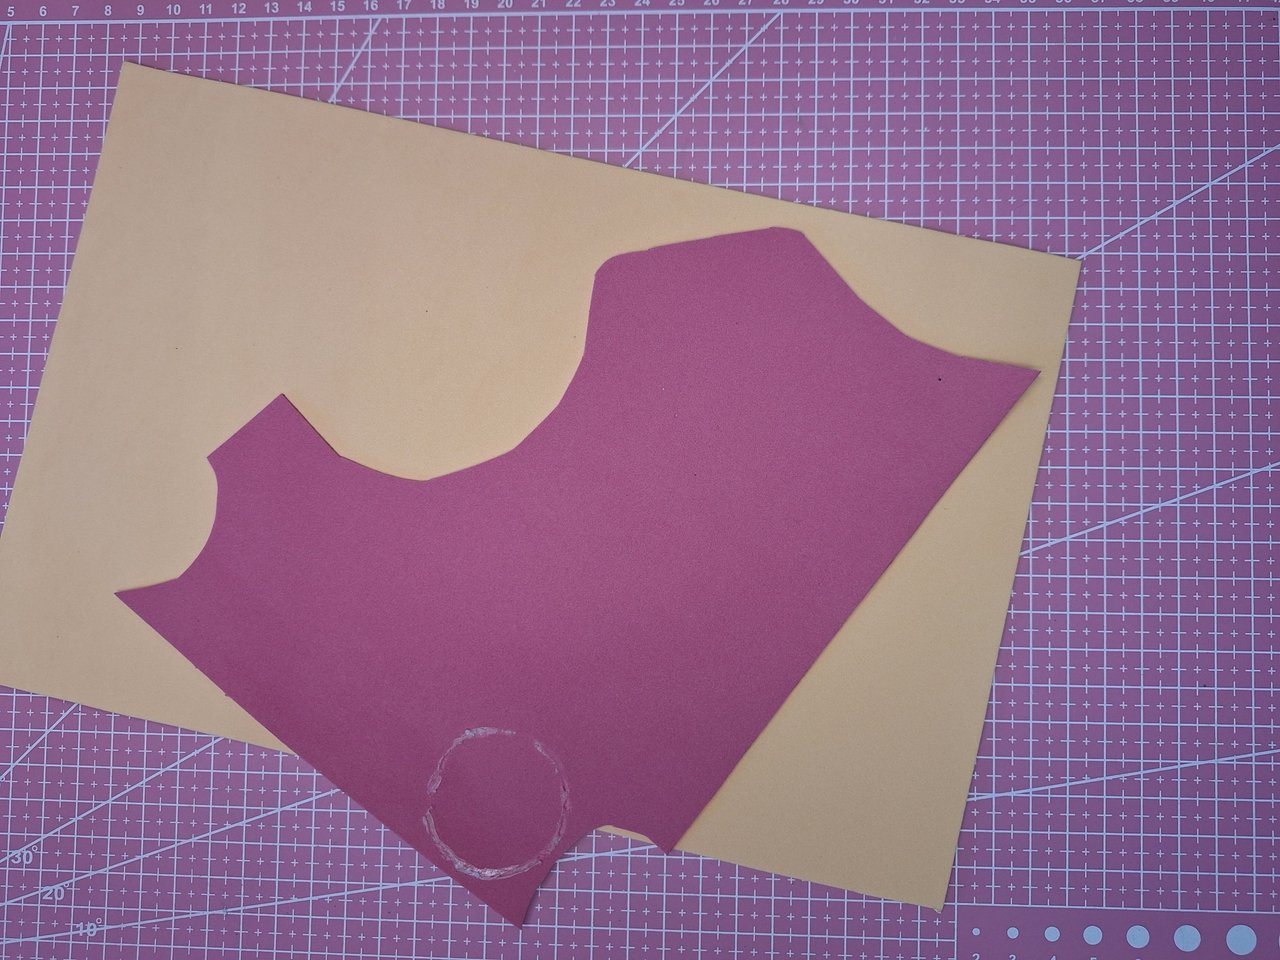
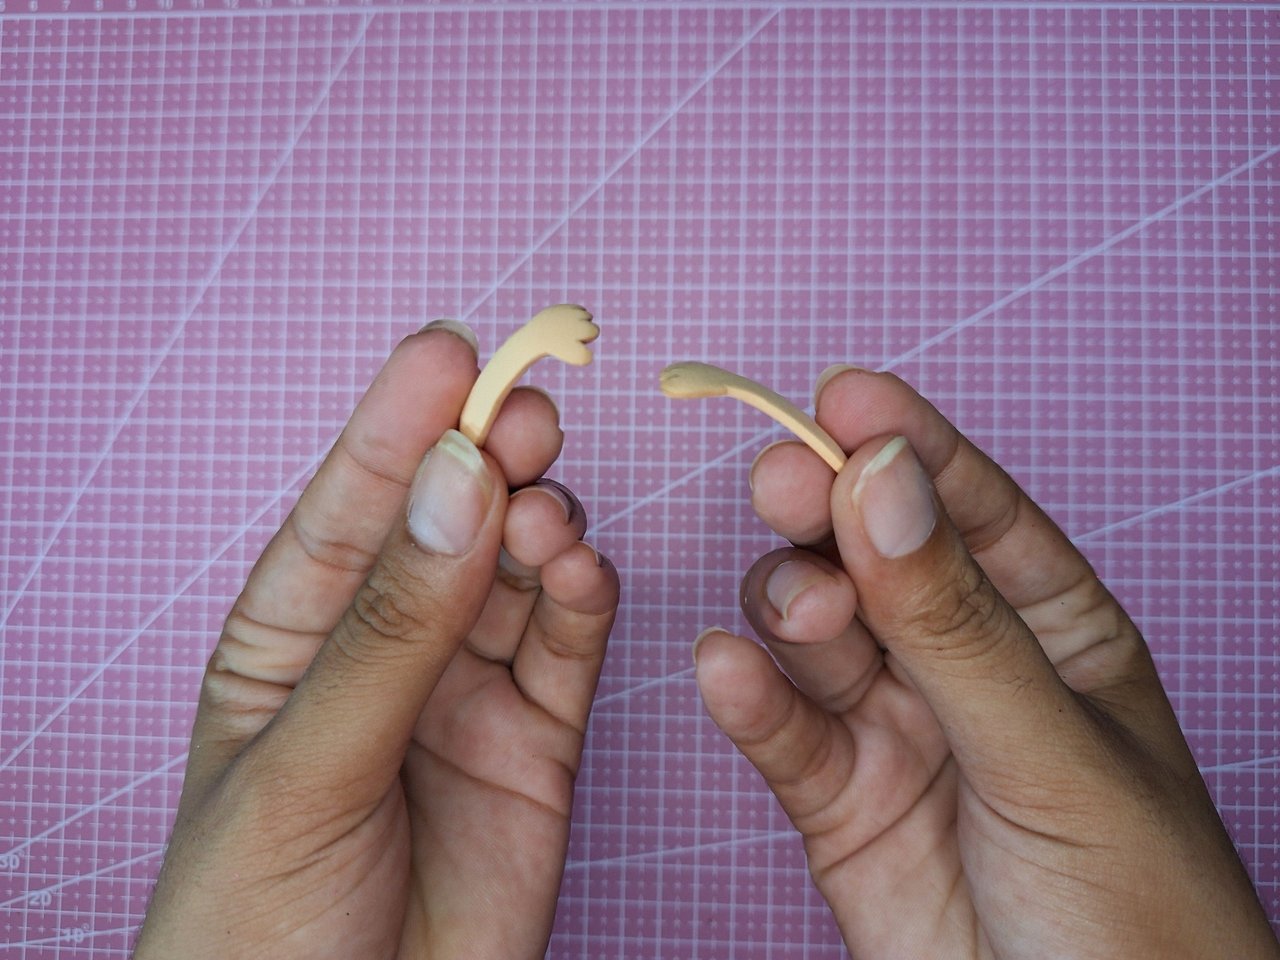
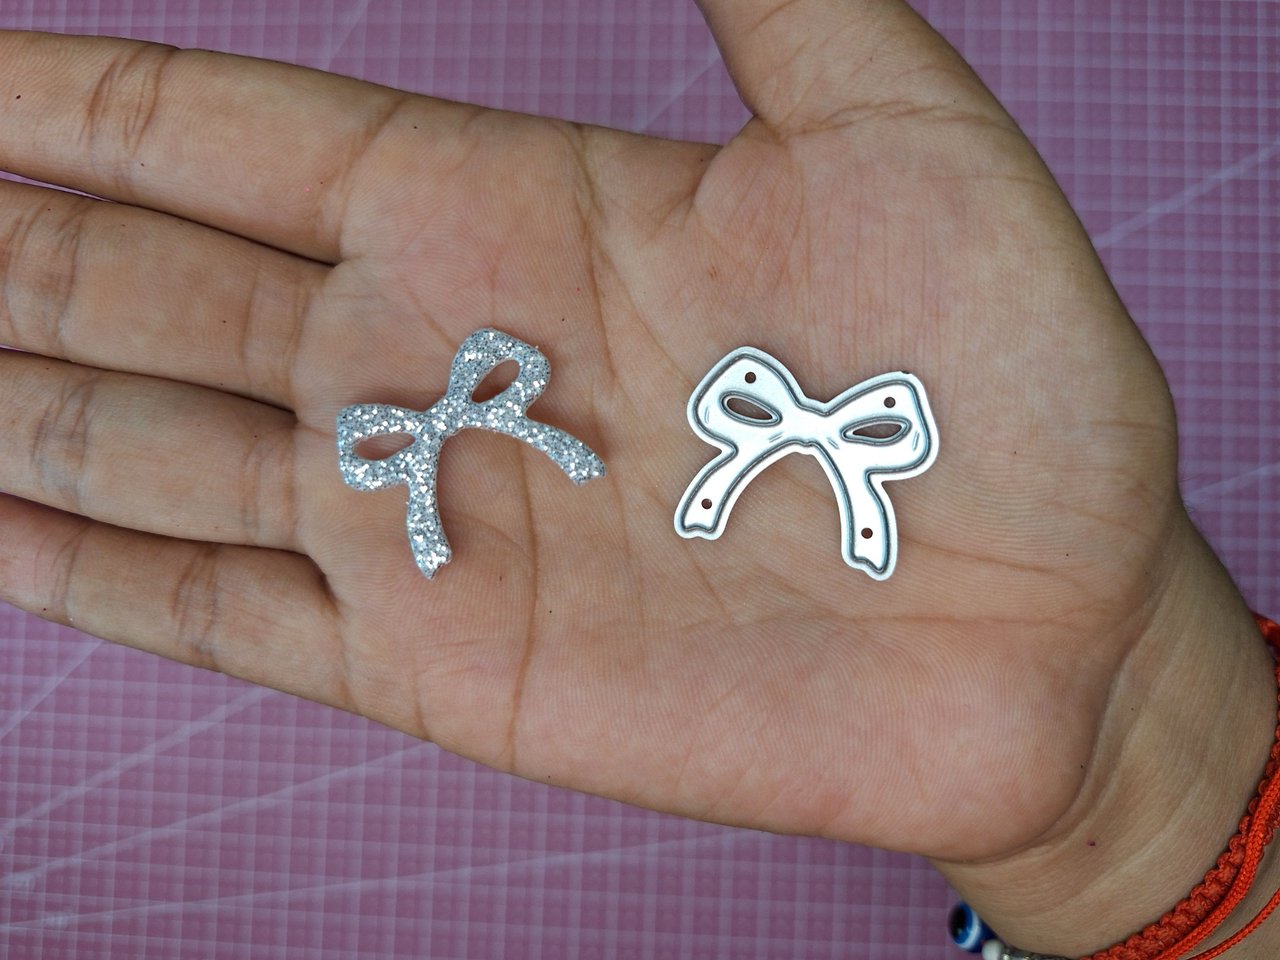
I drew and cut out two arms in skin-colored foami and applied heat to make them a little curved. With a bow-shaped die, I cut out a frosted silver colored bow, which I placed in the center of the chest and arms, each one in its corresponding place.
Dibujé y recorté dos brazos en foami color piel y les apliqué calor para hacerlas un poco curvas. Con un troquel con forma de lazo, recorté uno de color plateado escarchado, el cual coloqué en el centro del pecho y los brazos, cada uno en su lugar correspondiente.
 |  |  |
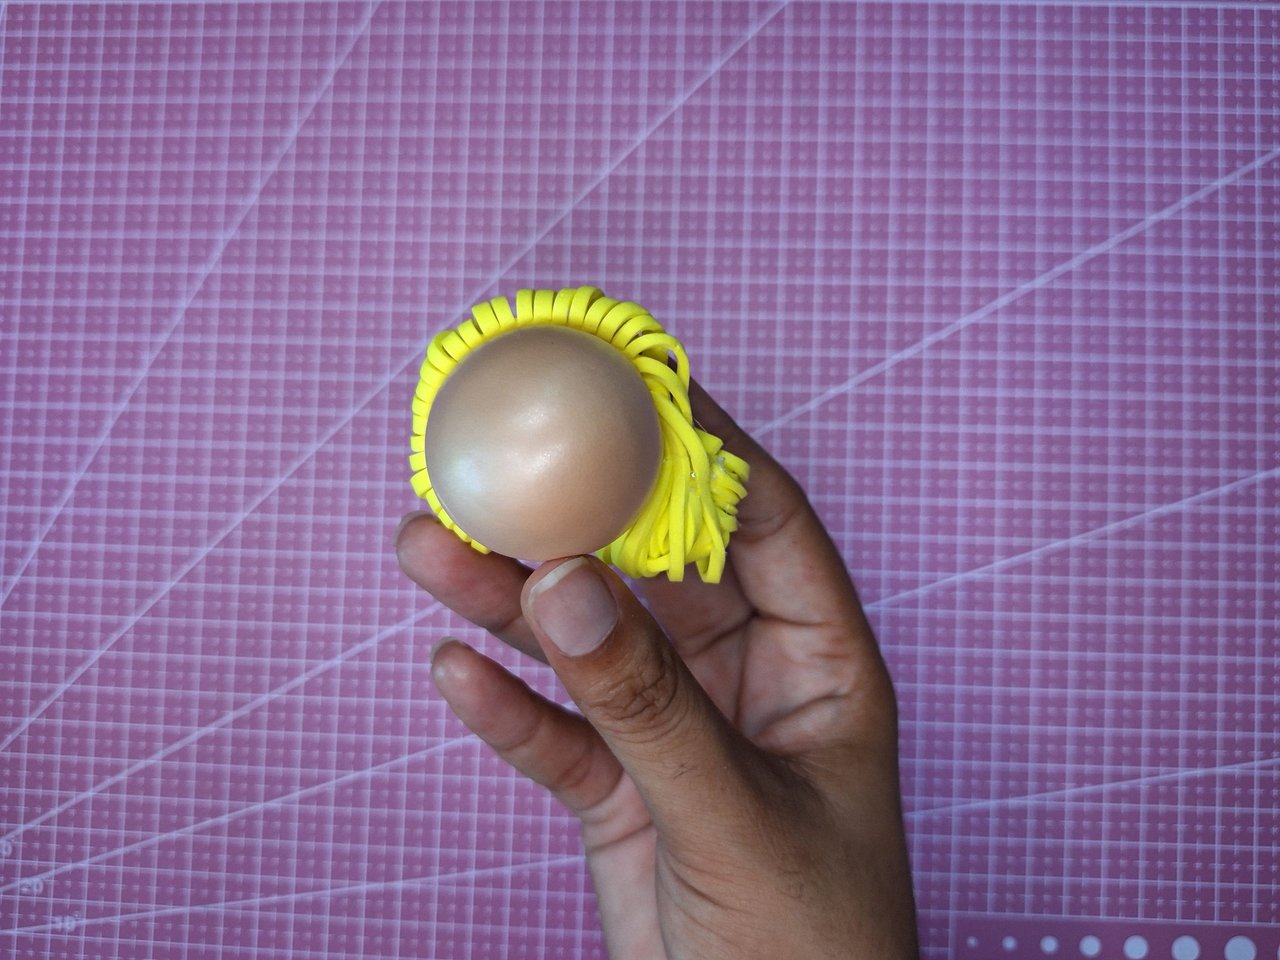 | 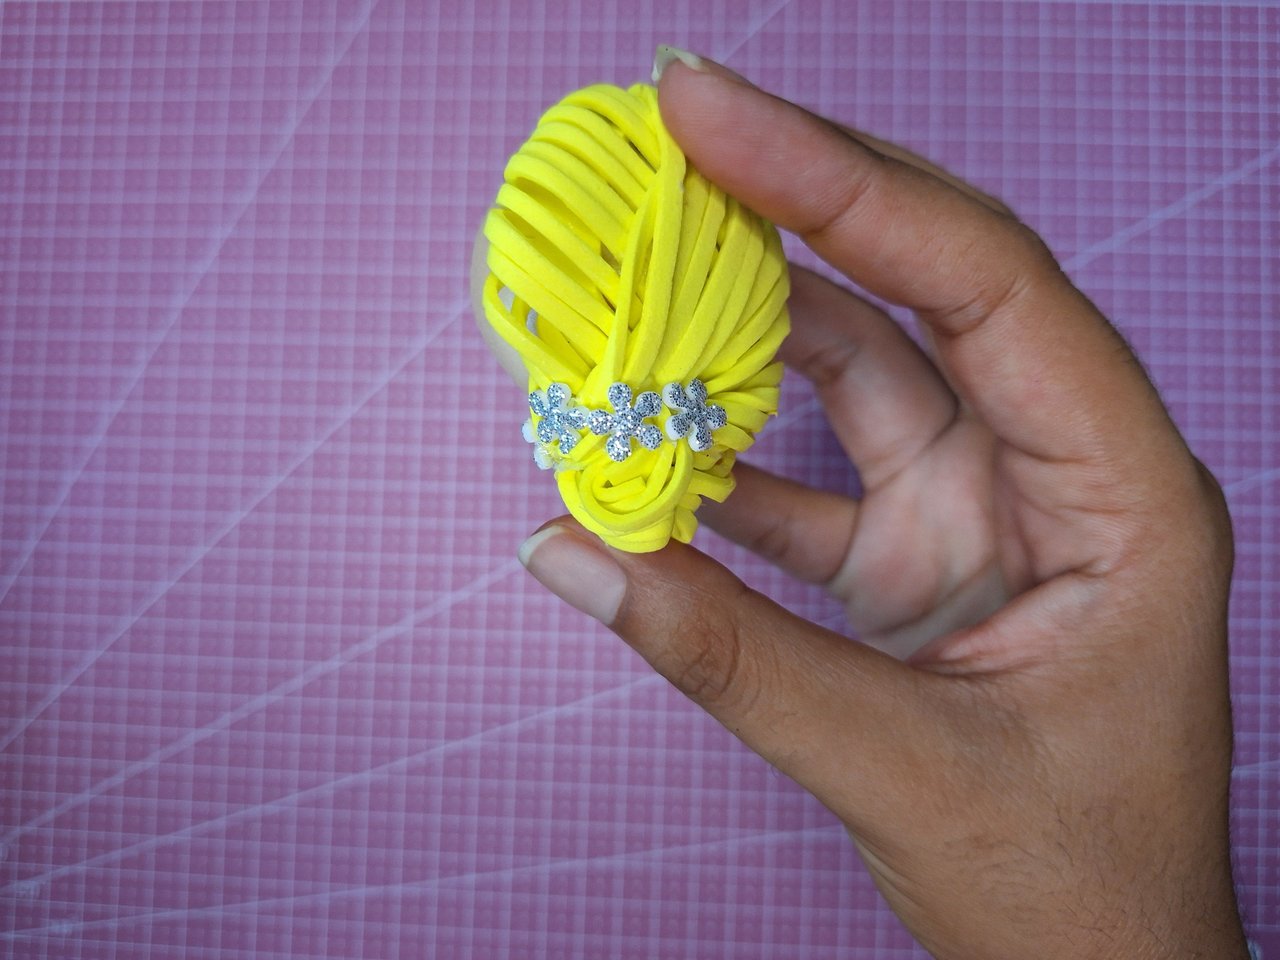 | 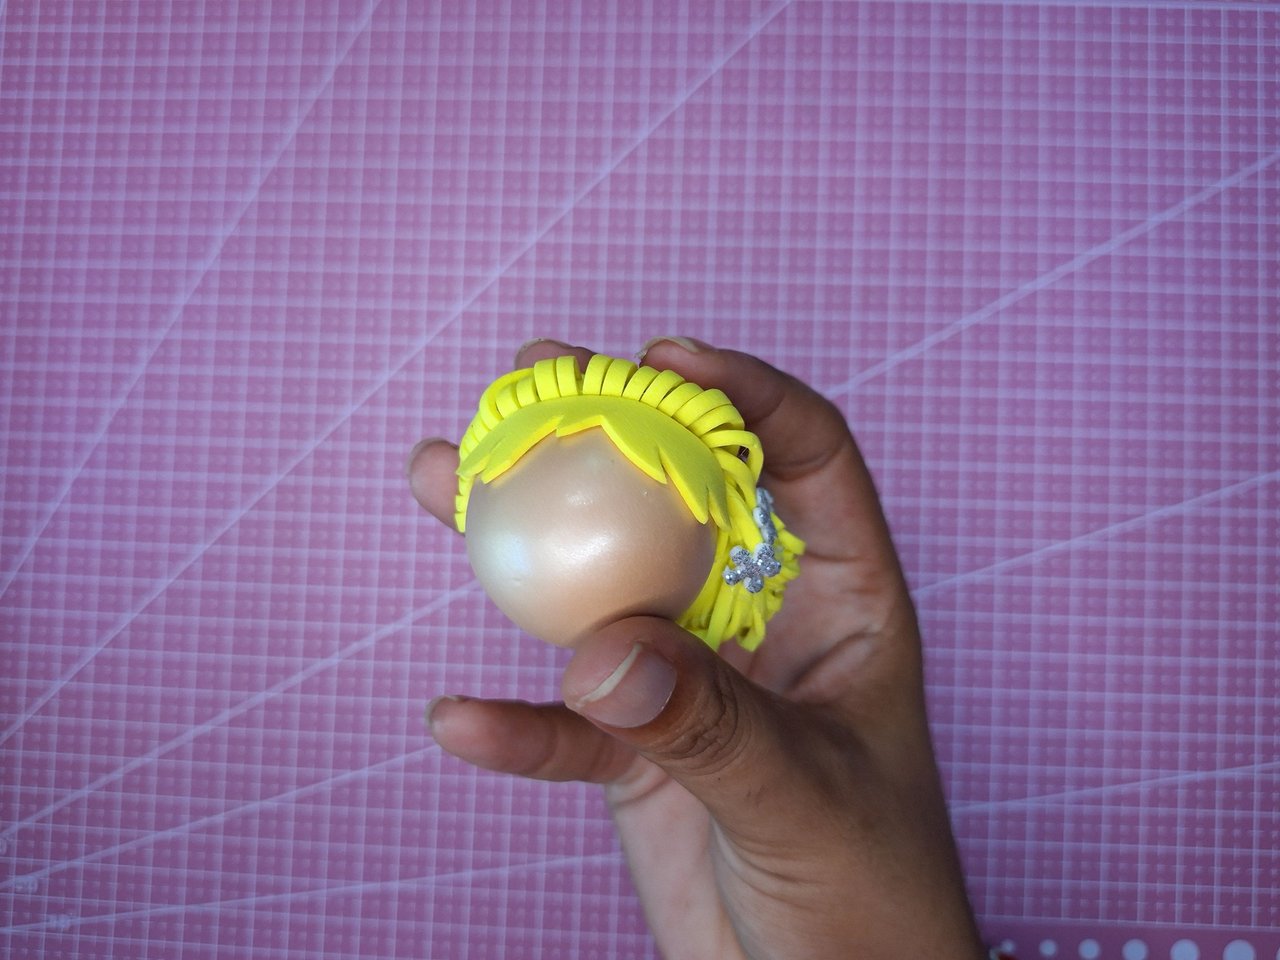 |
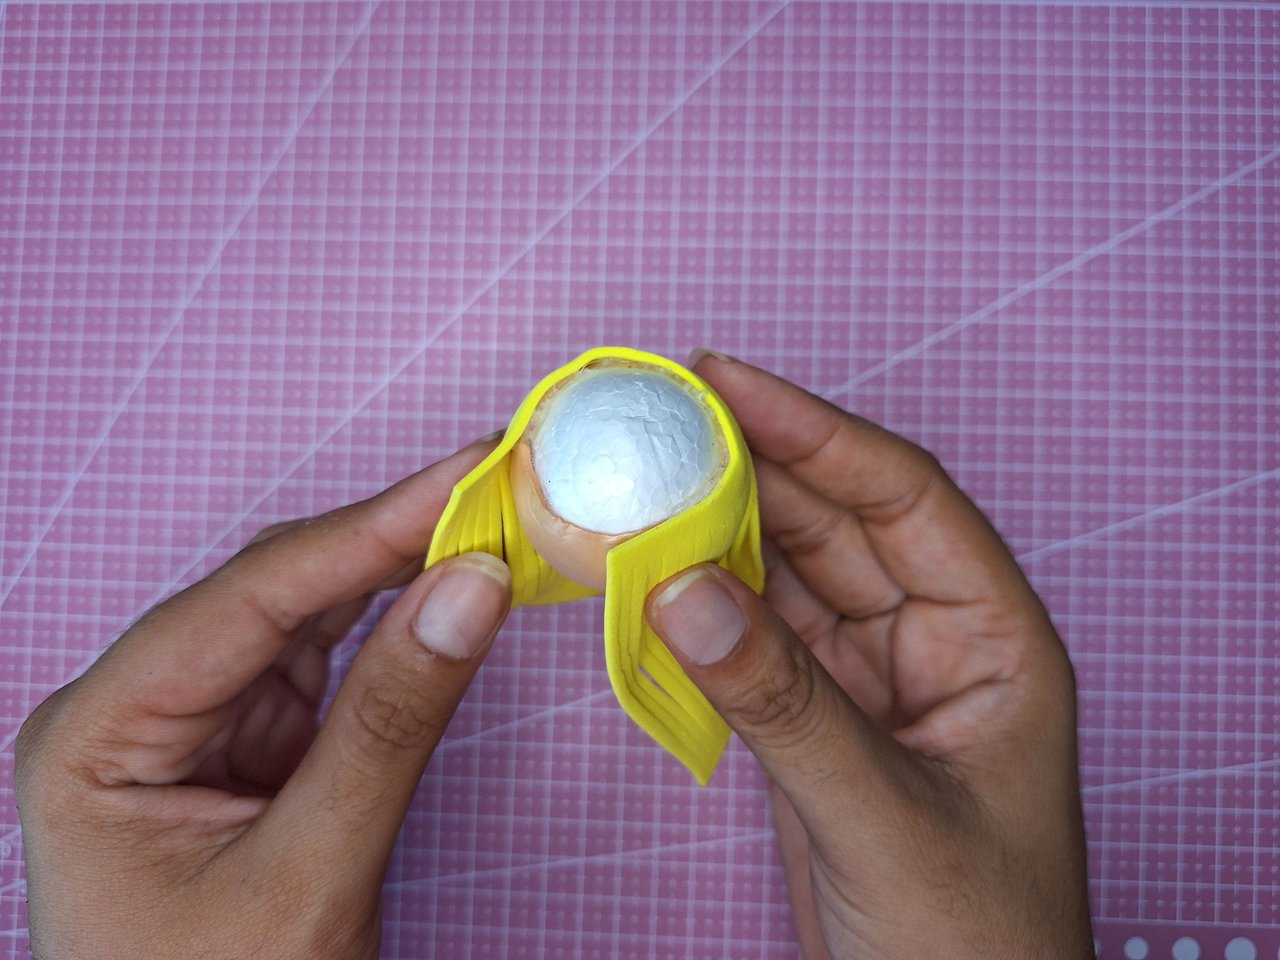
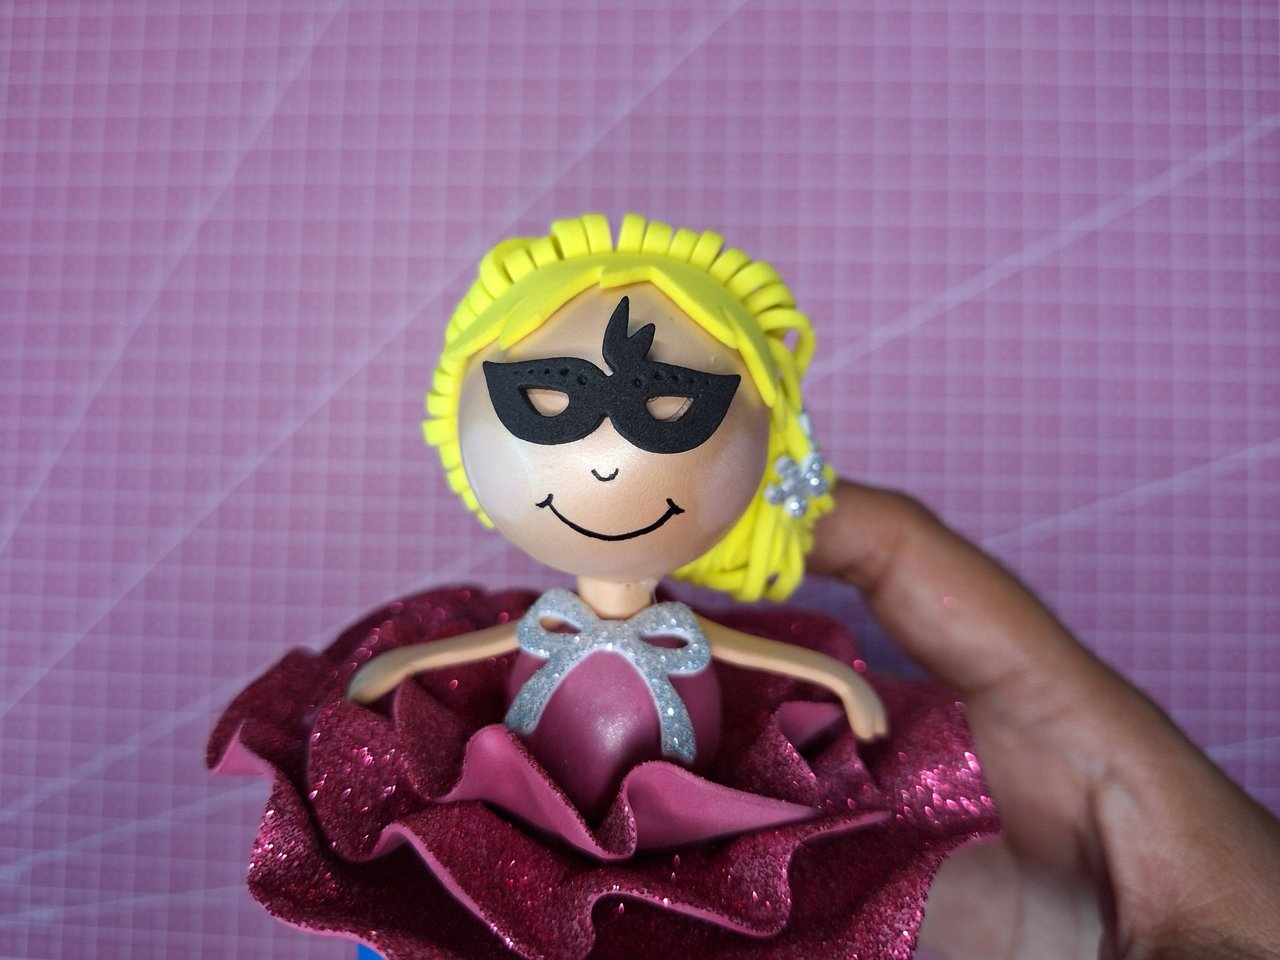
For the hair, I took a piece of yellow foami 10 cm x 8 cm and folded it in half to make cuts that did not reach the ends. I glued this piece in a circular shape on the skin-colored polyfoam ball. Then, I placed it and glued it in such a way that the ends made a bow on one side of the head. I glued little flowers around the bun to embellish the hair and finally, I cut out the shape of a fringe and placed it on the forehead.
Para el pelo, tomé una pieza de foami amarillo de 10 cm x 8 cm y la doble por la mitad para hacerle cortes que no llegaran hasta las puntas. Esta pieza la pegué de forma circular en la bola de poliespuma color piel. Luego fui acomodándola y pegando de tal forma que las puntas hicieran un moño a un lado de la cabeza. Pegué pequeñas florecitas alrededor del moño para embellecer el cabello y, por último, recorté la forma de un flequillo y lo coloqué en la frente.
 |  |
 |  |
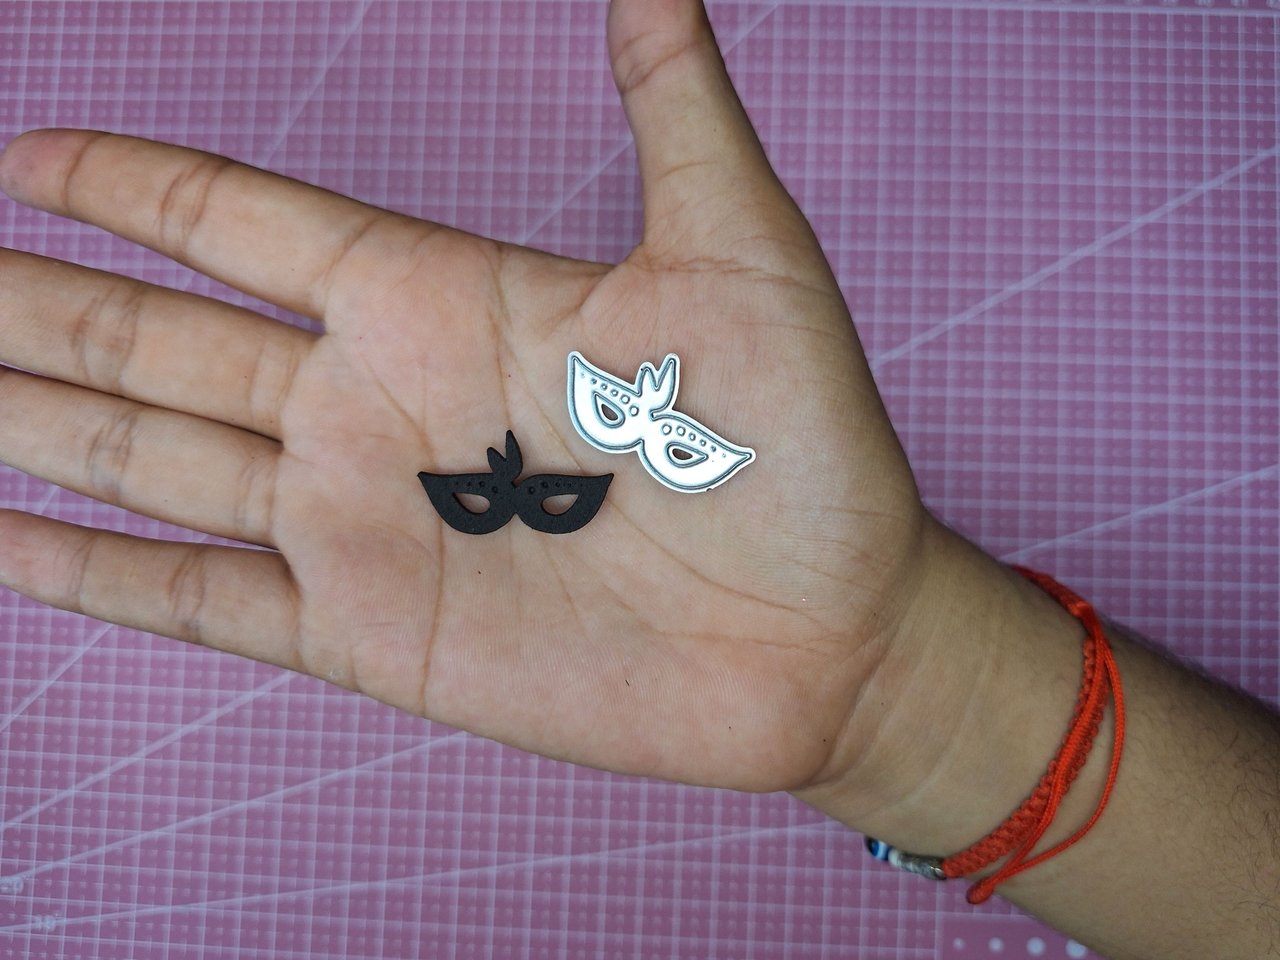
I cut out a mask using a die and placed it on the ballerina, then drew the nose, mouth and eyebrows with a black fine tip marker. Finally, in the center of all the tiny flowers, I glued light blue pearls to make them stand out even more and match the colors of the jewelry box.
Corté un antifaz con ayuda de un troquel y se lo coloqué a la bailarina, luego dibujé la nariz, la boca y las cejas con un marcador negro de punta fina. Para finalizar, en el centro de todas las flores diminutas, pegué perlas de un color azul claro para que resaltaran aún más y combinaran con los colores del joyero.
 |  |  |
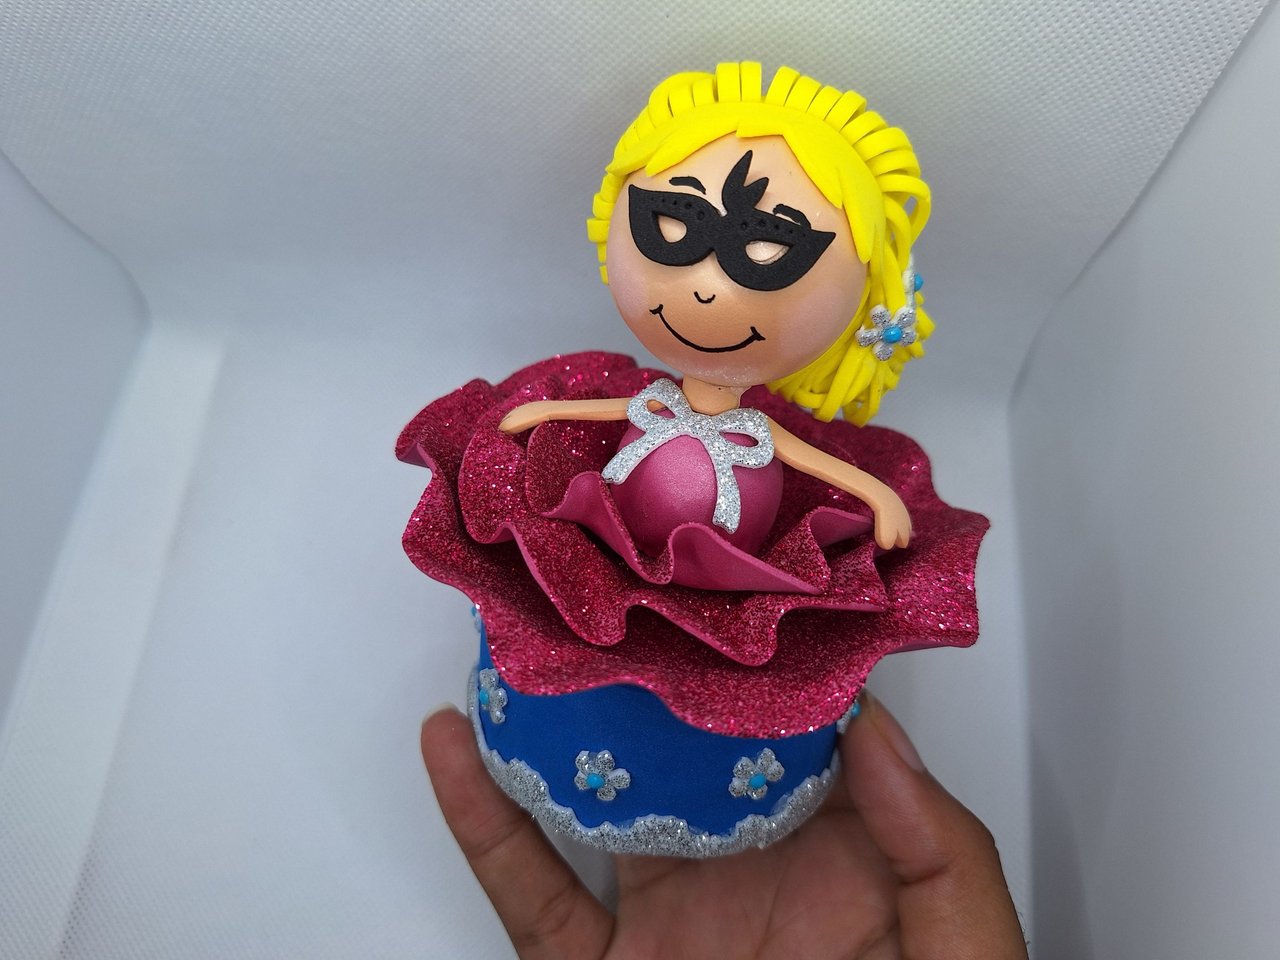 | 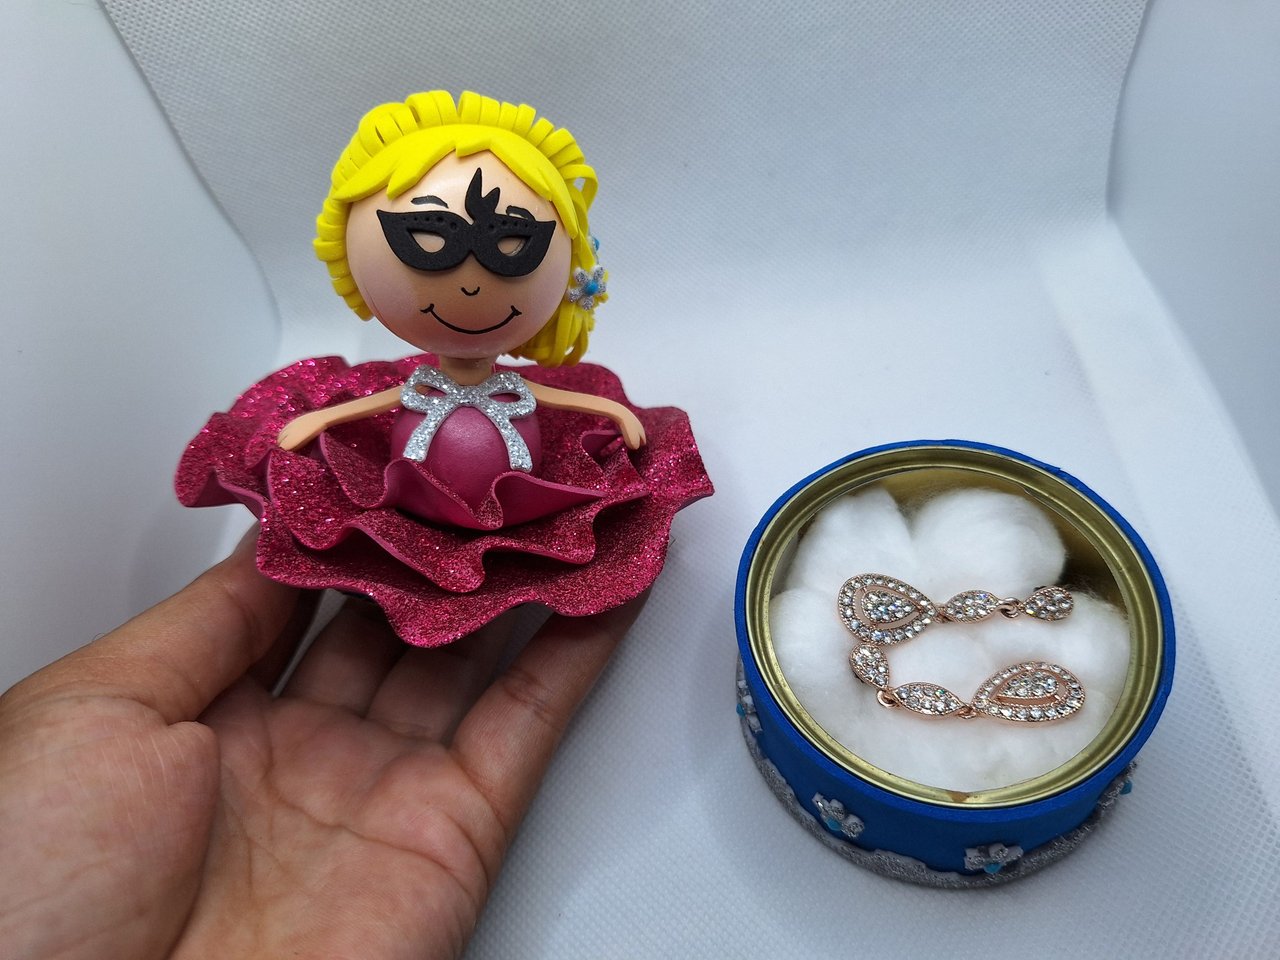 |
And thus is finished this beautiful jewelry box in the shape of a ballerina, something different and unusual, which will provide you with a small space to store your most precious jewelry, bringing beauty and joy to the place where you place it. I hope you liked it, leave me in the comments what you thought and new suggestions. Best regards.
Y de esta forma se encuentra terminado este hermoso joyero con forma de bailarina, algo diferente e inusual, que te proporcionará un pequeño espacio donde guardar tus joyas más preciadas, aportándole belleza y alegría en el lugar donde lo coloques. Espero que te haya gustado, déjame en los comentarios qué te pareció y nuevas sugerencias. Un saludo.
Cover made in Canva
English is not my native language, translated by DeepL
Posted Using INLEO
https://www.reddit.com/r/somethingimade/comments/1kh9a9i/ballerinashaped_jewelry_box/
This post has been shared on Reddit by @yale95reyra through the HivePosh initiative.
Y yo guardando mis cosas en un envase de plástico reciclado. 🤭
Me encantó tu bailarina, el vestido parece una flor, entonces es como si la bailarina saliera de una flor abriéndose. Usaste colores muy bonitos 🩷 y si, es una idea muy bella... Me recuerda a los joyeros que eran cajitas musicales con una bailarina girando. Qué tiempos.
Hay si, recuerdo esas cajitas musicales, bueno , solo las he visto en películas, nunca he visto una en persona. Ya sabes, ese mismo envase plástico reciclado que tienes, ya es hora de ponerlo bonito 😄, me alegro mucho de que te haya gustado 🤗
Me encanta, que idea tan buena y práctica. Quedó precioso.
Muchas gracias 🥰, lo mismo como joyero que de adorno.
This is well crafted and beautiful, I love how unique and nice the outcome is. Thanks for sharing this beautiful piece of creativity.
Thank you very much 🤗
Es un hermoso detalle para obsequiar, te felicito te ha quedado muy lindo este joyero, gracias por compartirnos tu idea, saludos 😊
Muchas gracias 🥰, así es, puede ser un lindo regalo, único y especial.
Lindo trabajo, quedo precioso.
Muchas gracias 🥰
you are very creative, this jewelry box is very beautiful, cute
Thank you 🤗
Yes you're welcome dear.
wow this is so cute, and functional. love the design , thank you for sharing.
Thank you very much 🤗
Wow qué artesanía tan bella y útil además. Me encanta el resultado. Tengo mis aretes sin un lugar donde guardarles así que lo voy a intentar por acá