Esp/Eng Diy Recycled Home-Essential With Cardboard |Diy Imprescindible para el hogar reciclado con cartón
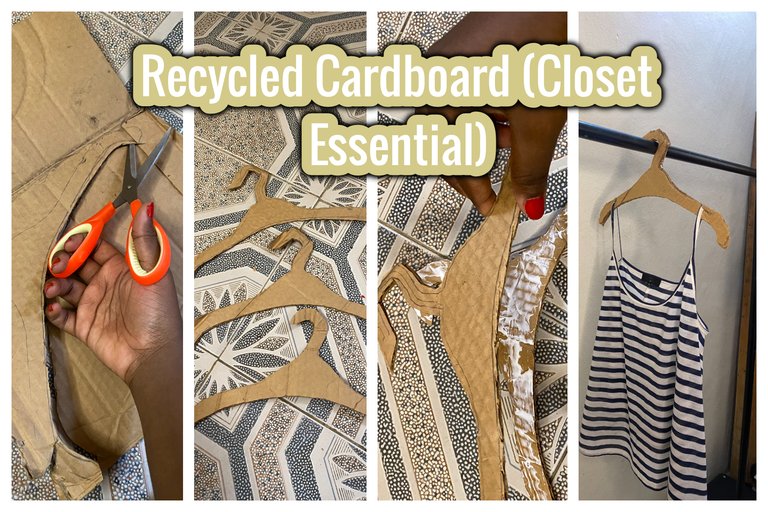
Happy day creative friends, i hope to find you doing great today as i bring to you yet another diy creation from the comfort of my home, today we look at the step by step process to iterate closet hangers using cardboard, i have thought of a way to recycled cardboard into this important home essential as i was looking to purchase a new hanger set. it was a fun idea i thought to share with you all , that cant be dine on a budget to , see below.
Esp
Feliz día amigos creativos, espero encontrarlos haciendo muy bien hoy como te traigo otra creación diy desde la comodidad de mi casa, hoy nos fijamos en el proceso paso a paso para iterar perchas armario con cartón, he pensado en una manera de reciclado de cartón en este importante hogar esencial como yo estaba buscando para comprar un nuevo conjunto de percha. fue una idea divertida que pensé en compartir con todos ustedes, que no se puede cenar en un presupuesto para, ver más abajo.
Materials Used
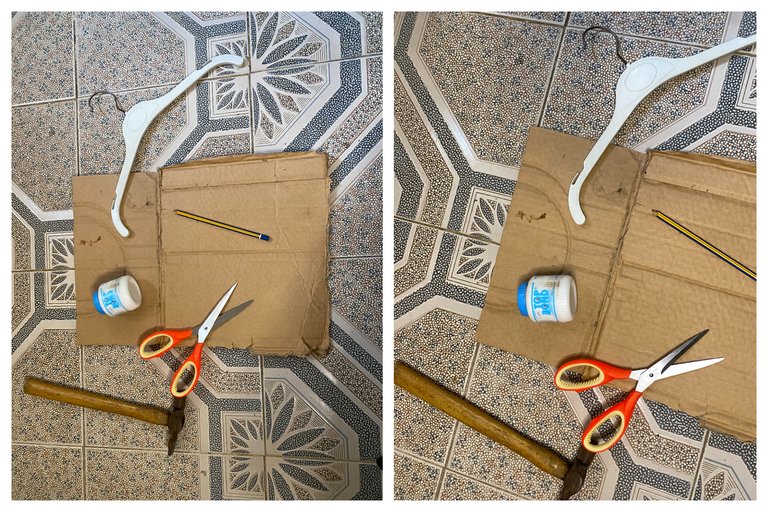
Cardboard
real hanger ( for pattern iteration)
white paper
Scissors
Bonding glue
hammer
pencil
esp
Cartón
percha real ( para iteración de patrones)
papel blanco
Tijeras
Pegamento de unión
martillo
lápiz
Steps by step
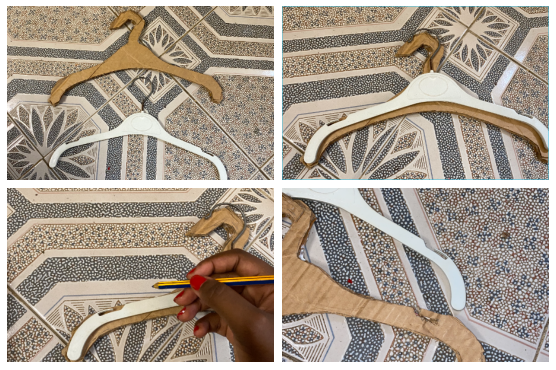
step 1
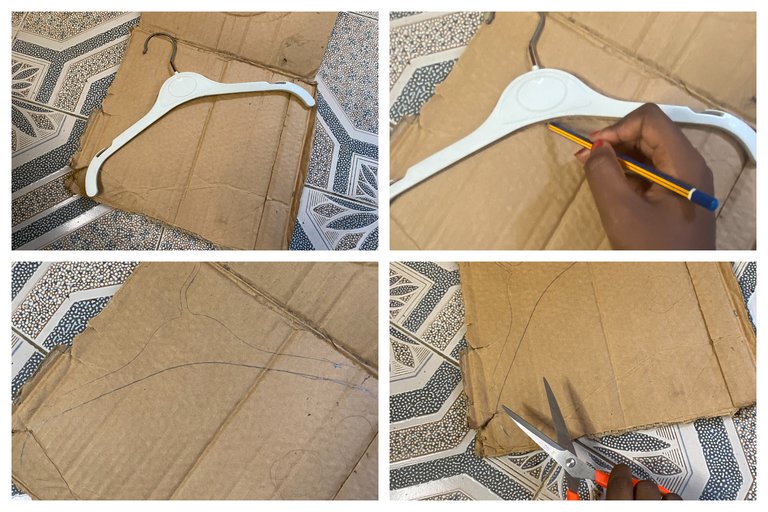
i started with the tracing of pattern, placing the actual hanger unto the cardboard surface i used a pencil to trace out the perimeter to achieve the exact size. and prepared for cutting .
comencé con el trazado del patrón, colocando la percha real sobre la superficie de cartón utilicé un lápiz para trazar el perímetro y conseguir el tamaño exacto. y preparado para el corte
step 2
In this step i have began cutting out the tracing with the scissors.
En este paso he empezado recortando el calco con las tijeras.
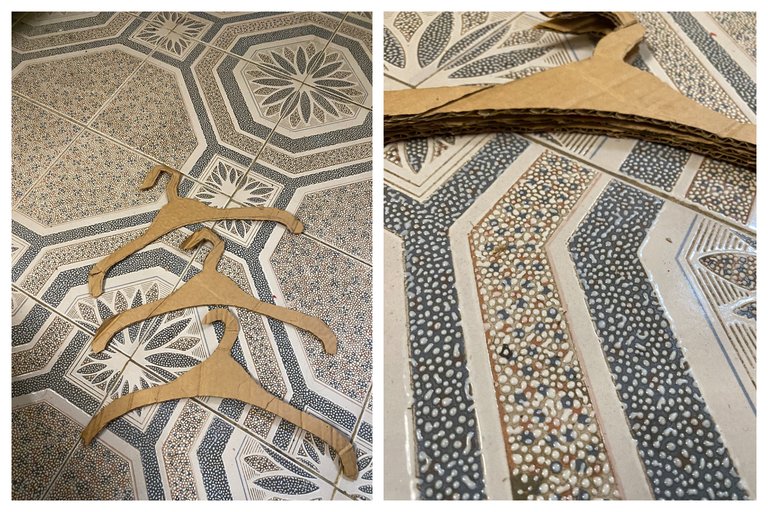
ps- here is how the the cutout look which i ma going to be stacking up.
ps- aquí es cómo la mirada del recorte que i ma que va a ser stacking up.
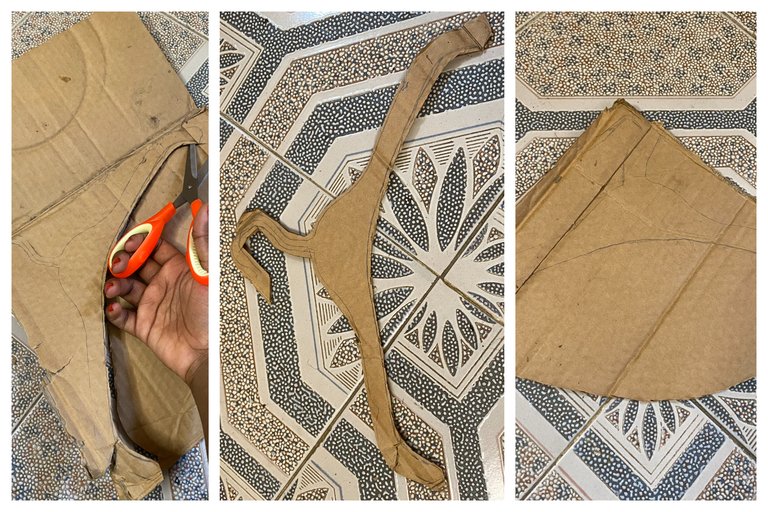
step 3
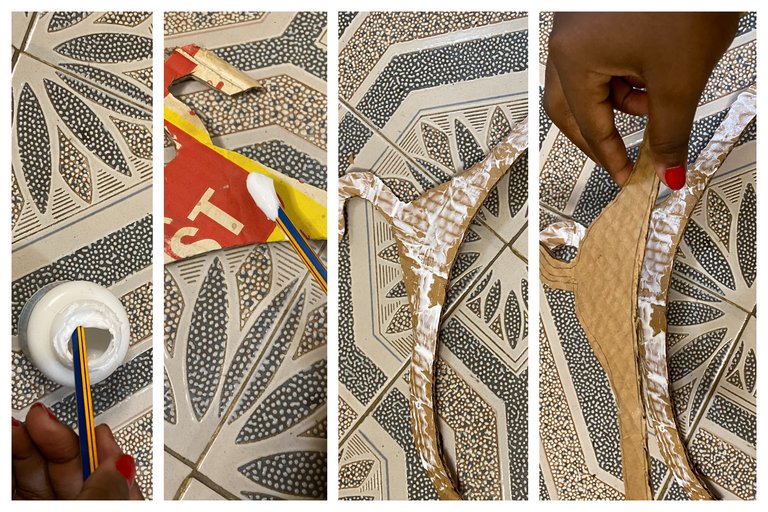
Here i started with the stacking the patterns , i applied some paper glue with the end of the pencil, coating the surface throughly. then began placing the patterns on top of each other.
Aquí empecé con el apilamiento de los patrones, he aplicado un poco de pegamento de papel con el extremo del lápiz, el recubrimiento de la superficie a fondo. luego comenzó a colocar los patrones uno encima del otro
step 4
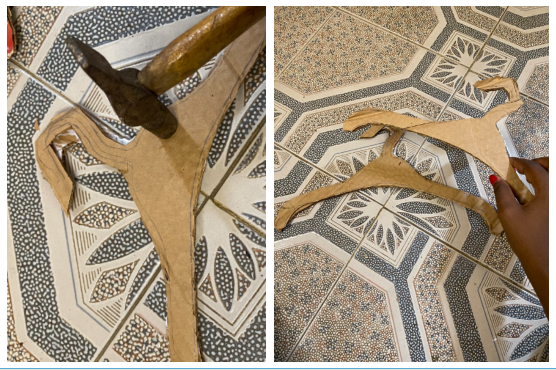
in this step i hit the stack with hammer so that they adhere completely to each other. and then i stack the last pattern
en este paso golpeo la pila con el martillo para que se adhieran completamente entre sí. y luego apilo el último patrón
.
ps- how it looks after stacking.
ps- cómo se ve después de apilar.
step 5
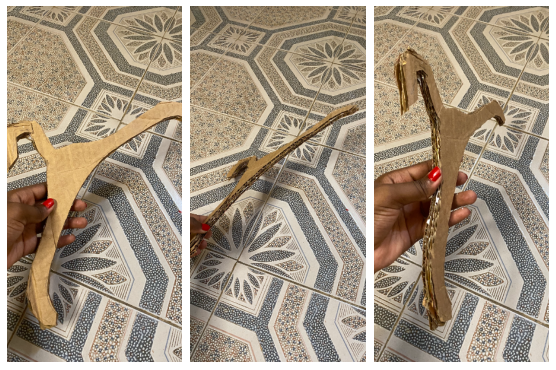
I went ahead to create the hook for clothing straps and sleeves,as you would see with the original hanger, i traced the position on the cardboard and cut it out with scissors.
Seguí adelante para crear el gancho para las correas de la ropa y las mangas, como se vería con la percha original, tracé la posición en el cartón y lo recorté con tijeras.
Result
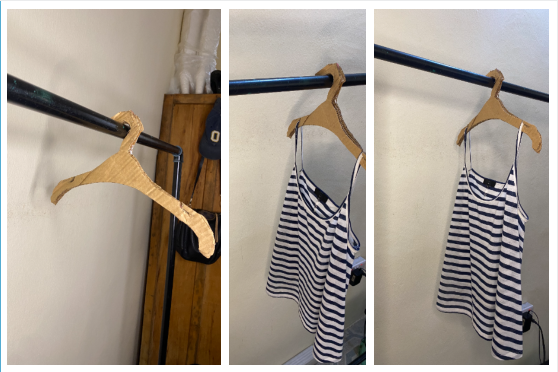
This was the result , i achieved, i went ahead t hang a cloth to see a demonstration of use case and turned out so useful.
Este fue el resultado , que logré, me adelanté t colgar un paño para ver una demostración de caso de uso y resultó tan útil.
What do you think of this diy creation, personally it was fun to create and appears useful. let hear your thoughts in the comments.
¿Qué opinas de esta creación diy, personalmente fue divertido para crear y parece útil. dejar oír sus pensamientos en los comentarios.
All images are mine captured on mobile device
Traducción realizada con la versión gratuita del traductor DeepL.com

Posted Using INLEO
Me gustó la idea la voy a poner en práctica, gracias por compartir. Saludos @vanessakor.
I am glad you liked it. thanks for your review ans stopping by my post.
Apart from being original, the work you did was very neat. It seems quite useful to get out of the way, maybe you can give it some other color finish or with some material to make it more resistant but I do not know if it is necessary.
Yes @nitsuga12,,, thank you for your review of my work, i also thought about giving it some sort of finishing to make it more aesthetically looking, it is definitely a great idea. i appreciate your sharing your ideas with me.
Very good.
thanks a lot.