Un Tulipán para Mamá (🇪🇸 | 🇺🇸)

FULL ENGLISH VERSION

Greetings, beautiful people of #HiveDIY. How have you been doing? Today, I have a special post dedicated to Mother's Day. It. It will help you prepare in advance with your little ones at home and make them an original and different card for their mothers.

𝐌𝐚𝐭𝐞𝐫𝐢𝐚𝐥𝐬 𝐭𝐨 𝐔𝐬𝐞
- Scissors
- One orange or your preferred color, cardboard letter size.
- Black and Orange fine tip marker (optional)
- Green and pink colored sheets (or a white sheet of paper and a green cardboard letter size).
- A ruler to measure.
- White glue
- Cold silicon.
𝐒𝐭𝐞𝐩-𝐛𝐲-𝐒𝐭𝐞𝐩
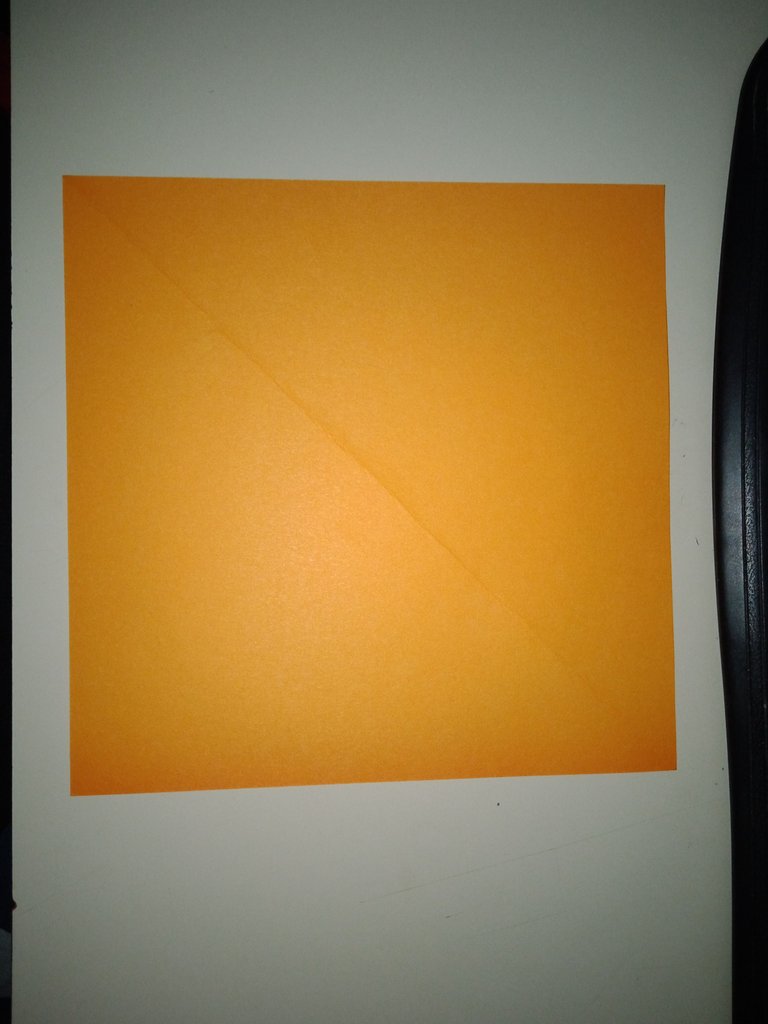
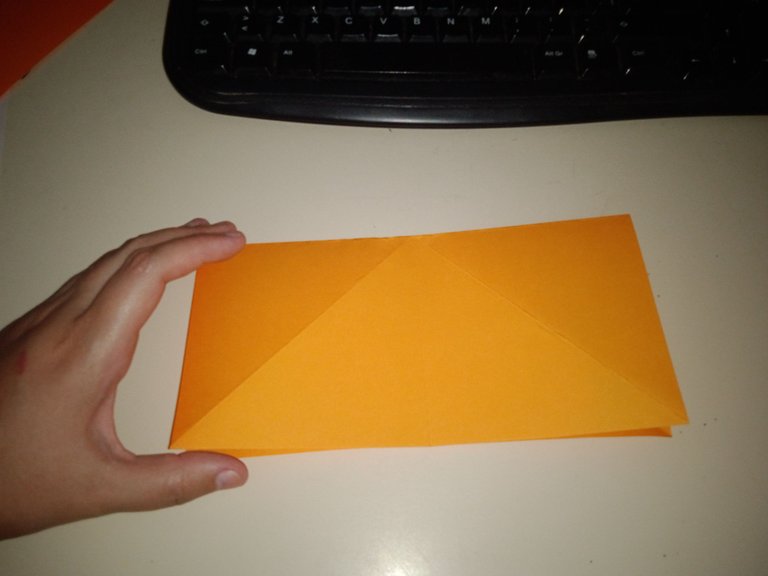
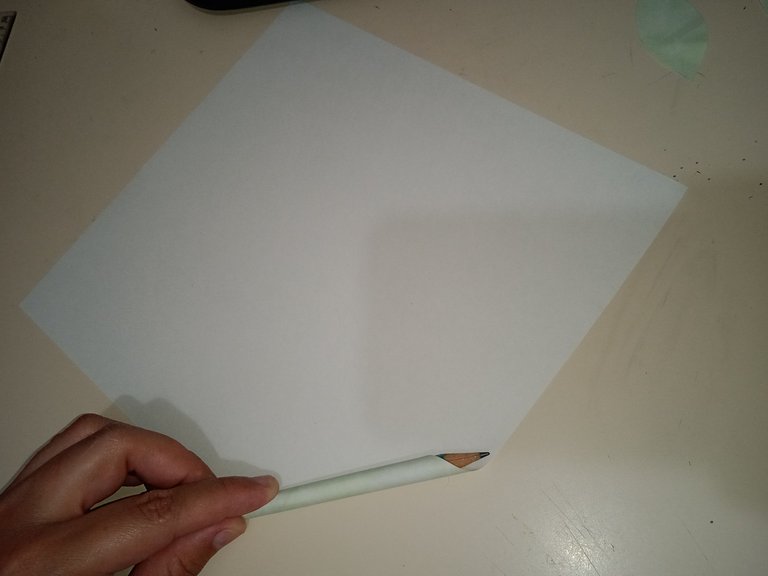
We start by cutting the orange cardboard into a square, which should be approximately 20 x 20 cm.
 |  |
|---|
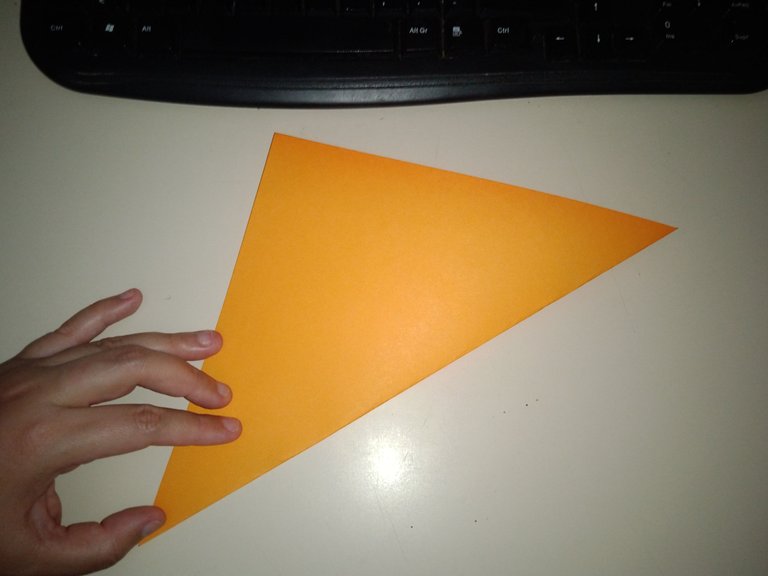
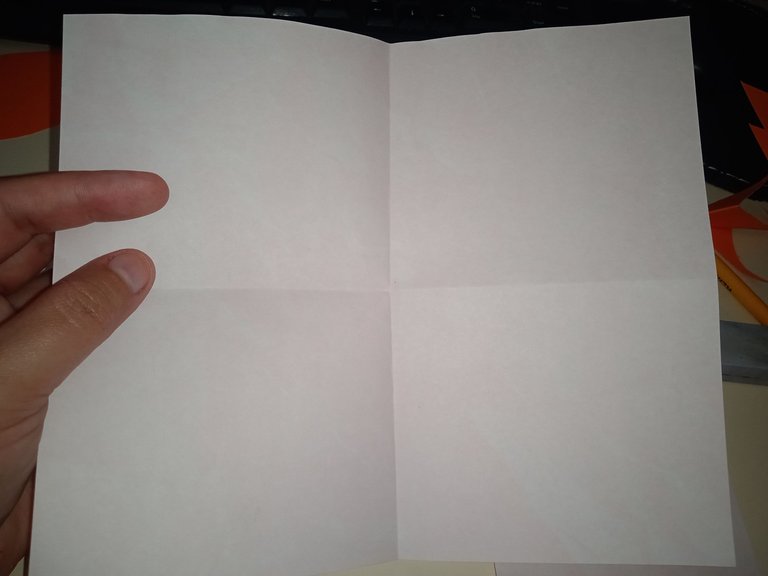
Once the square is ready, it is folded diagonally on each side to obtain a cross when the square is opened.
 |  |
|---|
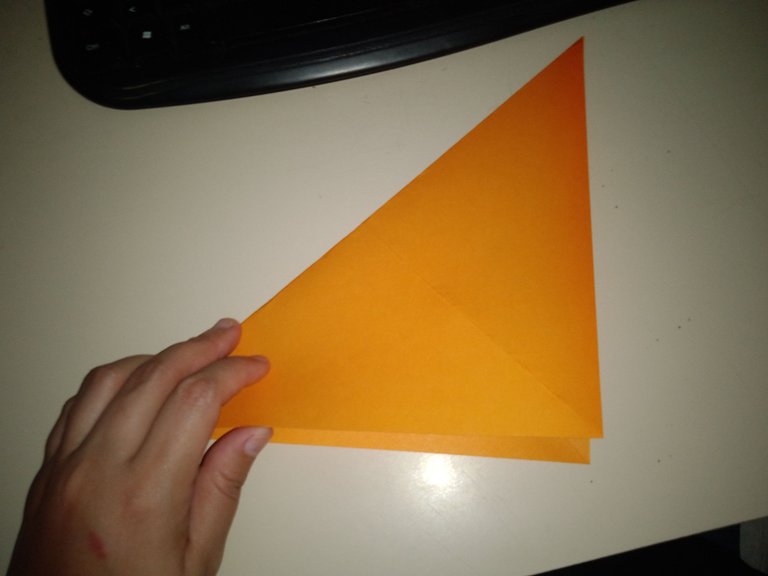
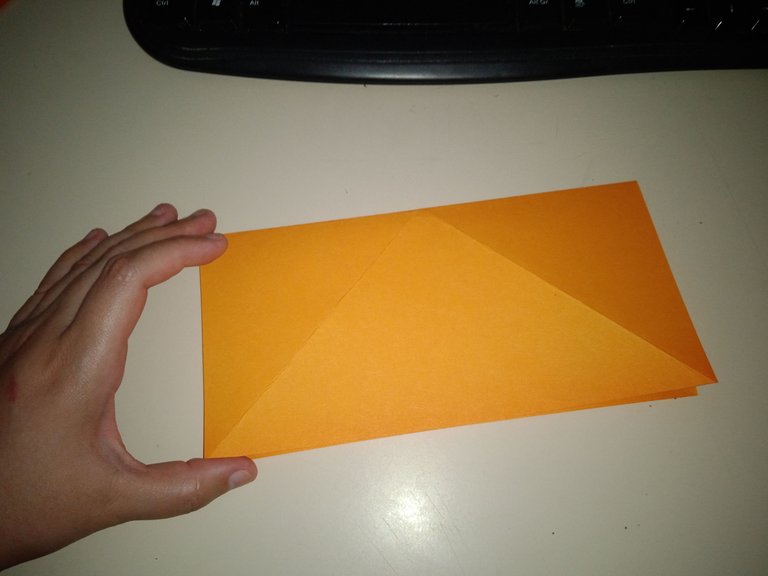
Then, proceed to fold horizontally, first one side and then the other, dividing the square into four parts.
 |  |
|---|---|
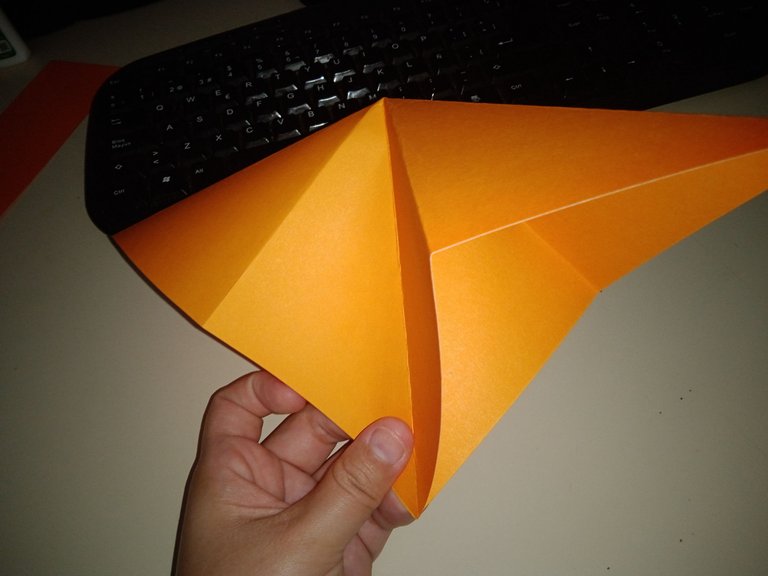
| Once folded in four parts, two ends are taken to form a large triangle | Then the right end is taken and the ends are joined together. |
 | 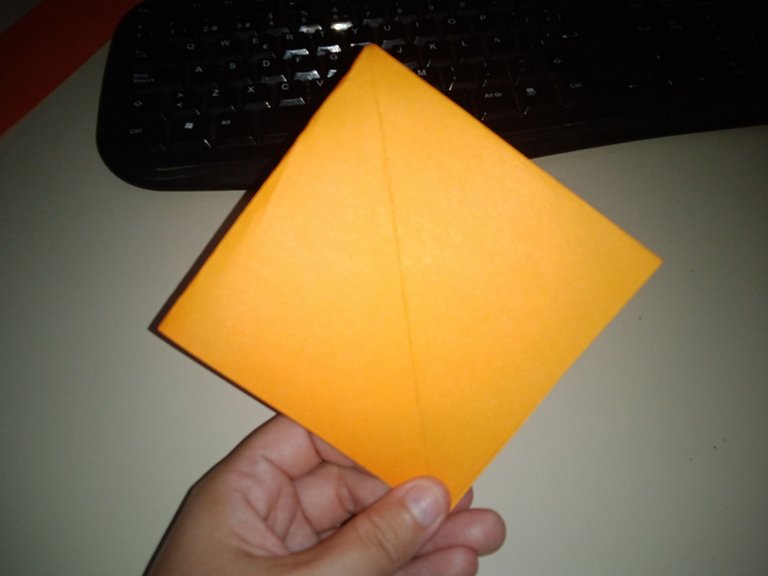 |
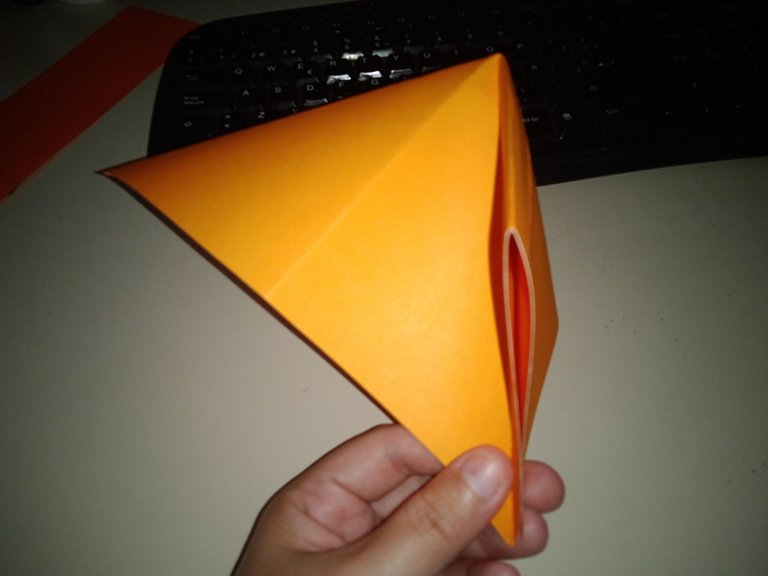
| Do the same on the left side. | And it should look like this, like a rhombus. |
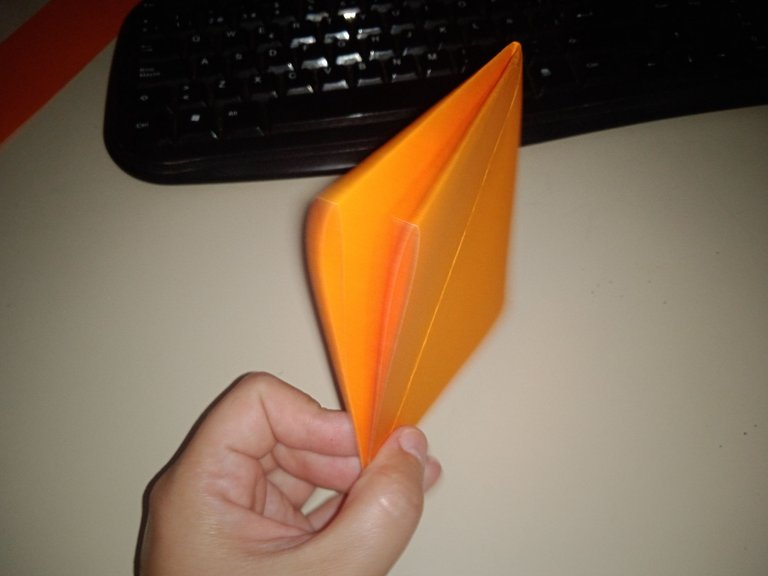
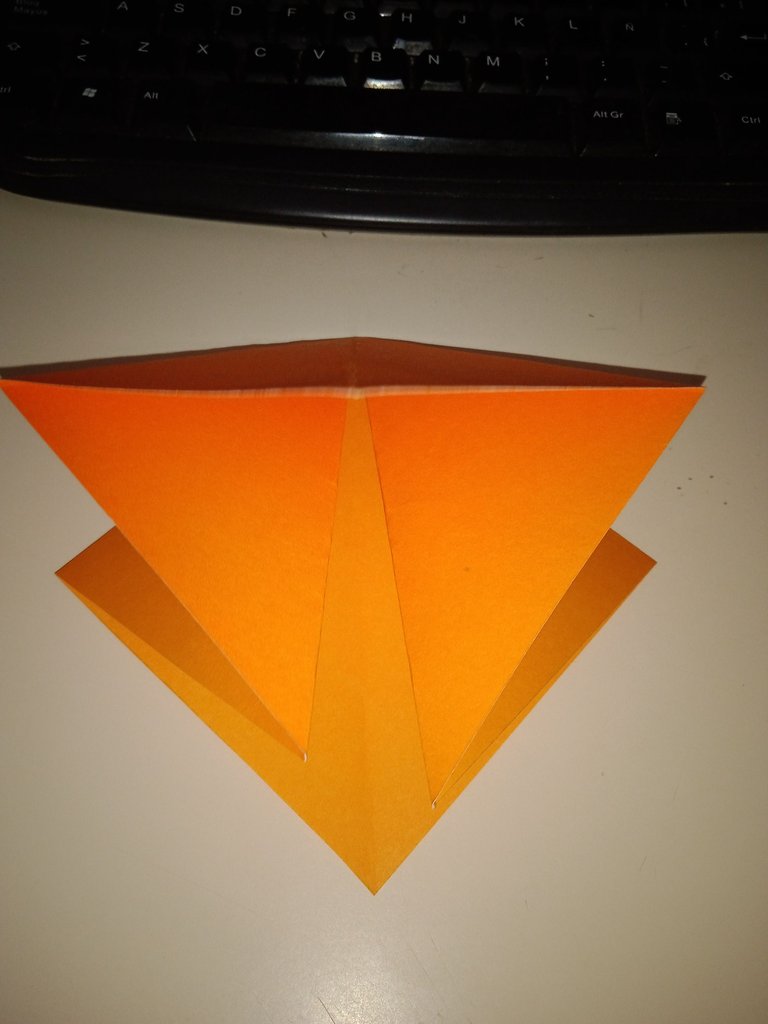
This is what it would look like if I let it loose on the table:
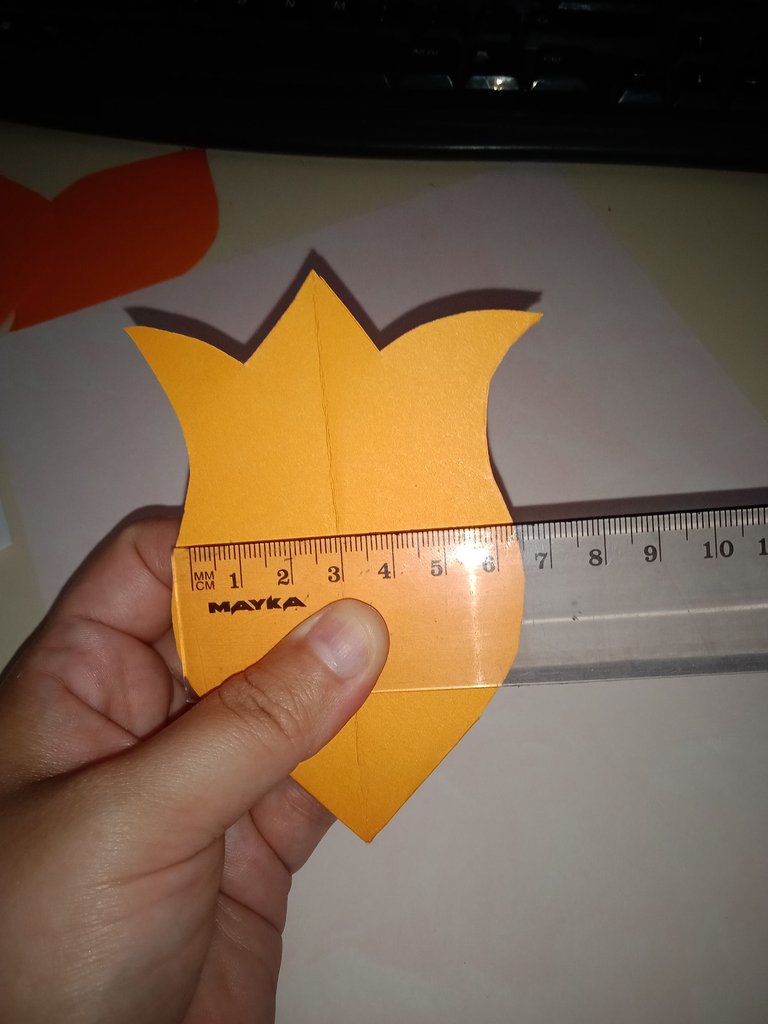
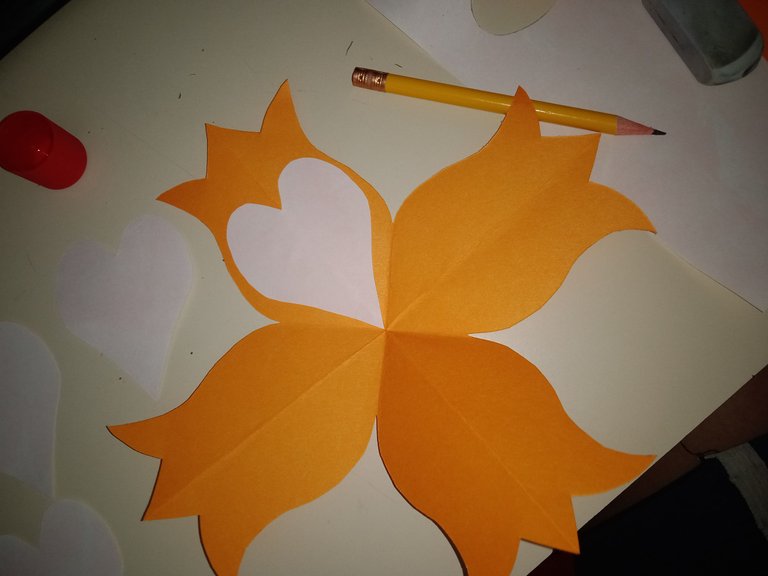
Now comes a fun part that I will leave to your discretion. You can make a mold on white paper either by printing the image or by freehand. I wanted to do it freehand directly on the card stock. This way, I saved materials and time. This is to draw the shape of the tulip.
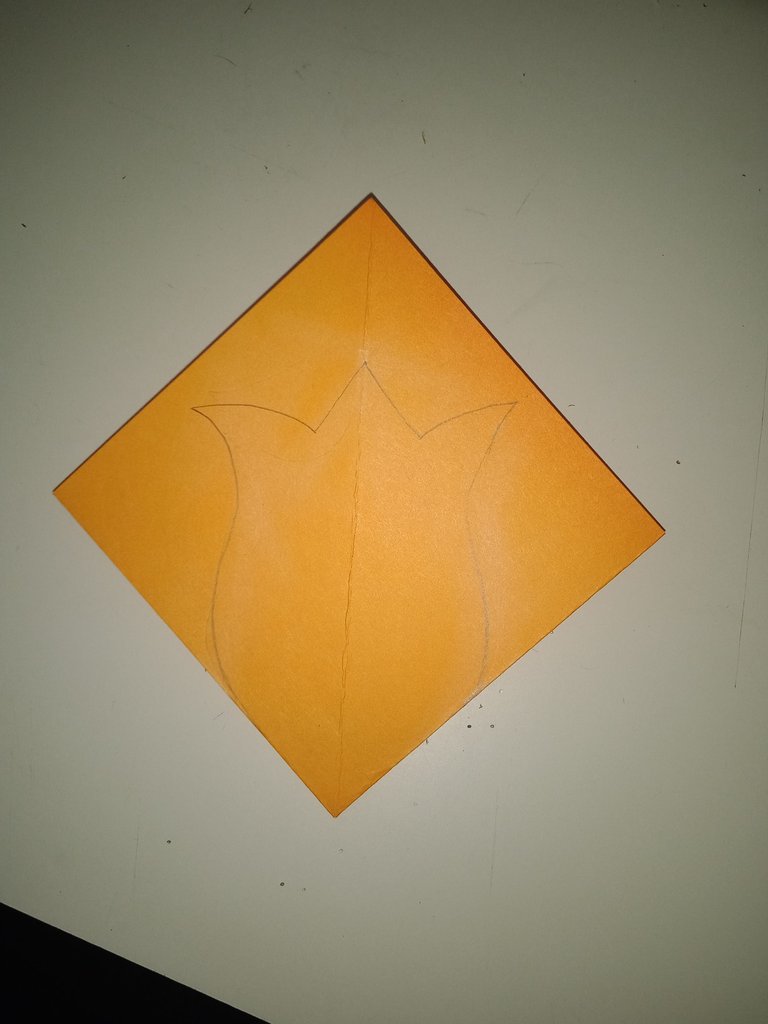
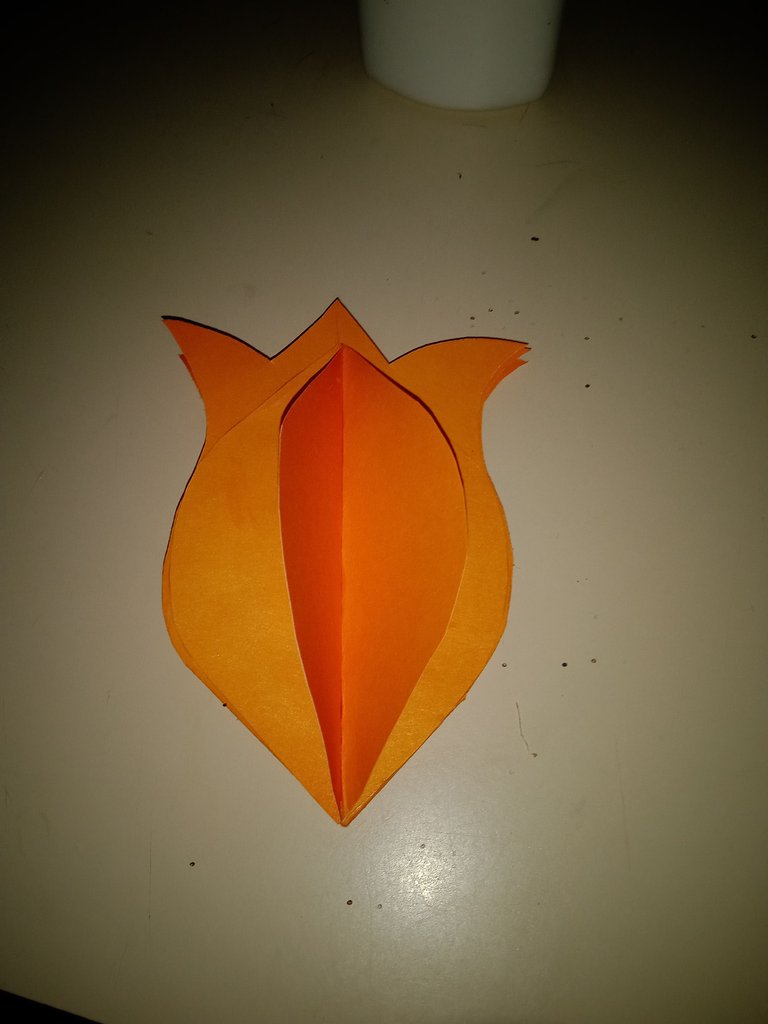
Then all that is left is to cut it out carefully using a pair of scissors that cut thick paper, since you will be cutting a cardboard folded in four parts.

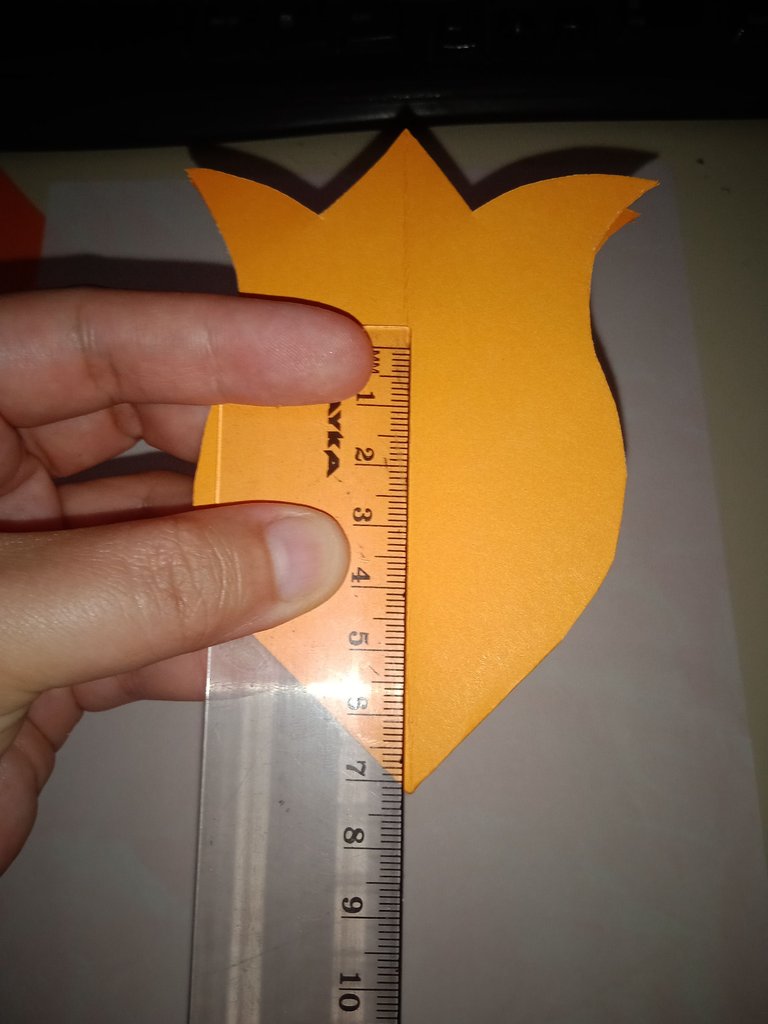
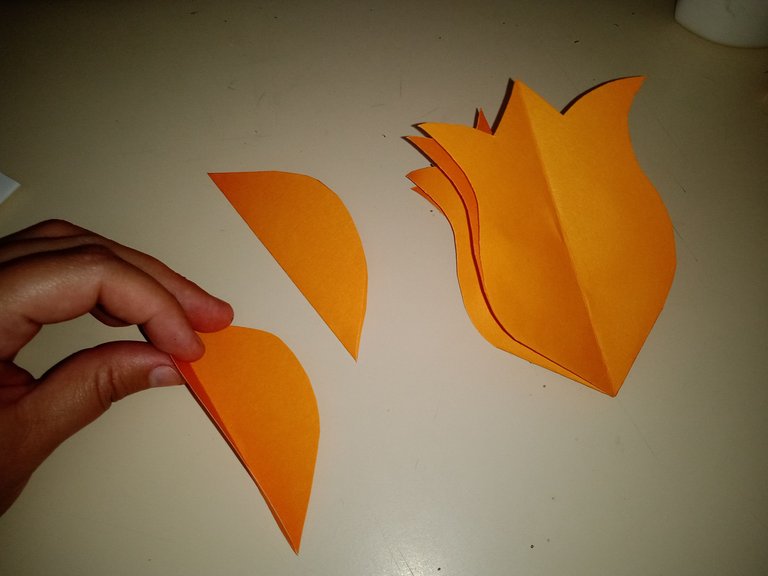
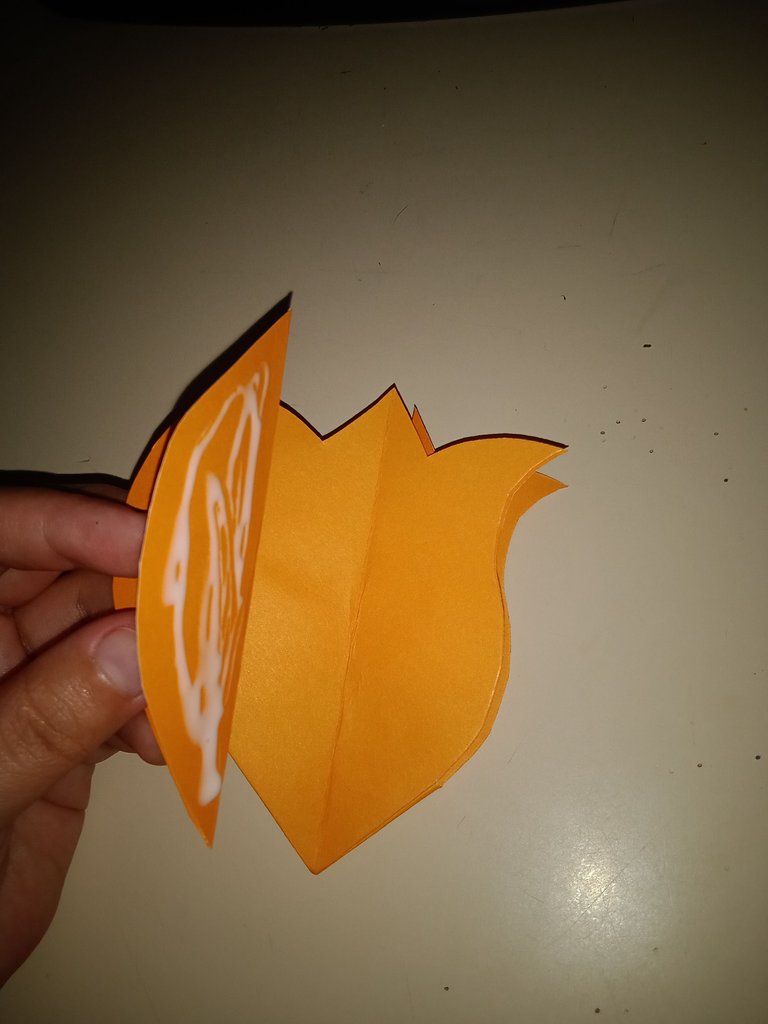
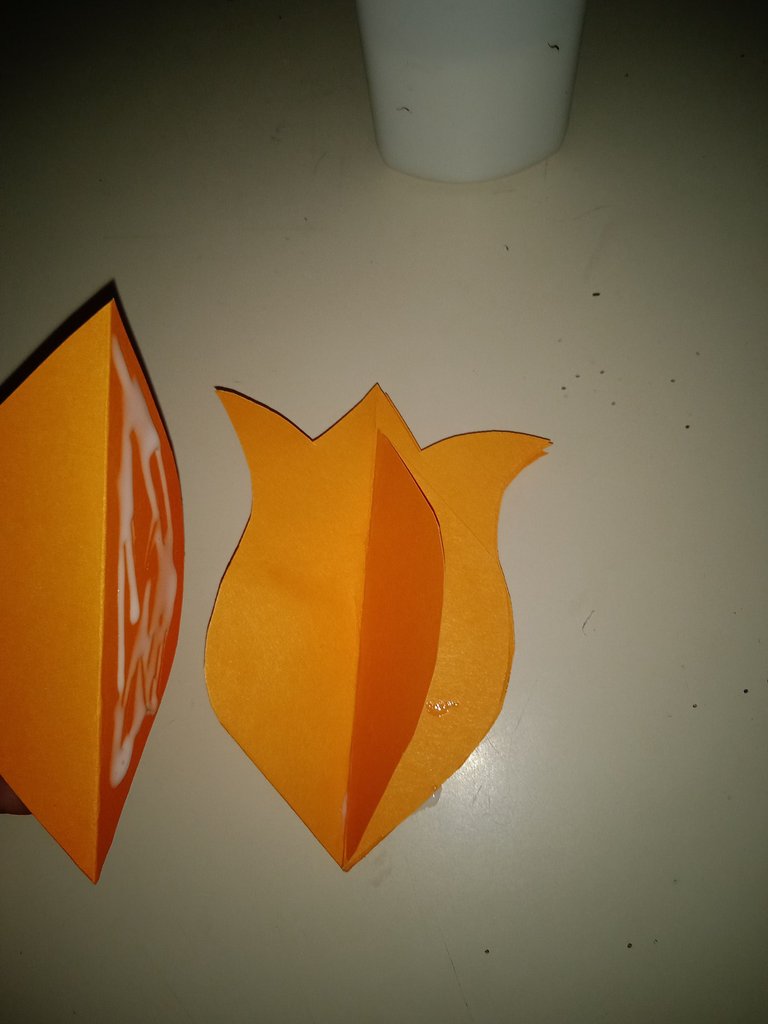
This is how it turned out. Then I used the remaining cardboard to make two more petals, which I will use to add to the front of the card to give it a 3D effect.

Here you can see the extra petals. I made them freehand, taking the width and height of the tulip as a base. In the end, they were a little smaller than expected, but they fulfilled their function.
 |  |
|---|
I set aside the petals for a while and took measurements of the tulip, both width and height. This is because now comes another fun part. We will make some hearts for the card filler.
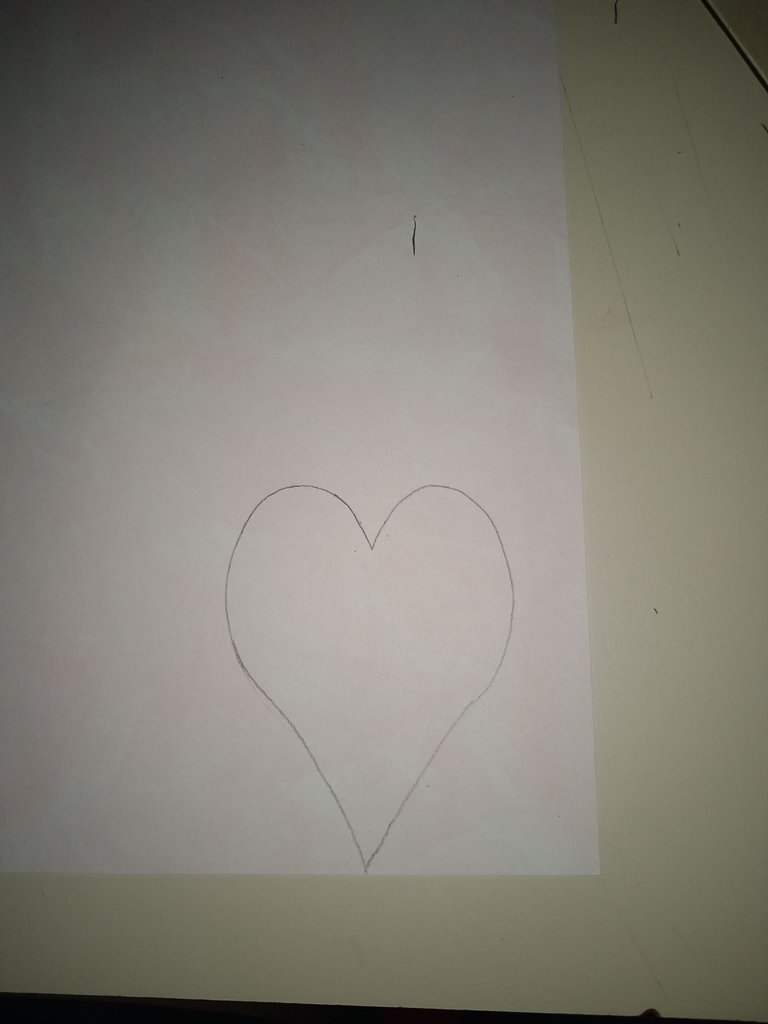
I made the heart by freehand first, to make a guide mold that would allow me to make 4 hearts of the same size equally.
 |  |
|---|---|
| Once I had the first heart cut out, I folded in four parts a piece of pink paper that can also be white or another color of your choice. | Then I just placed it carefully on the folded paper to draw its outline. |
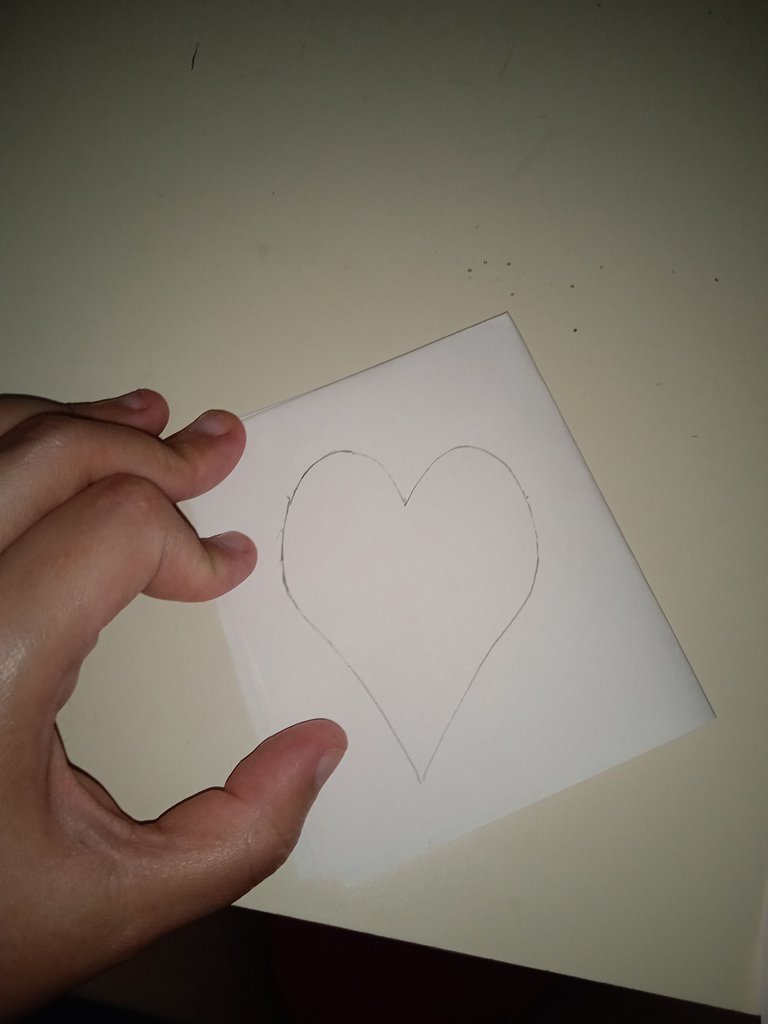 | 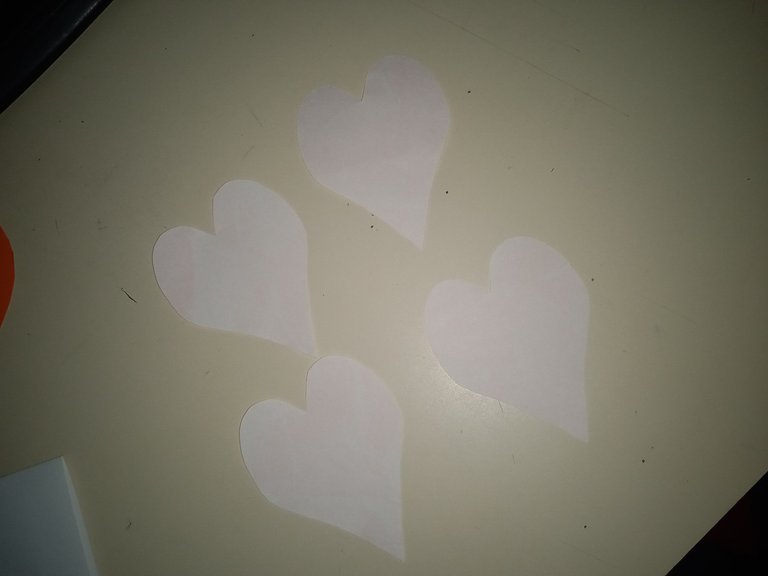 |
| Here it is drawn, I cut it out carefully. | Obtaining four hearts of the same size |
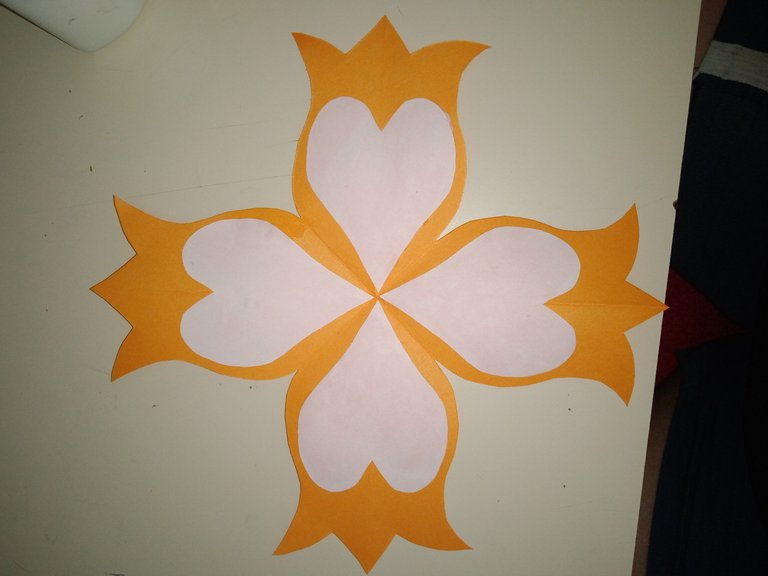
Now all that remains is to assemble the inside of the card. It consists of gluing the hearts on each petal of the tulip, as shown in the photos.
 |  |
|---|
Now I take the previous petals made with the remaining orange cardboard and glue them on the outside front.
 |  |  |
|---|---|---|
| I folded both petals in half a bit. | Then glued each one to the tulip by the folded end. First, one side. | Then the other side. |
The result is as follows:
The result is as follows: In the photo, you can see the unevenness of the petal. This one should have been the same size in height, from tip to tip, but since I had almost no extra orange cardboard material, I decided to leave it like that. I waited for the glue to dry, and let it dry well, leaving it flattened under a book.
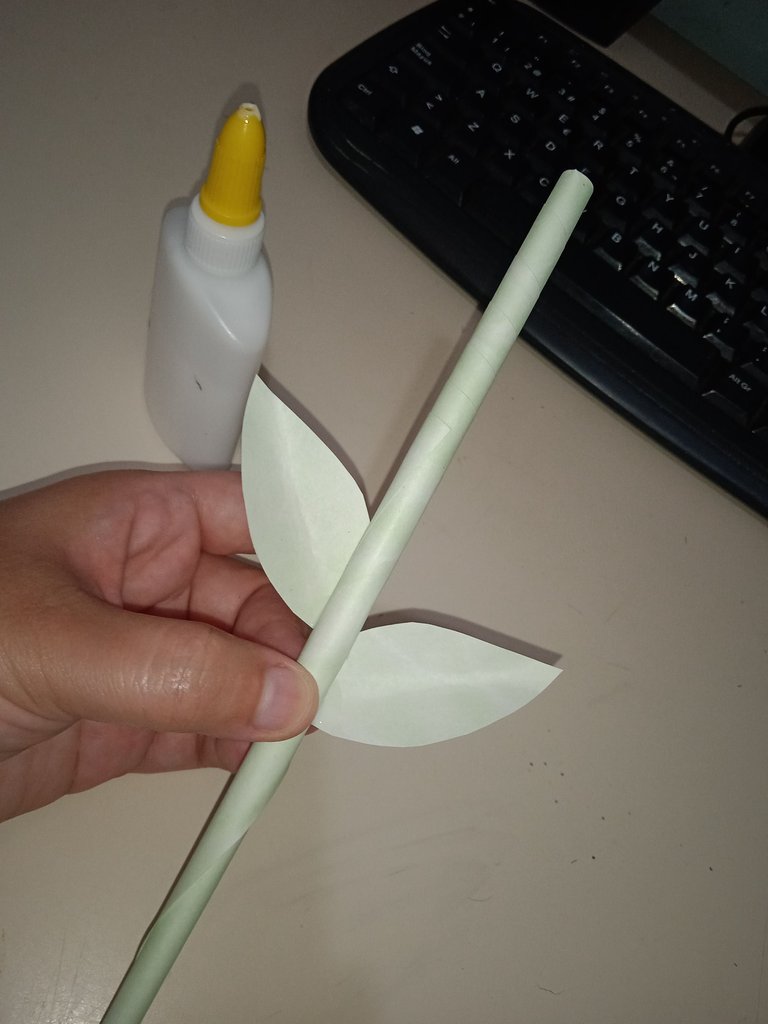
Now it's time to make the stem. To do this, you will need the green card stock or a green letter sheet. Before doing this step, I cut out a strip to use to draw some freehand leaves that I will show later. For now, the process of the stem is as follows:
 |  |
|---|---|
| To do this, you can help yourself with a pencil or a tall stick. Or if you prefer and you have a pulse for that, just roll it with your fingers, making a little tube. | Here you can see how I'm folding the sheet with the help of the pencil. At a certain point, before the whole thing is covered, you have to pull it out so it doesn't get stuck inside. |
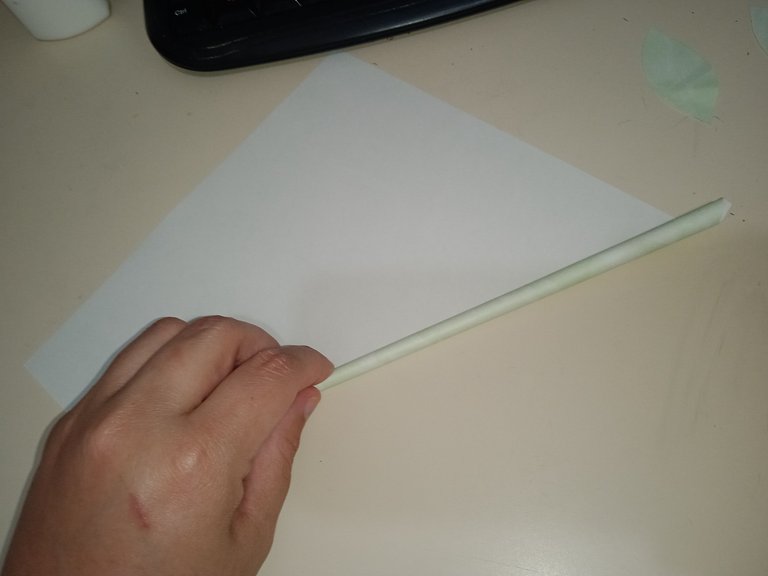 | 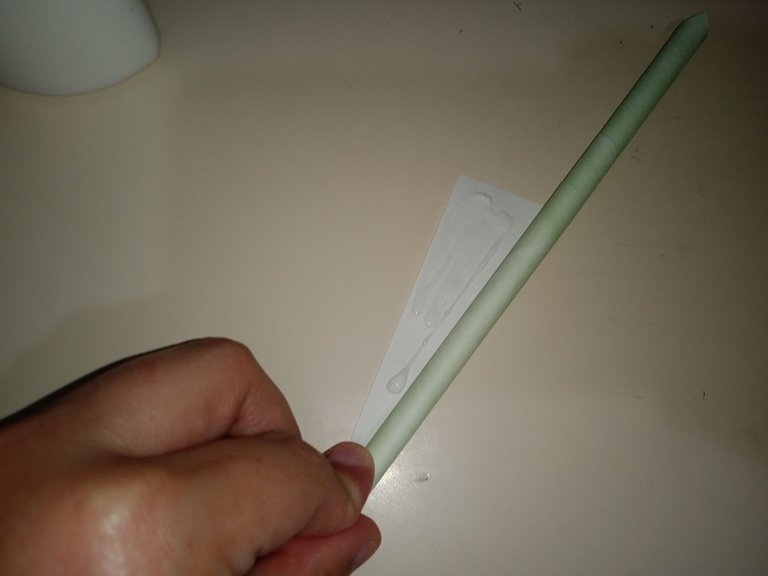 |
| Afterwards, you just have to continue rolling the paper to the end. | To close it, just add some white glue or cold silicone and let it dry. |
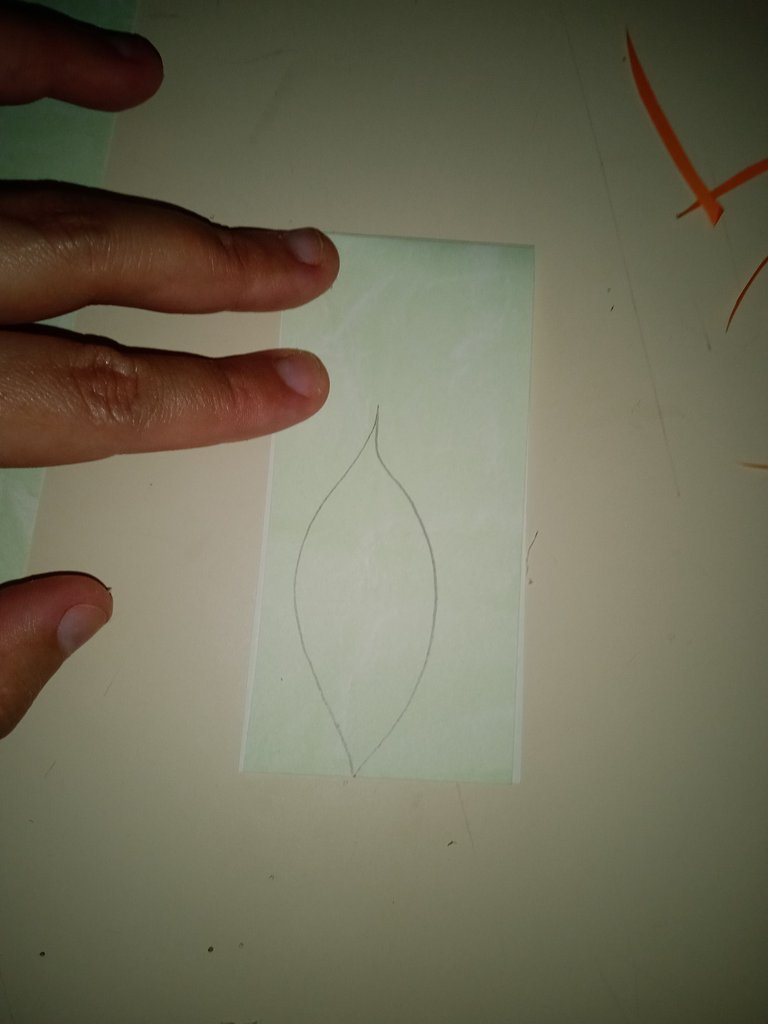
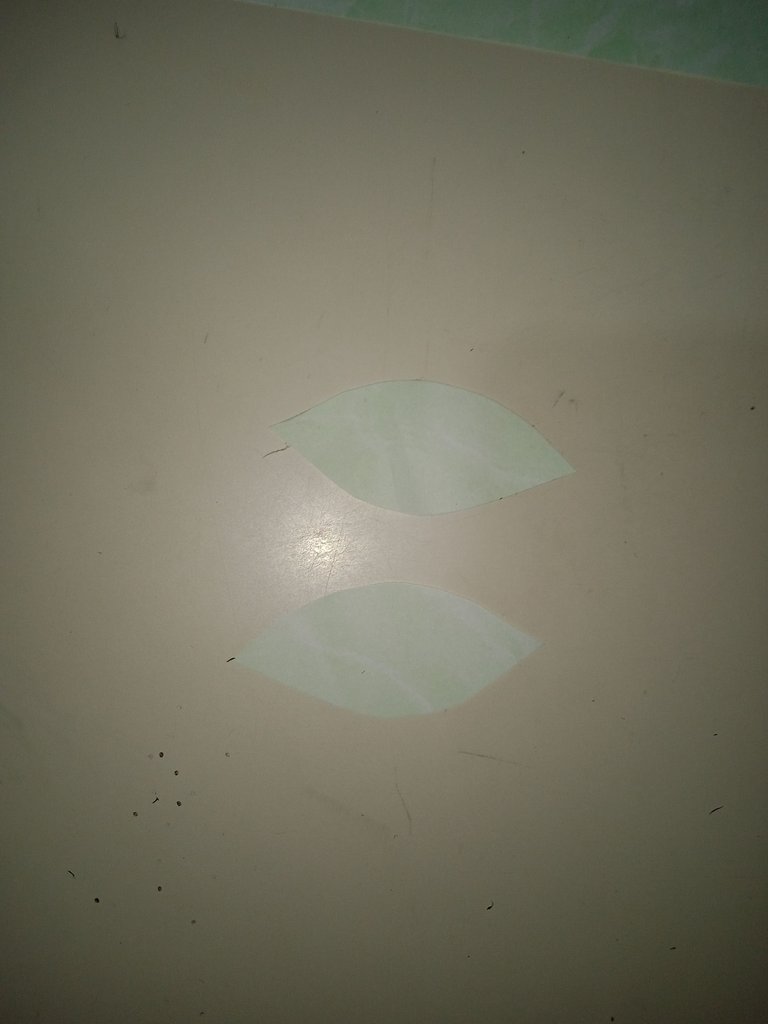
While you wait for this to happen, take the piece of green paper you left over there to draw the silhouette of a leaf. Before cutting it out, fold the paper so that you get two little leaves of the same size, doing it as follows:
 |  |
|---|
Now all that's left to do is to put everything together. It is worth mentioning that between the process and the process, I took the opportunity to write down the nice messages for my mom before gluing the tulip to the stem.
Another important thing I recommend is to let it dry without using a heavy book, since when I separated it, the glue did its thing and adhered more than it should have, breaking the cardboard a little, so I had to improvise by decorating it a little with an orange marker.
 |  |
|---|---|
 | 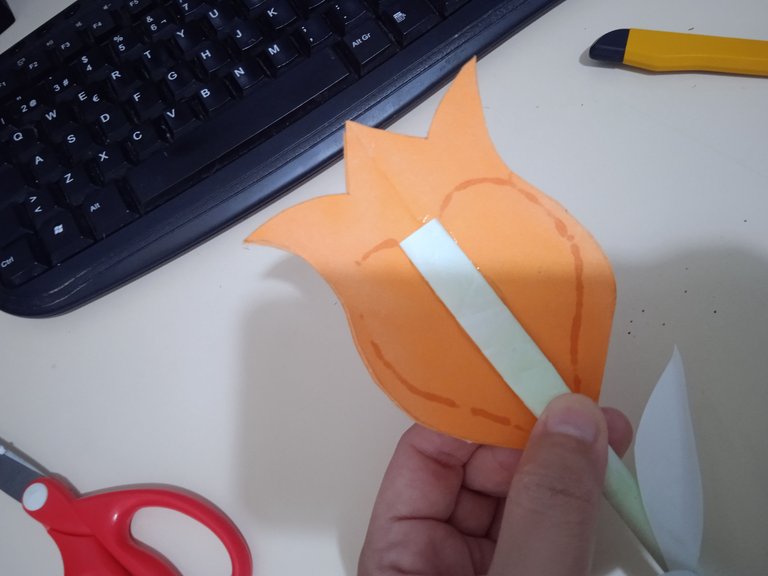 |
First, I glued the leaves I made as well as the petals, then I flattened a little the top of the stem to add cold silicone, and glued the tulip with the messages previously written inside.
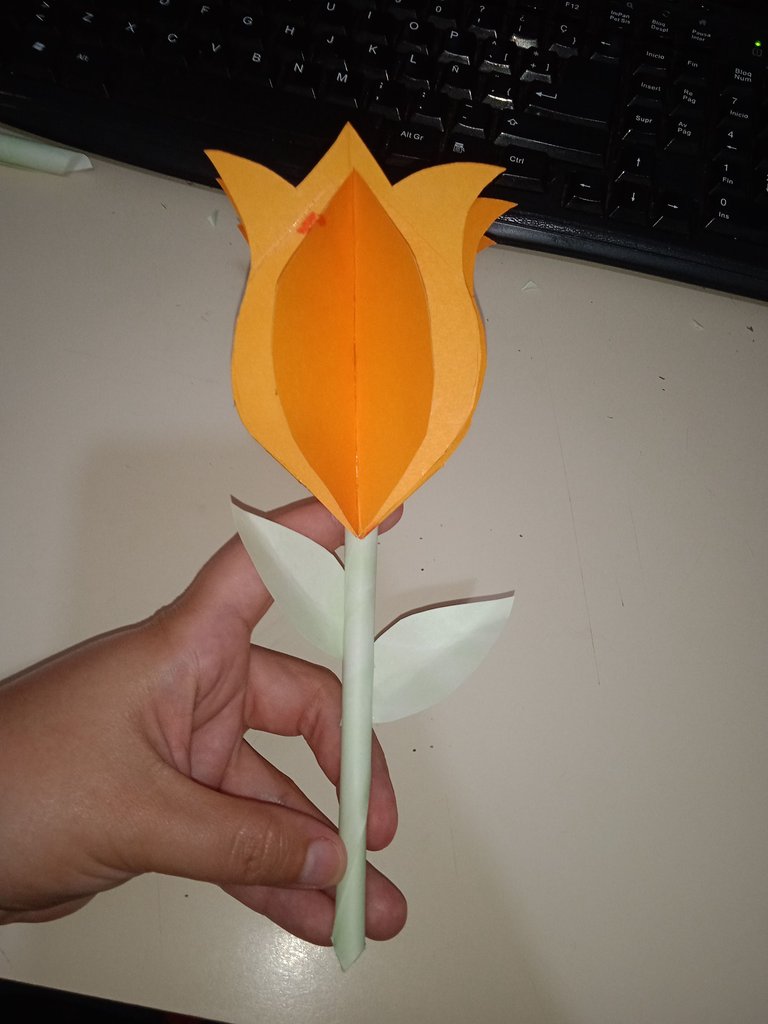
𝐅𝐢𝐧𝐚𝐥 𝐑𝐞𝐬𝐮𝐥𝐭
 |  |
|---|---|
| This is how it looks when closed | And this is how it looks when open |
What did you think? If you found my explanation complicated, you can look for the video tutorial on one of the many social networks of your preference. I hope you liked my work. See you in the next post! 🧡
Español
Saludos gente linda de #HiveDIY, ¿cómo les ha ido? Hoy les traigo un post especial dedicado al día de las madres, para que se preparen con anticipación junto con su pequeños en casa y les hagan una tarjeta original y diferente a sus madres.
𝐌𝐚𝐭𝐞𝐫𝐢𝐚𝐥𝐞𝐬 𝐚 𝐔𝐭𝐢𝐥𝐢𝐳𝐚𝐫
- Tijeras
- Una Cartulina Naranja o del Color de tu Preferencia tamaño carta.
- Marcador Punta fina Negro y Naranja (opcional)
- Hojas de colores verde y rosado. (También pueden ser una hoja blanca y una cartulina verde tamaño carta).
- Una regla para medir.
- Pega blanca
- Silicon al frío.
𝐏𝐚𝐬𝐨 𝐚 𝐏𝐚𝐬𝐨
Comenzamos tomando la cartulina naranja tipo carta y la recortamos como un cuadrado. Las medidas aproximadas de este deben ser de 20 x 20 cm respectivamente.
| |
|---|
Al tener el cuadrado listo, se dobla el mismo diagonalmente por cada lado, con el fin de obtener una cruz al abrir el cuadro.
| |
|---|
Luego se procede a doblar de manera horizontal, primero un lado y luego el otro, doblando de esta manera el cuadrado en 4 partes.
| |
|---|---|
| Una Vez doblado en cuatro partes, se toman dos puntas formando un triángulo grande. | Luego se toma el extremo derecho y se juntan las puntas. |
| |
| Se hace lo mismo del lado izquierdo. | Y debe quedar de esta forma, como un rombo. |
Así se vería si lo suelto en la mesa:
Ahora viene una parte divertida que dejaré a su criterio. Pueden hacer un molde en papel blanco ya sea imprimiendo la imagen o a mano alzada. Yo quise hacerlo a mano alzada directamente en la cartulina. Así me ahorraba materiales y tiempo. Esto para dibujar la forma del tulipán.
Ya luego sólo queda recortarlo con cuidado usando una tijera que corte papel grueso, ya que estarás cortando una cartulina doblada en cuatro partes.
Así fue como me quedó. Posteriormente usé el restante de cartulina para armar dos pétalos más, ya que me servirán para agregarlos al frente de la tarjeta y así darle un efecto 3D.
Aquí pueden ver los pétalos extras. Los hice a mano alzada, tomando de base el ancho y alto del tulipán. Al final me quedaron un poco más pequeños de lo esperado pero cumplen su función.
| |
|---|
Reservé los pétalos por un rato y tomé medidas del tulipán, tanto de su ancho como de su alto. Esto porque ahora viene otra parte divertida. Haremos unos corazones para el relleno de la tarjeta.
El corazón lo hice a mano alzada primero, para hacer un molde guía que me permitiera elaborar 4 corazones del mismo tamaño por igual.
| |
|---|---|
| Una vez tuviera el primer corazón recortado, doblé en cuatro partes un pedazo de hoja rosada que puede ser blanca también o de otro color de tu preferencia. | Luego sólo lo coloqué con cuidado en el papel doblado para dibujar su contorno. |
| |
| Aquí está dibujado, lo recorté con cuidado. | Obteniendo cuatro corazones del mismo tamaño |
Ahora sólo queda armar la parte interior de la tarjeta. Consiste en pegar los corazones en cada pétalo del tulipán, como lo muestro en las fotos.
| |
|---|
Ahora si retomo los pétalos anteriores hechos con el restante de cartulina naranja para pegarlo en la parte exterior frontal.
| | |
|---|---|---|
| Doblé un poco a la mitad ambos pétalos | Luego fui pegando cada uno por el extremo doblado al tulipán. Primero un lado. | Luego el otro lado |
Quedando como resultado lo siguiente:
En la foto pueden notar el desnivel del pétalo. Este debió quedar del mismo tamaño de alto, entre punta y punta pero como no tenía casi material extra de cartulina naranja, decidí dejarlo así. Esperé a que secara la pega y que secara bien, dejándolo aplastado debajo de un libro.
Ahora, toca hacer el tallo. Para ello necesitarás la cartulina verde o una hoja verde tipo carta. Yo antes de hacer este paso, recorté una tira para usarla y dibujar algunas hojas a mano alzada que mostraré más adelante. Por ahora el proceso del tallo es el siguiente:
| |
|---|---|
| Para hacerlo puedes ayudarte con un lápiz o un palito de altura. O si lo prefieres y tienes pulso para eso, sólo lo enrollas con tus dedos, haciendo un tubito. | Acá pueden ver cómo voy doblando la hoja con ayuda del lápiz. Llegado a cierto punto, antes de que se cubra todo, debes sacarlo para que no se quede atorado adentro. |
| |
| Ya después, sólo debes seguir enrollando todo el papel hasta llegar al extremo. | Para cerrarlo, sólo agrega un poco de pega blanca o silicón al frio y deja secar. |
Mientras esperas que esto ocurra, tomas el retazo de papel verde que dejaste por allí para dibujar la silueta de una hoja. Antes de recortarla, dobla el papel para que obtengas dos hojitas del mismo tamaño, haciéndolo de la siguiente manera:
| |
|---|
Ya para terminar sólo queda unir todo. Cabe destacar que entre proceso y proceso, aproveché de anotar los mensajes lindos para mi mamá antes de pegar el tulipán al tallo.
Otro dato importante que les recomiendo, es dejarlo secar sin usar un libro pesado, puesto que al separarlo, la pega hizo de las suyas y se adhirió más de lo debido, rompiéndose un poco la cartulina, por lo que tuve que improvisar decorando un poco con marcador naranja.
| |
|---|---|
| |
Primero pegué las hojitas que hice al igual que los pétalos, luego aplasté un poco la punta superior del tallo para agregarle silicón frio y pegar el tulipán con los mensajes previamente escritos en el interior.
𝐑𝐞𝐬𝐮𝐥𝐭𝐚𝐝𝐨 𝐅𝐢𝐧𝐚𝐥
| |
|---|---|
| Así se ve cerrada | Y así abierta |
¿A ustedes qué les pareció? Si se les hizo complicada mi explicasión, pueden buscar el tutorial en video por alguna de las tantas redes sociales de su preferencia. Espero que les haya gustado mi trabajo, hasta un próximo post! 🧡

| 𝐄𝐥𝐞𝐦𝐞𝐧𝐭𝐬 (𝐄𝐥𝐞𝐦𝐞𝐧𝐭𝐨𝐬) | 𝐓𝐨𝐨𝐥𝐬 (𝐇𝐞𝐫𝐫𝐚𝐦𝐢𝐞𝐧𝐭𝐚𝐬) |
|---|---|
| Photos used throughout the post are from my gallery (Las Fotos Utilizadas a lo largo del Post son de mi galería) | Redmi Note 9A Phone Camera (Cámara del Teléfono Redmi Note 9A) |
| Content and Original Text of my Authorship (Contenido y Texto Original de mi Autoría) | DeepL |
| CANVA | |
| Grammarly |
Posted Using INLEO
Muy bonito detalle para obsequiar el día de la madre. Nos dejas un paso a paso bastante detallado.
!discovery 25
This post was shared and voted inside the discord by the curators team of discovery-it
Join our Community and follow our Curation Trail
Discovery-it is also a Witness, vote for us here
Delegate to us for passive income. Check our 80% fee-back Program
This is a very nice gift to give a mother on her birthday. Excellent work with very detailed and easy-to-follow step-by-step instructions.
selected by @dayadam