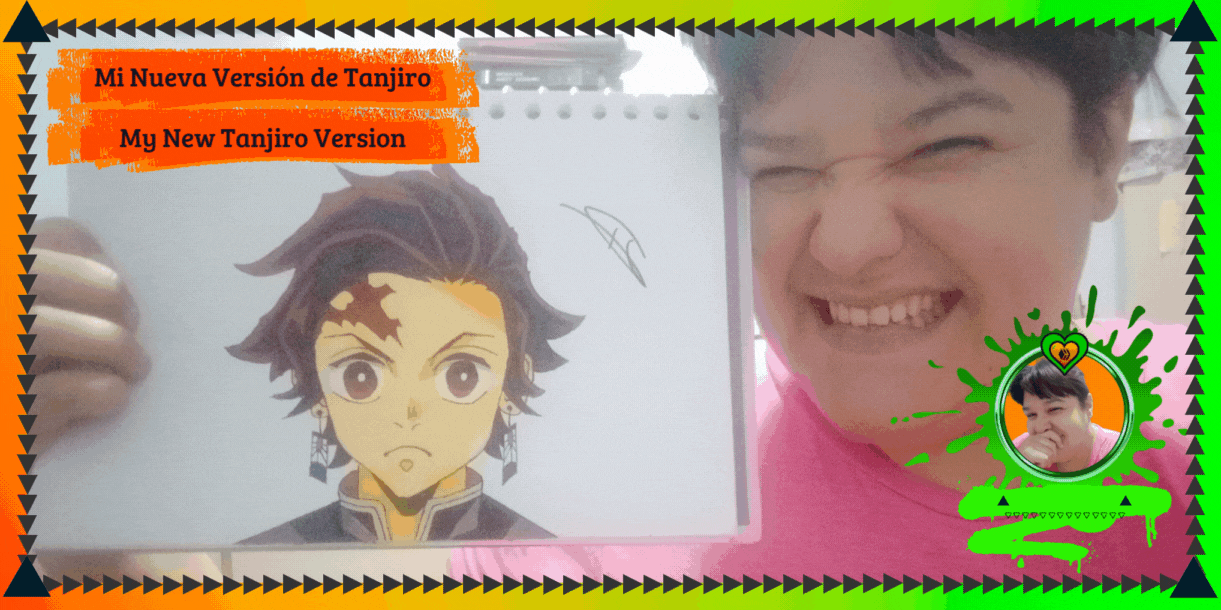
Mi Nueva Versión de Tanjiro (🇪🇸 | 🇺🇸)
FULL ENGLISH VERSION

Greetings, Artisans and Artists of this beautiful #HiveDIY Community. If you are faithful to my posts and you have walked my way in Hive, you will know that some time ago, I tried to draw Tanjiro Kamado, my Crush from Kimetsu no Yaiba and well, it didn't look good. Back then, I didn't have markers, and my colors were very scarce as well. This makes Tanjiro look somewhat addicted to drugs in the end. To make you understand me better, you can go to that publication and take a look at that Tanjiro by doing CLICK HERE.

𝐒𝐭𝐞𝐩-𝐛𝐲-𝐒𝐭𝐞𝐩
For this occasion, I once again chose as my guide and tutor my favorite YouTube art teacher known as GamoArt. At the end of the post, I will leave you the video tutorial by which I was guided to make this drawing.
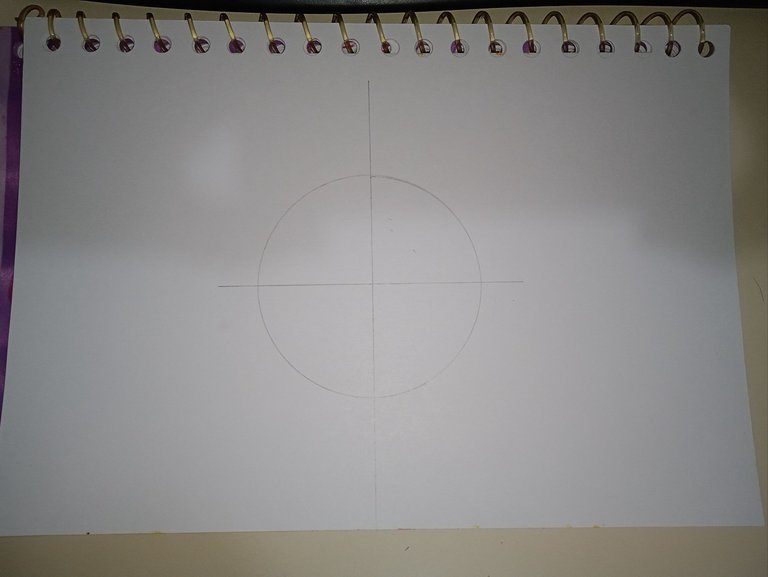
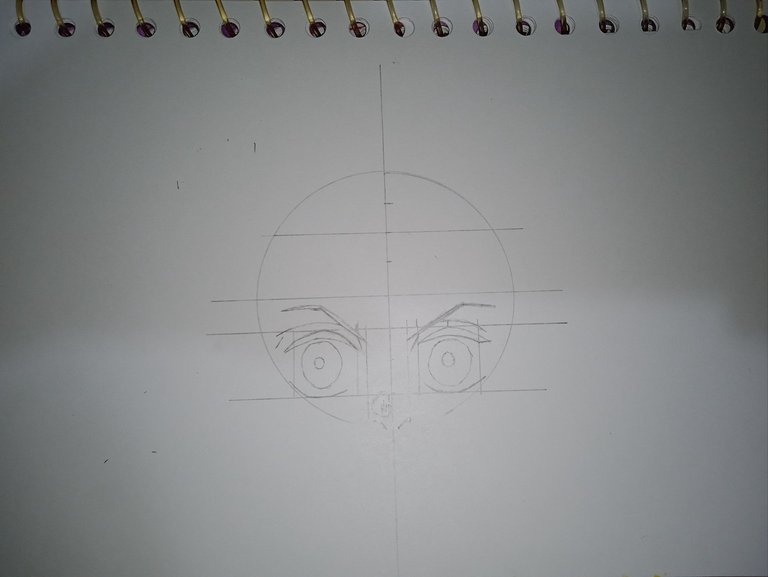
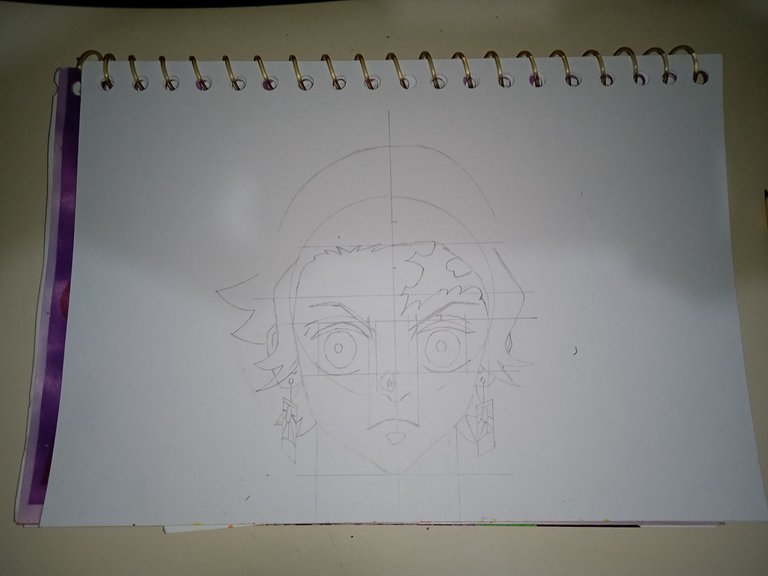
And well, the first step here is to make a guide circle with a cross in the center that divides it into 4 parts.
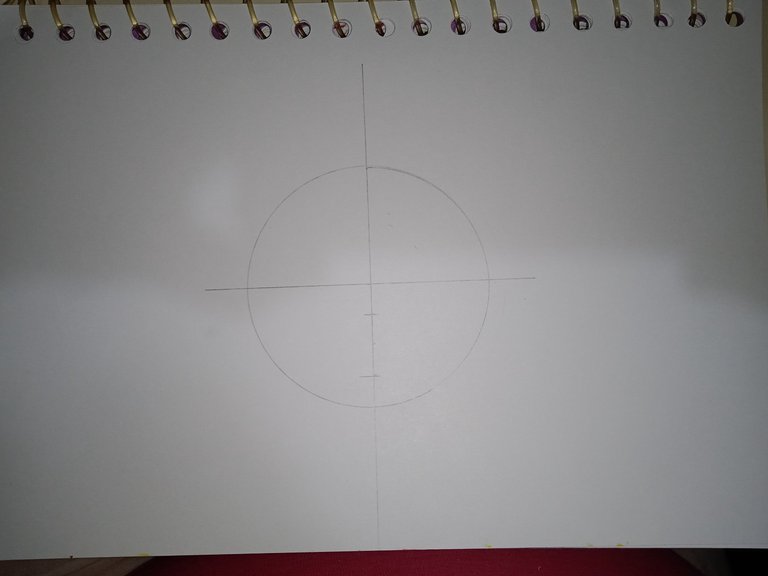
Once that is done, the lower vertical line inside the circle is divided into 4 equal parts, to take two other guide lines horizontally as shown in the following image:
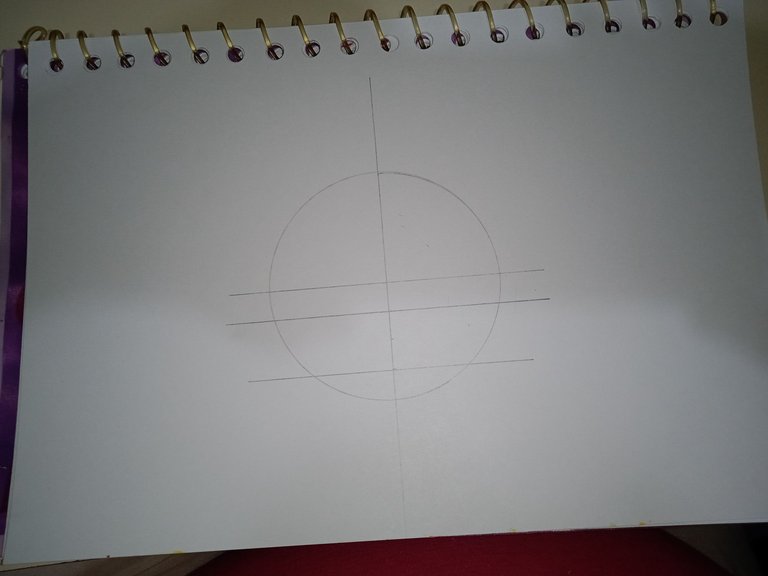
Once we have these new guidelines, we take the one closest to the center and divide it into 4 equal parts on each side.
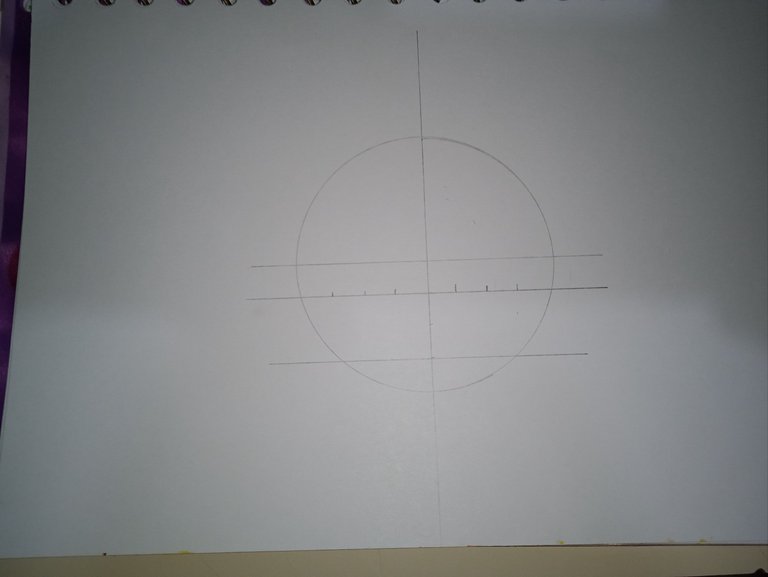
Once the line is divided, the spaces closest to the center and the edge of the circle are taken to make 4 new vertical guide lines.

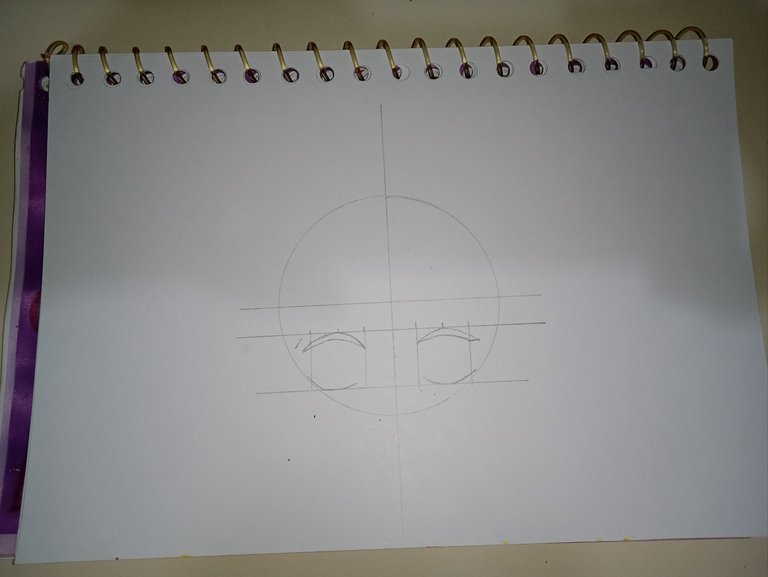
Doing this allows us to symmetrically place the eyes of our dear Tanjiro. If you remember, it was in this step that I made a mistake by making them too close, resulting in a depressing and different look.
Although it is a bit annoying to make these lines before working, for now and for the little experience I have drawing, I prefer to take a few minutes to visualize where the parts of the face will be located.
I like this simple technique, and that's what I like the most about the explanations of YouTuber GamoArt, because he explains it in detail, and if I can do it, you can do it too.
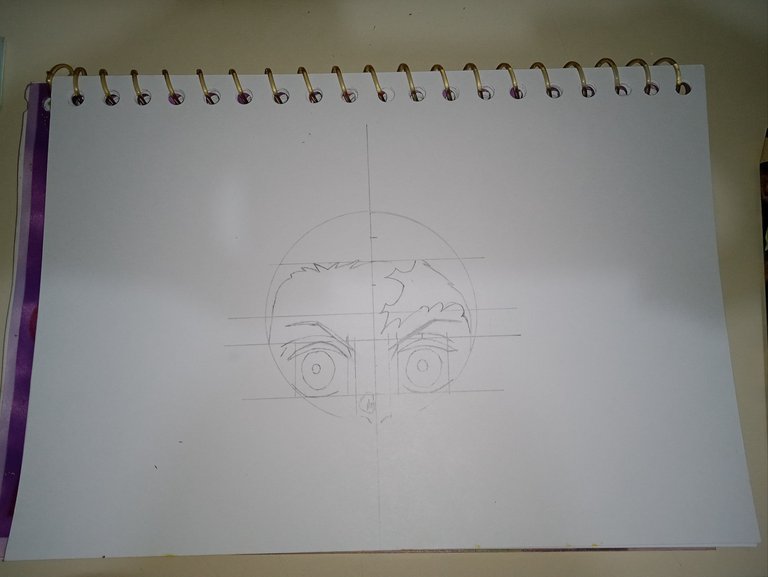
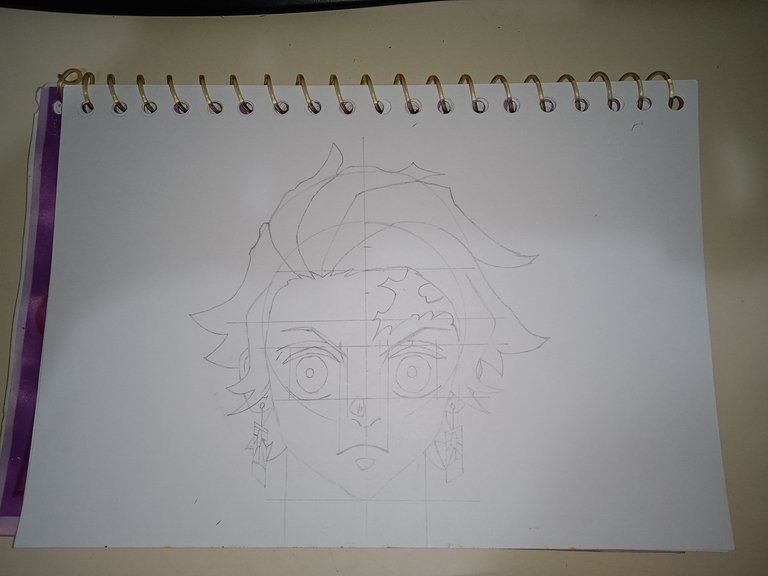
And well, back to my step-by-step, you can notice in the above photo that I start detailing the upper and lower lashes of Tanjiro quite simply.
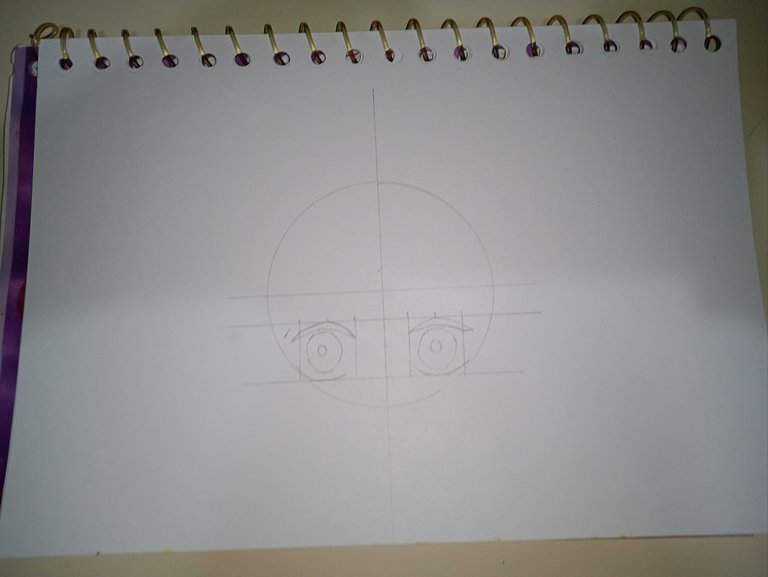
Then I add the pupils, as symmetrical as possible. And well, the eye of Tanjiro, like the other characters, is usually characterized by being semi-octagonal, but this time it came out more oval than octagonal 🤣 and it looked good, so I left it like that.
Then I drew her eyebrows very thinly, indicating discomfort in the eye. At the same time, I added the eyelid details.

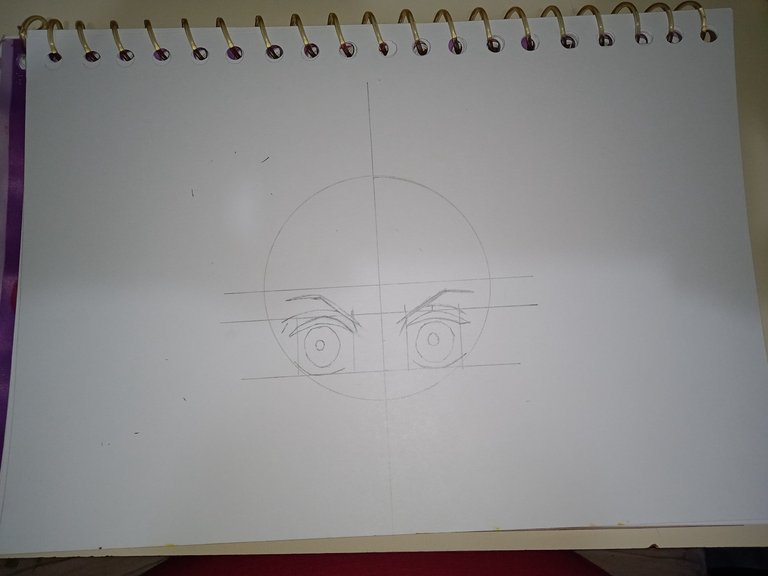
In this step, I added the nose with its holes and a small side shadow. Note that to place it symmetrically, I drew guide lines again at the beginning of each eyebrow of Tanjiro.
In this step, I divided the upper vertical guideline into 4 equal parts to draw another horizontal guideline that will allow me to delimit the forehead of Tanjiro.
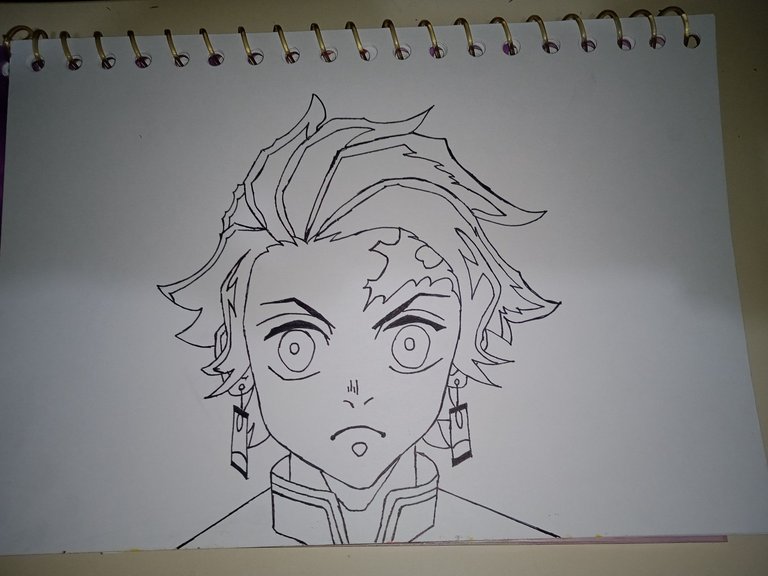
In this way, I was able to delimit Tanjiro's face with the beginning of his hair and his characteristic scar on the side of his face.
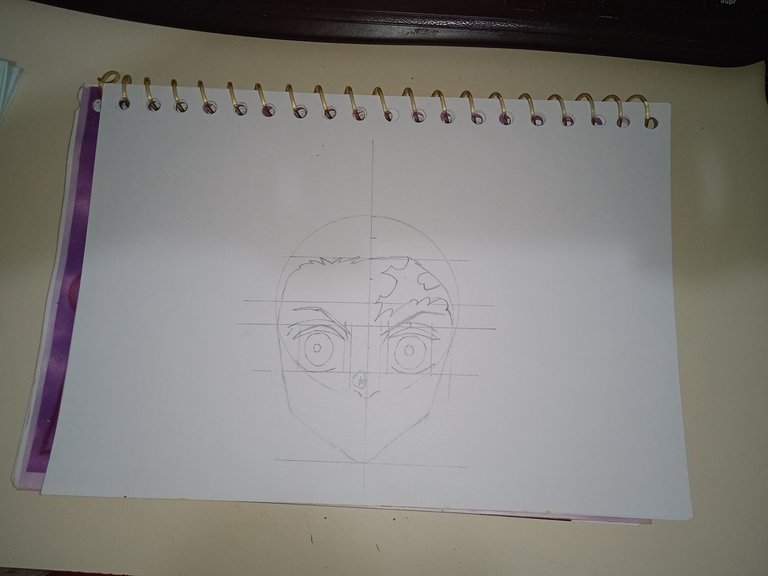
Then I sketched the contour of her face, drawing a guideline below. This part, if I did it by eye percent, without taking into account measurements, but in my case it was more because I was forced to apply a force method, the way GamoArt explained I couldn't do it.

Here, as you can see, I added the mouth and the shadow under his mouth, taking as a guide line the distance between Tanjiro's tears.
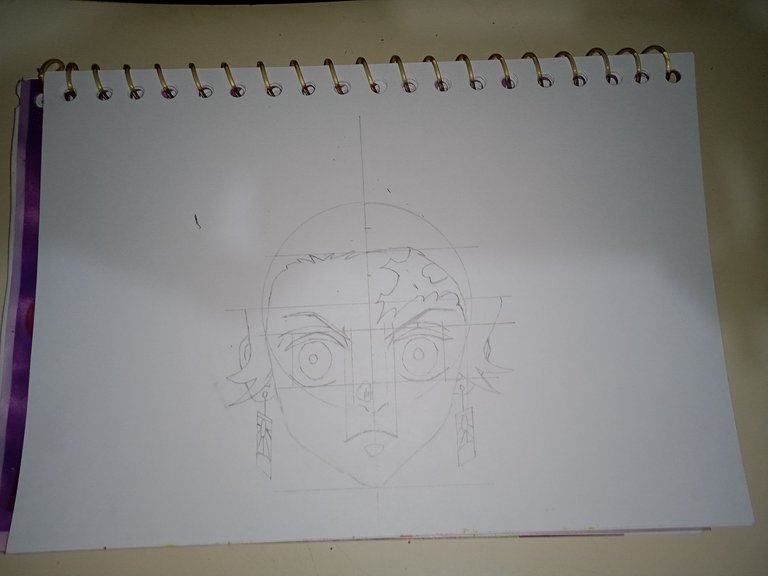
Then it was time to start making her locks of hair on the sides of her face, adding her ears with their respective hanafuda earrings.
I then made a semi-circle at the top to guide me as to how far our favorite character's hair would go. I also added a few strands here and there.
At this stage, it could be said that Tanjiro is ready to be highlighted in black but still lacks some details.
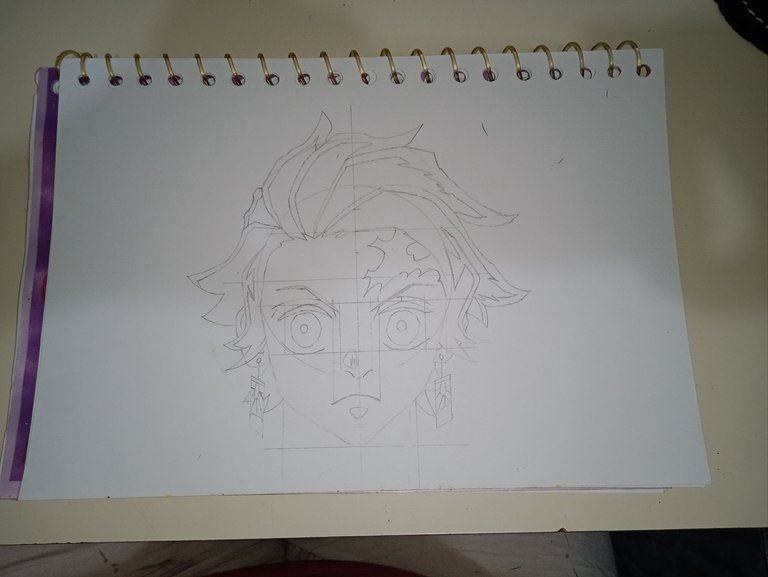
At this stage, her hair is ready, but I still need to add his torso (this next step I should have applied with Zenitsu).
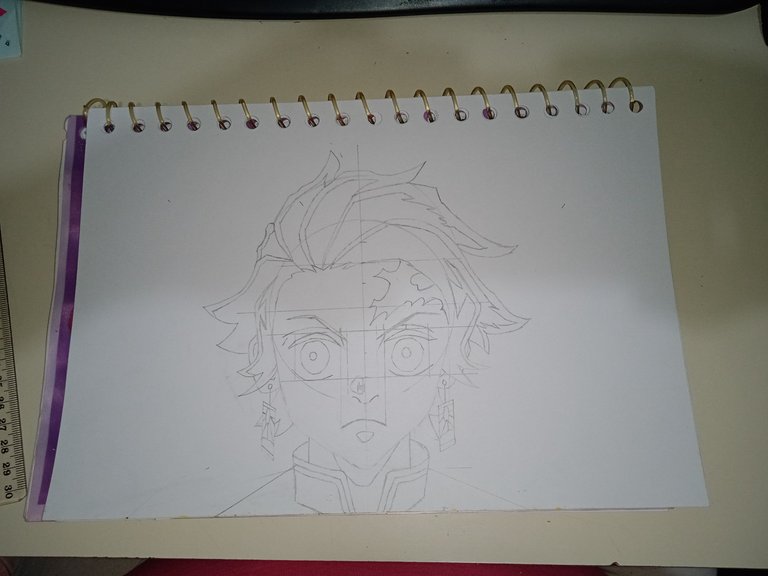
Once his torso is sketched, our hero Tanjiro is ready to be highlighted with a black fine tip marker, resulting in the following:
And now, Tanjiro is ready to be colored. It's worth mentioning that for this stage GamoArt wanted to go out of the usual and colored him using gray and red tones. I wanted to be more traditional, so this was my result:
𝐅𝐢𝐧𝐚𝐥 𝐑𝐞𝐬𝐮𝐥𝐭
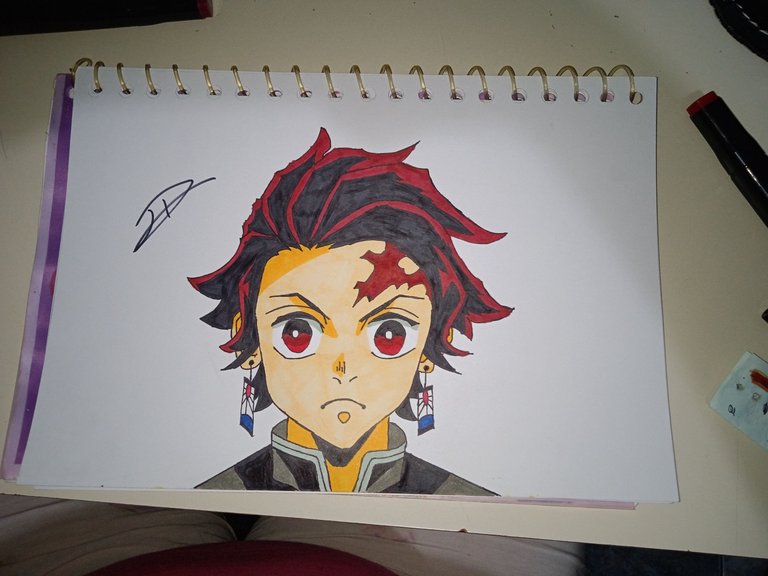
I loved the way it turned out. For me, this is Tanjiro the original, and I feel proud of my drawing and its finish. What do you think? Did you like it? Let me know your opinions in the comments! I'll be glad to read them! See you next time! 💚

At the end of the post, you can see the Complete Video Tutorial from which I was guided to make this drawing. click on HERE to go there
Español
Saludos Artesanos y Artistas de esta linda Comunidad #HiveDIY. Si son fieles a mis post y han recorrido mi camino en Hive, sabrán que hace algún tiempo intenté dibujar a Tanjiro Kamado, mi Crush de Kimetsu no Yaiba y pues no me quedó bien. En aquel entonces no tenía marcadores y mis colores estaban muy escasos también. Esto hizo que al final Tanjiro se viera algo adicto a las drogas. Para que me entiendan mejor, pueden ir a esa publicación y echar un vistazo a aquel Tanjiro haciendo CLIC AQUI.
𝐏𝐚𝐬𝐨 𝐚 𝐏𝐚𝐬𝐨
Para esta ocasión volví a elegir de guía y tutor a mi profesor de arte favorito en YouTube conocido como Gamo Art. Al final del post, les dejaré el video tutorial del cual me guie para hacer este dibujo.
Y bueno, el primer paso aquí es el de hacer un círculo guía con una cruz al centro que divida a este en 4 partes.
Una vez hecho eso se divide en 4 partes iguales la línea vertical inferior dentro del círculo, para tomar otras dos líneas guías de manera horizontal como muestro en la siguiente imagen:
Al tener estas nuevas líneas guías, se toma la más cercana al centro y se divide en 4 partes iguales de cada lado.
Una vez divida la línea, se toman los espacios más cercanos al centro y al borde del círculo para hacer 4 nuevas líneas guías verticales.
Hacer esto nos permite ubicar de manera simétrica los ojos de nuestro querido Tanjiro, que si bien recuerdan, fue en este paso que me equivoqué al hacerlos muy cercanos, resultando un aspecto deprimente y totalmente diferente.
Aunque sea un poco fastidioso hacer estas líneas antes de trabajar, por ahora y por la poca experiencia que tengo dibujando, prefiero tomarme unos minutos para visualizar dónde quedaran ubicadas las partes del rostro.
Esta simple técnica me gusta mucho y es lo que más me agrada de las explicaciones del YouTuber GamoArt, porque lo explica detalladamente y si yo puedo hacerlo tu también puedes lograrlo.
Y bueno volviendo a mi paso a paso, pueden notar en la foto anterior que empiezo a detallar las pestañas superiores e inferiores de Tanjiro de manera bastante sencilla.
Ya luego le agrego las pupilas, lo más simétricas posible. Y bueno el ojo de Tanjiro al igual que los demás personajes, se suele caracterizar por ser semi octagonal, pero en esta ocasión me salió más ovalada que octagonal 🤣 y se veía bien, así que lo dejé así.
Después le dibujé sus cejas muy finamente indicando molestia en la mirada. A su vez agregué los detalles del párpado.
En este paso le agregué la nariz con sus orificios y una pequeña sombra lateral. Nótese que para ubicarla de manera simétrica, dibujé líneas guía nuevamente en el inicio de cada ceja de Tanjiro.
En este paso me dispuse a dividir la línea guía superior vertical en 4 partes iguales para dibujar nuevamente otra línea guía horizontal que me permitirá delimitar la frente de Tanjiro.
De esta manera pude delimitar el rostro de Tanjiro con el inicio de su cabello y su característica cicatriz a un lado de su rostro.
Después esbocé el contorno de su cara dibujando una línea guía más abajo. Esta parte si la hice al ojo por ciento, sin tomar en cuenta medidas, pero en mi caso fue más porque me vi obligada a aplicar un método force, de la forma que explicó GamoArt no pude hacerlo.
Aquí como ven, le agregué la boca y la sombra debajo de su boca, tomando de línea guía la distancia entre los lagrimales de Tanjiro.
Luego tocó empezar a hacerle sus mechones de cabello en los lados del rostro agregando a su vez las orejas con sus respectivos aretes hanafuda.
Luego hice un semi círculo en la parte superior para guiarme hasta dónde llegaría el cabello de nuestro personaje favorito. También agregué algunos mechones aquí y allá.
En esta etapa se podría decir que Tanjiro está listo para ser resaltado en negro pero aún le faltan algunos detalles.
En esta etapa su cabello si está listo pero aún me falta agregar su torso (este siguiente paso debí haberlo aplicado con Zenitsu).
Una vez esbozado su torso, nuestro héroe Tanjiro está listo para ser resaltado con marcador negro punta fina, quedando como resultado el siguiente:
Y ahora sí, Tanjiro está listo para ser coloreado. Cabe destacar que para esta etapa GamoArt quiso salirse de lo usual y lo coloreó usando tonos grises y rojos. Yo por mi parte quise ser más tradicional, así que este fue mi resultado:
𝐑𝐞𝐬𝐮𝐥𝐭𝐚𝐝𝐨 𝐅𝐢𝐧𝐚𝐥
A mí me encantó cómo quedó. Este para mí, si es Tanjiro el original y me siento orgullosa de mi dibujo y su acabado. ¿A ustedes qué les pareció? ¿Les gustó? Déjenme saber en los comentarios sus opiniones! con gusto las voy a leer! Hasta la próxima! 💚
𝐕𝐢𝐝𝐞𝐨 𝐓𝐮𝐭𝐨𝐫𝐢𝐚𝐥 𝐆𝐮í𝐚

| 𝐄𝐥𝐞𝐦𝐞𝐧𝐭𝐨𝐬 (𝐄𝐥𝐞𝐦𝐞𝐧𝐭𝐬) | 𝐇𝐞𝐫𝐫𝐚𝐦𝐢𝐞𝐧𝐭𝐚𝐬 (𝐓𝐨𝐨𝐥𝐬) |
|---|---|
| Las Fotos Utilizadas a lo largo del Post son de mi galería (Photos used throughout the post are from my gallery) | Cámara del Teléfono Redmi Note 9A (Redmi Note 9A Phone Camera) |
| Contenido y Texto Original de mi Autoría (Content and Original Text of my Authorship) | DeepL |
| CANVA | |
| Grammarly |
Posted Using INLEO
omg bebé Tanjiro!! 😭💗 Hermoso
Such a lovely Tanjiro drawing!!! <3
Great job! ^^
Soy fan de este anime y tu dibubo me parece fenomenal 👏🏻👏🏻👏🏻
¡Felicitaciones!
Estás participando para optar a la mención especial que se efectuará el domingo 6 de abril del 2025 a las 8:00 pm (hora de Venezuela), gracias a la cual el autor del artículo seleccionado recibirá la cantidad de 1 HIVE transferida a su cuenta.
¡También has recibido 1 ENTROKEN! El token del PROYECTO ENTROPÍA impulsado por la plataforma Steem-Engine.
1. Invierte en el PROYECTO ENTROPÍA y recibe ganancias semanalmente. Entra aquí para más información.
2. Contáctanos en Discord: https://discord.gg/hkCjFeb
3. Suscríbete a nuestra COMUNIDAD y apoya al trail de @Entropia y así podrás ganar recompensas de curación de forma automática. Entra aquí para más información sobre nuestro trail.
4. Visita nuestro canal de Youtube.
Atentamente
El equipo de curación del PROYECTO ENTROPÍA