¡Hazlo tú mismo! Colgante de paletas para decorar. | DIY! Popsicle stick pendant for decoration.
Felíz martes amigos de la comunidad Hive Diy, espero se encuentren bien, quiero desearles una semana exitosa, llena de bendiciones y cosas buenas, empieza la semana con buena energía siendo positivos en todo momento para alcanzar los objetivos, por otra parte hoy me encuentro con ustedes para mostrarles una nueva idea creativa.
Happy Tuesday, friends of the Hive DIY community. I hope you are all well. I want to wish you a successful week, full of blessings and good things. Start the week with good energy, being positive at all times to achieve your goals. I'm also here today to share with you a new creative idea.
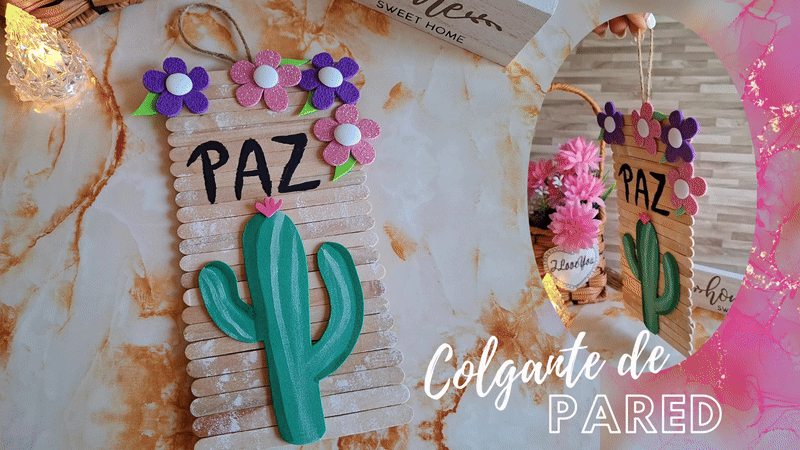
En esta oportunidad les comparto una idea creativa para realizar en casa, se trata de un colgante de pared elaborada con paletas, y además utilizando foami para complementar la decoración, esta idea surgió de esta imagen de pinterest colgante en ésta idea se utiliza una tablita de madera pero en vista de no poseer este material utilicé paletas de helado, lo bueno es que es económico de realizar. Así que comencemos.
This time I share with you a creative idea to do at home, it is a wall hanging made with pallets, and also using foam to complement the decoration, this idea came from this image on Pinterest pendant in this idea a wooden board is used but since I do not have this material I used ice cream sticks, the good thing is that it is economical to do. So let's begin.


| Materiales | Materials |
|---|---|
| Paletas de helado | ice cream popsicles |
| Foami rosa y morado | Pink and purple foami |
| Foami verde | Green foam |
| Pintura, pincel | Paint, brush |
| Tijera | Scissors |
| Silicón | Silicone |
| Cartón | Cardboard |

Paso a paso / Step by step
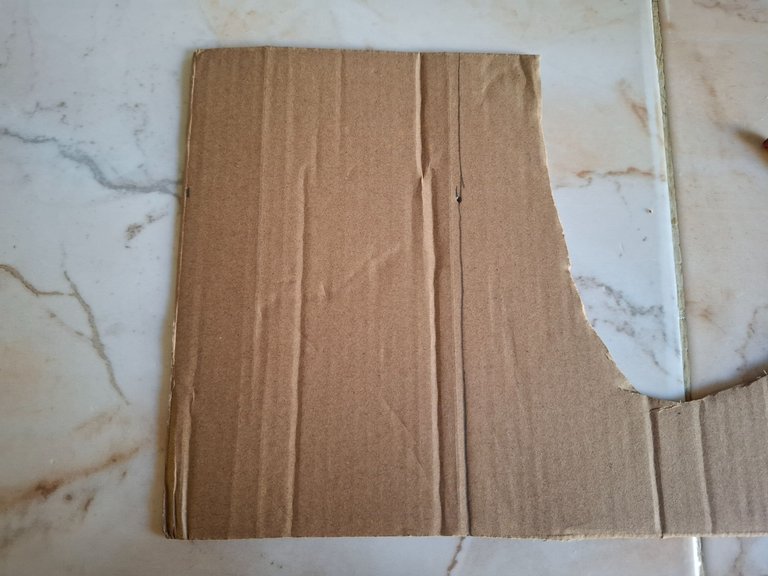
El primer paso que voy a realizar será cortar el cartón, con una medida de 22 x 10 cm, como me faltaba una parte lo que hice fue unirlas con silicón.
The first step I'm going to take is to cut the cardboard, measuring 22 x 10 cm. As I was missing a part, I joined them together with silicone.
 |  |
|---|
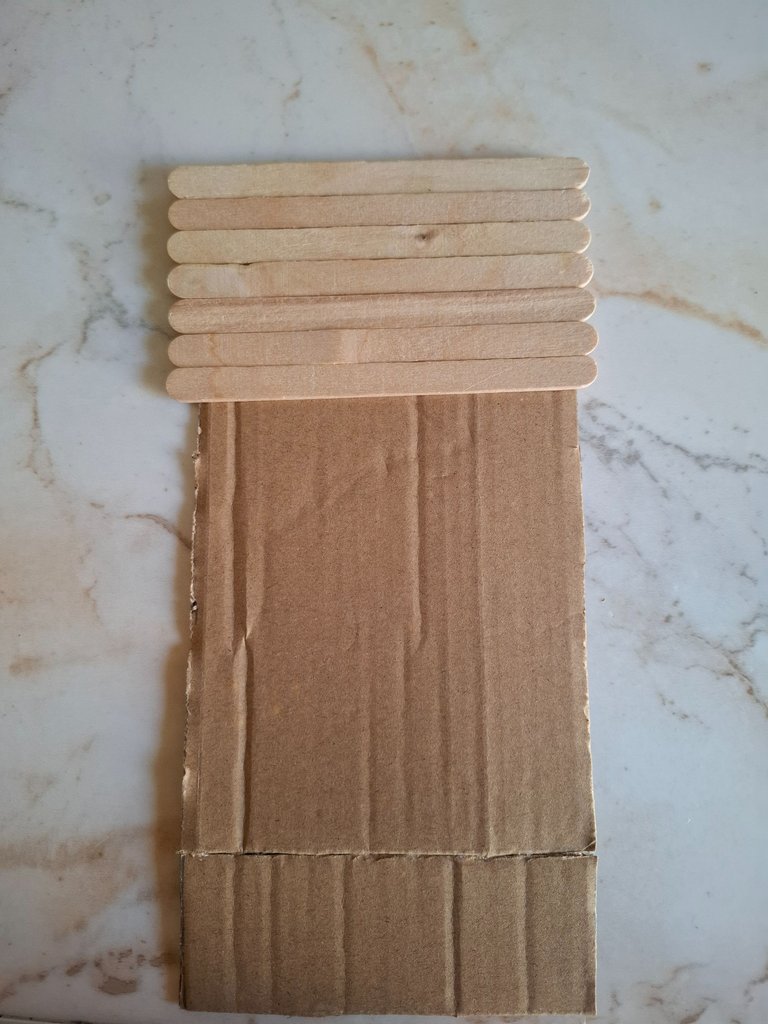
Ahora voy a seleccionar las paletas ya que algunas vienen de forma irregular y no encajan correctamente, voy a comenzar a pegar sobre el cartón con silicón caliente, en total utilicé 23 paletas.
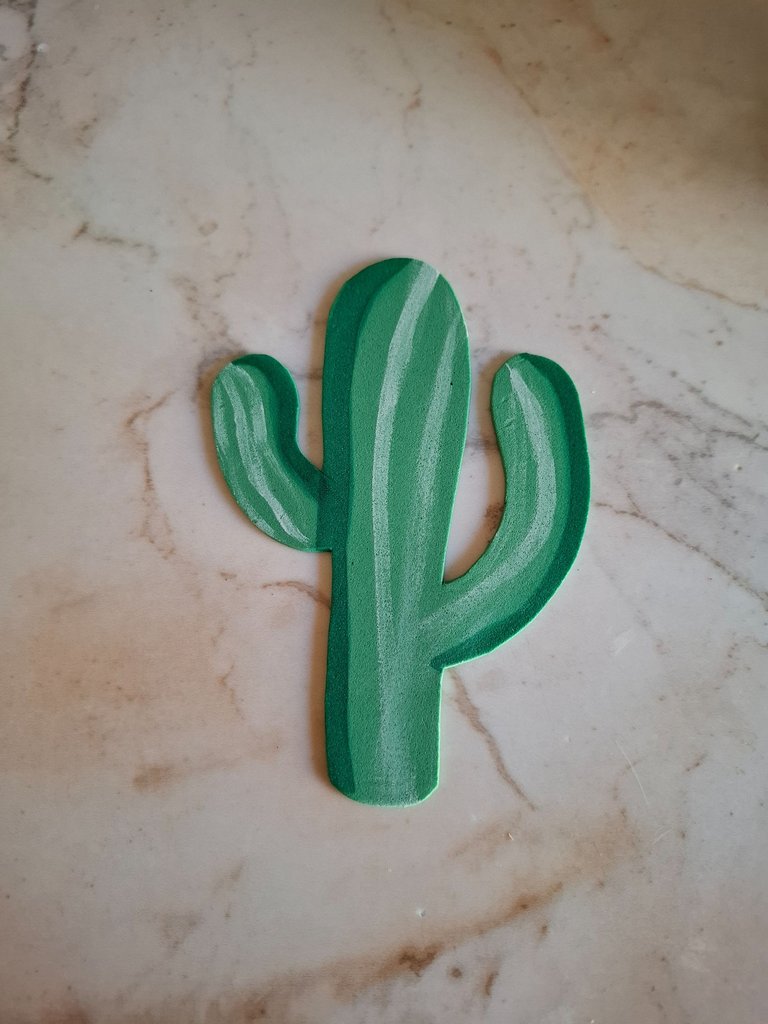
Ahora voy realizar el molde en forma de flor y cactus para la decoración, para el cactus en foami verde oscuro aplicamos marcador del mismo color en el borde, y con in pincel realizamos líneas sobre el foami.
Now I'm going to select the popsicles, as some are irregularly shaped and don't fit properly. I'm going to start gluing them onto the cardboard with hot glue. I used 23 popsicles in total.
Now I'm going to make the flower and cactus-shaped mold for decoration. For the cactus, we'll use dark green foam with a marker of the same color on the edge, and use a brush to draw lines on the foam.
 |  |
|---|
 |  |
|---|
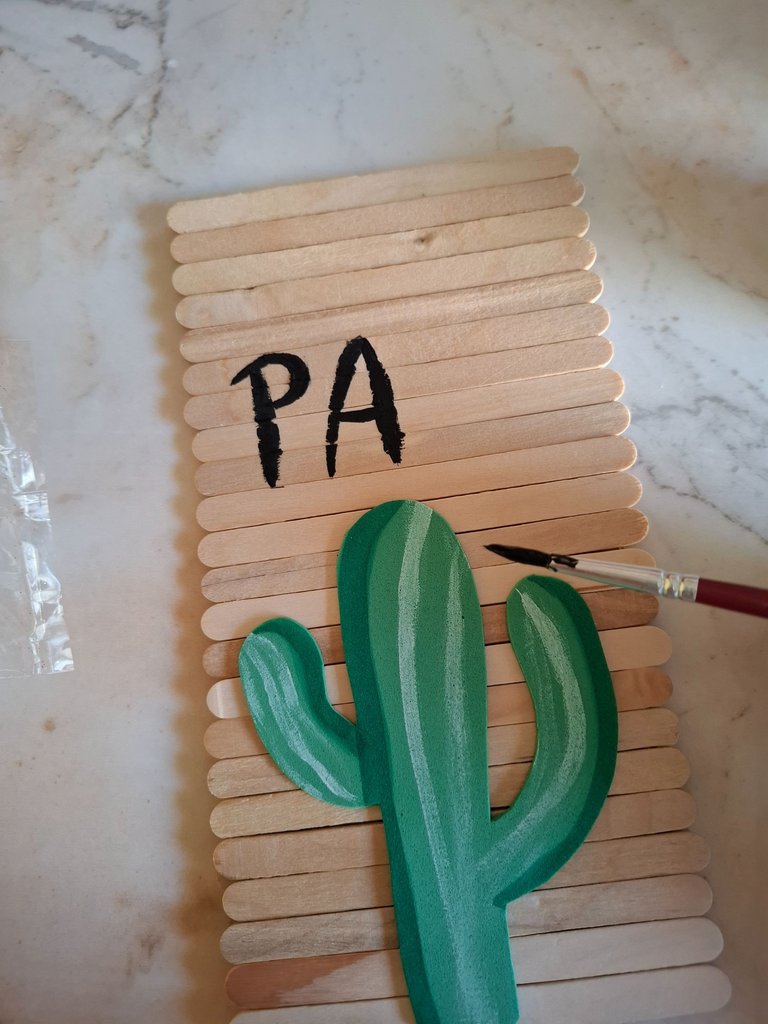
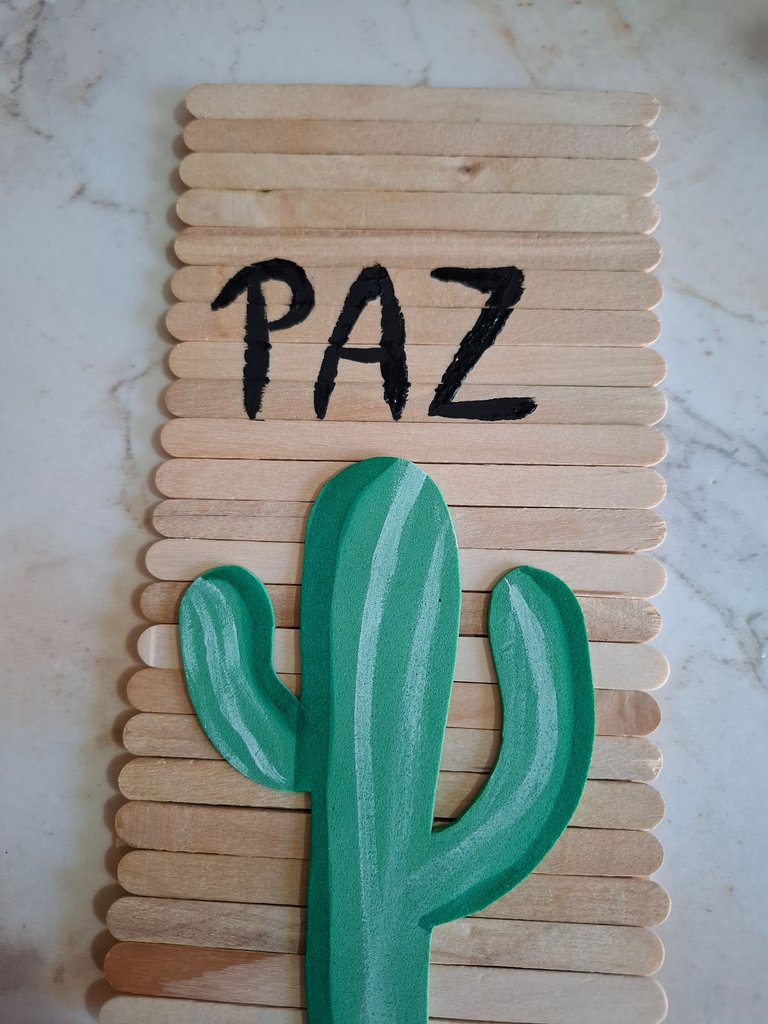
Voy a realizar las letras con pintura negra, coloqué la palabra "Paz" esta pintura de color negro ya se estaba secando y se veía grumosa, me costó un poco realizar las letras aunque no soy experta traté de darle la mejor forma posible.
I'm going to make the letters with black paint. I placed the word "Peace." This black paint was already drying and looked lumpy. It took me a while to make the letters, although I'm not an expert, so I tried to give it the best shape possible.
 |  |
|---|
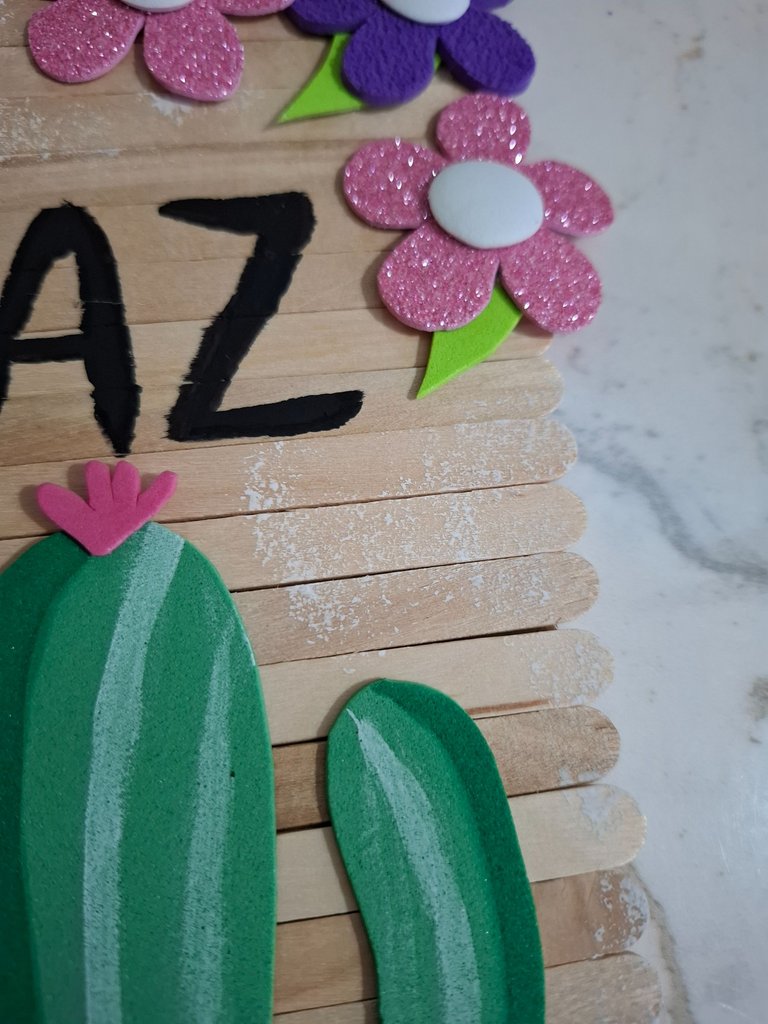
Pegamos y ahora voy a continuar con las flores, realicé dos flores de color rosa escarchado, y dos color morado con foami texturizado tipo paño, para el centro foami blanco el cual voy a termoformar con la plancha. Y las hojas en color verde manzana.
Now I'll glue them together, and now I'll continue with the flowers. I made two frosted pink flowers and two purple ones using textured foam. For the center, I used white foam, which I'll heat-form with an iron. And the leaves are apple green.
 |  |
|---|
 |  |
|---|
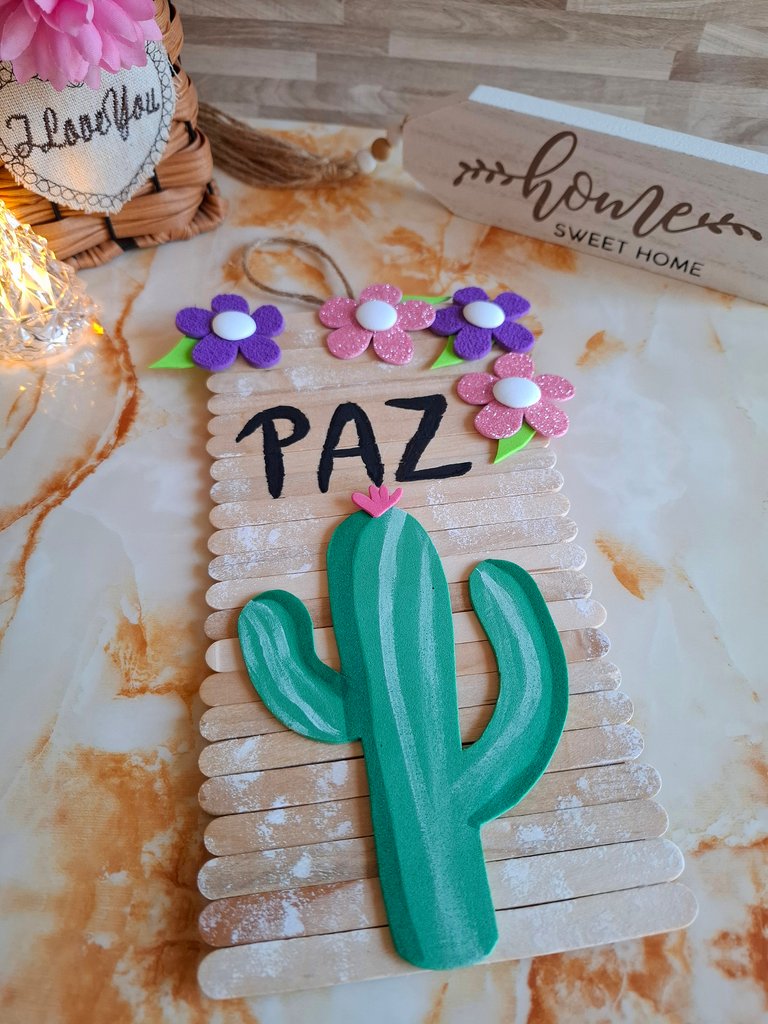
Cómo último paso voy a pegar las flores y con un algodón voy a tomar un poco de pintura blanca y las esparcimos sobre las paletas, en la parte trasera ubiqué mecatillo y listo.
As a final step, I'm going to glue the flowers and with a cotton ball I'm going to take a little white paint and spread them on the palettes, on the back I placed some string and that's it.
 |  |
|---|
De esta forma terminé este bello colgante para pared, espero les haya gustado el resultado, muchas gracias por visitar mi publicación nos vemos en una próxima oportunidad con más ideas creativas.
This is how I finished this beautiful wall hanging. I hope you liked the result. Thank you very much for visiting my post. See you next time with more creative ideas.
Más del resultado final:
More of the final result:


Contenido original. - original content.
Los separadores y banner fueron realizados en Canva. - The dividers and banner were made in Canva.
Fotografías tomadas con mi Samsung A55. - Photographs taken with my Samsung A55.
Gif creado desde Giphy / Gif created from Giphy
Traducción de: Google traductor - Translation of: Google translator.
Posted Using INLEO
¡Felicidades! Esta publicación obtuvo upvote y fue compartido por @la-colmena, un proyecto de Curación Manual para la comunidad hispana de Hive que cuenta con el respaldo de @curie.
Si te gusta el trabajo que hacemos, te invitamos a darle tu voto a este comentario y a votar como testigo por La Colmena.
Si quieres saber más sobre nuestro proyecto, te invitamos a acompañarnos en nuestro servidor de Discord.
Hermoso colgante. Gracias por compartir tu trabajo amiga.
Feliz tarde.
Una hermosa decoración para nuestros espacios favoritos💖 me gustó mucho esta idea☺️