🩷 Mi Regalo para Mamá con Mucho Cariño en su Día 🩷 \\ 🩷 My Loving Gift for Mom on Her Day 🩷 by @lorimusic
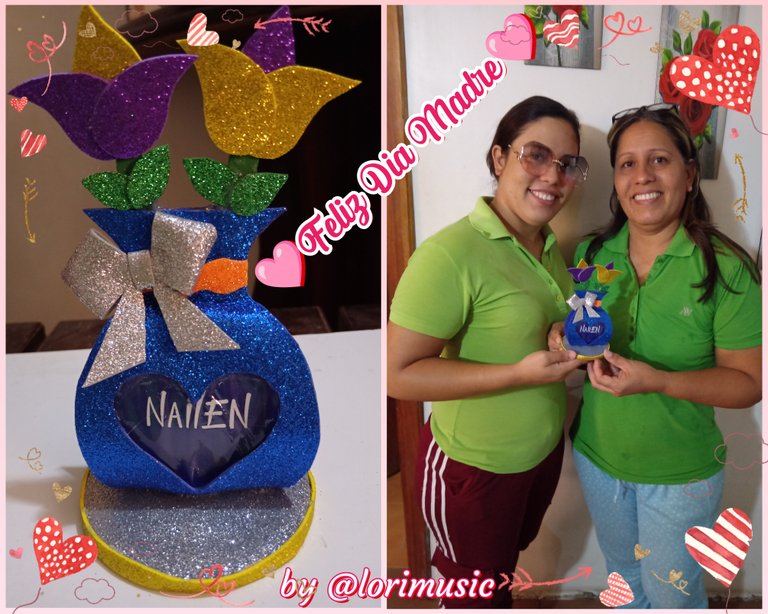
Holaaaa! Apreciados amigos de #hivediy, Feliz Inicio de Semana para todo. Reciban todos un Cordial y Grato Saludos de mi parte como todos sabemos el día de ayer fue el día de las madres, un día muy especial para todas las madres del mundo pero para mi no es el día más importante porque para mi el día de las madres son todos los días de la vida mientras las tengamos siempre a nuestro lado, este ser Maravilloso Amado por todos sus hijos, como no Querer, Adorar y Amar a este ser humano que nos dio la vida y nos trajo al mundo durante 9 meses en su barriga, es por eso que el día de las madres los celebró siempre durante los 365 día del año. Solo que este día de las madres le hacemos presencia para recordar que existe una persona que te Valora Inmensamente y te Quiere con todos su Corazon.
El día de ayer le hice un Lindo Regalo a mi mamita, elaborado por mis propias manos, muy creativo y llego con Mucho Cariño para ella. Espero que mi post sea de total Agrado para todos ustedes Excelente Comunidad de #hivediy.
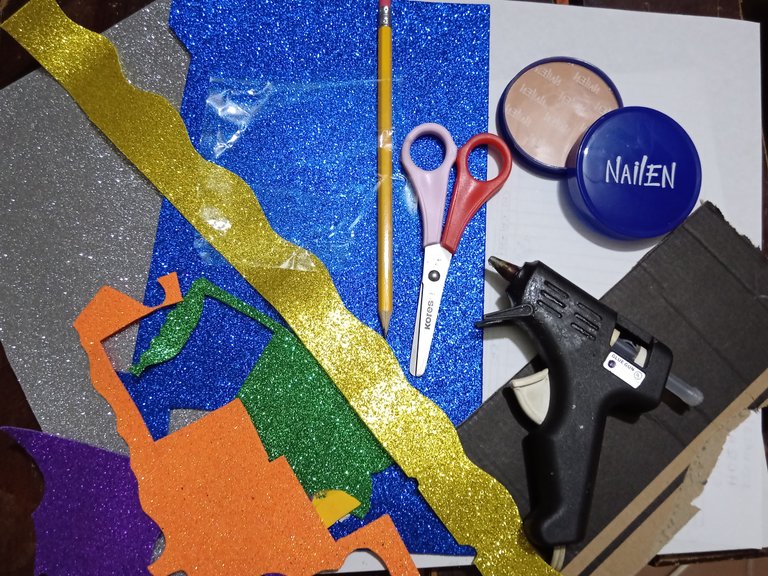
Los materiales necesarios son:
- Silicon en Barra
- Papel Celofan
- Polvo de Cara
- Carton
- Foami
- Tijera
- Lapiz
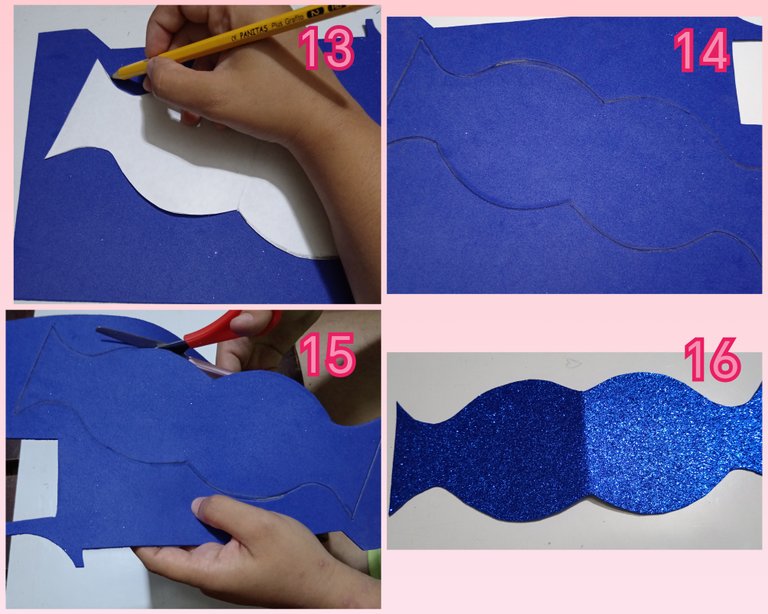
Paso 1
Cómo primer paso, comenzaremos dibujando nuestro molde en una hoja de maquina (reciclaje) luego cortamos nuestro molde en este caso es un mini florero.

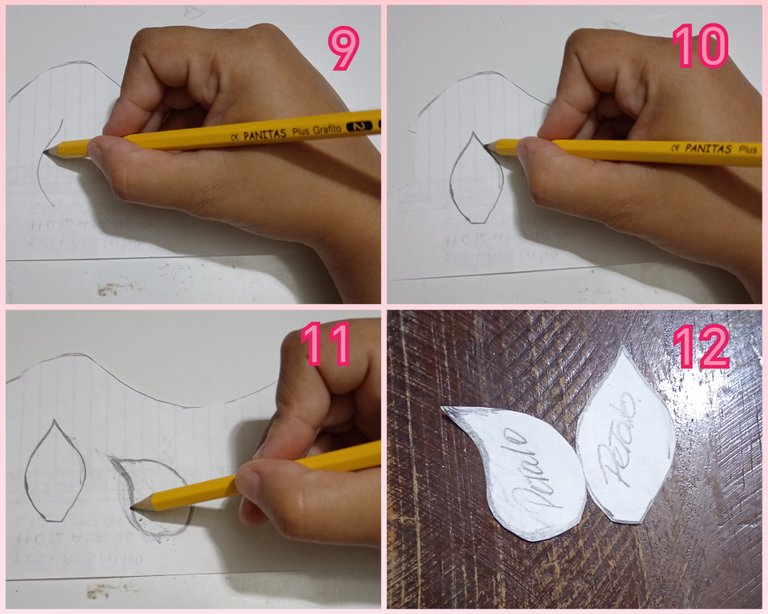
Paso 2
Acá volvemos a repetir el paso anterior pero en esta oportunidad dibujaremos unos pétalos de rosa y cortamos la figura.
Paso 3
Seguimos, dibujando en el foami nuestro molde de florero y cortamos el mismo.
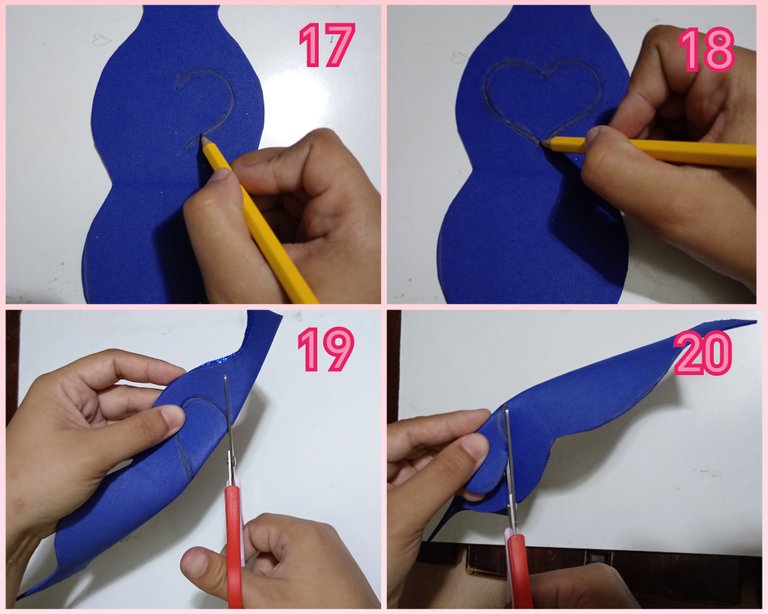
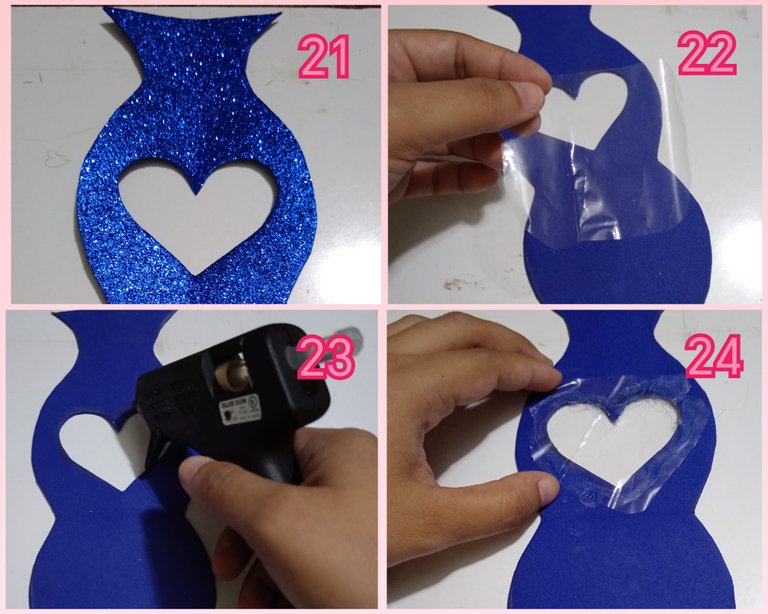
Paso 4
Una vez ya listo el forero en el foami, dibujaremos dentro del mismo un corazón y cortamos, seguidamente procedemos a pegar un pedacito de papel celofan trasparente en el corazón de esta manera.
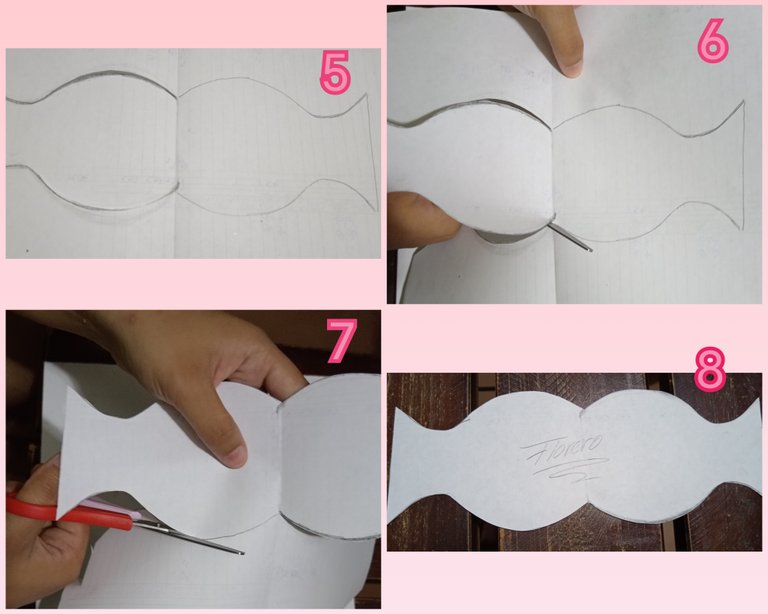
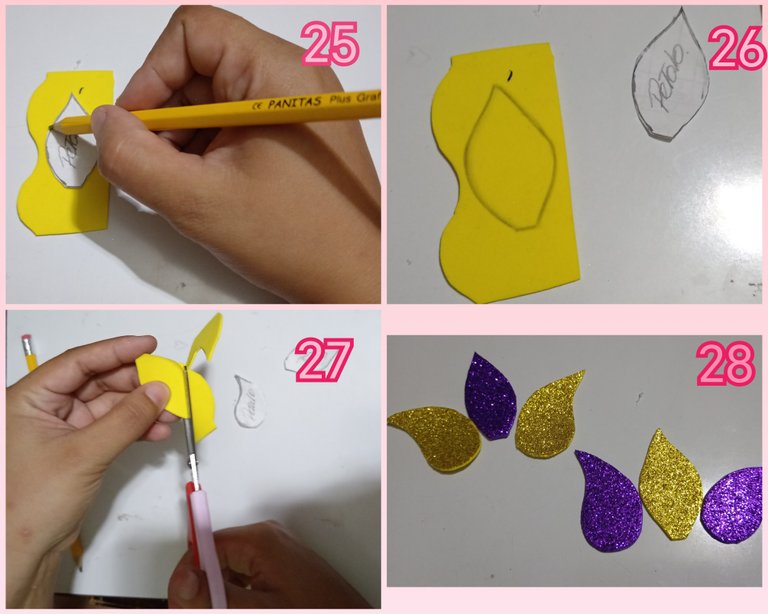
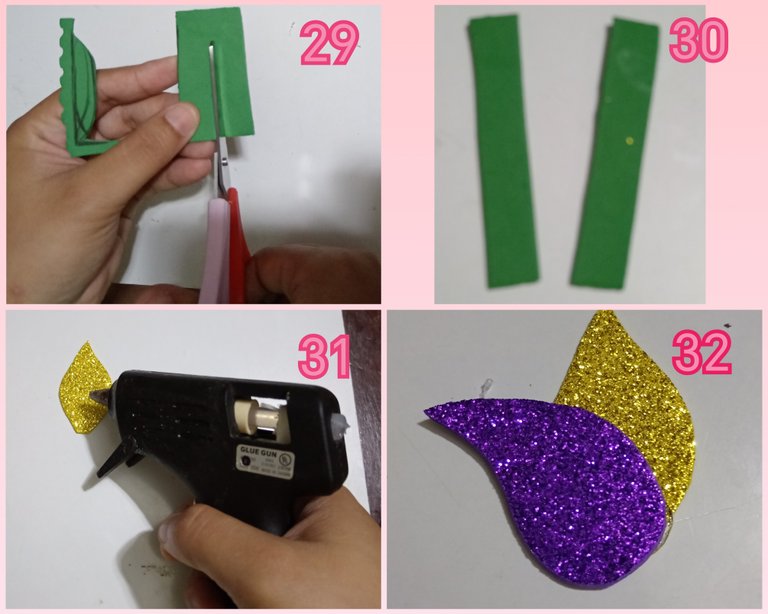
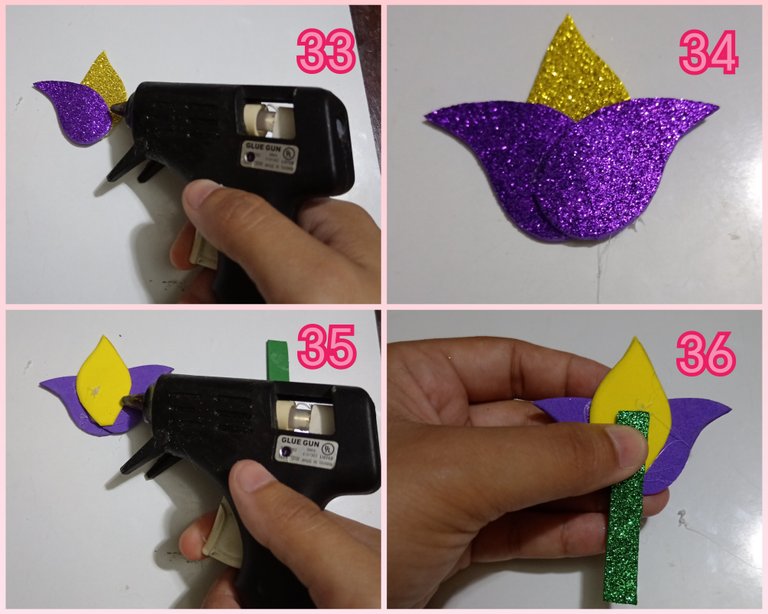
Paso 5
Este será nuestro paso más largo, debido a que aquí comenzaremos haciendo las rosas, debemos marcar el molde de los pétalos en los foami de colores y cortar hasta pegar las piezas para dar forma.
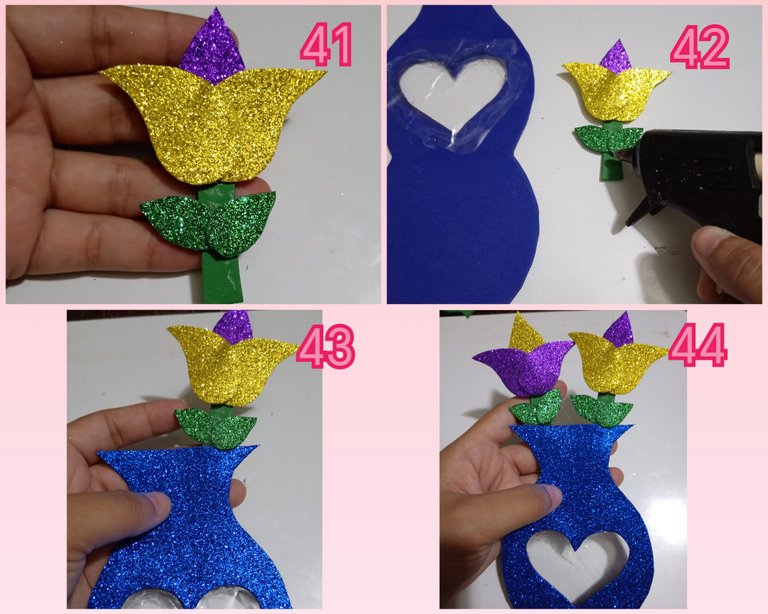
Paso 6
Ya pegada las rosas en el florero, doblaremos la mitad del florero uniendolo cara a cara.
Paso 7
Con el cartón dibujaremos un círculo y haremos lo mismo con el foami donde sacaremos dos uno será para la parte inferior y otro para la parte superior del círculo de cartón y por la orilla le coloque una pequeña cinta de foami, esto será la base de nuestro florero.
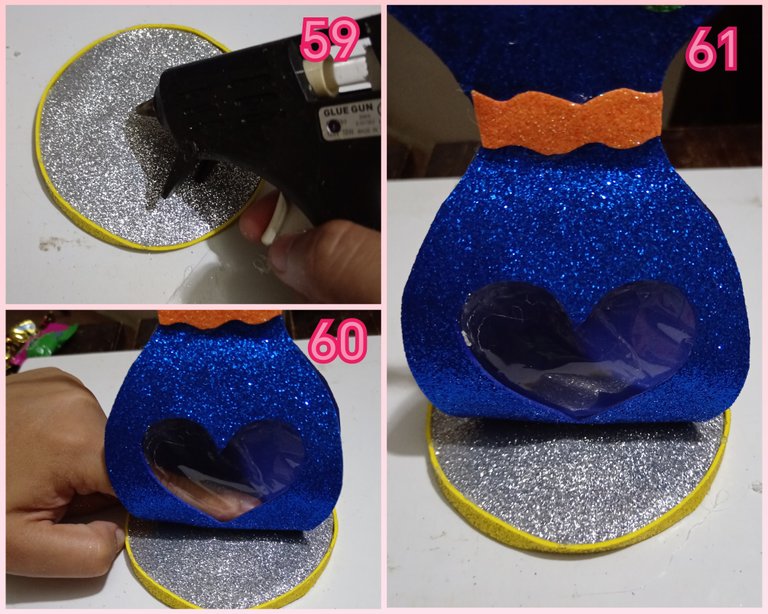
Paso 8
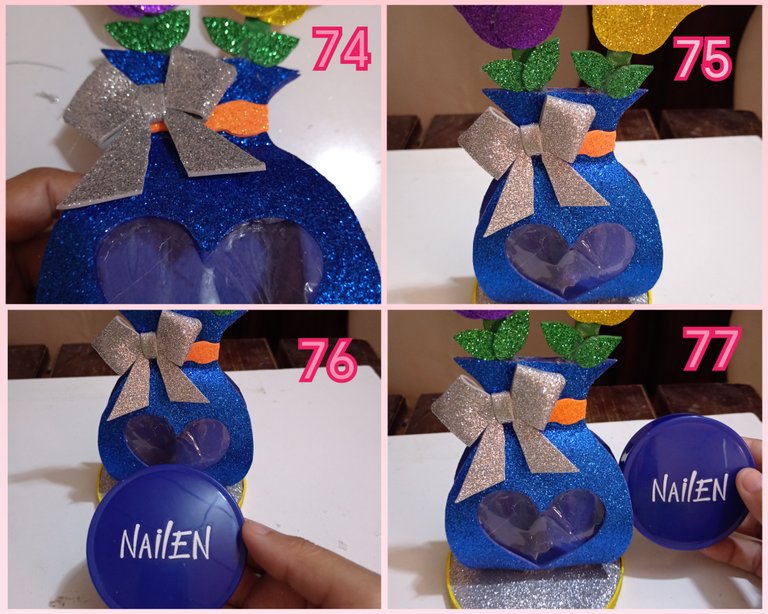
Ya esta agarrando forma nuestro presente para Mamá, procedí colocamdole unos detallitos a mi florero y luego procedí a pegarla en la base.
Paso 9
Como toque final en cuanto a los detalle, decidí hacerla también un lazo con foami.
Paso 10
En este último paso, casi para finalizar le colocarlas dentro del florero lo que quieras obsequiar a mamá bien se dulces, caramelos, chocolates en mi caso le obsequie un polvo de cara, lo tenía guardado desde mucho tiempo y el momento llego.
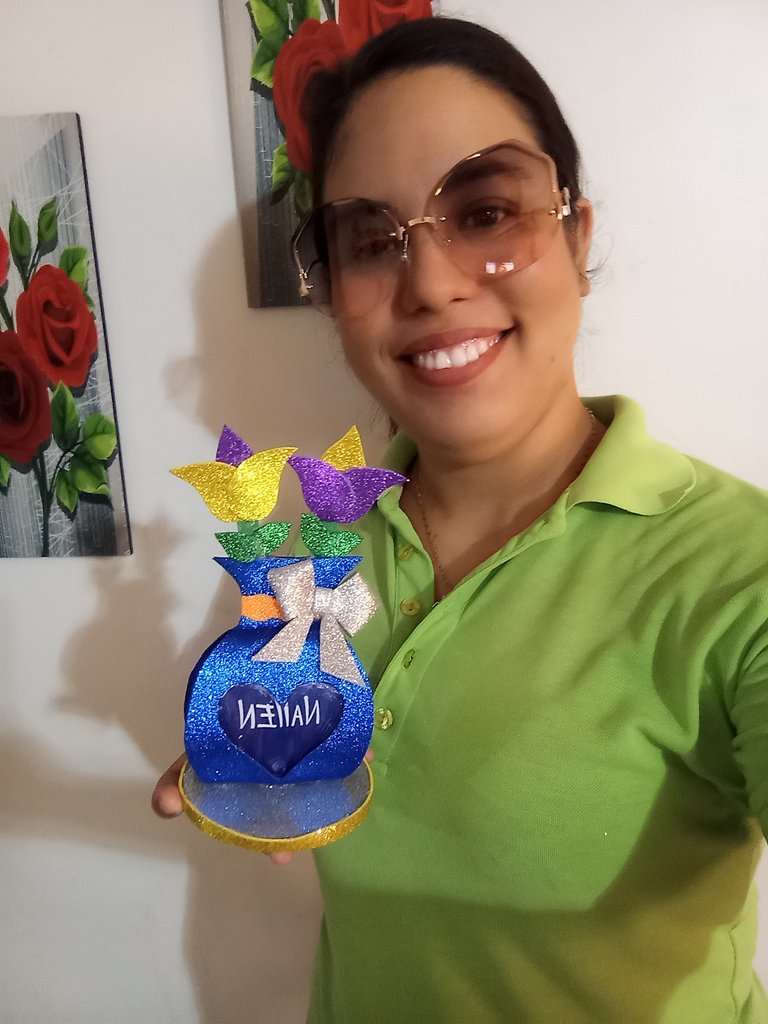
Ya finalizado estos pasos, este será el resultado de mi presentación.


Helloooo! Dear friends of #hivediy, Happy New Week to everyone. Receive my warm and sweet greetings from me. As we all know, yesterday was Mother's Day, a very special day for all the mothers in the world, but for me it's not the most important day because, for me, Mother's Day is every day of our lives, as long as we always have her by our side. This wonderful being, loved by all her children, is how we can not want, adore, and love this human being who gave us life and carried us into the world for 9 months in her belly. That's why Mother's Day is always celebrated 365 days a year. This Mother's Day, we make her presence known to remember that there is someone who values you immensely and loves you with all her heart.
Yesterday, I gave my mom a beautiful gift, made by my own hands, very creative, and it arrived with much love for her.
I hope my post is of total enjoyment to all of you, Excellent #hivediy Community.
The necessary materials are:
- Silicone Stick
- Cellophane Wrap
- Face Powder
- Cardboard
- Foam
- Scissors
- Pencil

Step 1
As a first step, we will begin by drawing our mold on a machine sheet (recycling) then we cut out our mold in this case it is a mini vase.
Step 2
Here we repeat the previous step but this time we will draw some rose petals and cut out the shape.
Step 3
We continue, drawing our vase mold on the foam and cutting it out.
Step 4
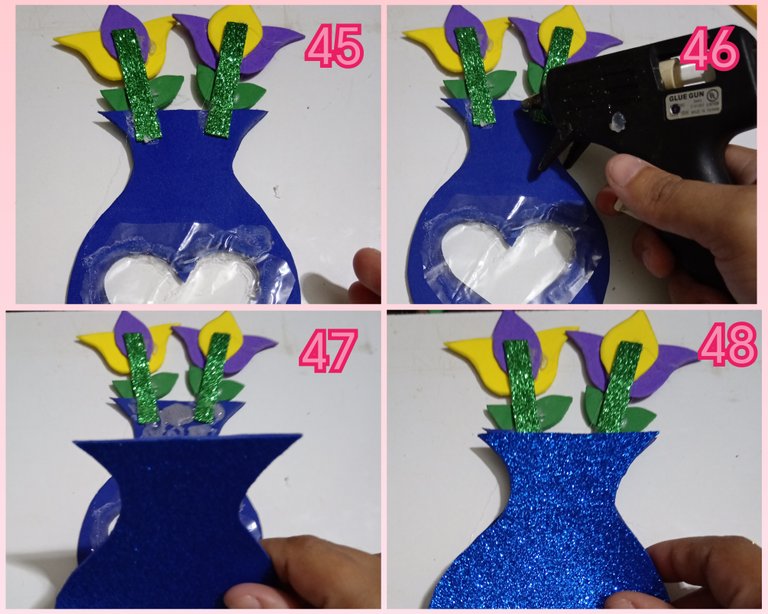
Once the foam insert is ready, draw a heart inside it and cut it out. Then, glue a small piece of transparent cellophane paper onto the heart like this.
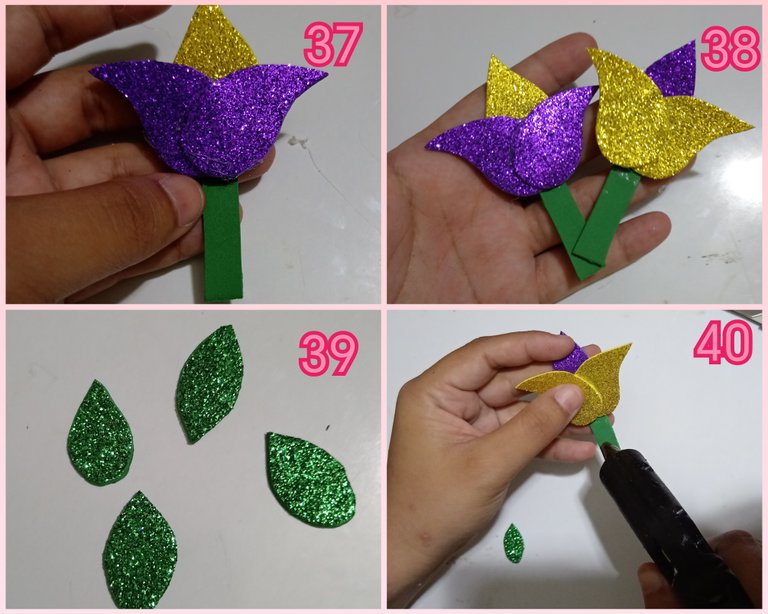
Step 5
This will be our longest step, because here we will begin making the roses, we must mark the petal pattern on the colored foam and cut until we glue the pieces to give shape.
Step 6
Once the roses are glued to the vase, we will fold the half of the vase, joining it face to face.
Step 7
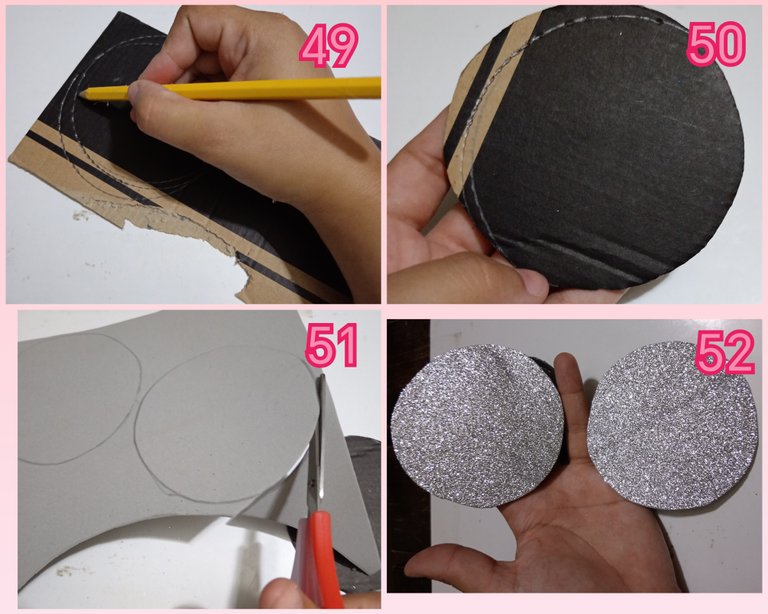
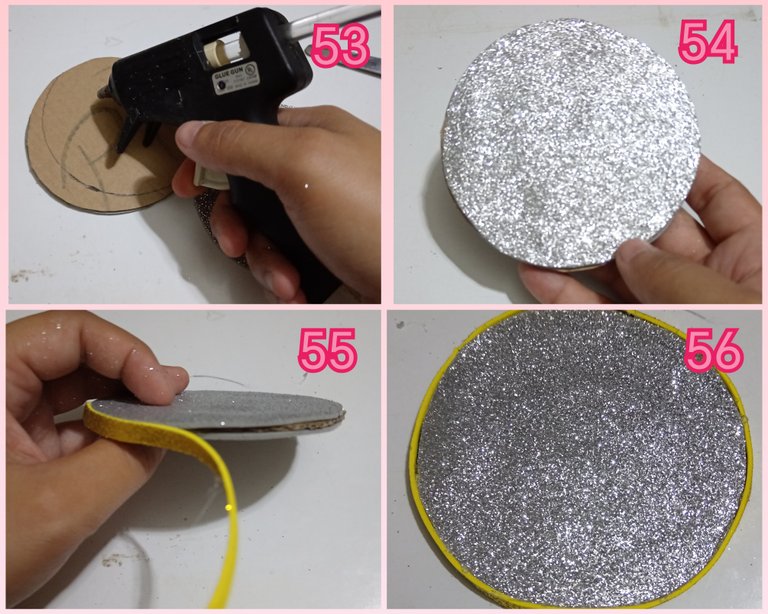
With the cardboard we will draw a circle and do the same with the foam where we will take two, one for the bottom and one for the top of the cardboard circle and along the edge I will place a small foam strip, this will be the base of our vase.
Step 8
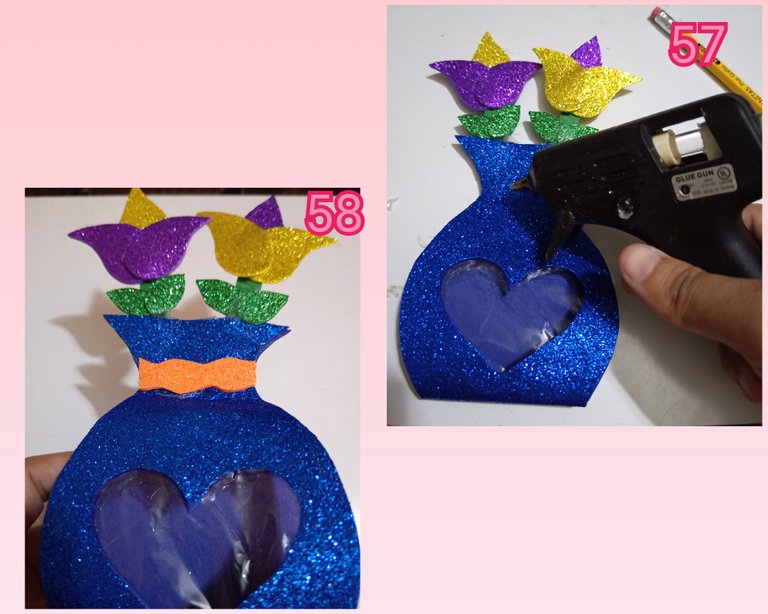
Our present for Mom is already taking shape, I proceeded to add some details to my vase and then I proceeded to glue it to the base.
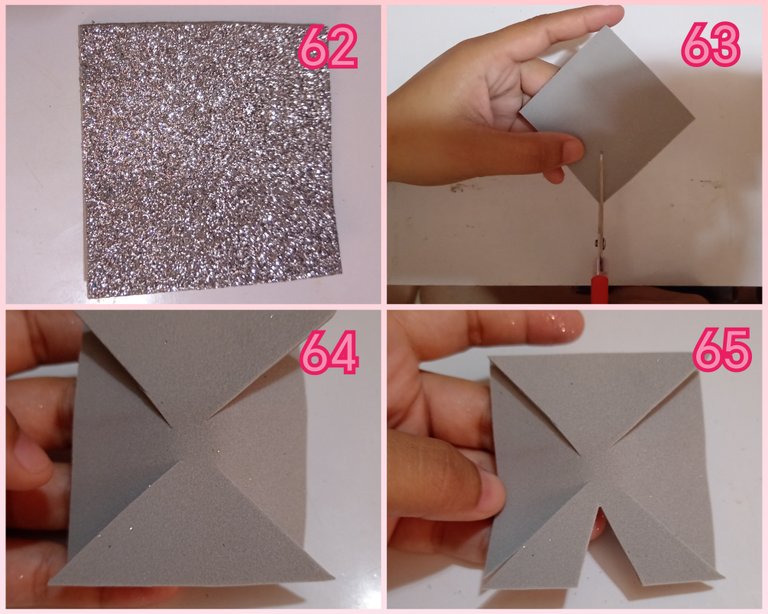
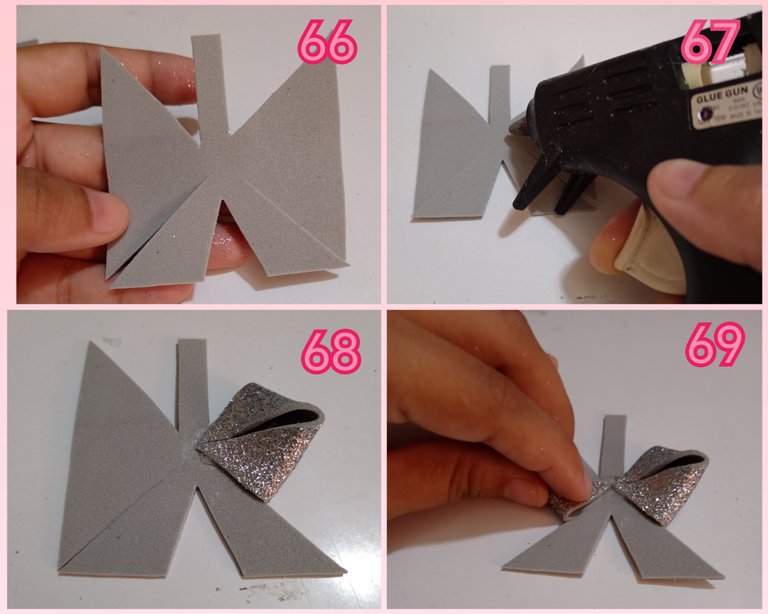
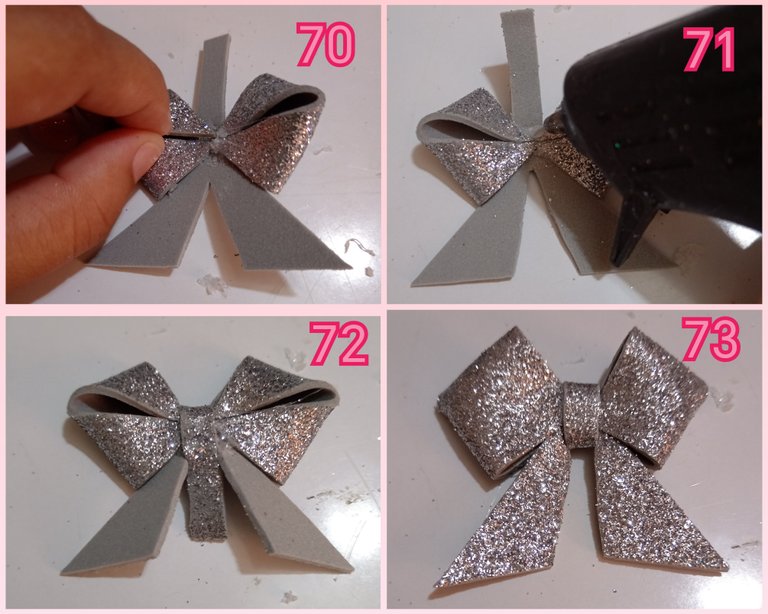
Step 9
As a final touch in terms of details, I decided to also make a bow with foam.
Step 10
In this last step, almost to finish, place whatever you want to give to mom inside the vase, be it sweets, candies, chocolates. In my case, I gave her a face powder, I had it saved for a long time and the moment arrived.
After completing these steps, this will be the result of my presentation.

Espero le haya gustado post, Gracias por pasar y recuerda no dudes en dejar tu comentario.
I hope you liked the post, thanks for stopping by and remember to leave your comment.
Todas las imagenes son de mi autoría y fueron tomadas desde mi telefono movil Honor X8a.
All the images are my own and were taken from my Honor X8a mobile phone.
This is so beautiful, she deserves this and many more. The detailing and colour combination is superb, bravo!
selected by @ibbtammy