How To Fabricate A Backslab Splint For Patient's Use.
How to Fabricate a Backslab Splint For a Patient.
Good day Friends!
Happy new week! I wish us a fantastic week ahead.
A weekend well spent, Weekend gives me the privilege to explore other skills I have other than my profession which is physiotherapy. And since helping people and providing solution to problems that are in my capacity has now become an hobby for me, I Fabricated a nice backslab splint for a patient to use in order to prevent knee buckling for his physiotherapy sessions.
Let me quickly brief us what backslab splint is and it uses. Backslab splint is an orthotic device that can be used to support a weak knee in order to prevent knee buckling while standing. It can also be used to give sustained stretching for any part of the body that's spastic.
To make a backslab splint, you need the following materials.
- Pipe
- Maco
- Hook and loop
- Revetting pin
- Belt/Velcro strap
- Spray paint
- Jig saw and sanda machine
- Evostic gum
- Ring chain
- Soldering iron
- Hammer.
Backslab/posterior slab splint use by physiotherapist in standing their patient is very easy to make. The process of making it is straightforward and include the following.
First of all, get the measurement of the patient that want to use it by measuring the thigh circumference, knee circumference and above ankle circumference since is custom made, then get a pipe of 3inches thickness, 9 feet long. Divide those circumferences by 2 because backslab only cover half of the leg.
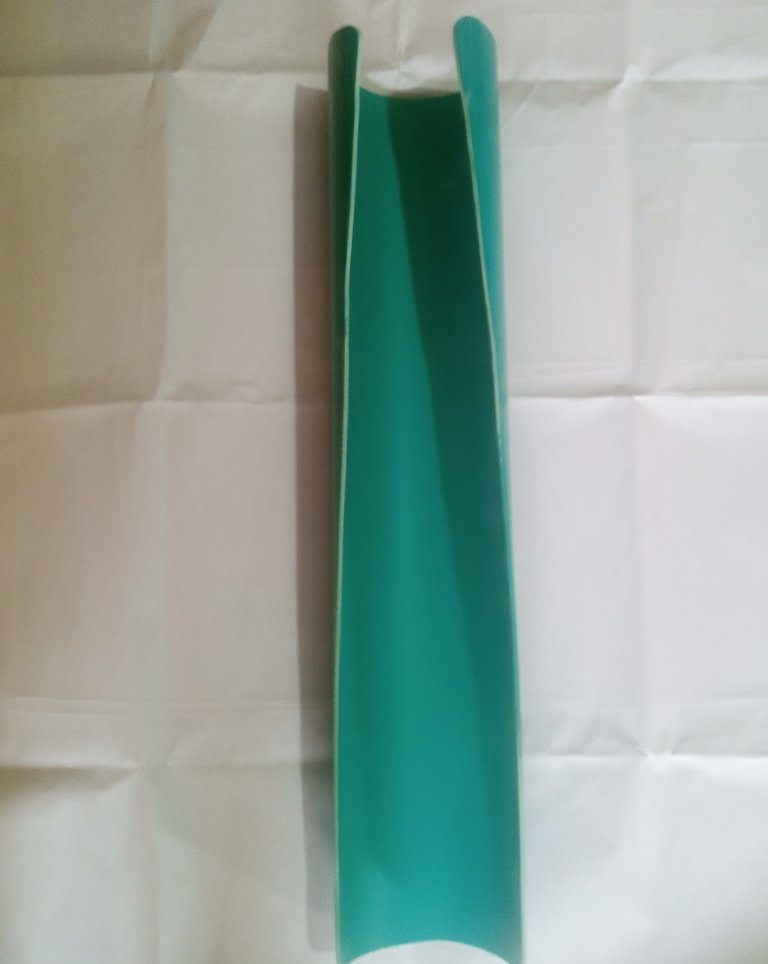
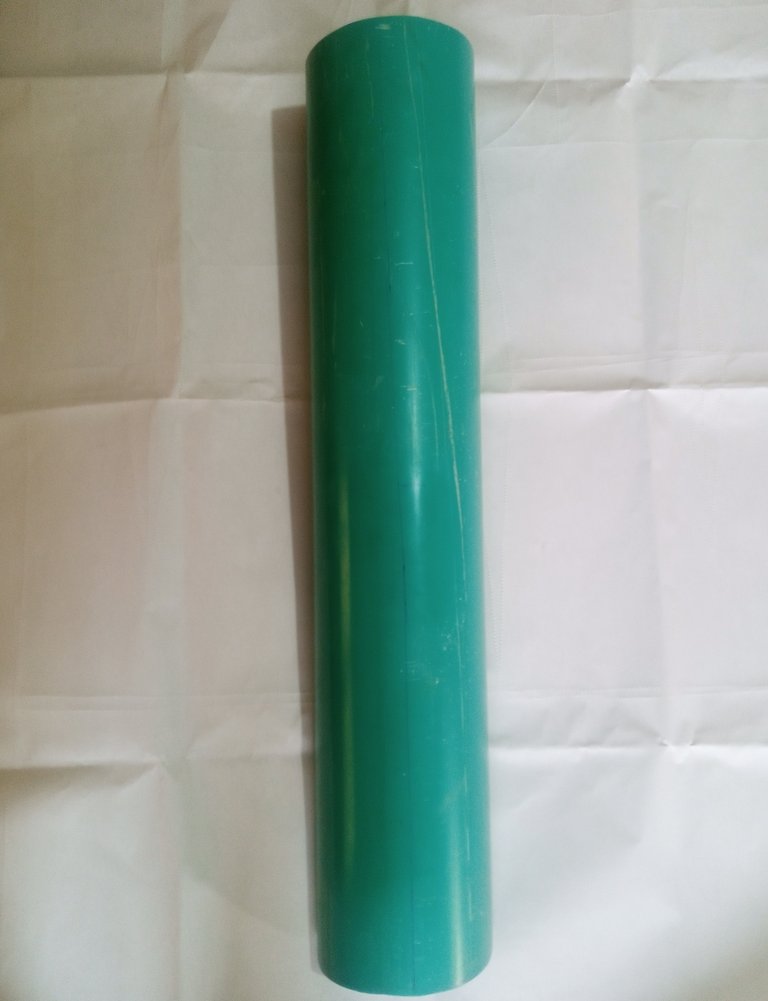
Stage 1: Mark out the divided circumferences on the pipe and use ruler to connect the circumference together in a straight line, then cut it out using jig saw and smooth out the edges of the pipe to have an even edges that can prevent skin irritation/damage.
Picture after molding.
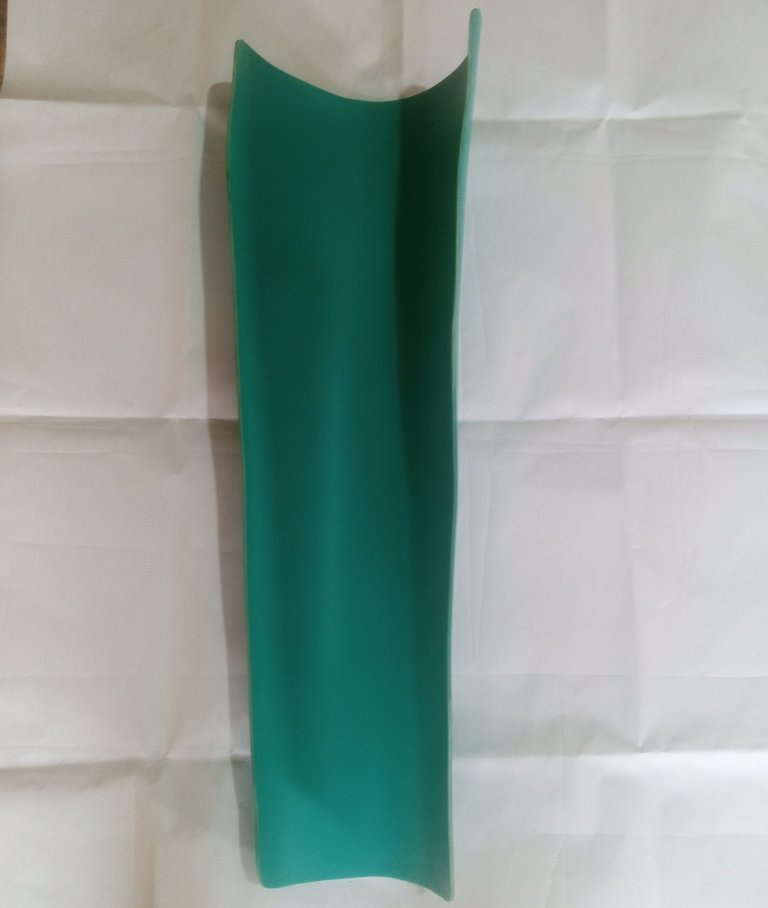
Stage2: Wash the cut out pipe with water, then mold it to your prefer shape on fire. After molding, allow it to cool and then spray it with spray paint of any colors depending on your patient preference.
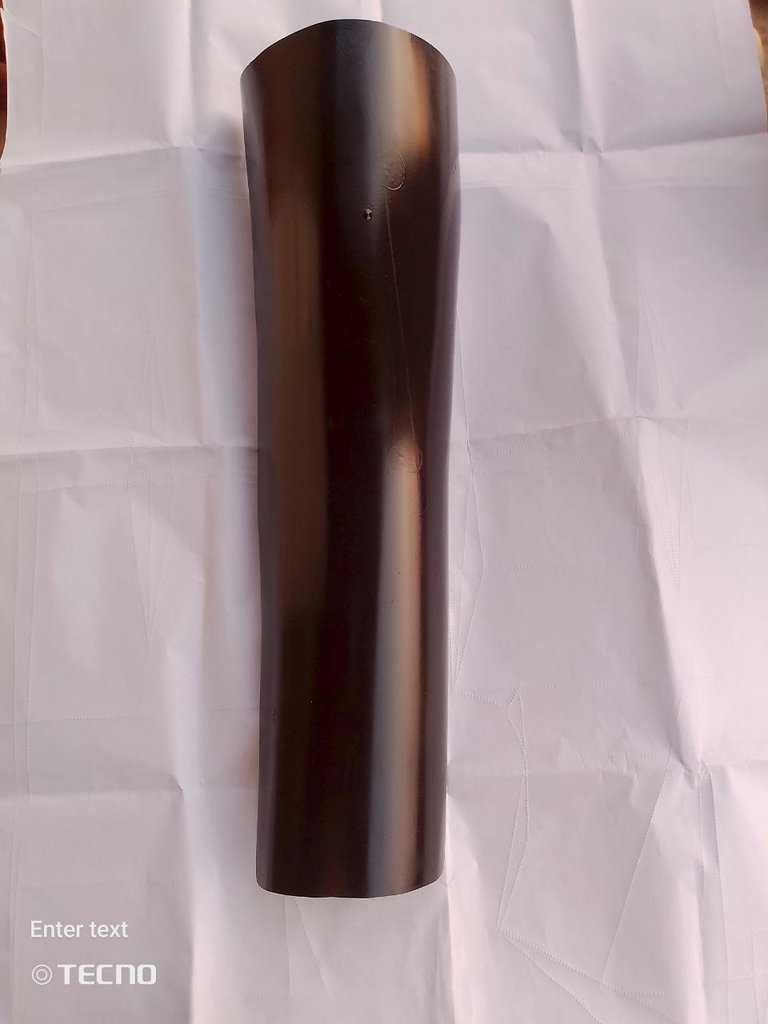
Picture after painting.
Stage3: Next step is to sew the strap,this is use to attach the slab against the leg. So you take the belt/Velcro strap, ring and hook&loop, sew everything together to the size of the slab and the style you wish.
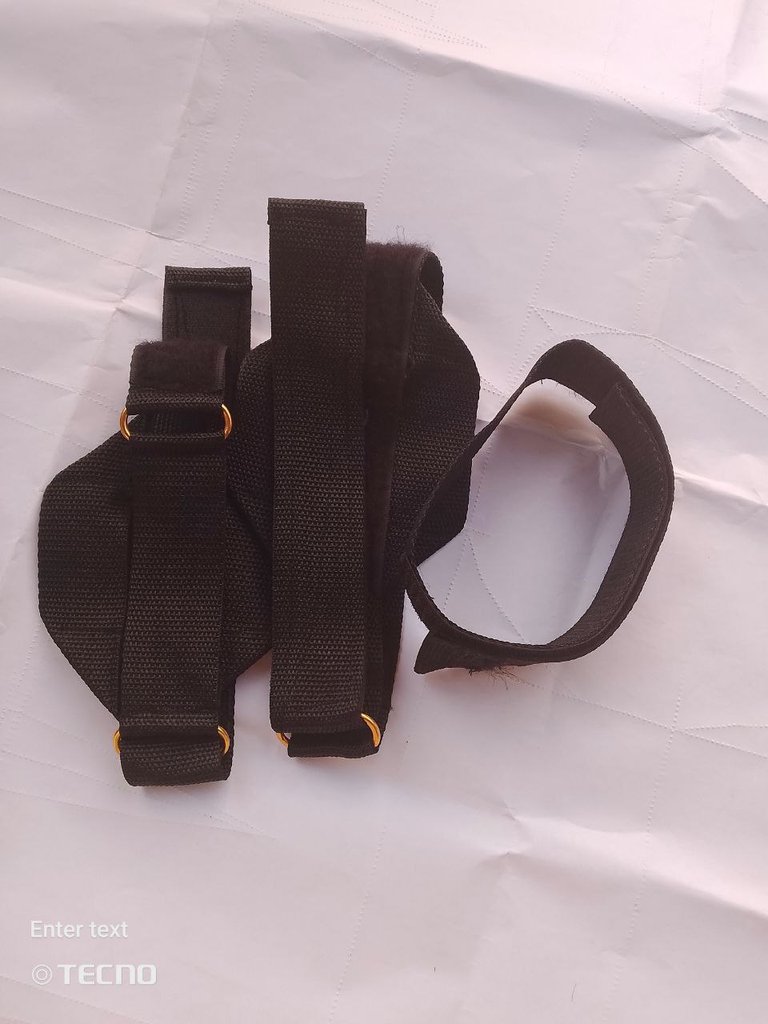
Strap after sewing it
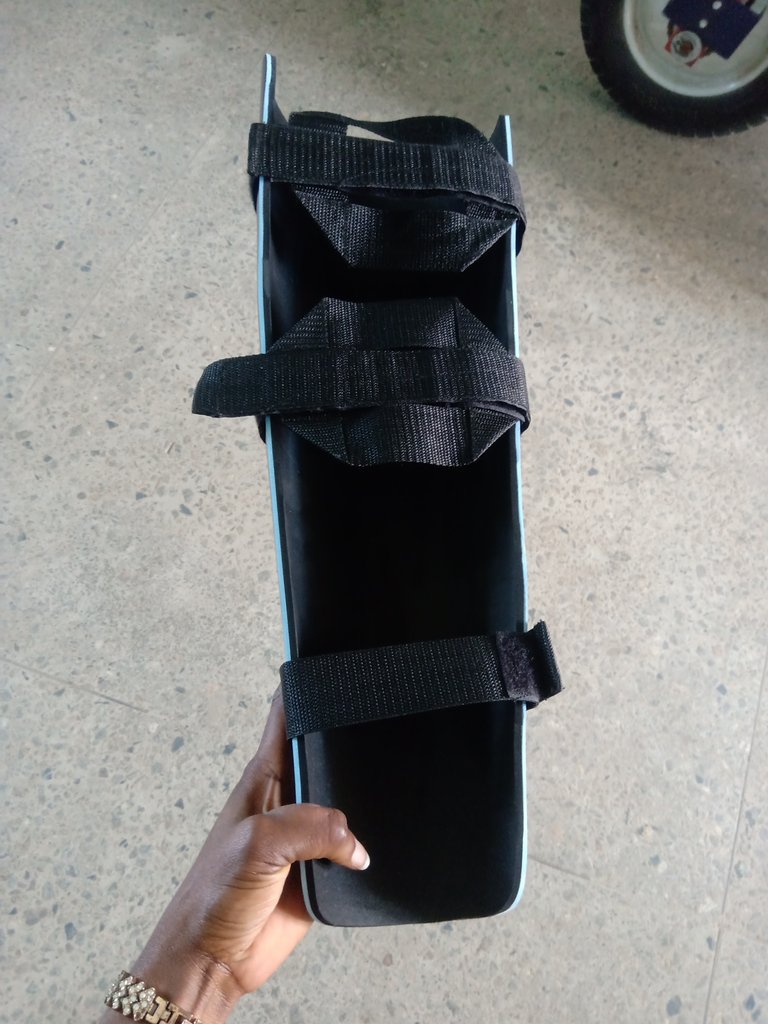
Stage 4: Perforate holes on the backslab using soldering iron, then insert riveting pin within the perforated holes to hold the strap in place, after that process, use hammer to attach the everything together.
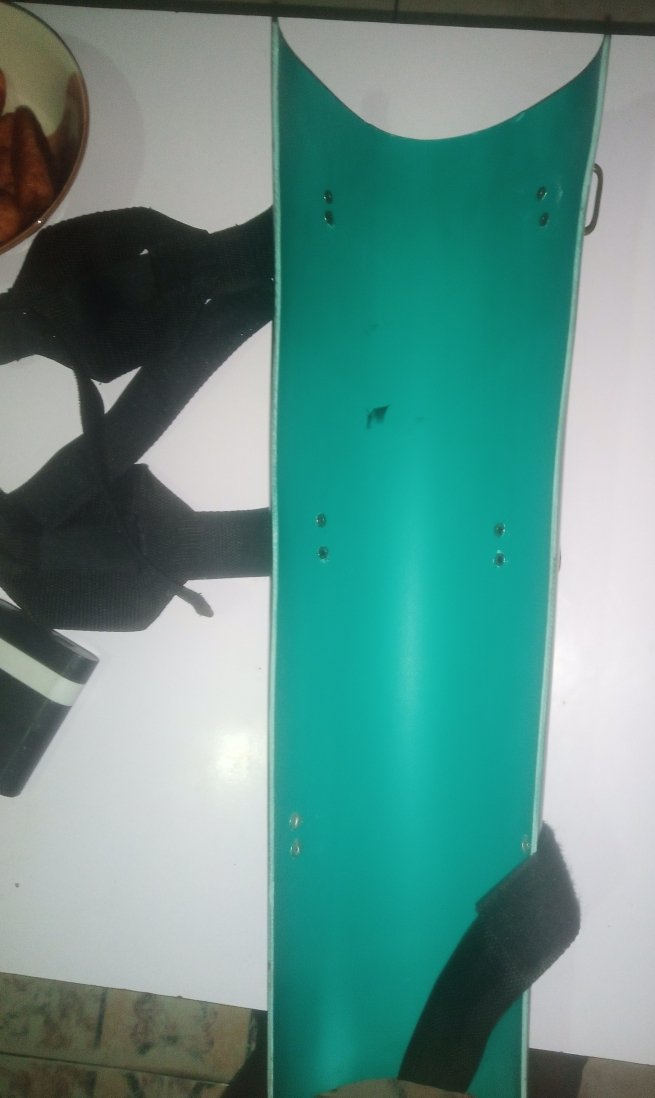
Image after attaching strap.
Stage5: After joining everything together, now is to put maco inside the backslab to prevent skin irritation/damage that the pin can cause if is directly touching the skin. What will do here is to, rub the inner part of the backslab and back of maco with evostic gum, then allow it to dry a little before attaching it together.
Final stage: Your backslab is ready, you just need to smooth out the edges of the backslab to make it fine and neat. After making it, it can then be use to stand patient so as to bear weight on the affected leg.
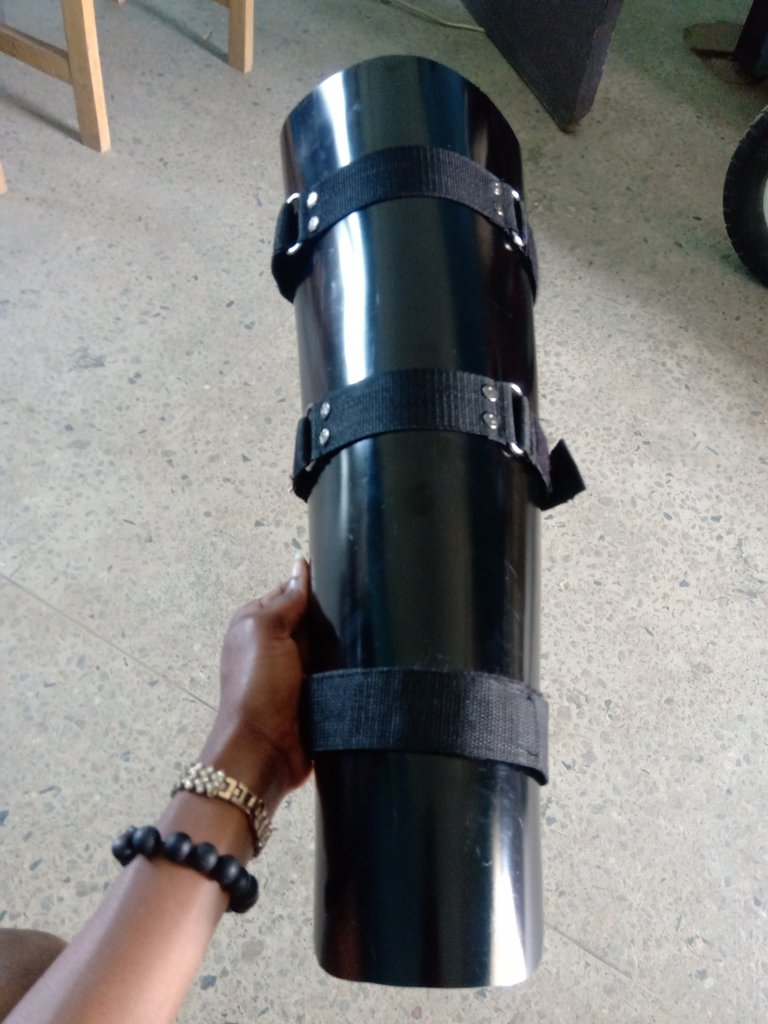
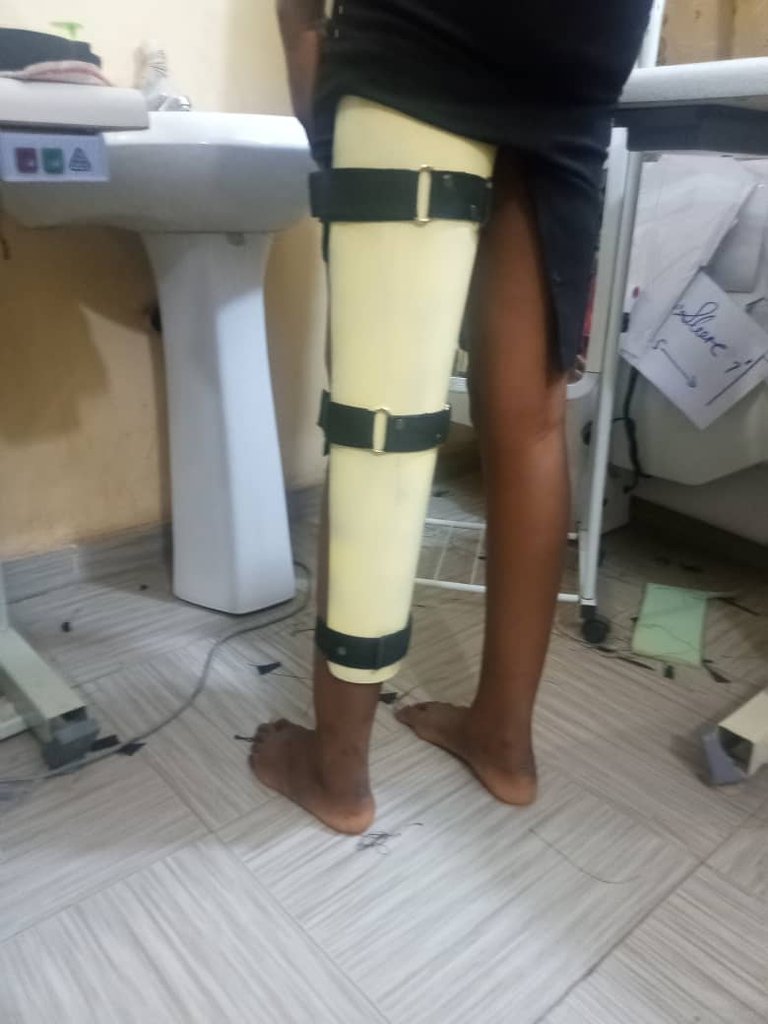
picture of a backslab splint in use
Trust this is helpful and straightforward. Thank you for taking out time to read it.
All pictures used in the article are mine.
Congratulations @jimohlamide! You have completed the following achievement on the Hive blockchain And have been rewarded with New badge(s)
Your next target is to reach 600 upvotes.
You can view your badges on your board and compare yourself to others in the Ranking
If you no longer want to receive notifications, reply to this comment with the word
STOPThank you so much for this detailed and practical guide! It’s inspiring to see how you’ve combined your physiotherapy expertise with hands-on skills to create something so beneficial for patients. The step-by-step explanation with materials and process makes it very accessible for anyone interested in orthotic fabrication. Wishing you a fantastic week ahead as well, and keep sharing these valuable insights!