Special: Get Active! Initiative Hive DIY N°18 (Eng subtitles) / Especial macramé
Hello, artisan community greetings this is my first post here in this community. This is the first time I am making this type of macrame craft to present in the community #HiveDiy gets active no 18 and the theme is macrame. I made a macrame pendent leaf. It isn't easy to show the process by writing the post but I will try my best. going step by step.

I made this pendant using a white cotton macrame string and made it using three different macrame knots.
- Lark's head knot
- Square knot
- Double half-hitch knot

material I used
13o cm x 4 pieces of white cotton string
30 cm x 18 pieces of white cotton sting
comb
scissors
glue diluted with water.
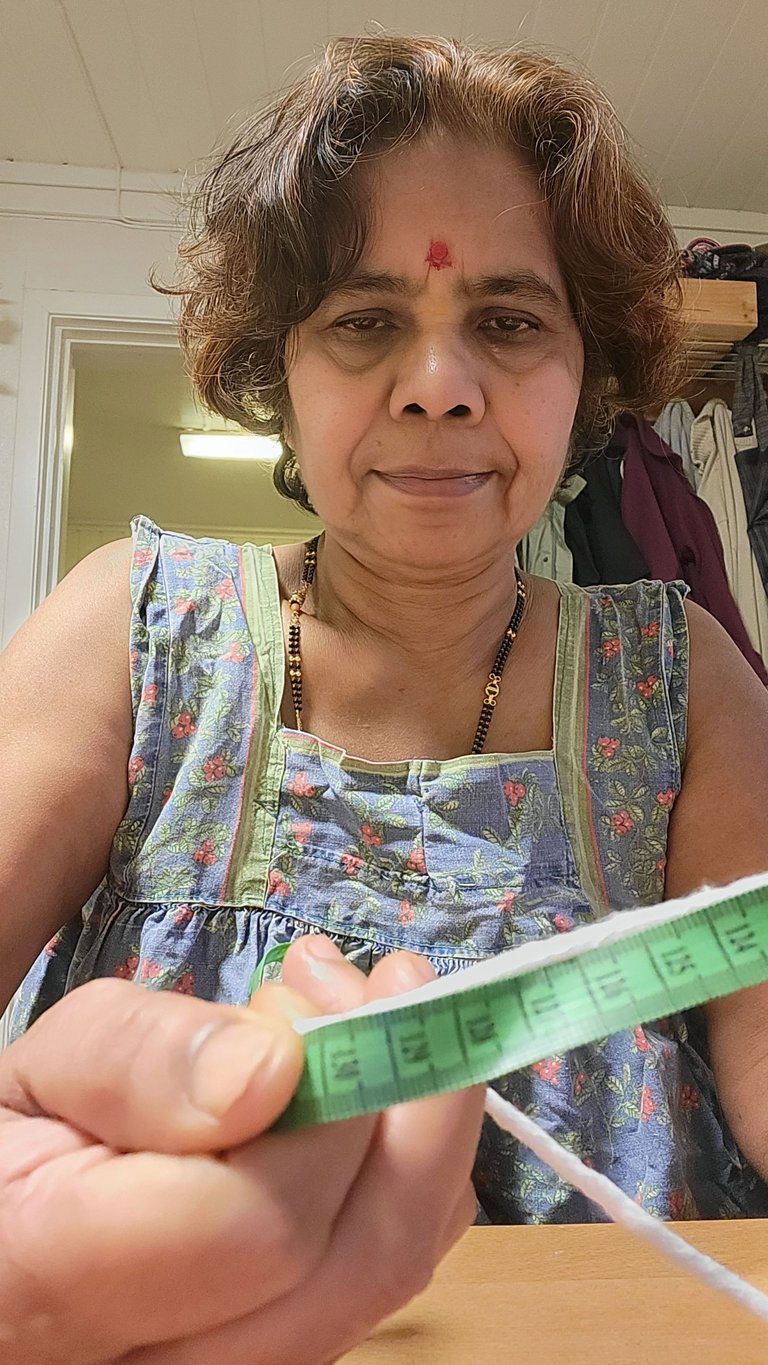
Cut the required pieces of string I used 5 mm white cotton macrame string .
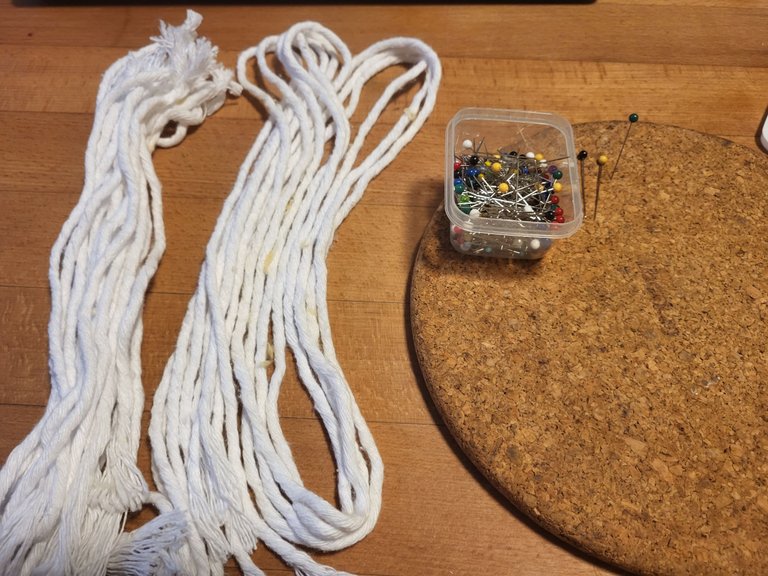
Cut 130 cm 4 pieces. and 30 cm 18 pieces/cords.
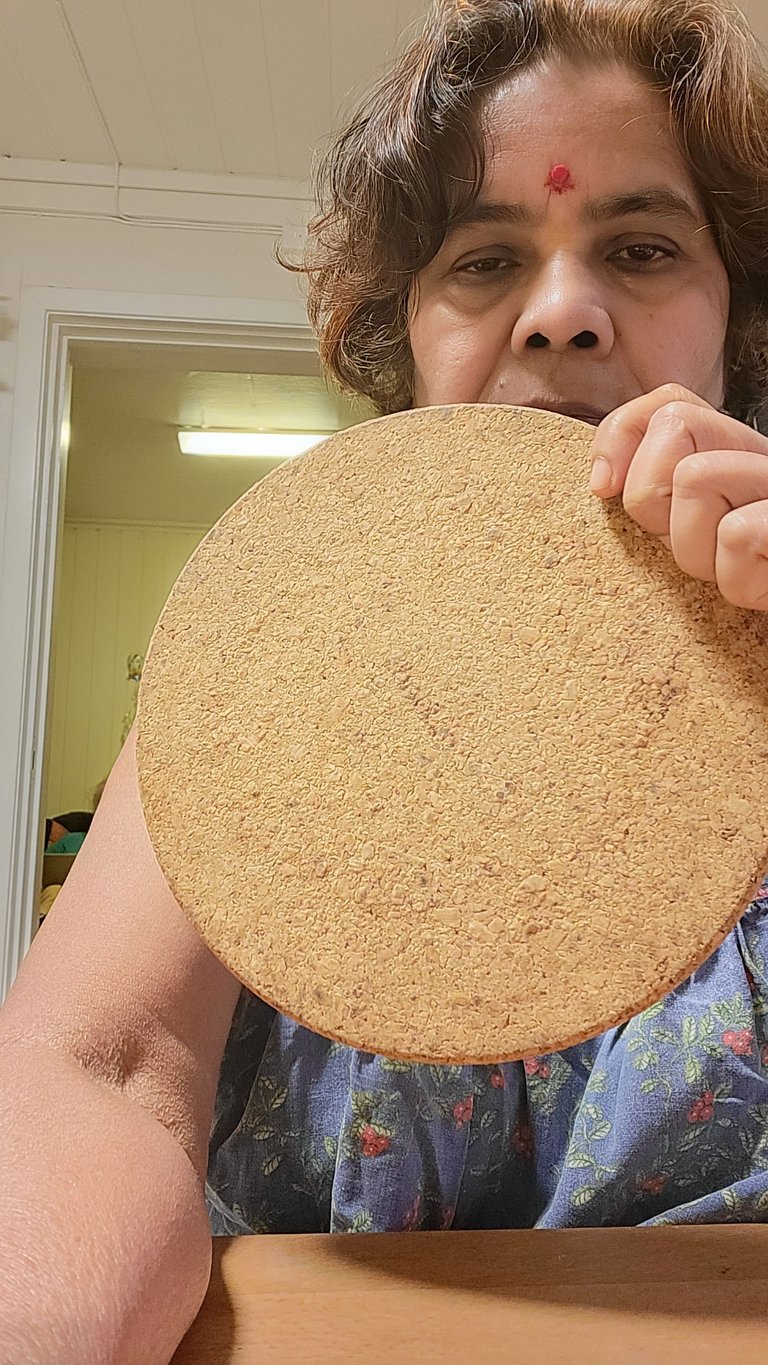
I used a cork pad for working support.
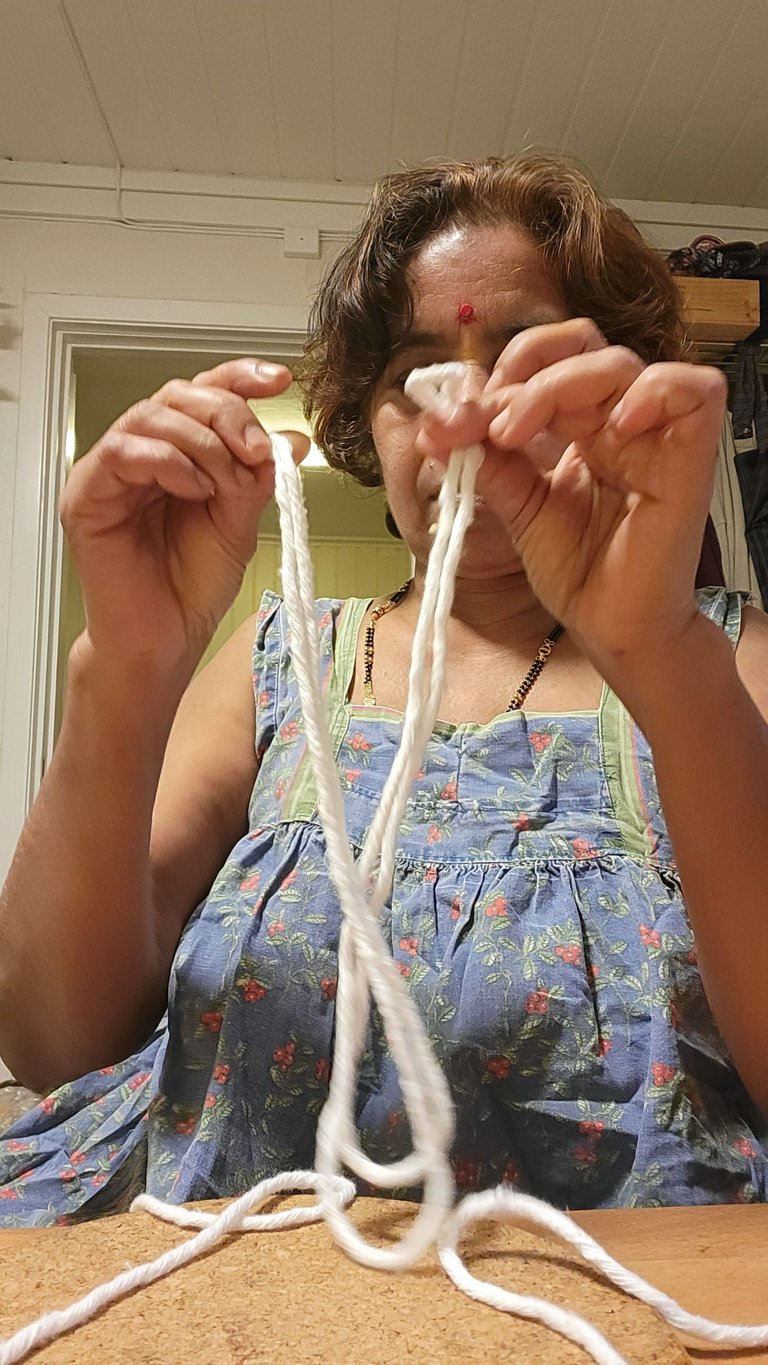
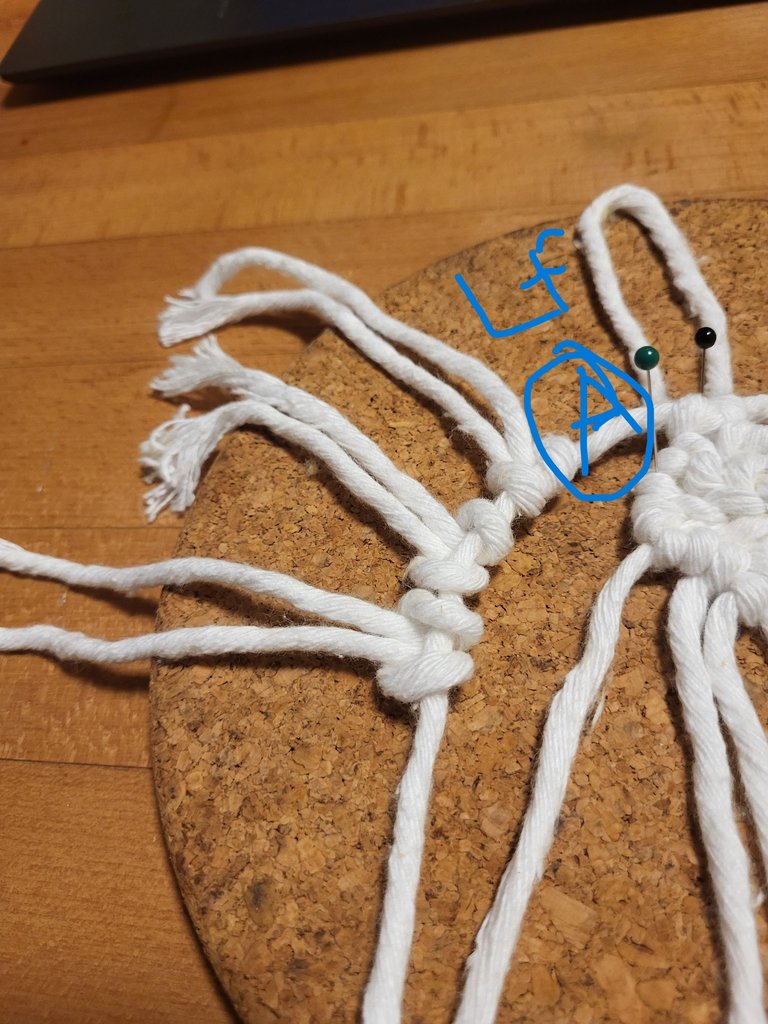
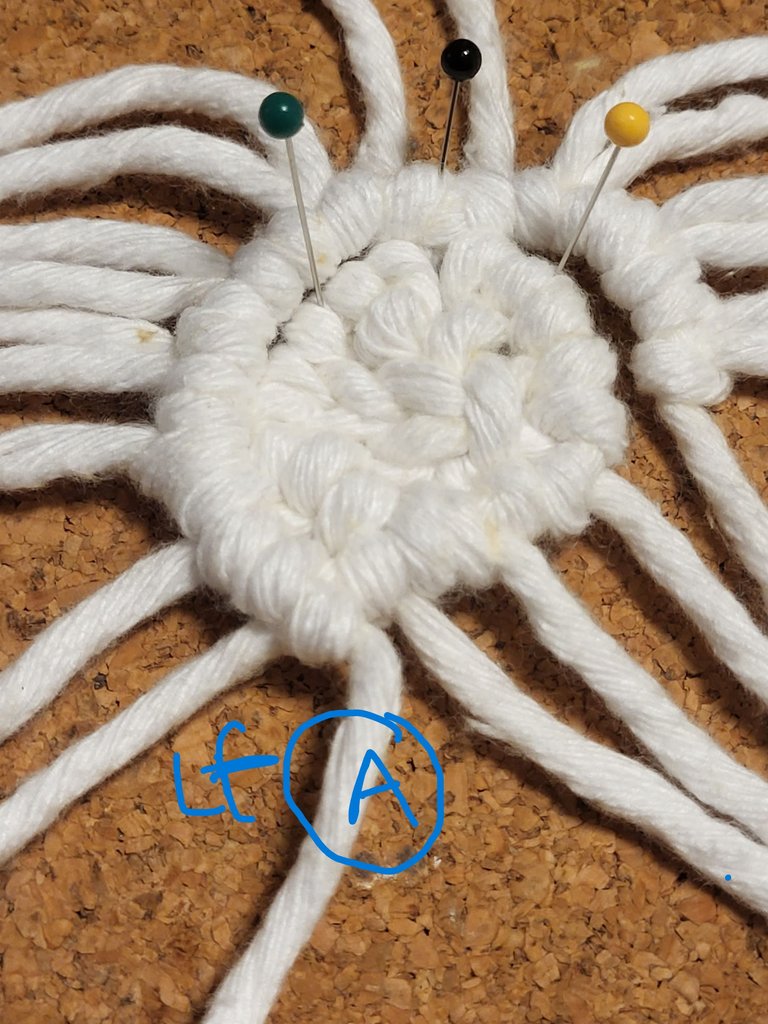
Holding the center point.

I made a loop this is the cord I named A.
On the loop, I made Lark's head knot from another cord I named it B
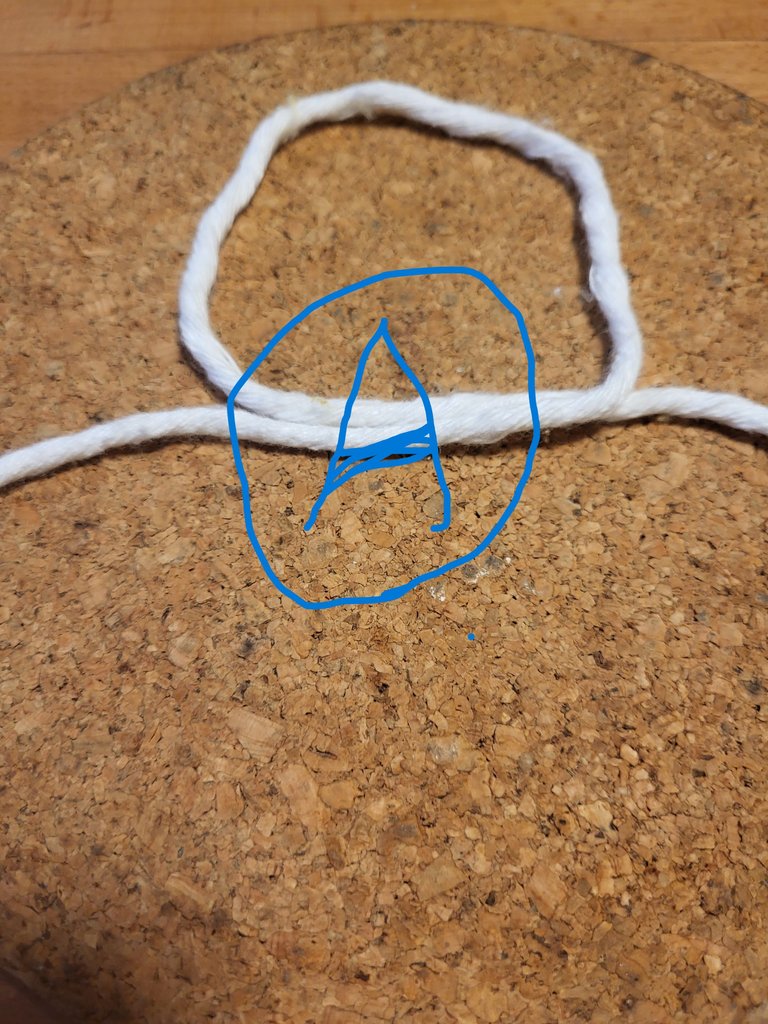
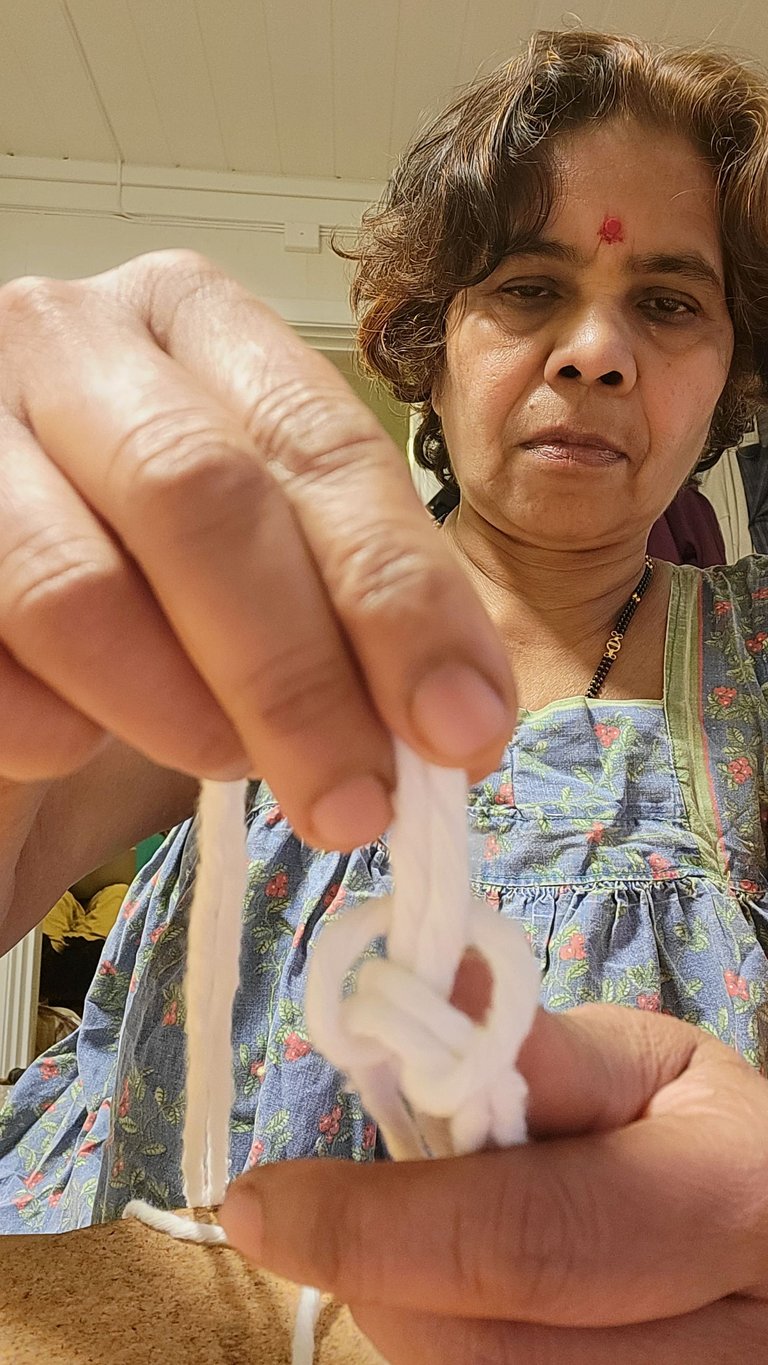
in the center of the cord A make a loop..
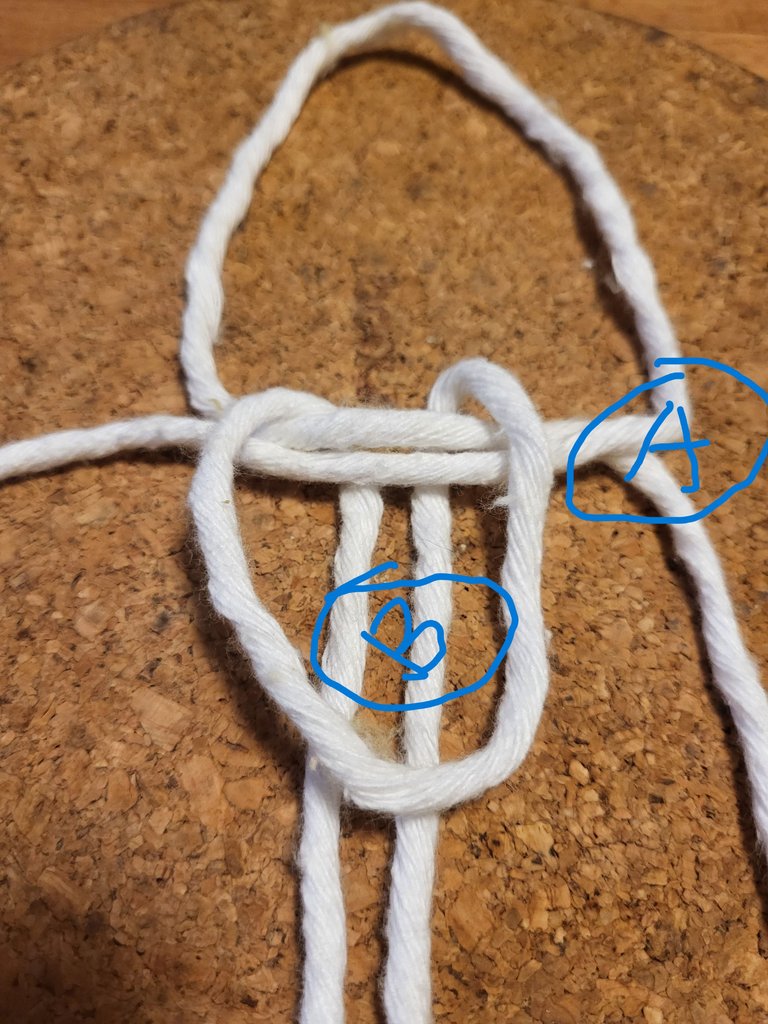
Attach cord B using a lark\s head knot.
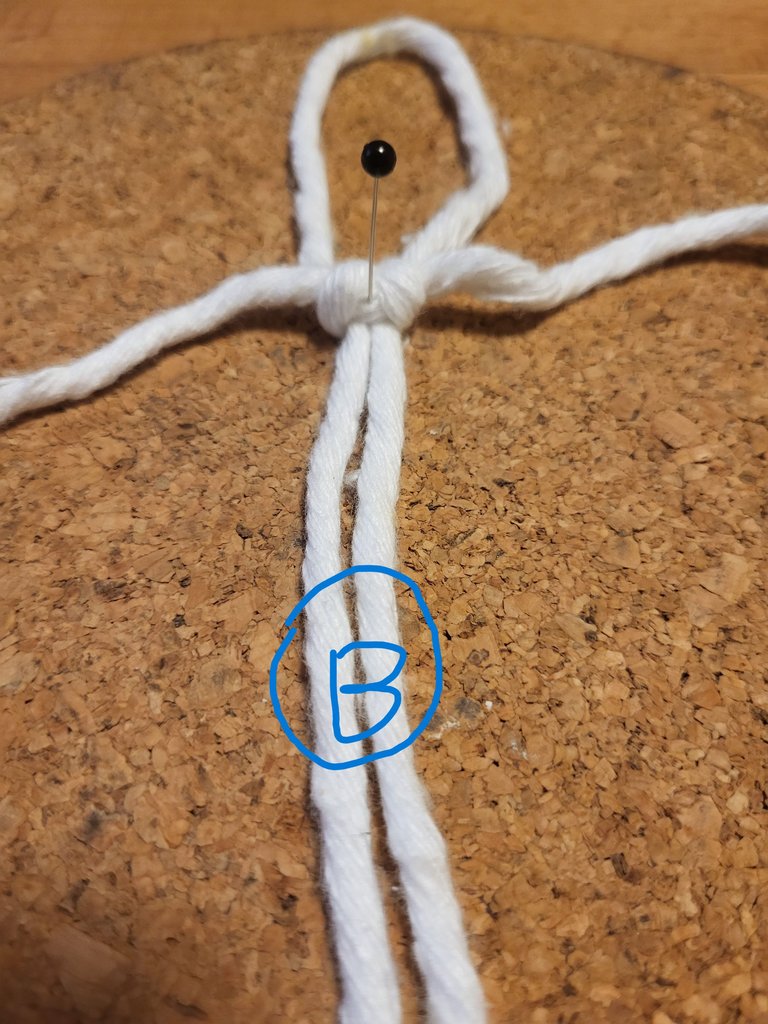
Tighten the knot and put the center to the cork for stability.
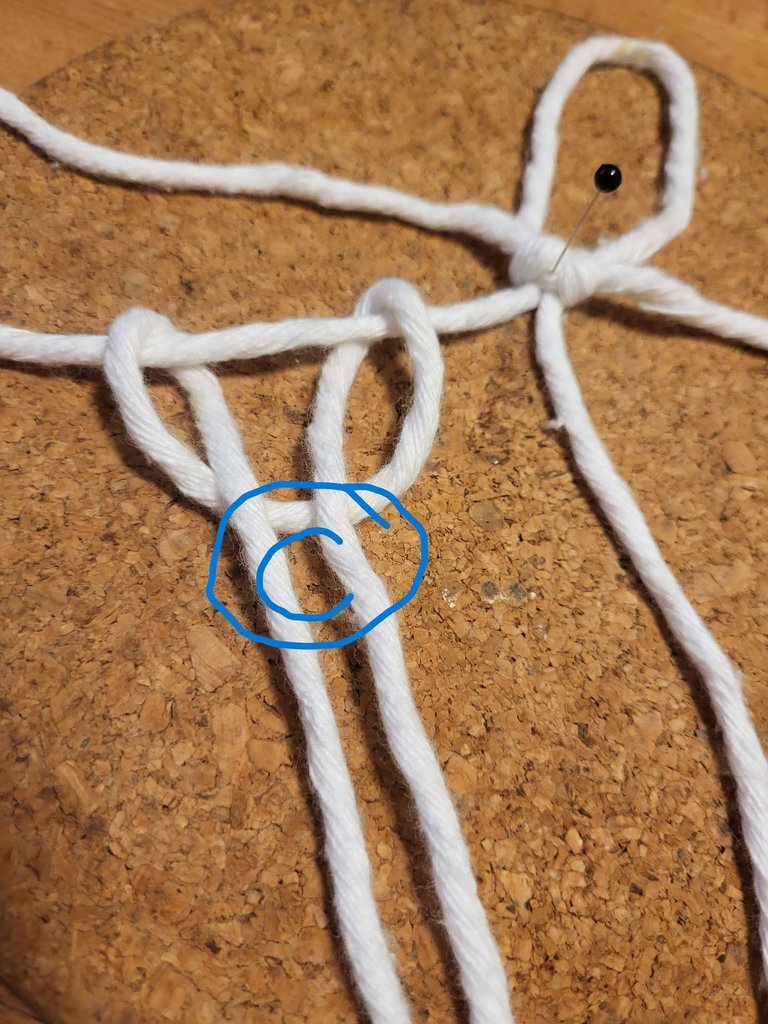
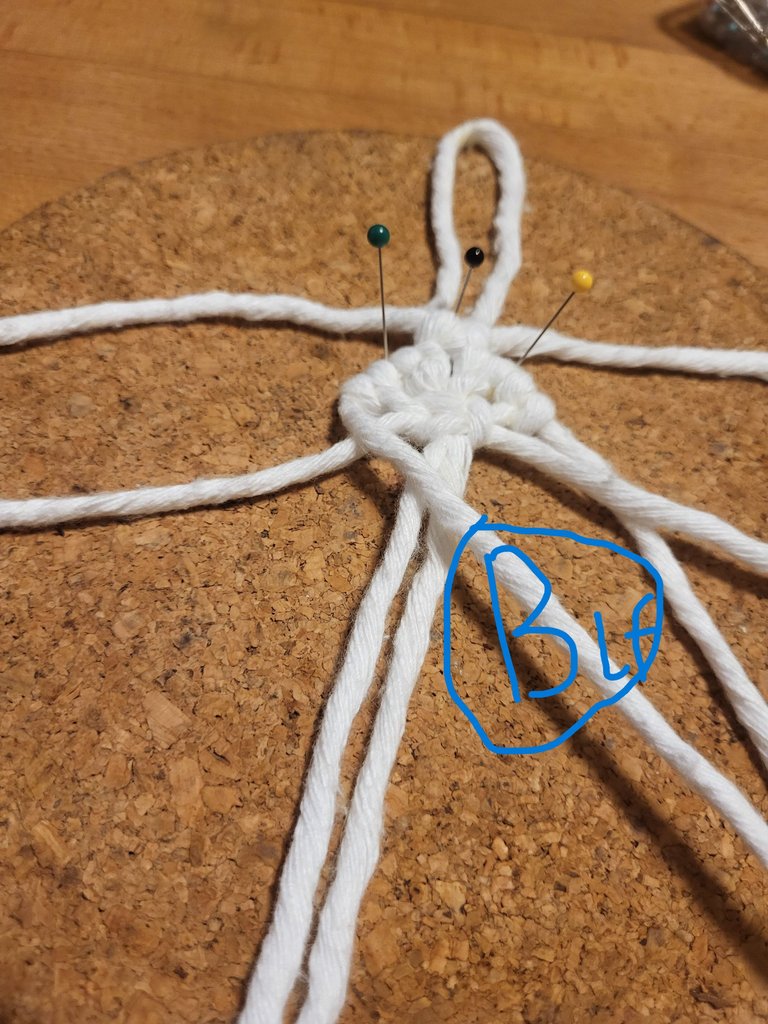
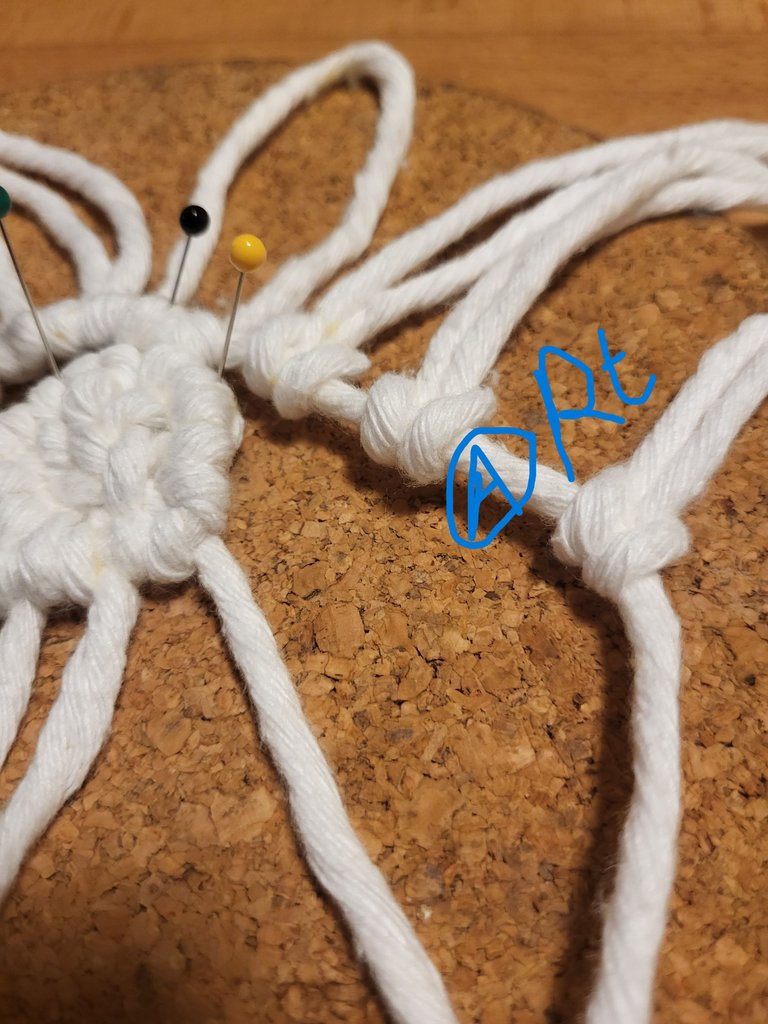
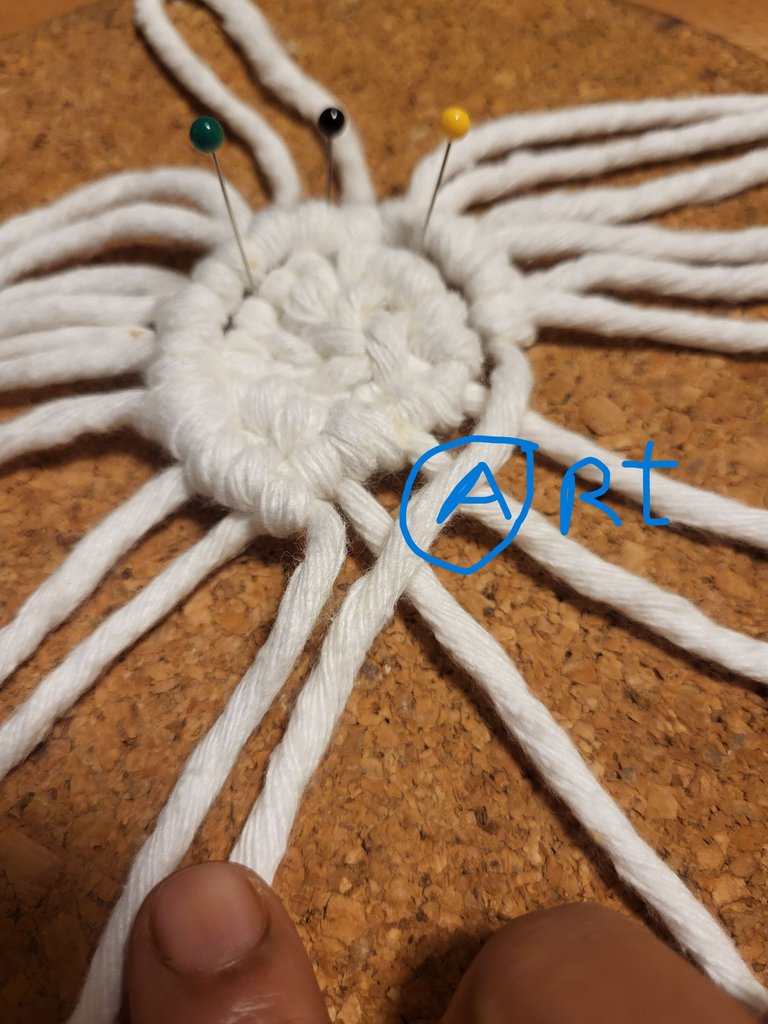
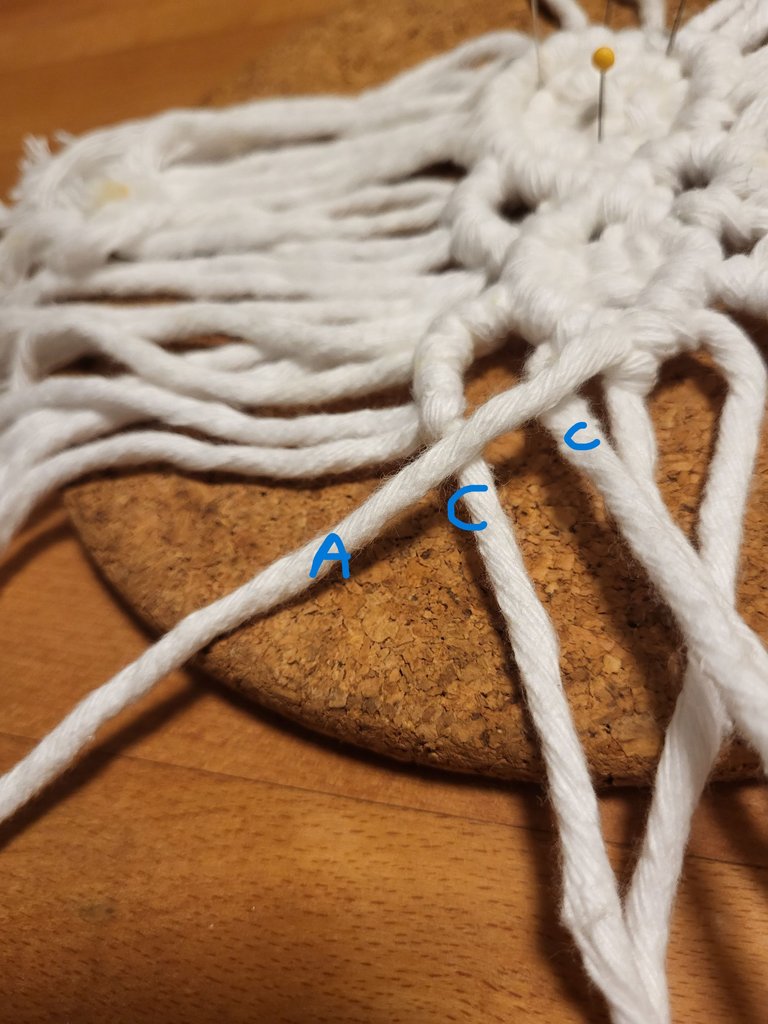
Attach cord C on the left side of cord B using a lark head knot.
Make an extra half-hitch on both sides of cord B and tighten them.
Repeat the right side on cord B the attached cord named D.
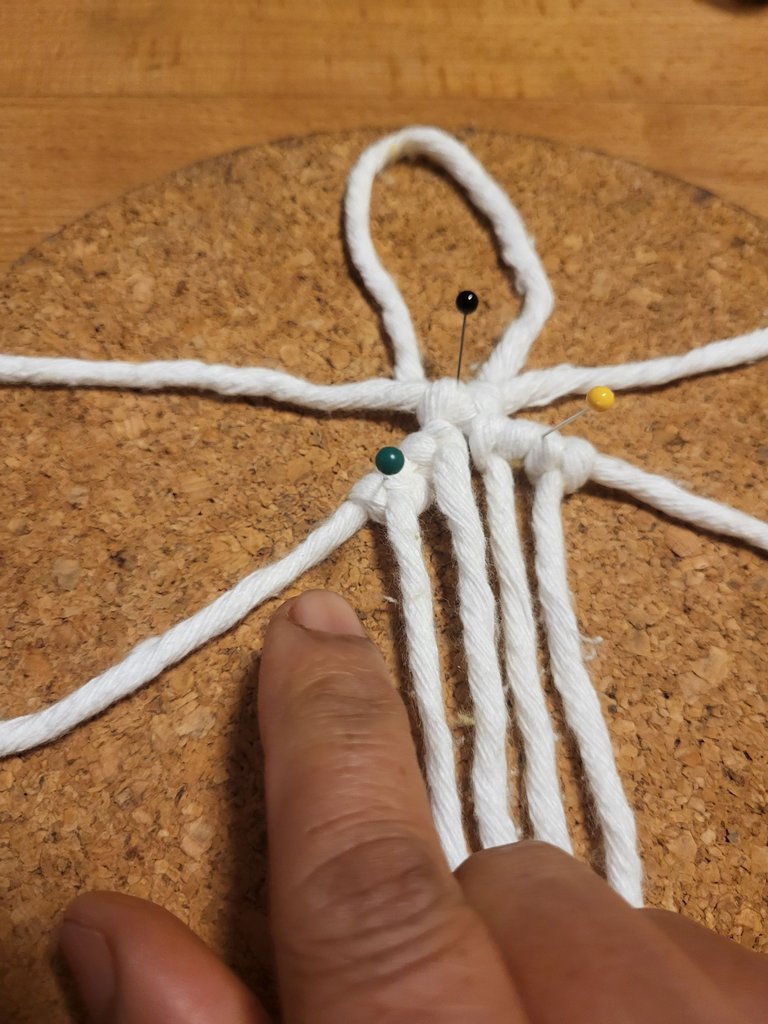
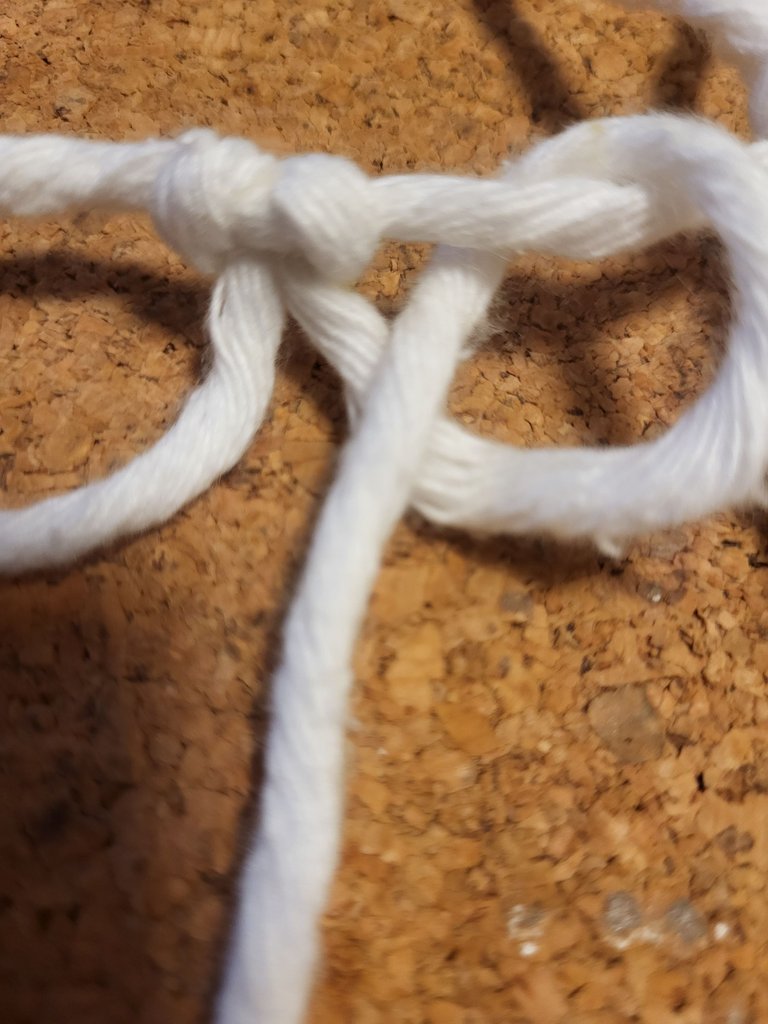
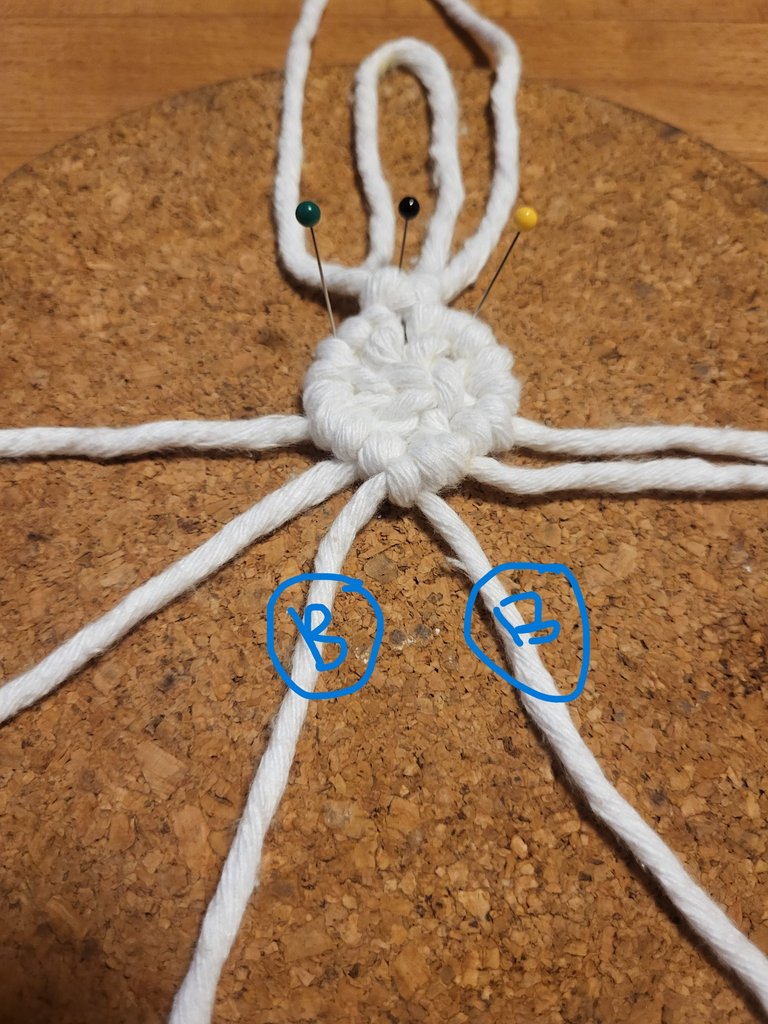
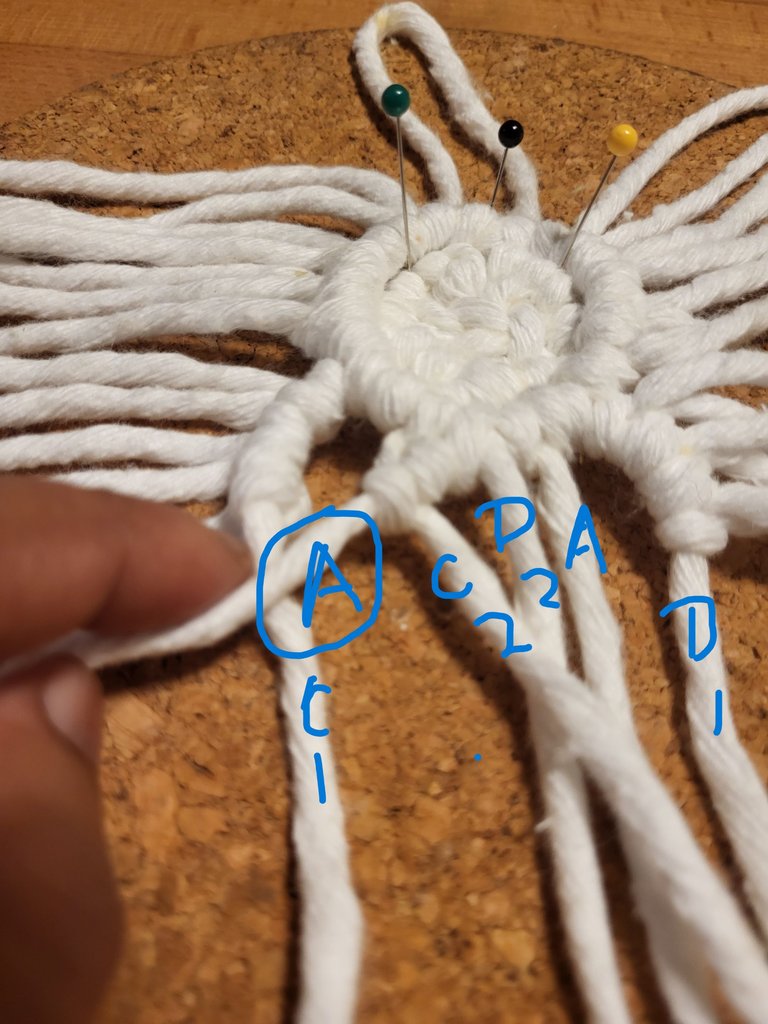
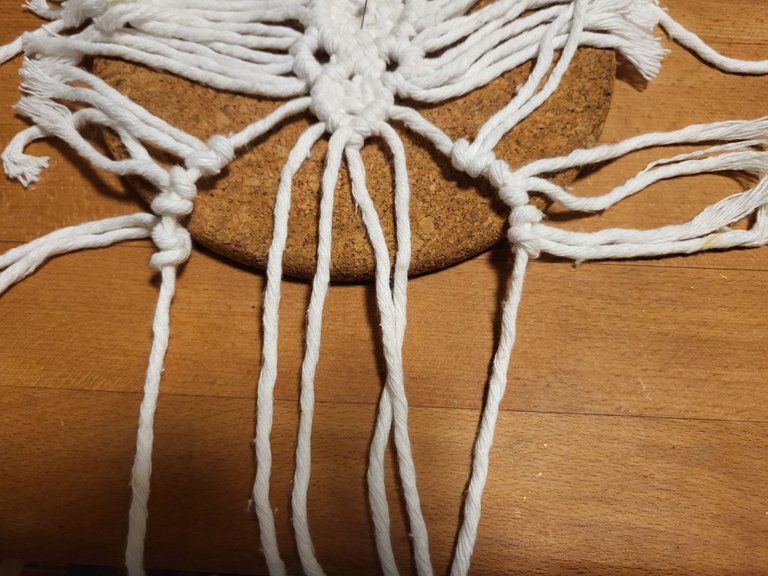
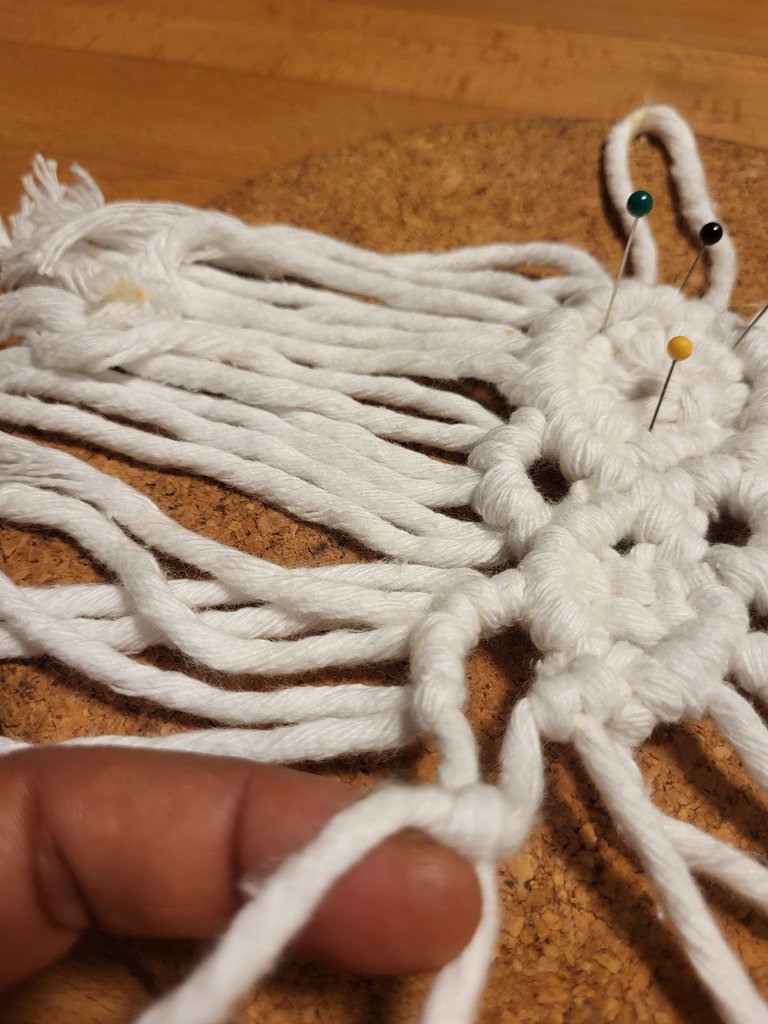
put some extra pins for stable position of all cords.
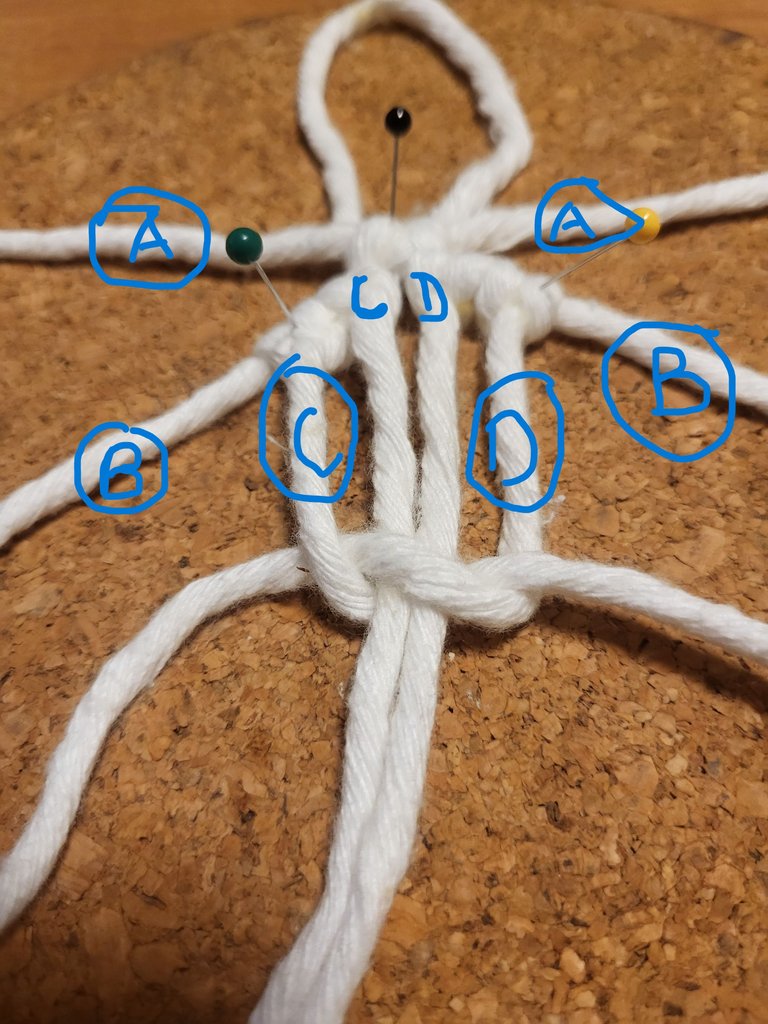
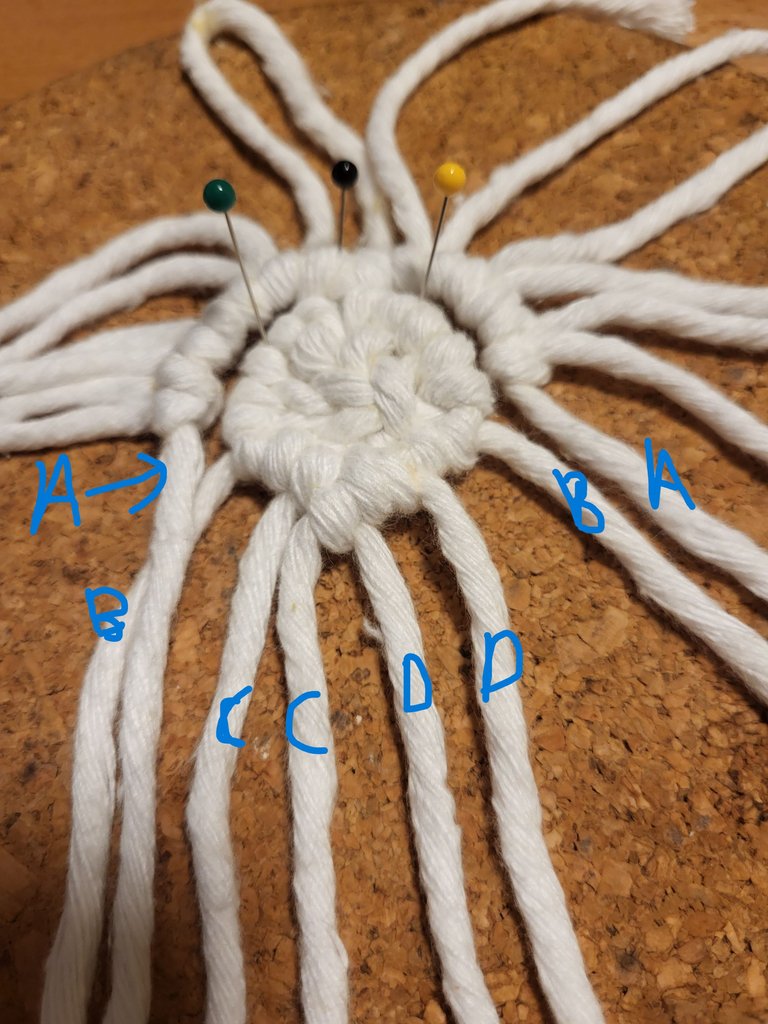
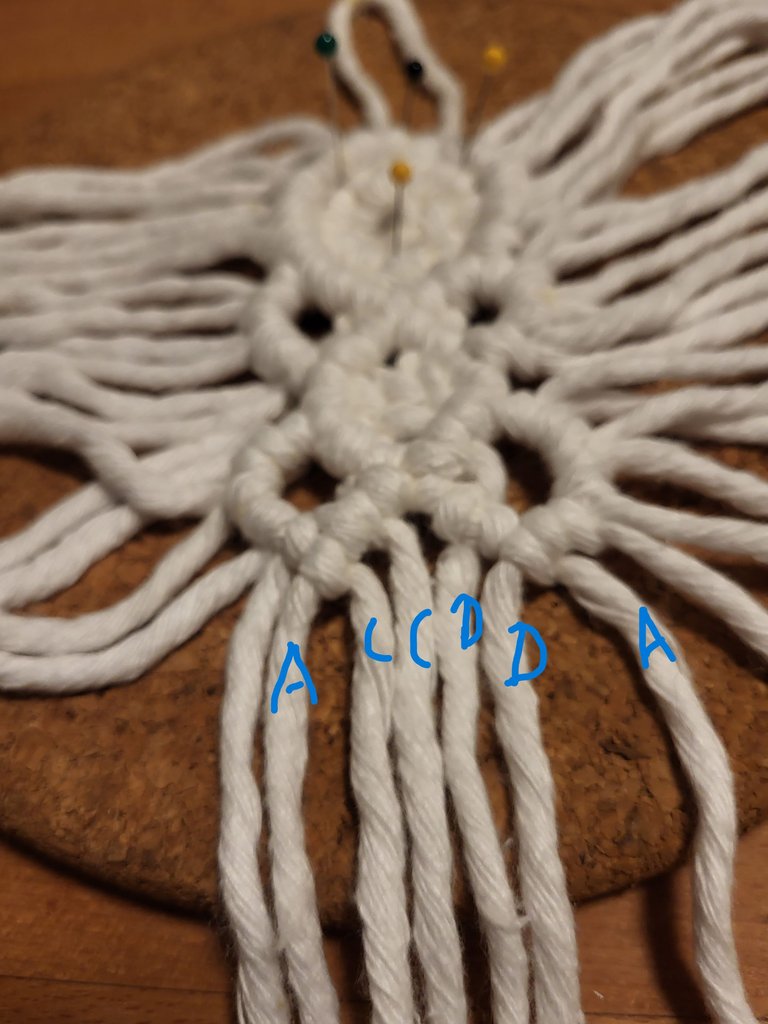
Here are the positions of all cords.
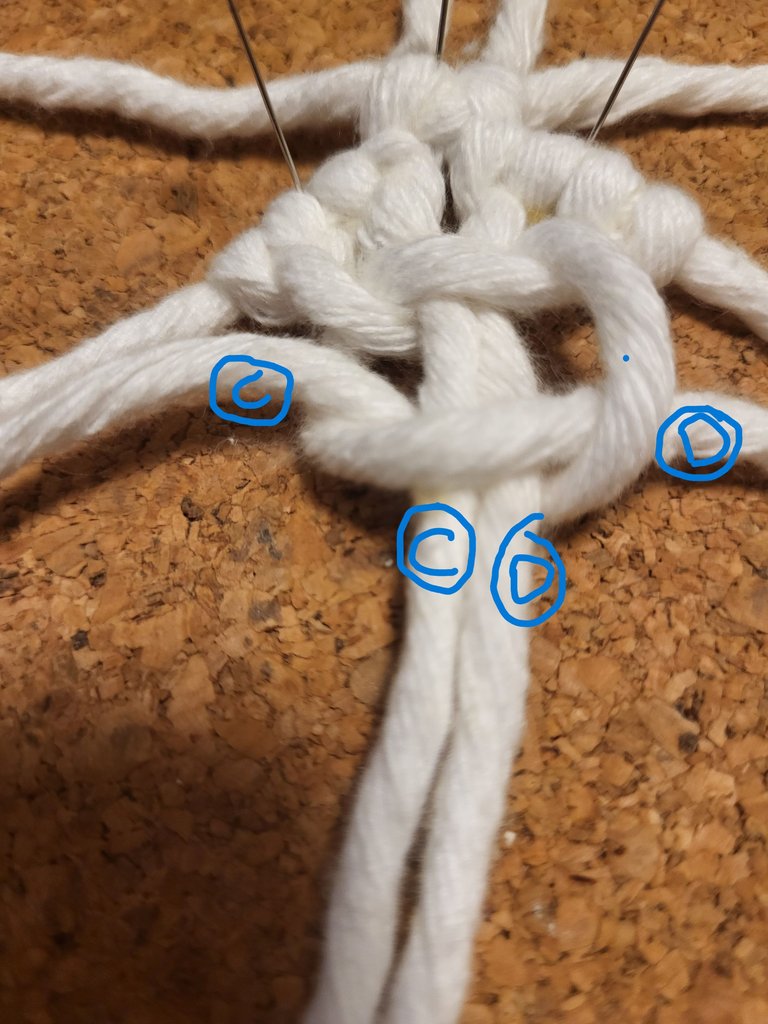
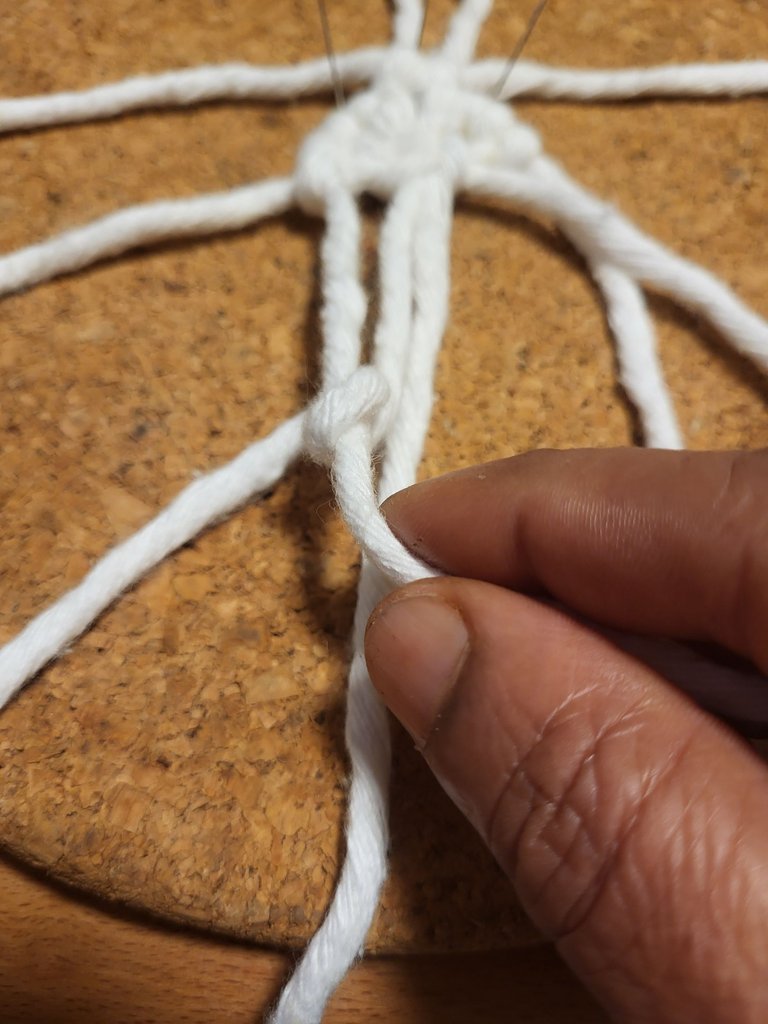
Using the cord C and D make a square knot in the center.
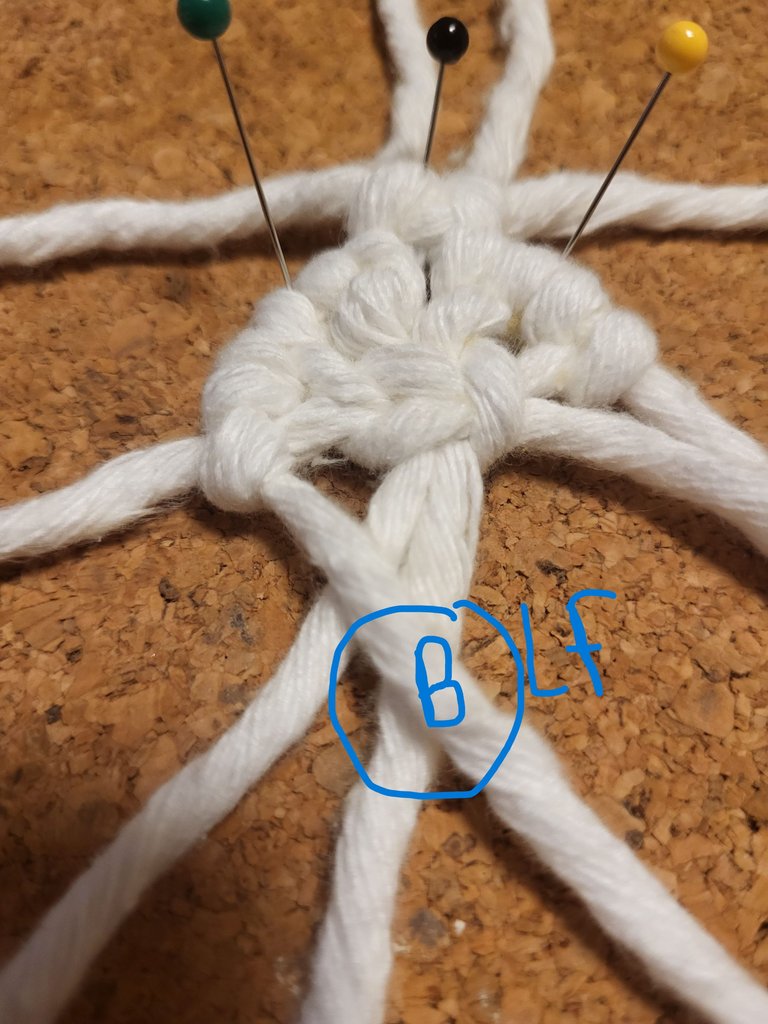
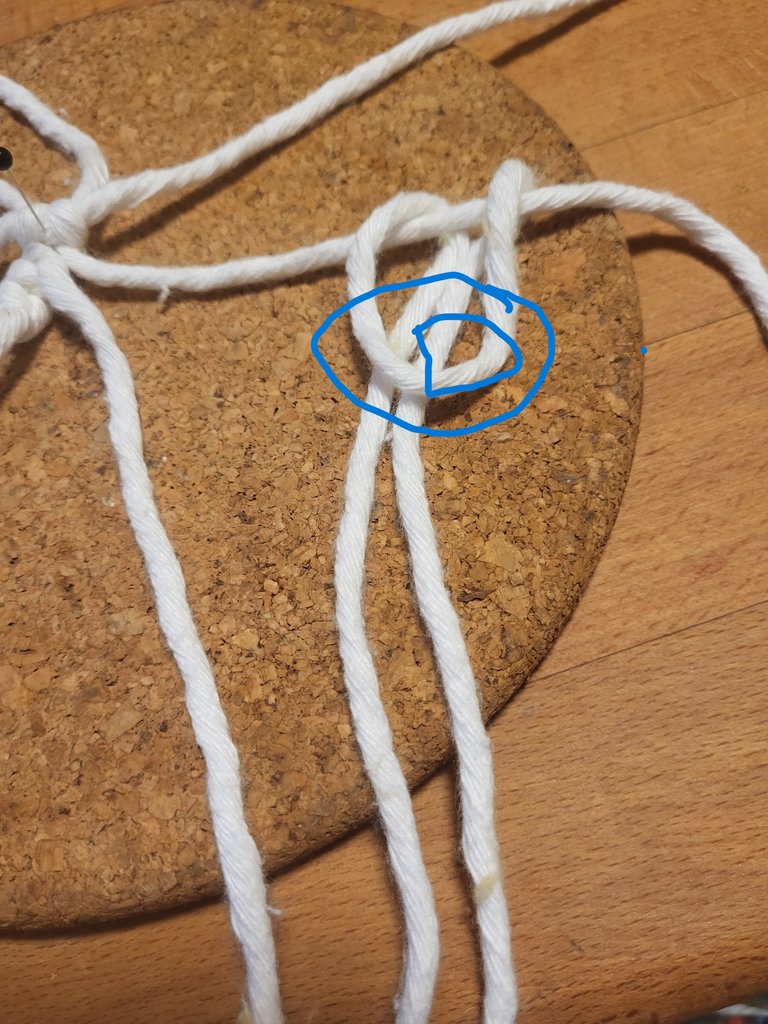
Bring the left B cord across on cord C and make a double half-hitch on cord B to form a round shape.
Repeat on the other side. bring the right side B cord across cord D and make double half-hitch on cord B.
Now here is the round shape formed tie both B cords and finish the round.
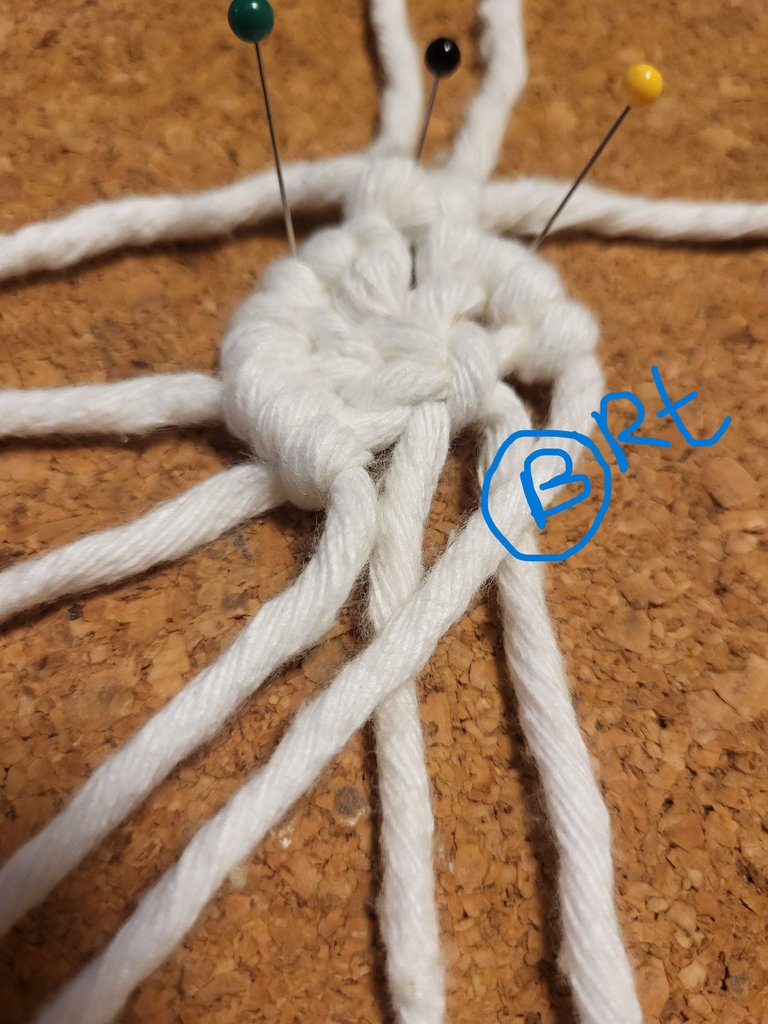
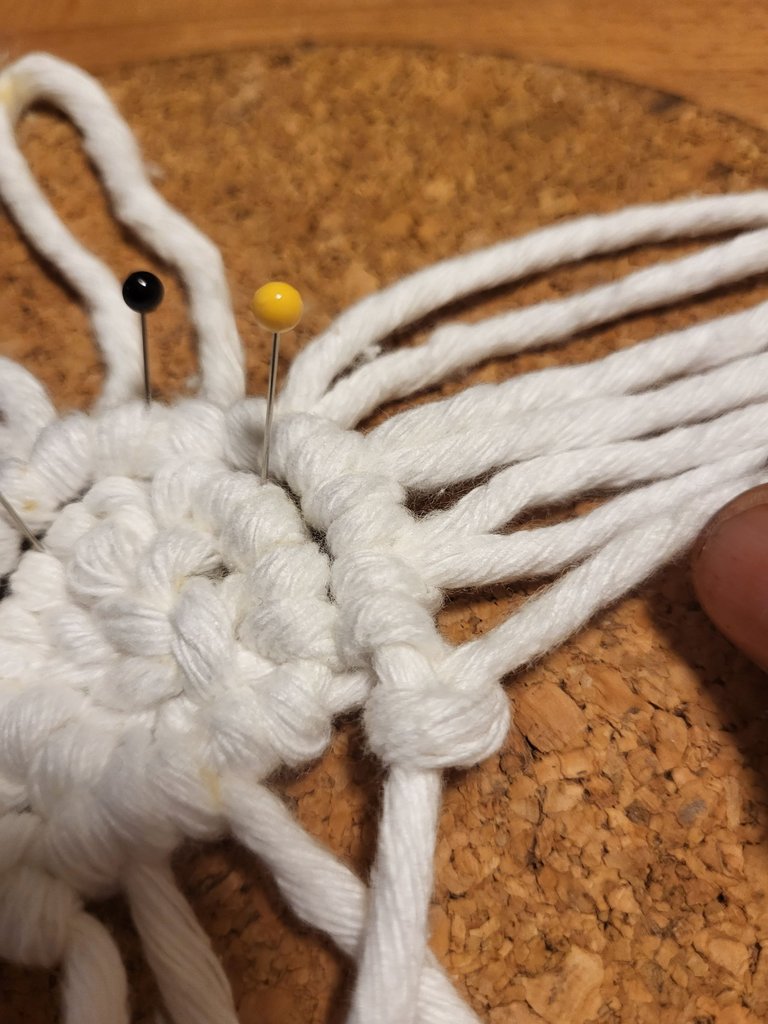
Take the left side Cord A and attach 30 cm cords one by one using a lark\s head knot.
repeat the right side tighten all knots and bring them to the center/top.
after attaching 3 small cords on each side the cord's position are like this.
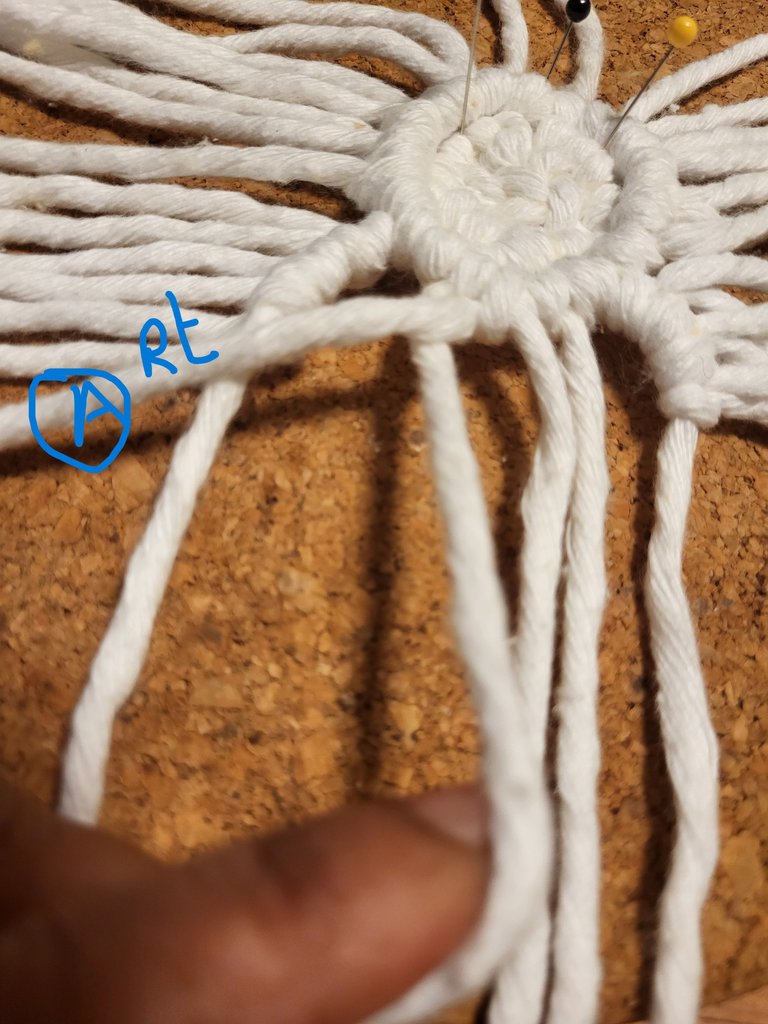
bringing A cord across and tying double half-hitch. forming another round shape here. sorry my macrame became a little messy during handling them back and forth.
Repeat the same on the right side.

Attach 3/3 small cords (30cm)on cord C1 on the left side and Cord D1 on the right side. use a larks head knot. tighten knots and bring them to the center top.
making the double half hitches by cord D1 and cord D2 brings the right-sided cord A toward the left.
Repeat same on right side.
after making double half-hitch knots on cord A on both sides
the left-sided cord A comes across the left and the left-sided cord A comes across to the right. Here we have to attach cord A and cord C1 using a half-hitch.
Repeat the same on the right side and attach cord A to the cord D1
here it forms like two eyes.
Here is a little complicated to explain this stage but when you work with it you understand how to manage.
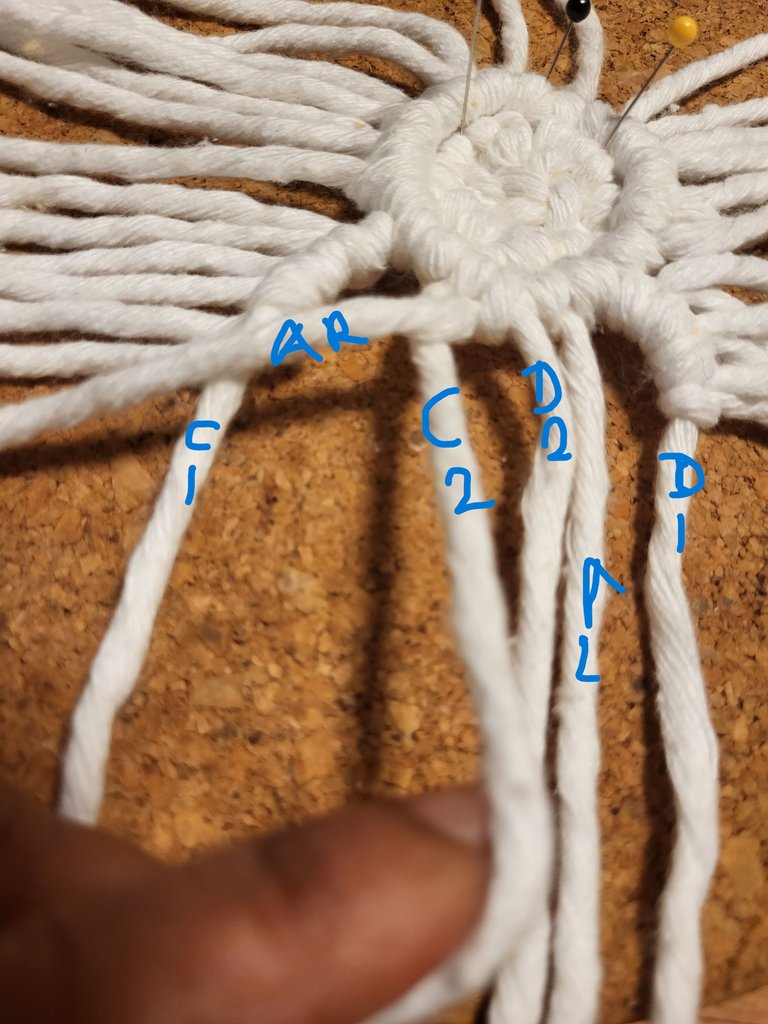
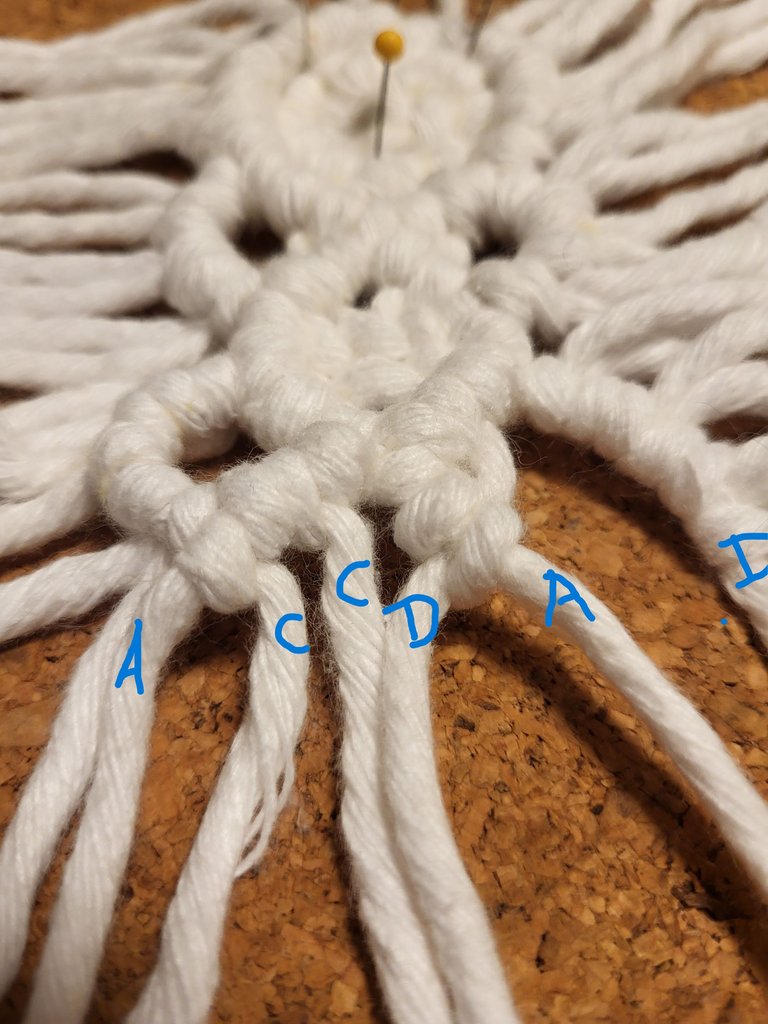
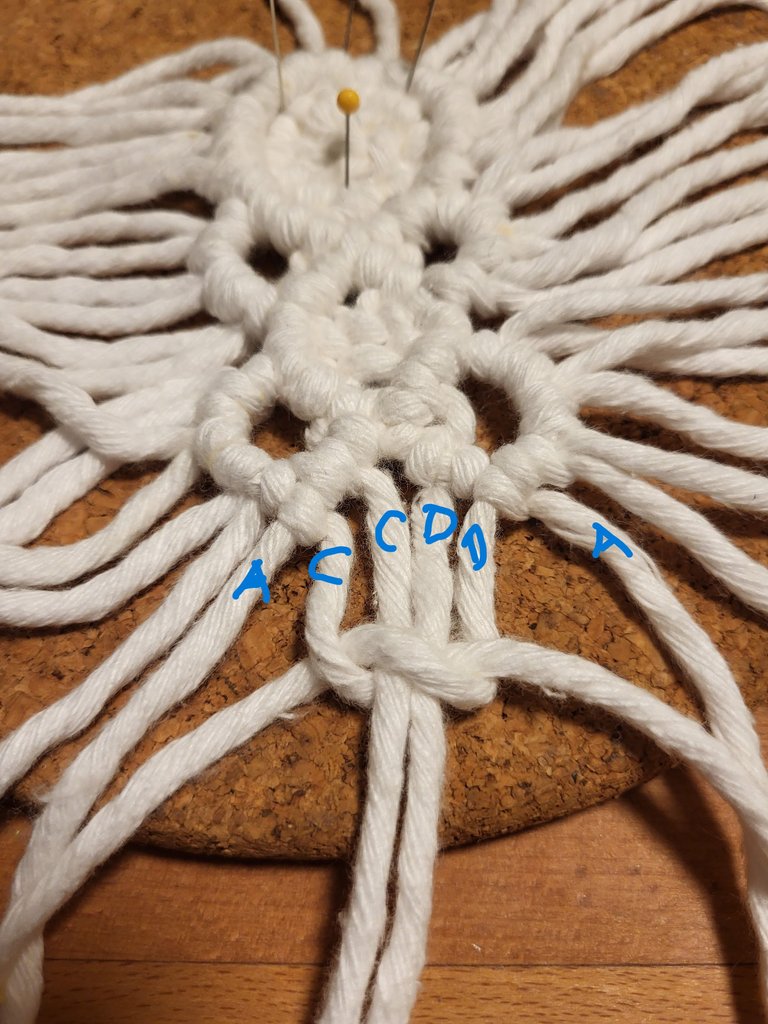
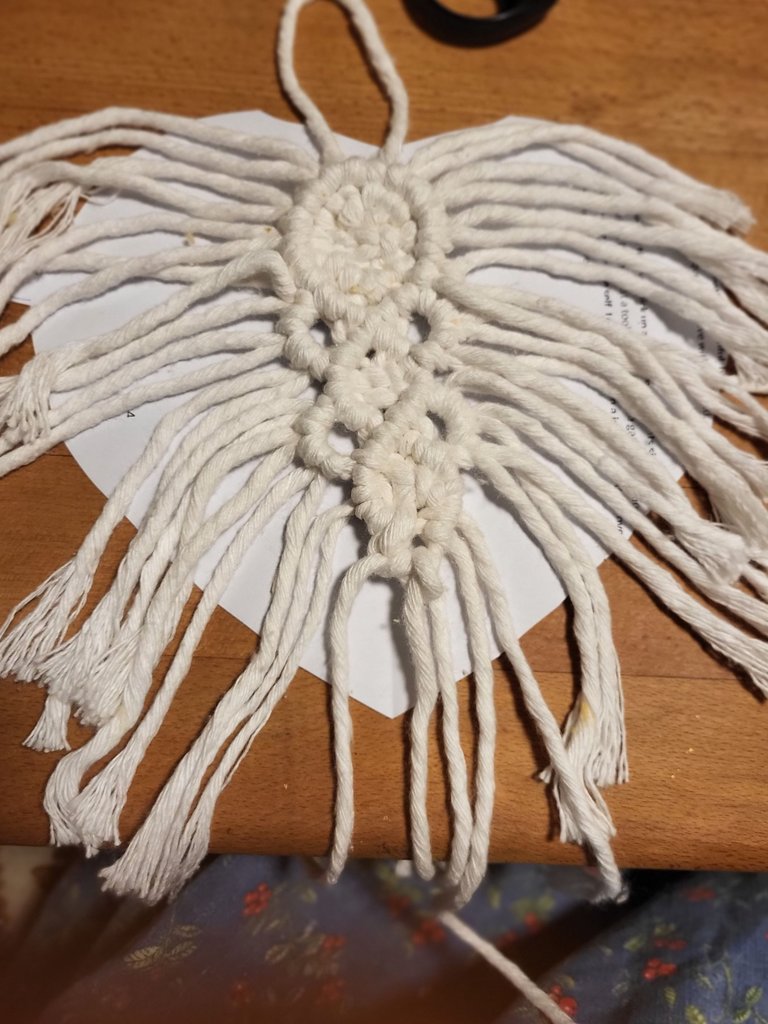
Now the position of all cords is like this.
select the 4 cords from the center(C1/C2 D1/D2) and make 1 square knot.

Bring the Cord A across the C1 and C2 and make double half hitches. the cord A will be in the center now. repeat the same on the other side And bring cord A to the center.

Attach the leftover 6 small cords (30cm) 3 on each side outer C cord and outer D cord. use larks head knots. Tighten them and push them upward to the center.
Bring the cord A across the C1 and C2 making double half-hitches.
repeat the on the same other side now both A cords are on sides.
tie C and A cord with a double half hitch.
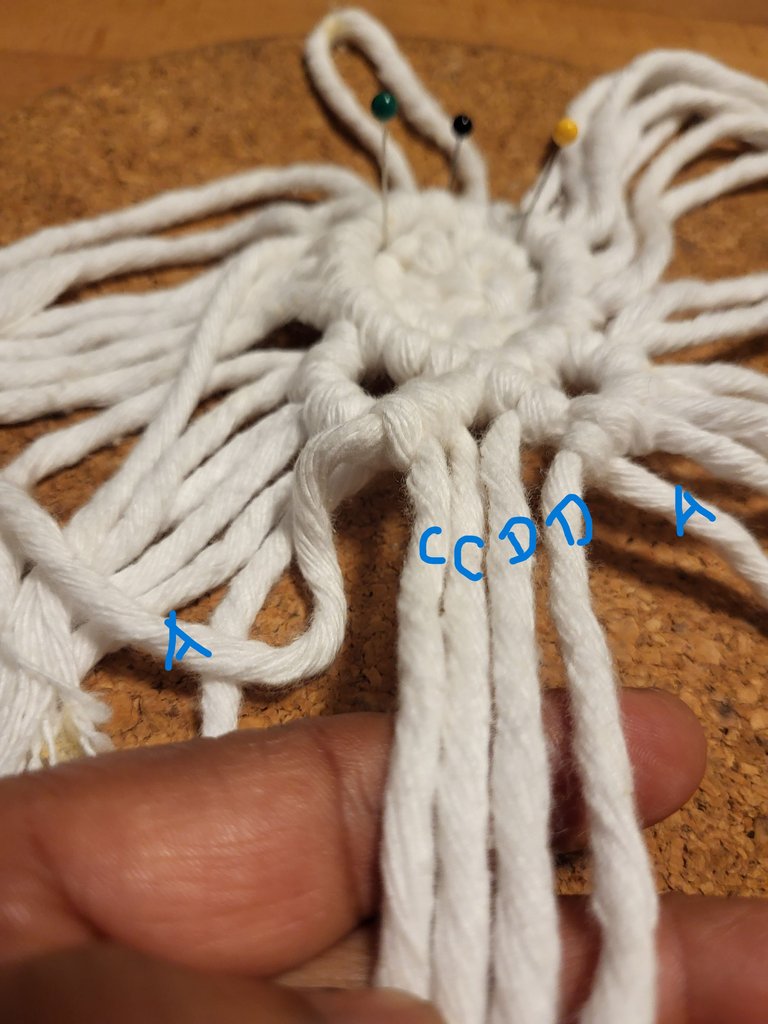
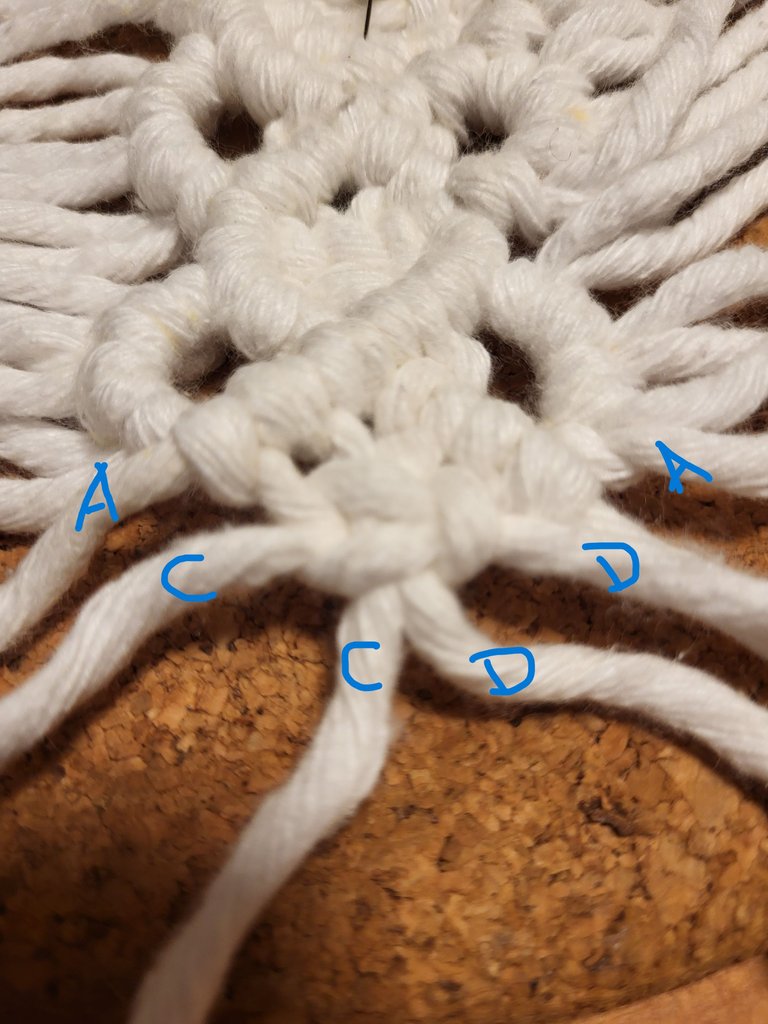
Now all cords are in this position. but still, right-sided D and A have to be tied.
using the centered 6 cords we have to finish the craft.
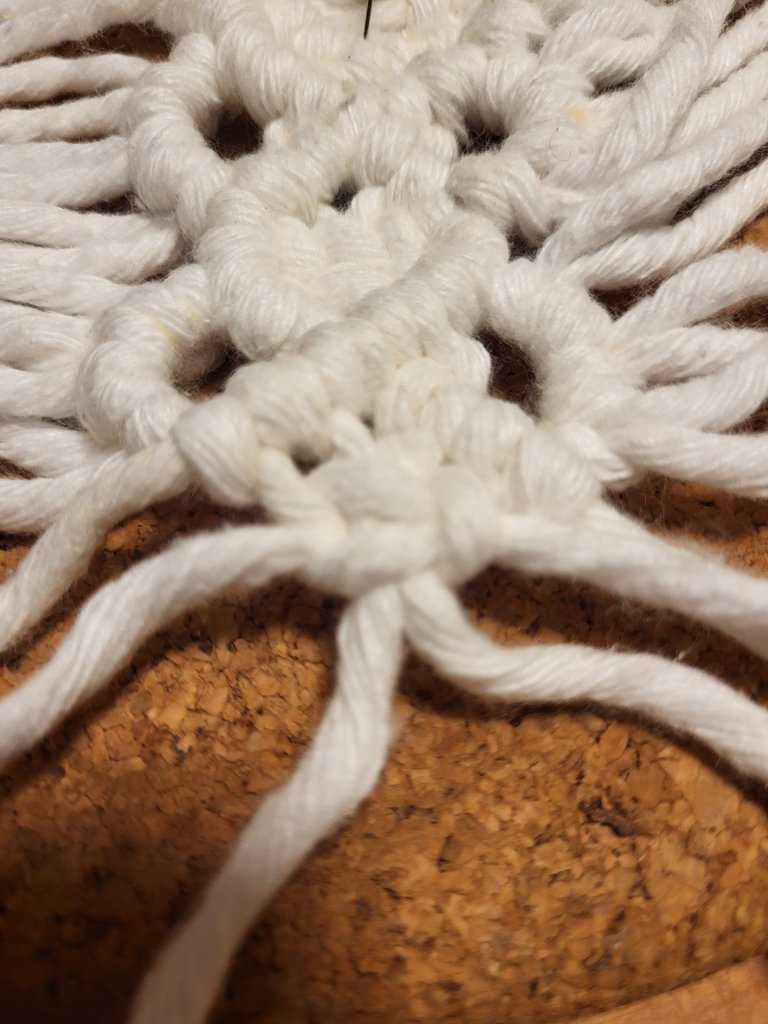
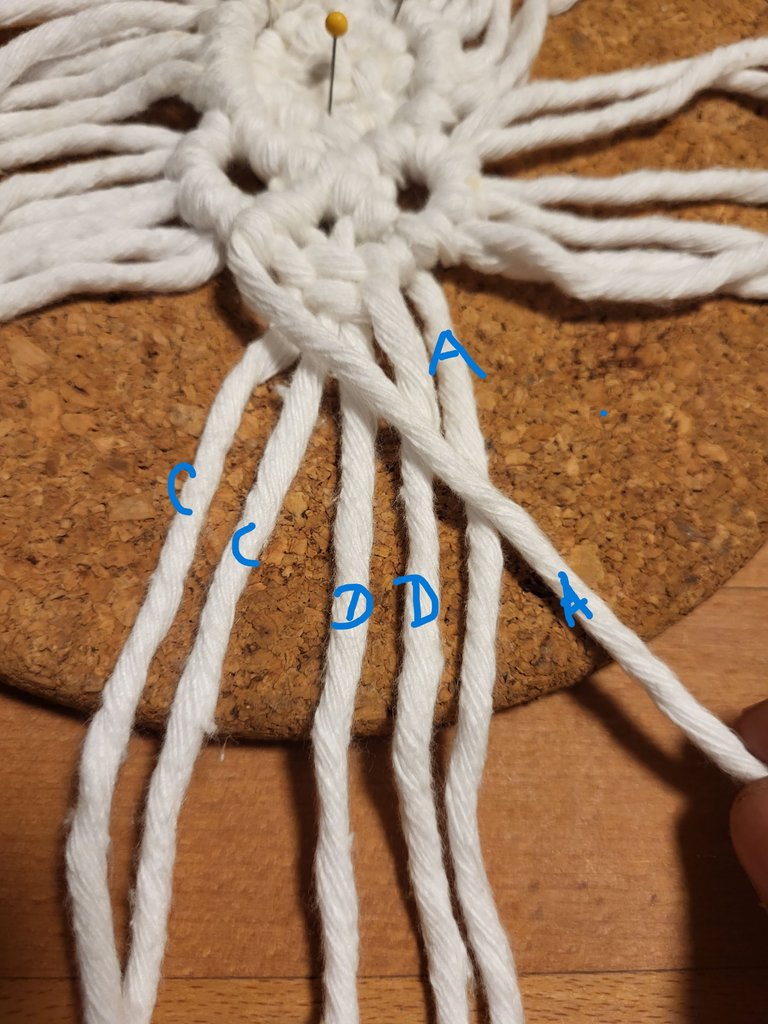
make the last square knot using the centered 4 cords.CCDD
bring back cord A to the center making double half-hitches over the C and C cord.
the same thing has to be repeated on the right side bringing A cord across the D and D cords making double half-hitches.
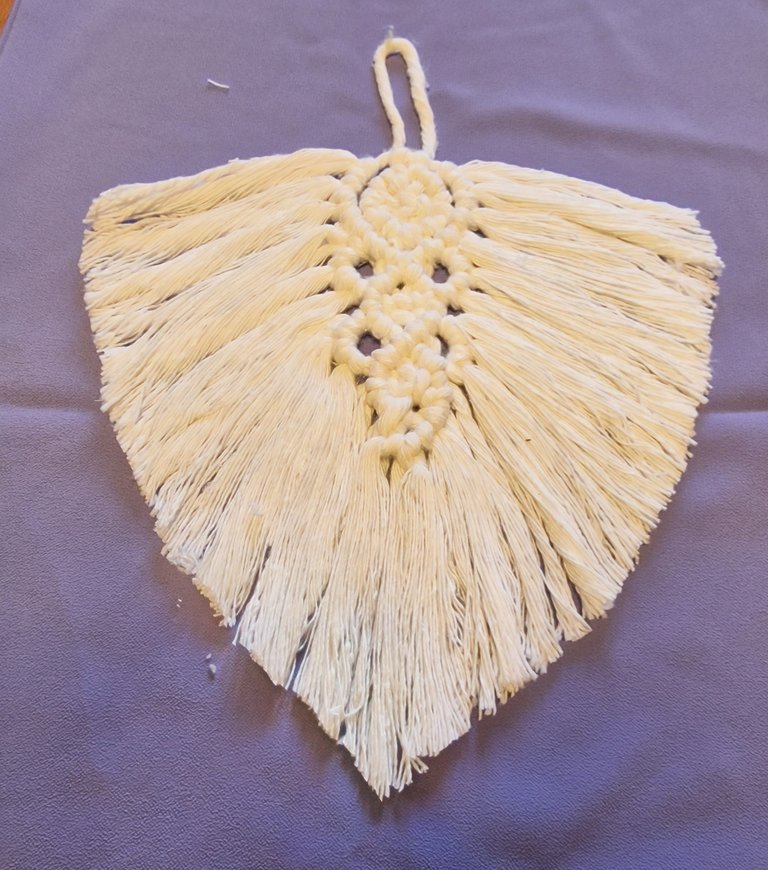
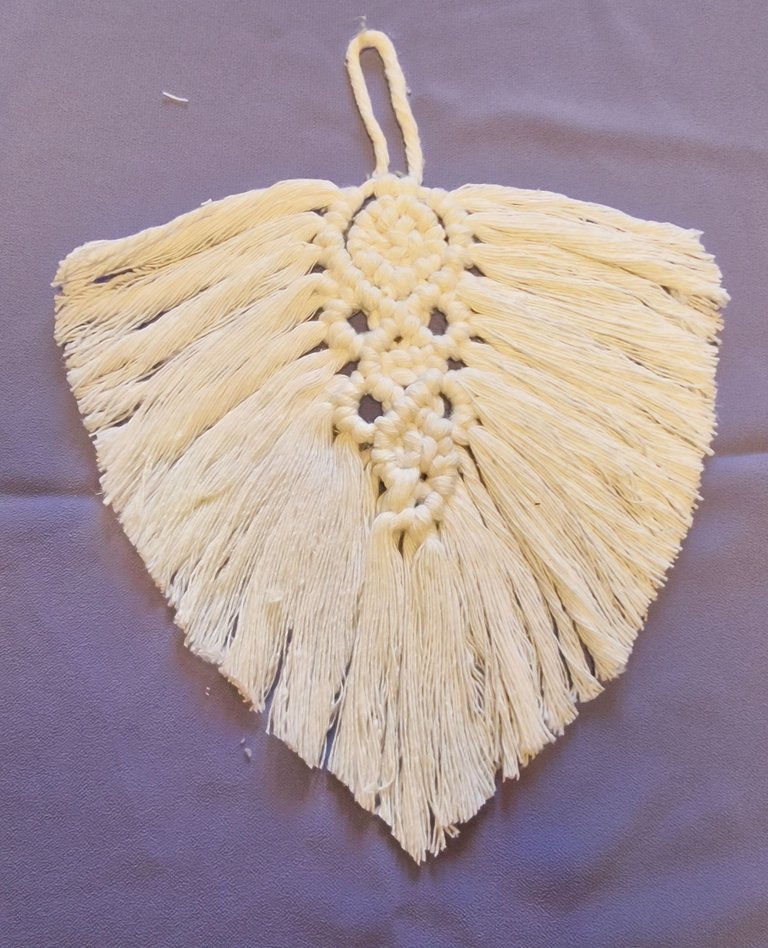
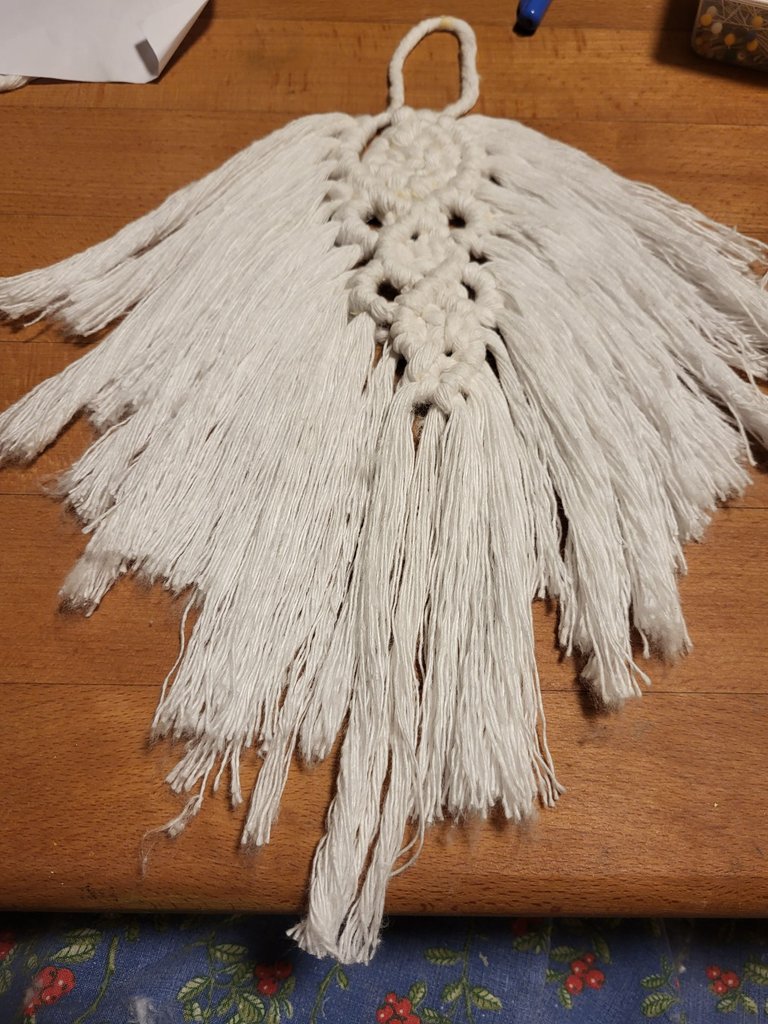
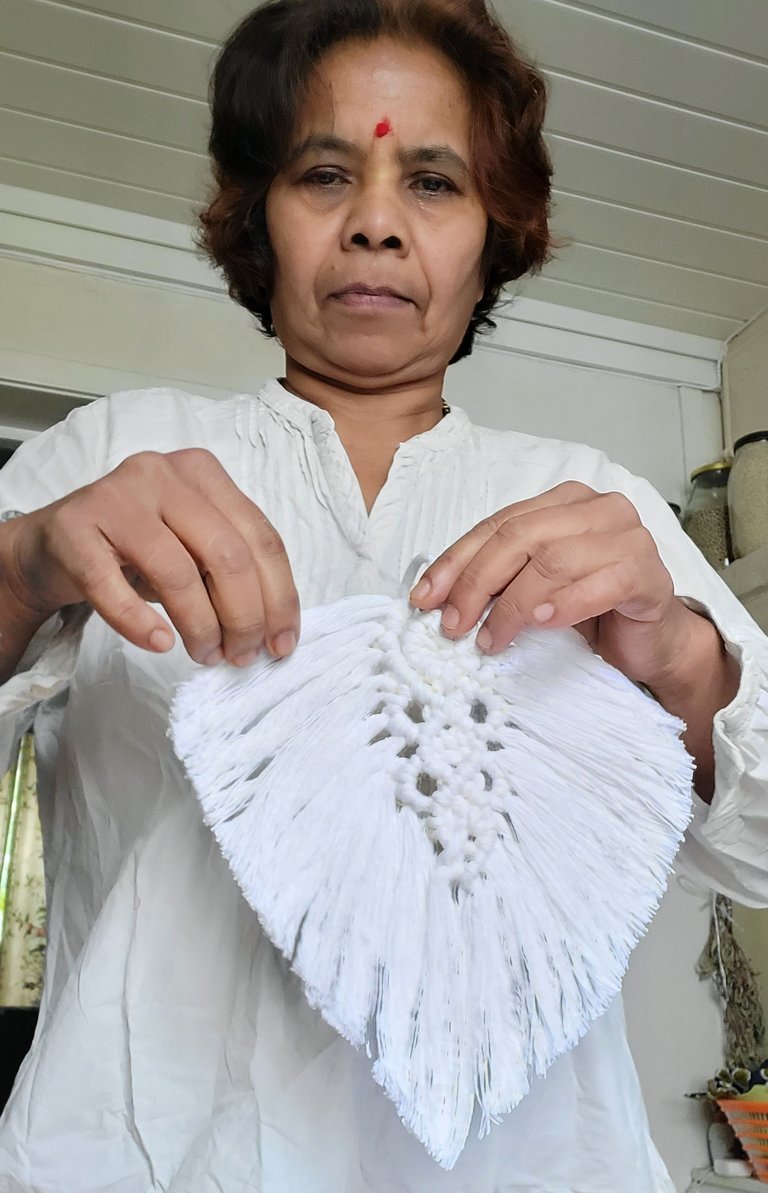
Here is the final result.
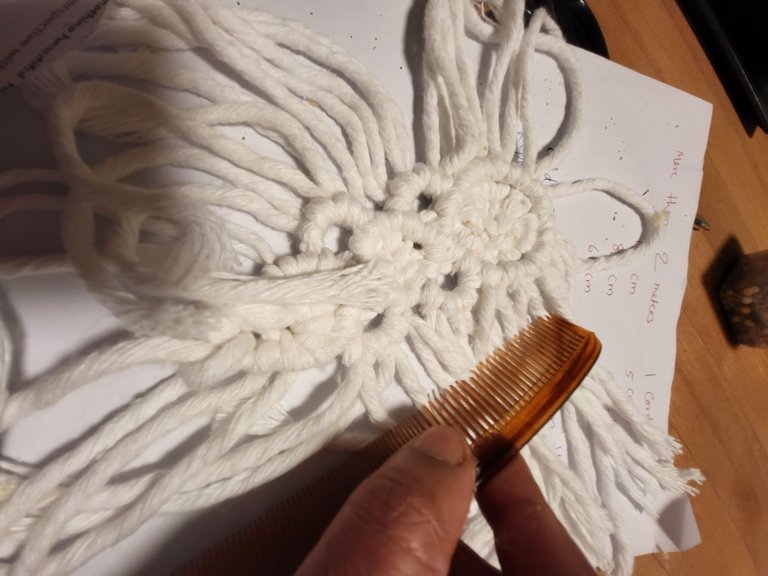
carefully separate the threads using a comb.
I don't use hair spray I mixed glue with water and sprayed on the craft to keep the stiffness. I did this at night.
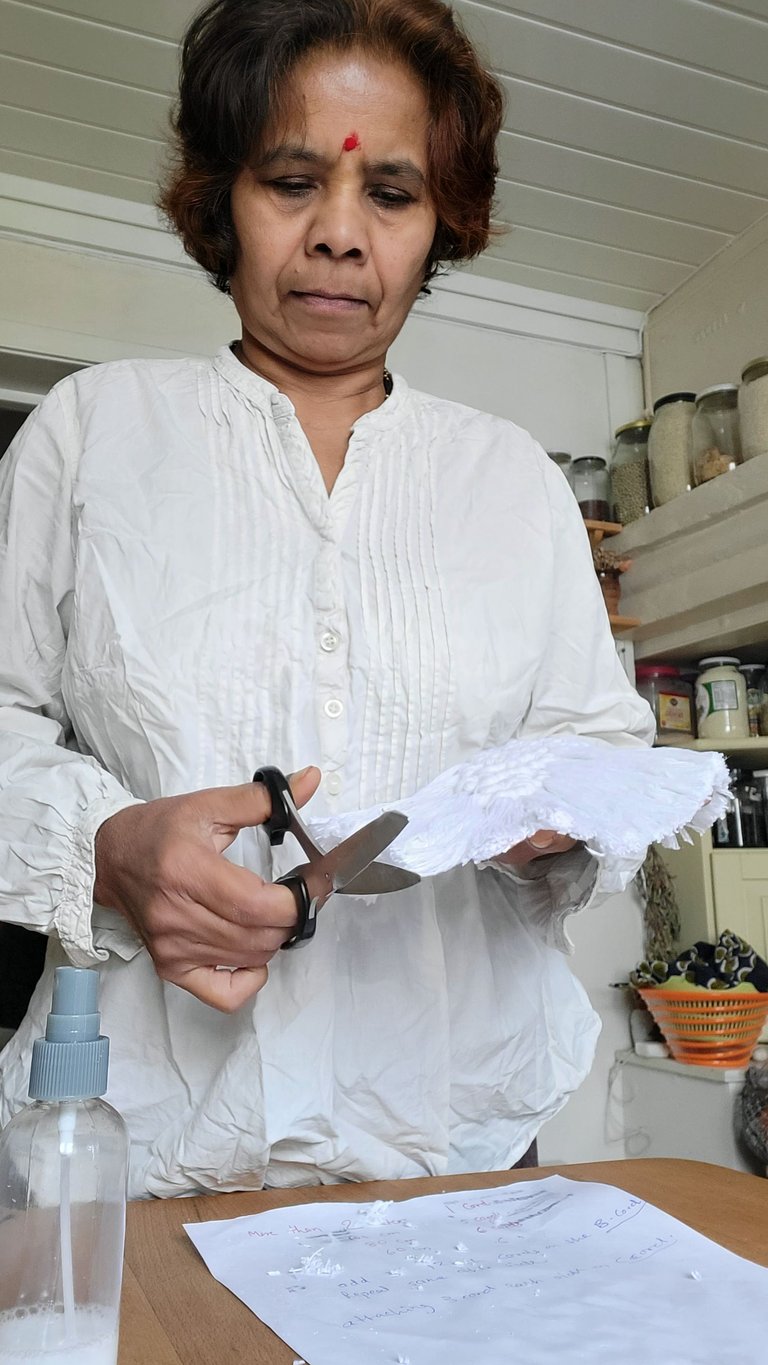
The next day I cut the leaf into shape
How it forms my leaf wall hanger.
thank you for joining me and reading my post.
Posted Using InLeo Alpha
wow. it is both a leaf and a feather in one. you have very good skill. best of luck in the competition
!INDEED
Thank you very much for your support. :)
(4/5)
@hindavi! @eolianpariah2 Totally agrees with your content! so I just sent 1 IDD to your account on behalf of @eolianpariah2.
(html comment removed: )
)
Thank you very much. :)
It turned out amazing. It looks a little complicated to make, but in your post you explain it very well.
Thank you for stopping by.:)
Making it not easy.. but explain it process is more difficult 😛 but you explain it very Well.. 👍🏻
Love the design 👍🏻
thank you dear I should made a different one but here in Norway, the art material sewing material or paints are very expensive. I did it easy and simple. Thanks for stopping by.Happy Jalmastami. Jai Shri Krishna. :)
You are all Rounder.. 👍🏻
Happy janmashtami 🙏🏻
Jai shree Krishna..
Wow!! This was done with so much precision. I love your step by step tutorial and thanks for sharing this creative piece with the community Good job!
Thank you very much @diyhub for curation and support. :)
Precioso, es un detalle para tantas ocasiones o lugares. Excelente post
https://inleo.io/threads/view/hive-130560/re-leothreads-26c6hw3fy
Thank you very much for your support. :)
Hello, Thanks for the photo, I wonder how you did it? Nicely edited. Greetings :)
Not every person has such talent and not every person creates such special and laborious things. I really like it very much.
You have a very beautiful look, my friend
You mean I knew many things thanks for your compliment. :)