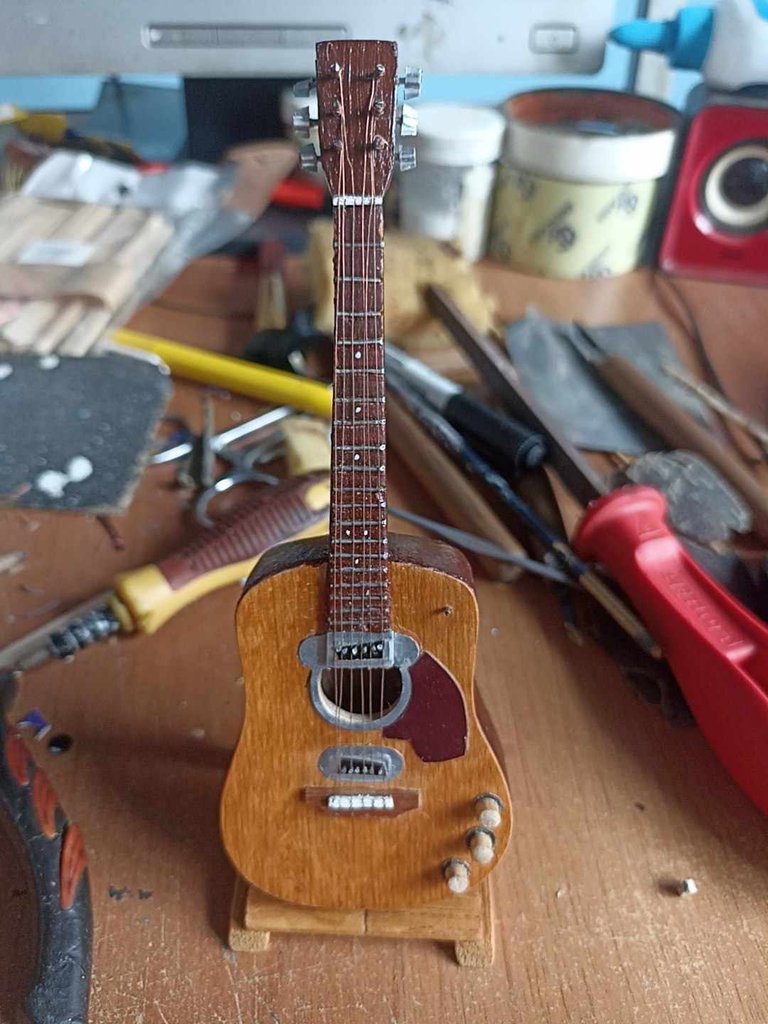
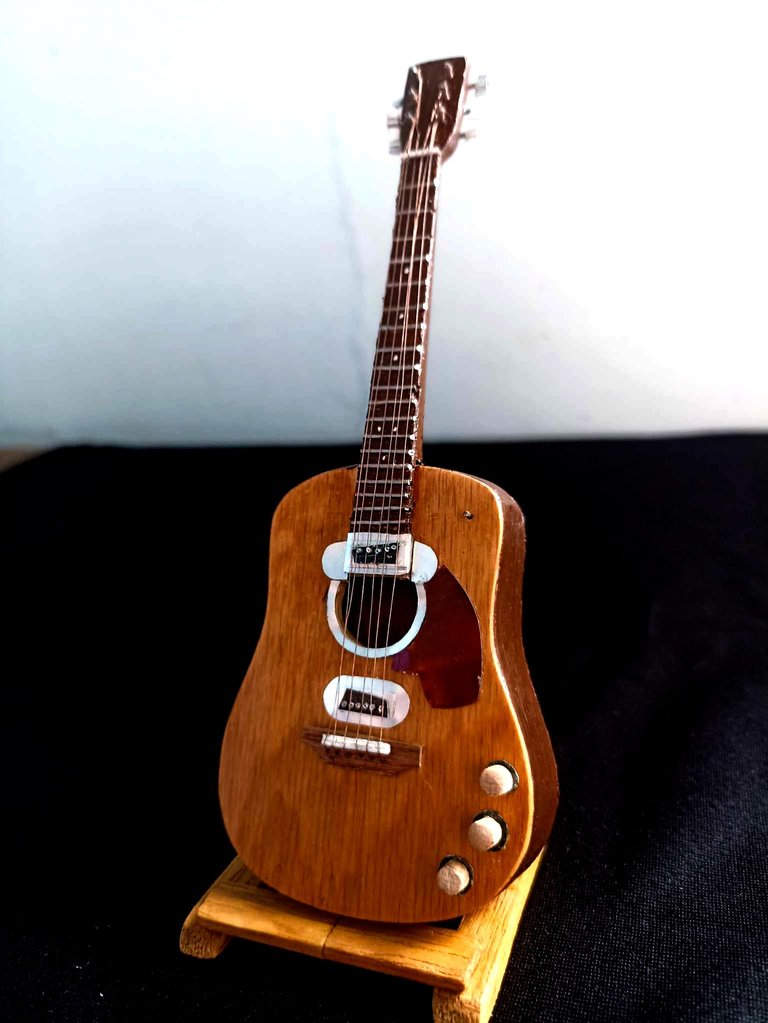
Kurt Cobain Unplugged Scale Model Guitar Handmade - Guitarra Unplugged modelo a escala de Kurt Cobain Hecha a Mano [ENG-ESP]


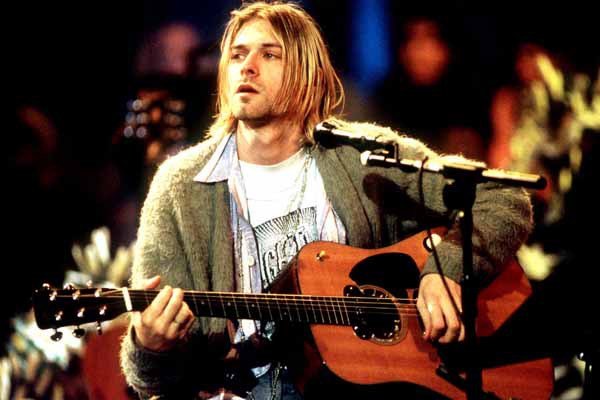
Hello dear artist and artisan friends of our beloved Hive Diy community, it is an honor and a blessing to be able to return here again to share with you a project that I have been working on for some time. It was not something I did overnight, but in my free time I did a little bit of everything until I could finish it. I want to share with you a replica of a scale model of rock legend Kurt Cobain's guitar. With a guitar like this, the group Nirvana performed their famous acoustic concert on MTV, becoming one of the most legendary. The guitar is a Martin D-18, being this number 7, with serial number 166854 and it was originally built for right-handed players, but had to be modified because Kurt Cobain was left-handed. I have made this scale model using recycled wood, as well as aluminum cans and copper wire. I will show you step by step how I made it, I hope you like it!
Hola queridos amigos artista sy artesanos de nuestra querida comunidad de Hive Diy, es todo un honor y una bendición porder regresar por aqui de nuevo para compartir con ustedes un proyecto en el que estuve trabajando por algún tiempo. No fue algo que hice de un día para otro sino que en mis ratos libres hacía de todo un poco hasta que pude finalizarlo. Quiero compartir con ustedes una réplica de un modelo a escala de la guitarra de la leyenda del rock Kurt Cobain, con una guitarra como esta el grupo Nirvana relizó su famoso concierto en acústico en MTV convirtiéndose en uno de los más legendarios. La guitarra es una Martin D- 18 siendo esta la numero 7, con el numero de serie 166854 y originalmente fue construida para diestros, pero tuvo que ser modificada porque Kurt Cobain era zurdo. Este modelo a escala lo he realizado utilizando madera reciclada, así como también latas de aluminio y alambre de cobre, les mostraré paso a paso como la hice, espero les guste!

 | |  |
|---|---|---|
 | 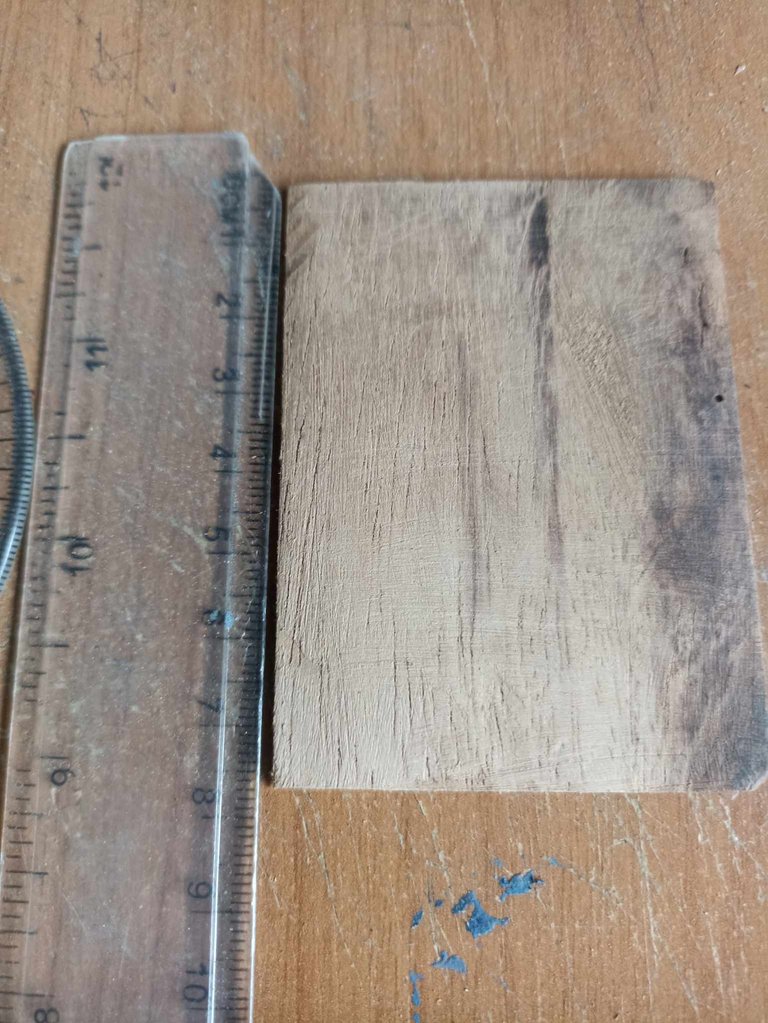 | 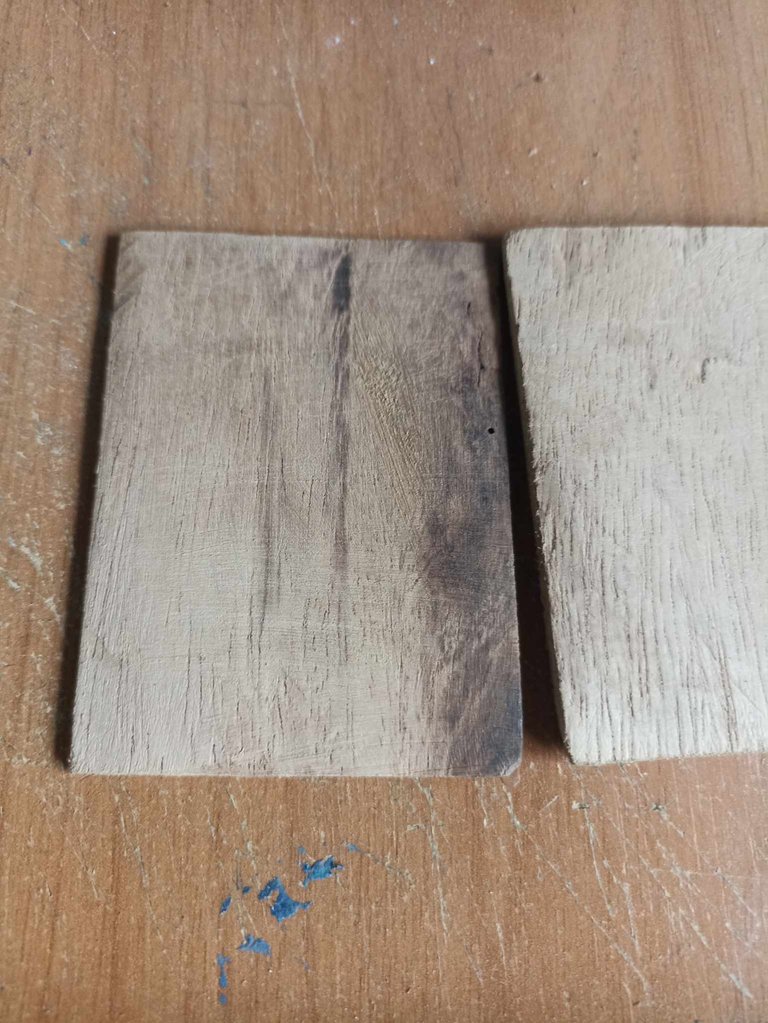 |
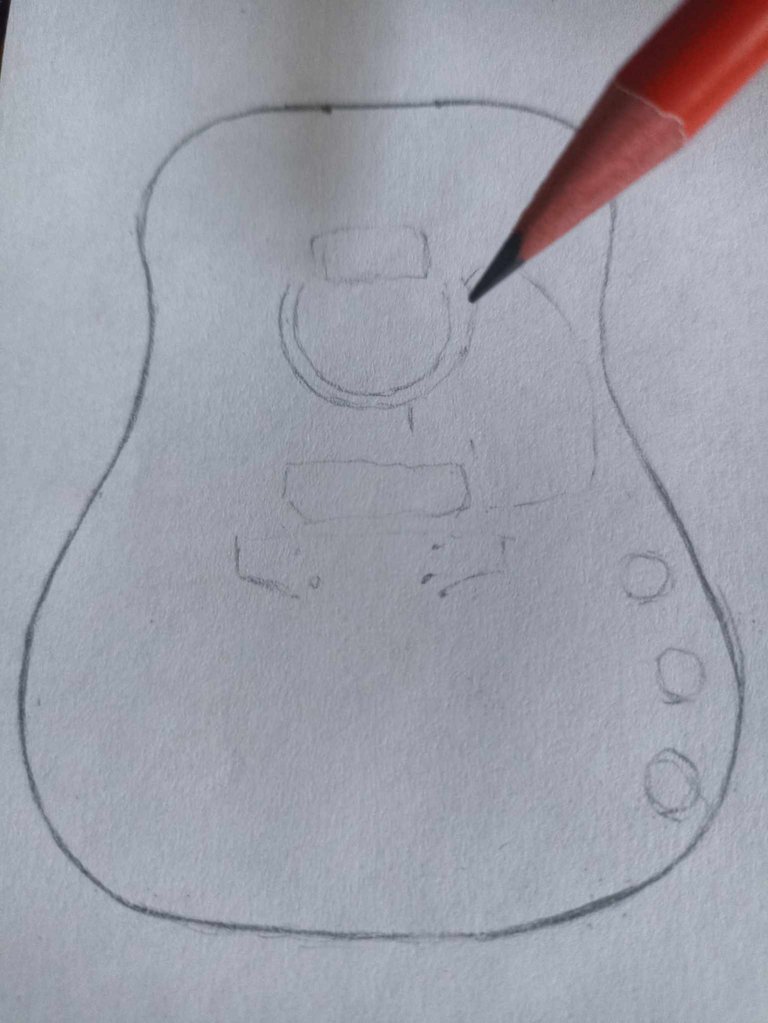
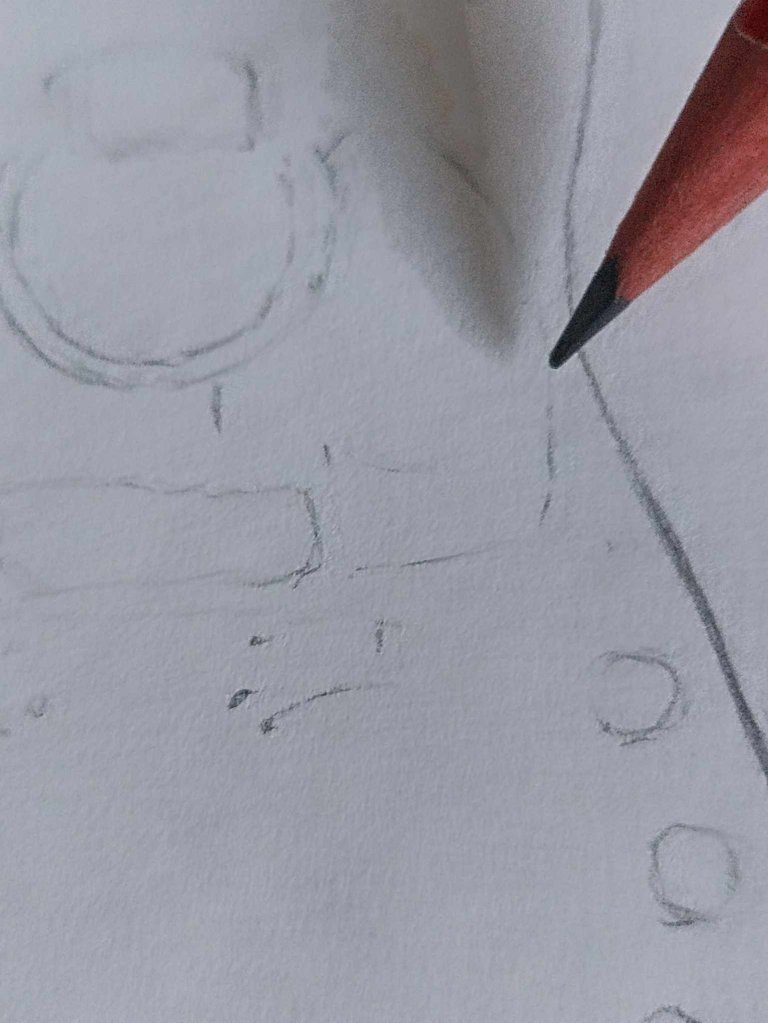
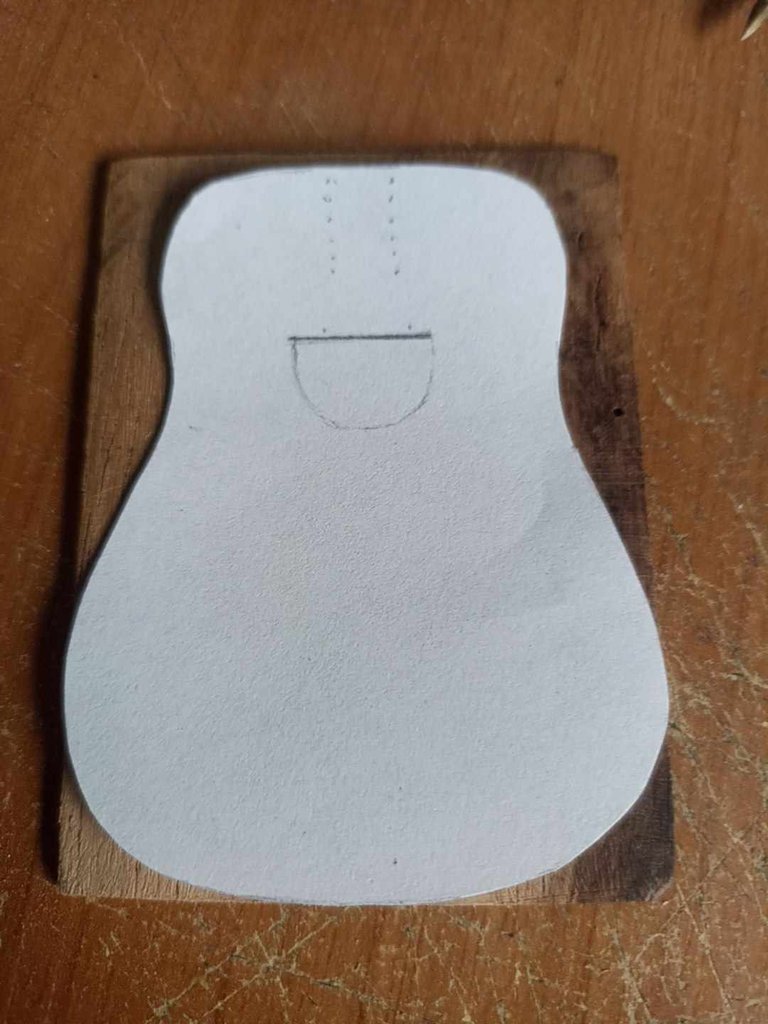
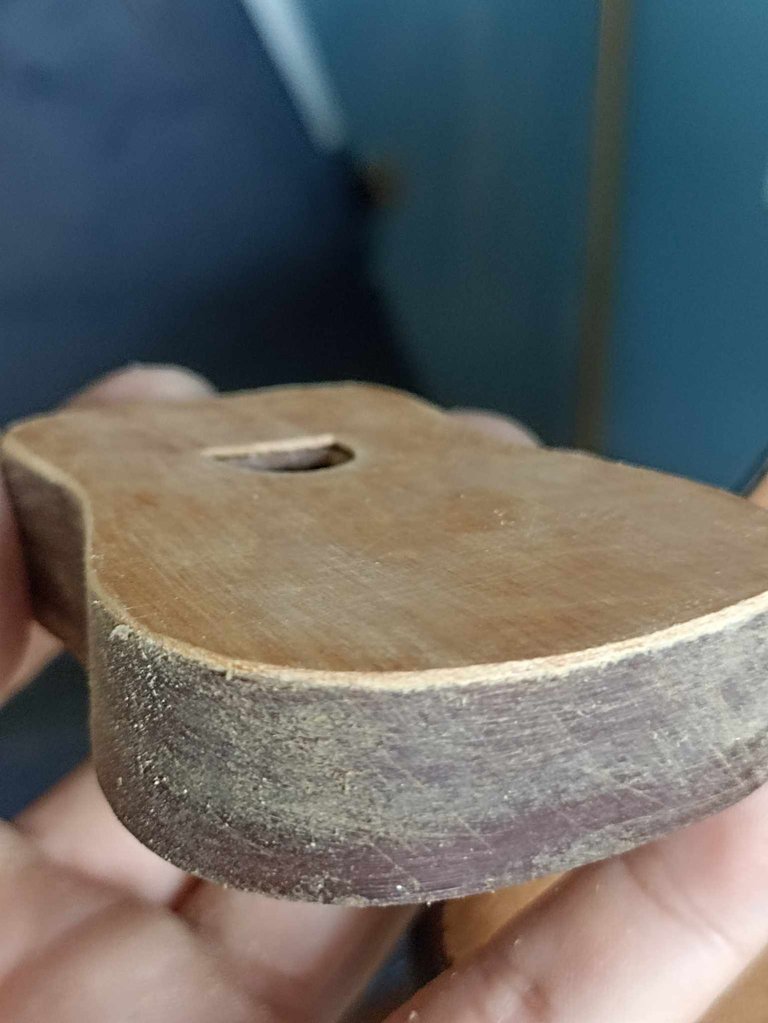
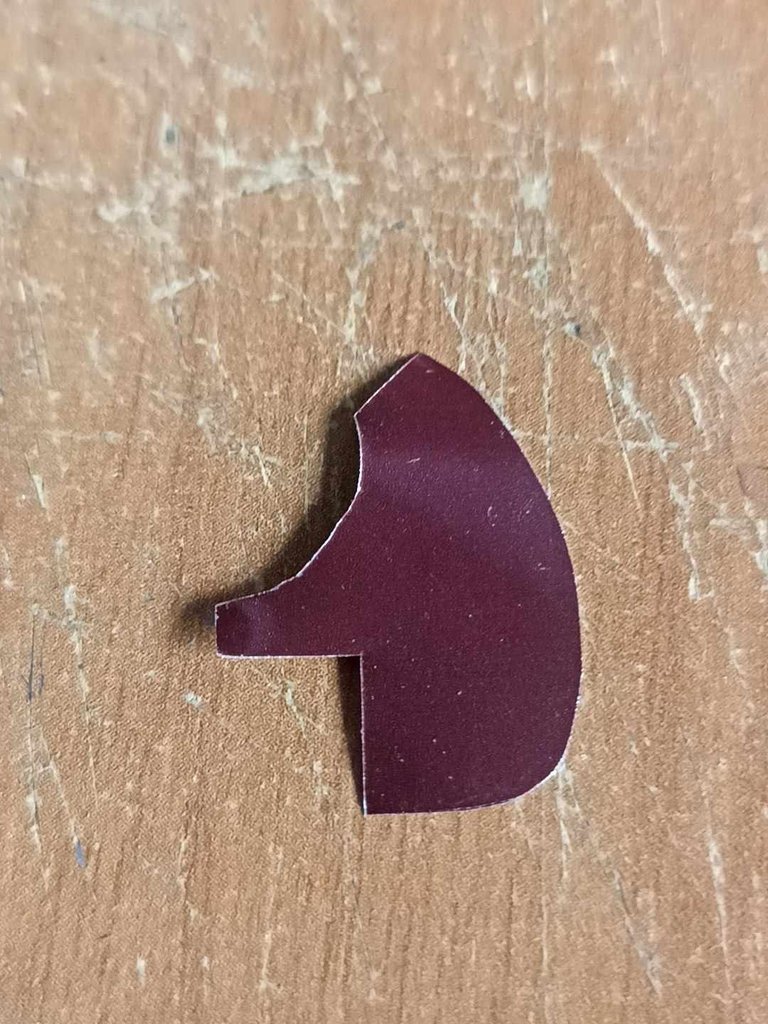
The model doesn't follow a particular scale; I made the measurements at my discretion. I made the guitar body using templates measuring 8 centimeters long by 5.5 centimeters wide, while the neck measures 10 centimeters long; I used these measurements to make the template. For the guitar body, I used recycled wood that I found at a carpentry shop, where my idea came from. I cut these just a little larger so I could use the templates on them and then shape them.
El modelo no obedece a una escala en particular sino que hice las medidas a mi criterio. El Cuerpo de la guitarra lo hice a través de unas plantillas que miden 8 centímetros de largo por 5,5 centímetros de ancho, mientras que el mástil mide 10 centímetros de largo, con estas medidas hice la plantilla. Para el cuerpo de la guitarra utilicé madera de reciclaje que encontré en una carpintería y donde surgió mi idea, estas las corté solo un poco más grande para poder utilizar las plantillas sobre ellas y luego darle forma.
 |  |  |
|---|---|---|
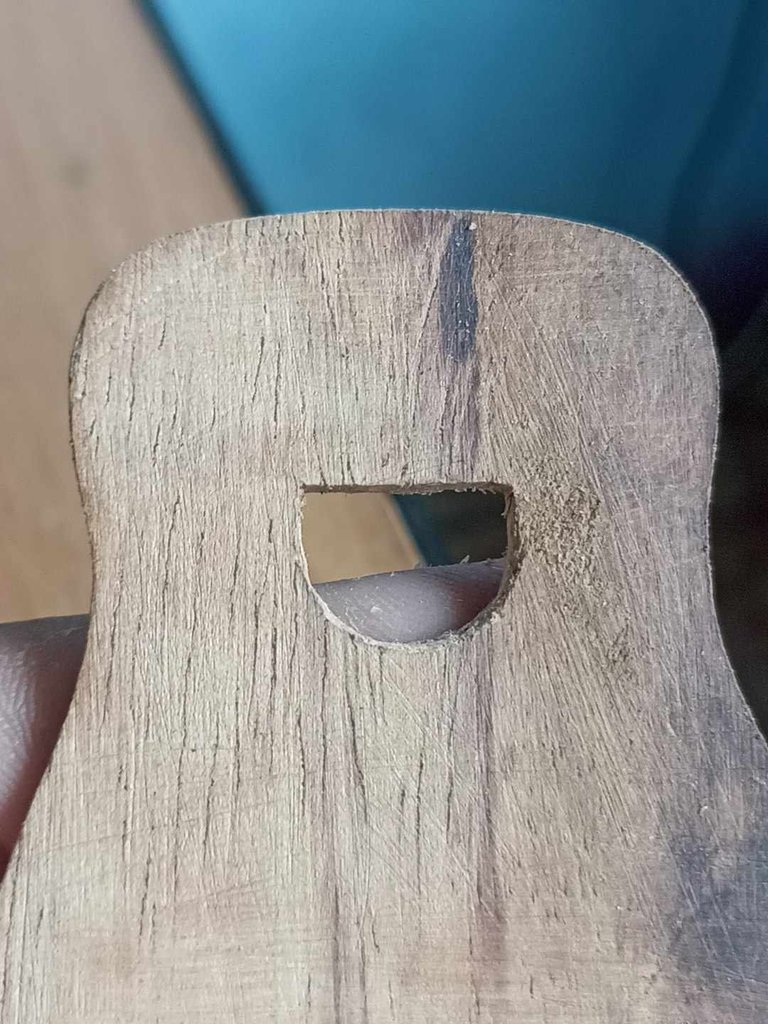 |  |  |
Once I cut the templates, I placed them on top of the wood to draw the shape exactly. Then I began to shape both pieces, then I drilled the hole that allows the sound of the strings to enter the box. I also had a strip of wood, 1.5 millimeters thick, as thick as possible so that it would be like an easy-to-bend sheet. I cut it down to 1.5 centimeters, so that it would serve to join the two previously cut pieces of wood together. With a wrench, I held the strip of wood tight for several days until it was firm.
Una vez corte las plantillas las puse encima de la madera para dibujar la forma tal cual, luego comencé a darle forma a ambas piezas, seguidamente abri el agujero que sirve para que el sonido de las cuerdas entre en la caja. También tenía una cinta de madera, de 1,5 milímetros de espesor, tanto como fuera posible para que quedara como una hoja facil de doblar, la corte hasta tener 1,5 centímetros y así me sirviera para unír ambas maderas antes cortadas. Con una llave de presión mantuve ajustada la cinta de madera por varios días hasta que quedar abien firme.
 |  |  |
|---|---|---|
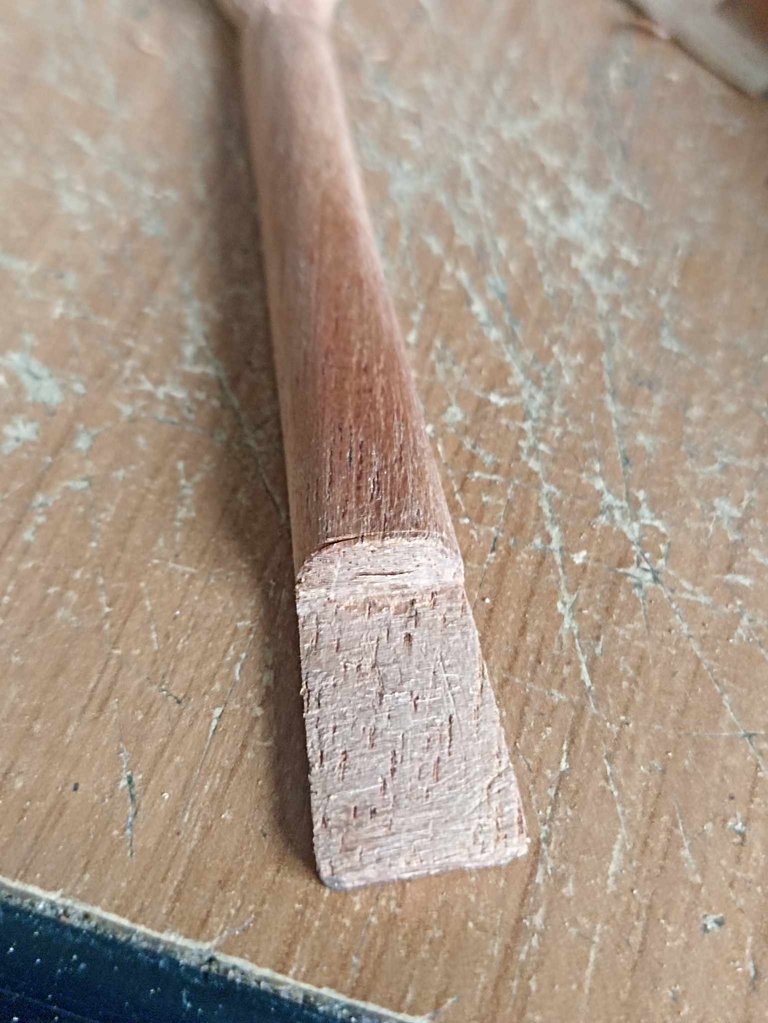 | 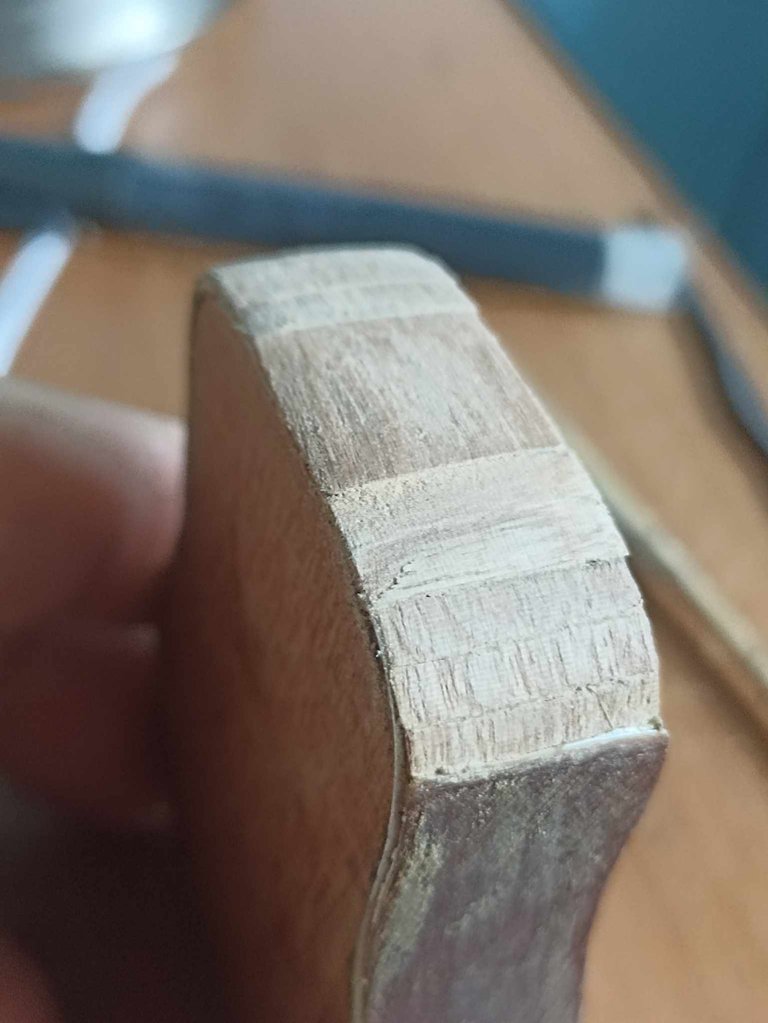 |  |
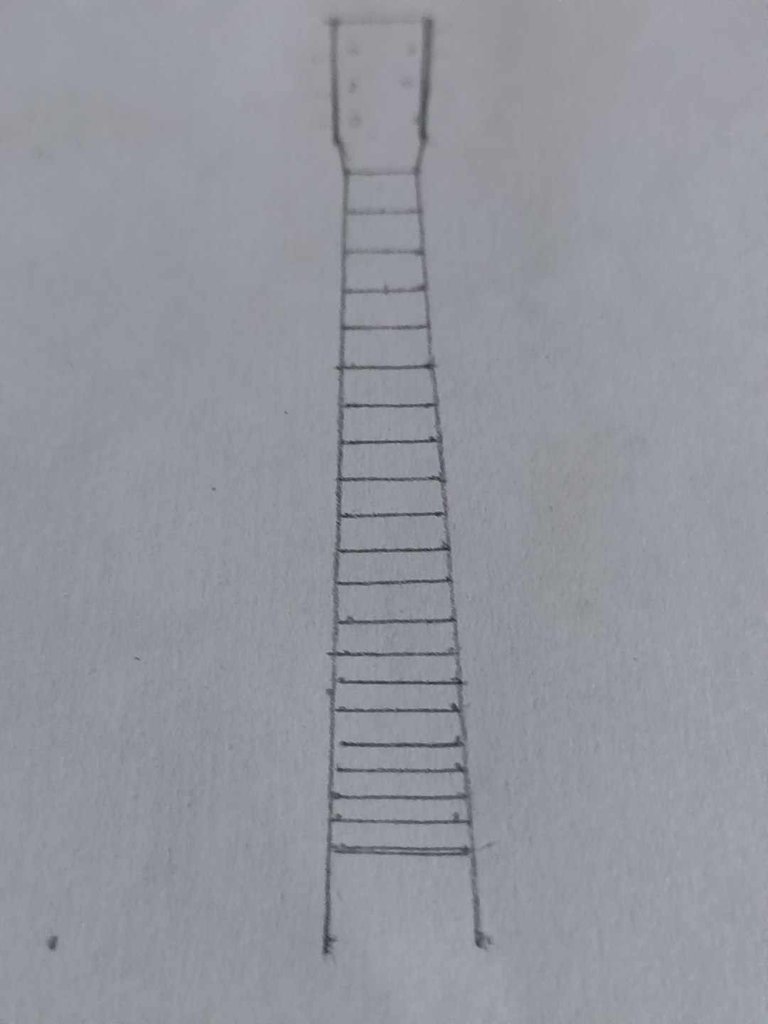
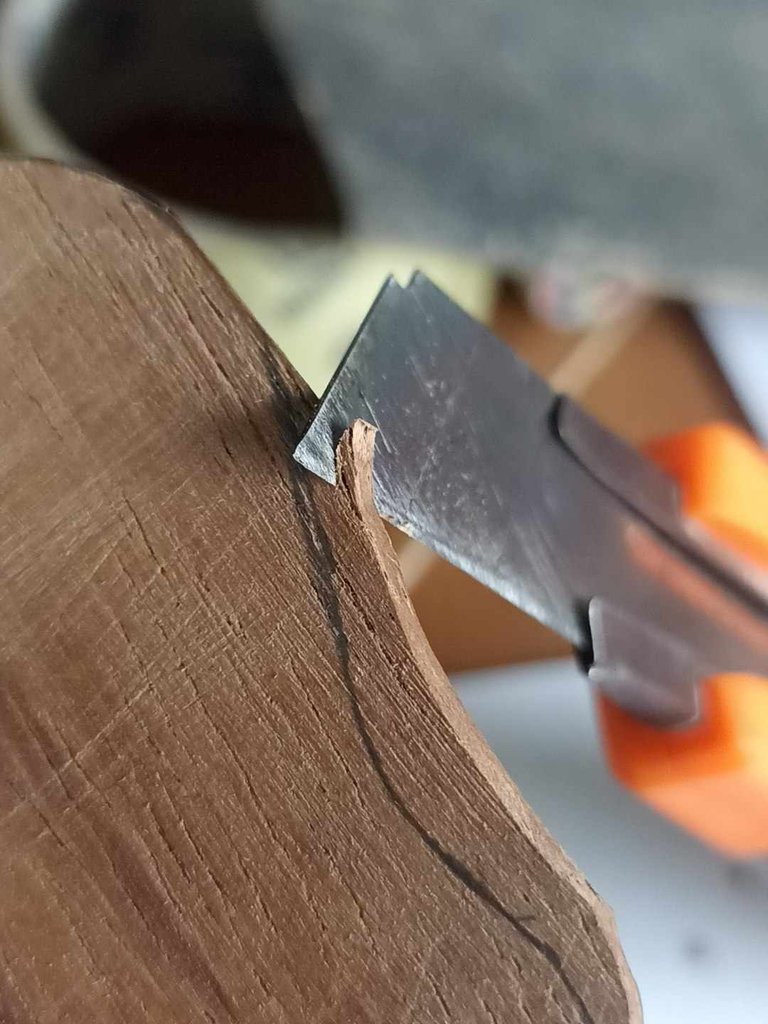
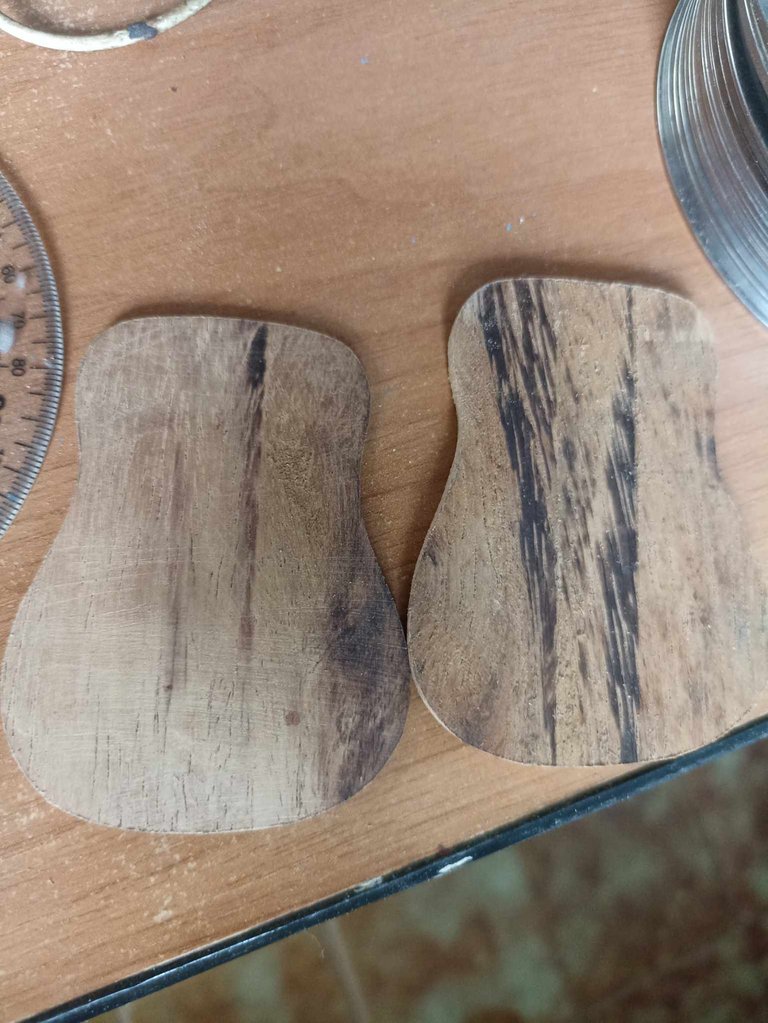
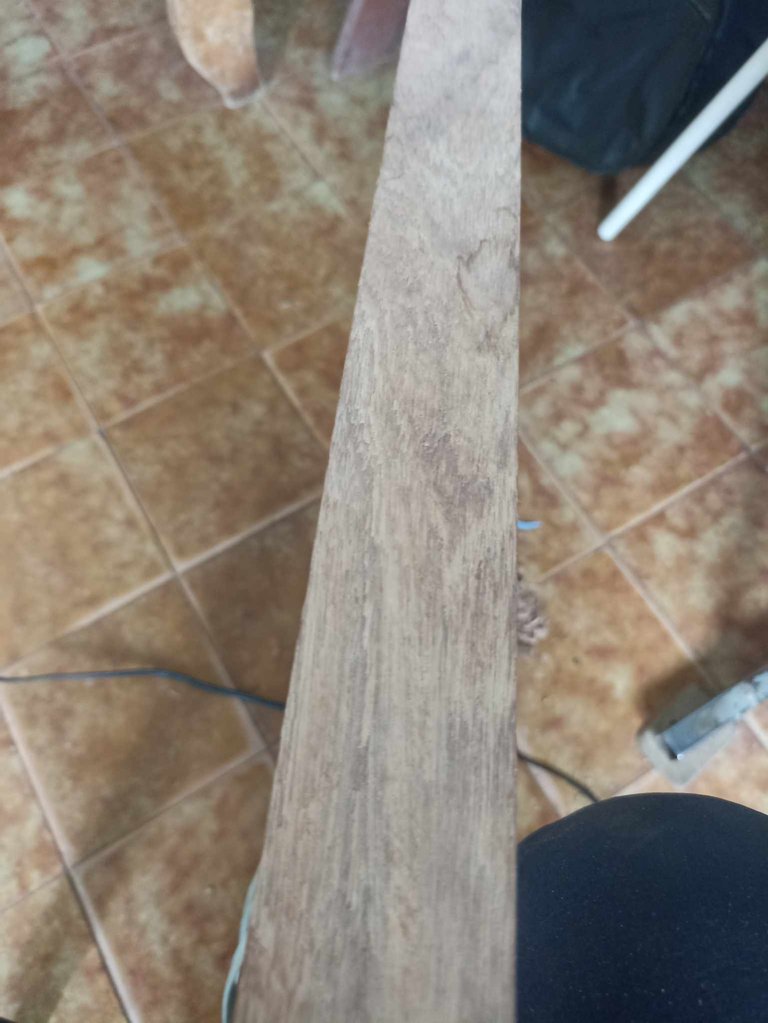
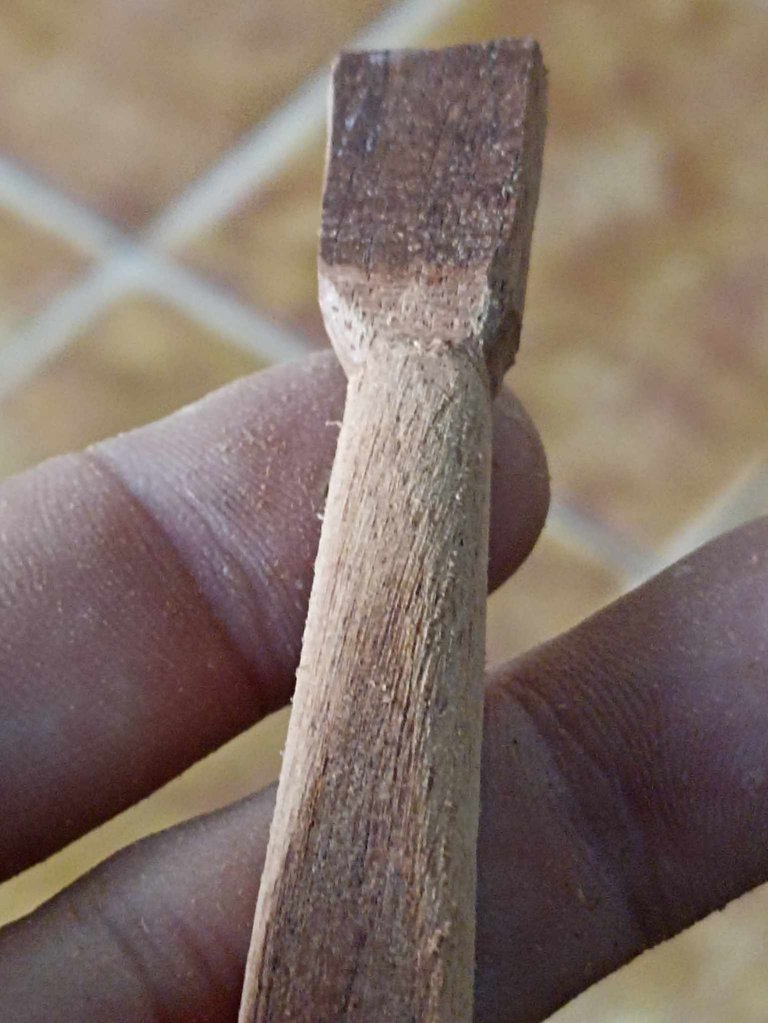
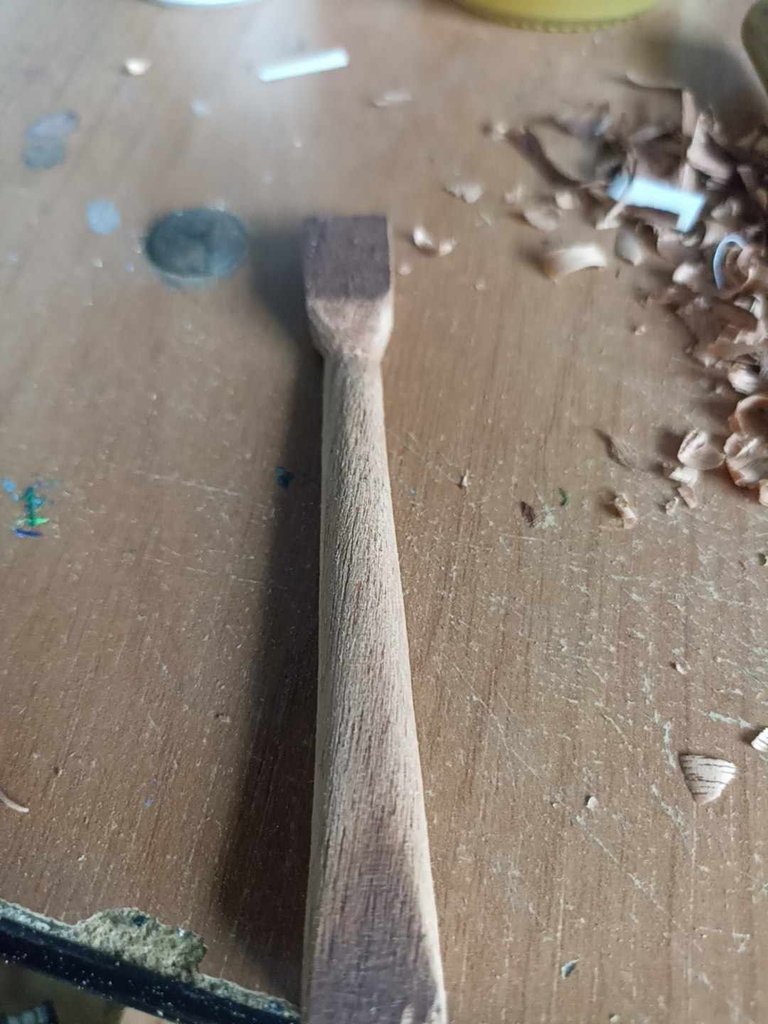
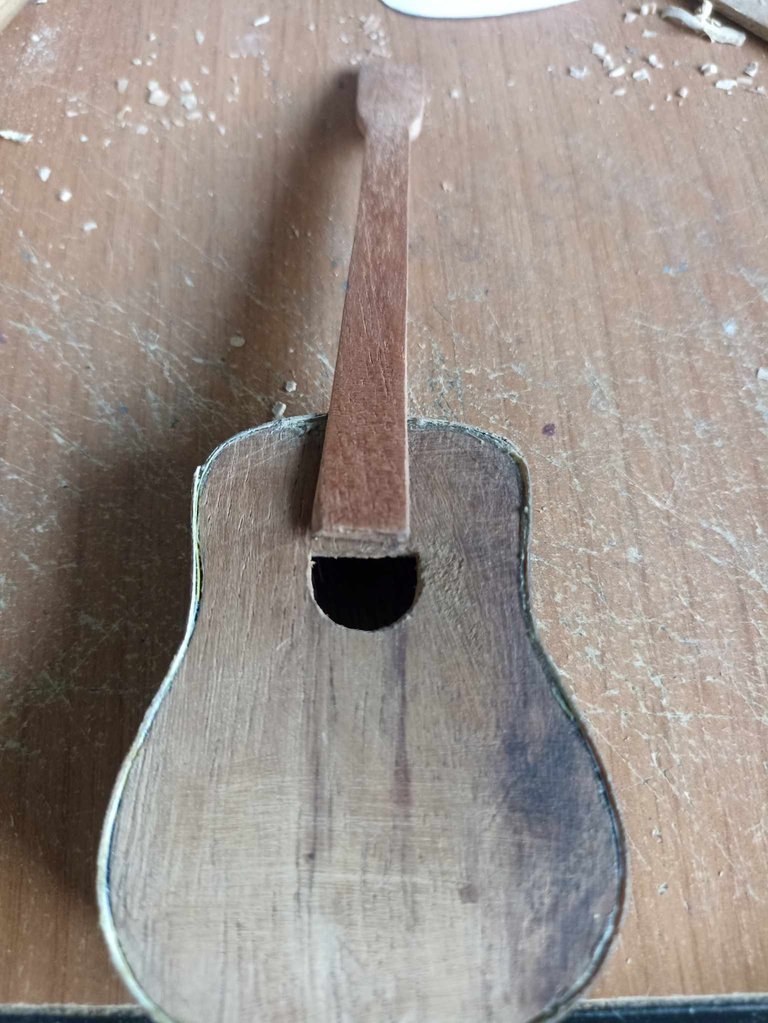
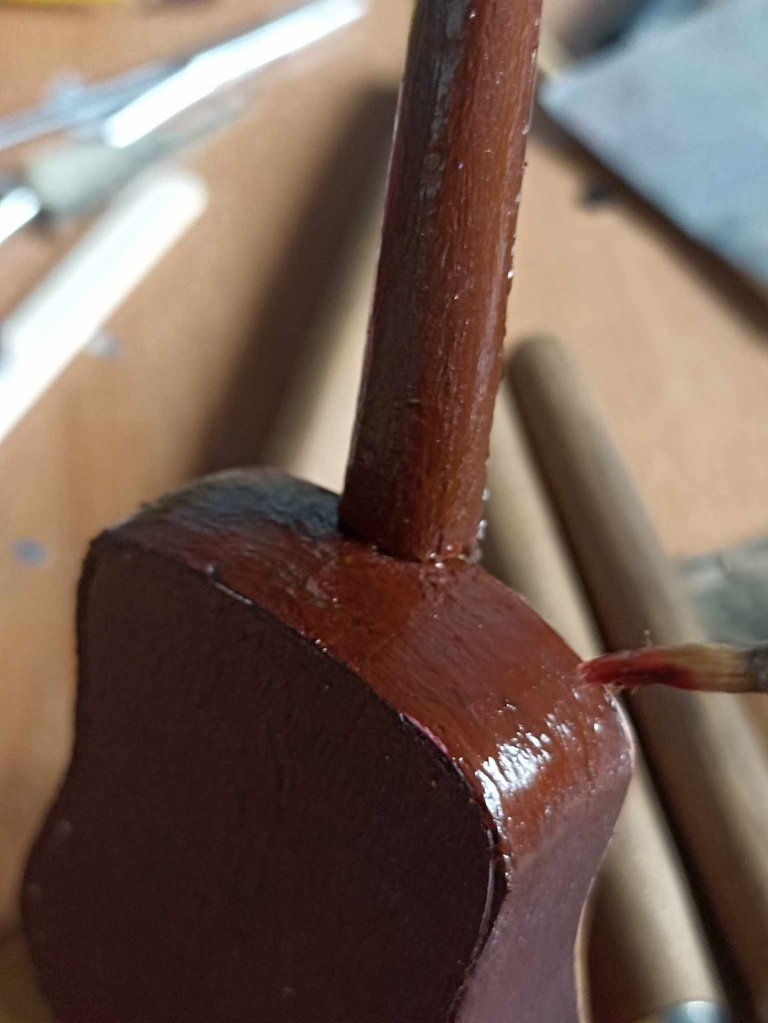
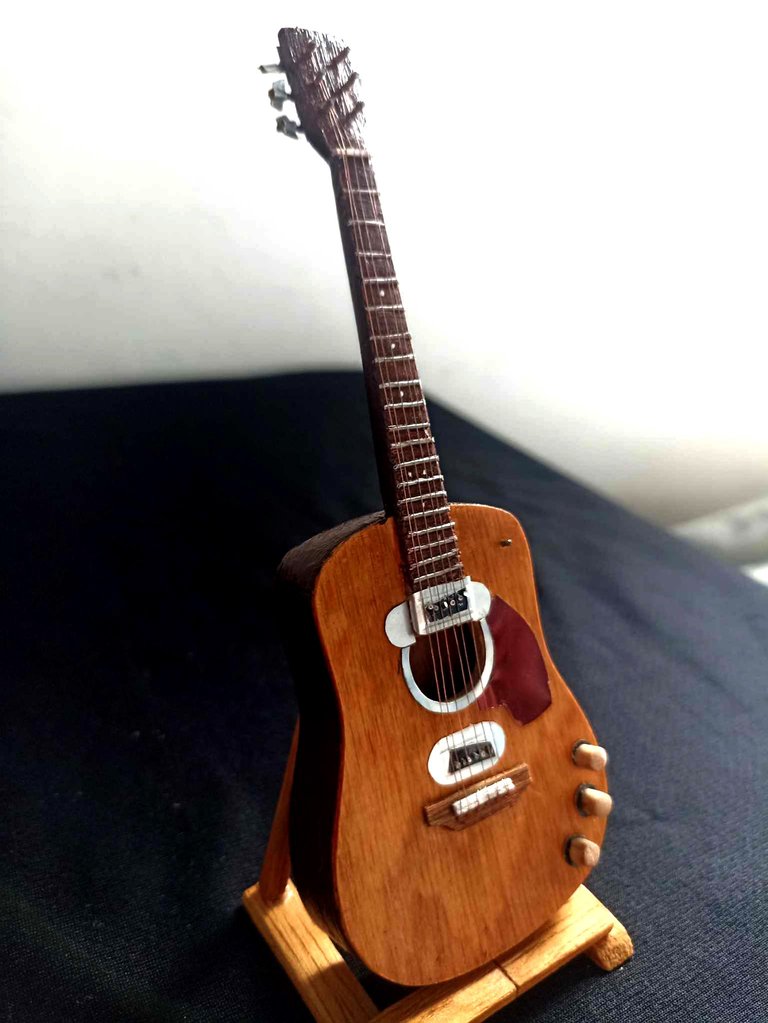
Next, I started making the neck for the guitar. Also using the template, I drew on top of the wood. In this case, mahogany, which is a reddish color and is the same wood used in the original guitar. I made the neck by cutting and gradually shaping it into the desired shape. Then, I sealed the top of the guitar body, which was the most complicated part. Up to that point, I couldn't bend the wood strip, so I had to cut small scraps of wood and glue them together until I finished sealing them. After that, I began to clean up all the protruding parts with sandpaper.
Después comencé a hacer el mástil para la guitarra, también con la plantilla dibujé encima de la madera, en este caso madera caoba que es de color rojizo, y es la misma madera que utilizaron en la guitarra original. Hice el mastil cortando y dándole poco a poco la forma deseada, despues sellé la parte superior del cuerpo de la guitarra que fue la parte mas complicada, ya que hasta ese punto no pudo doblar la cinta de madera así que tuve que picar pequeños retazos de madera y pegarlos hasta terminar de sellas. luego de eso con una lija comencé a limpiar todas aquellas partes que sobresalían.
 |  | |
|---|---|---|
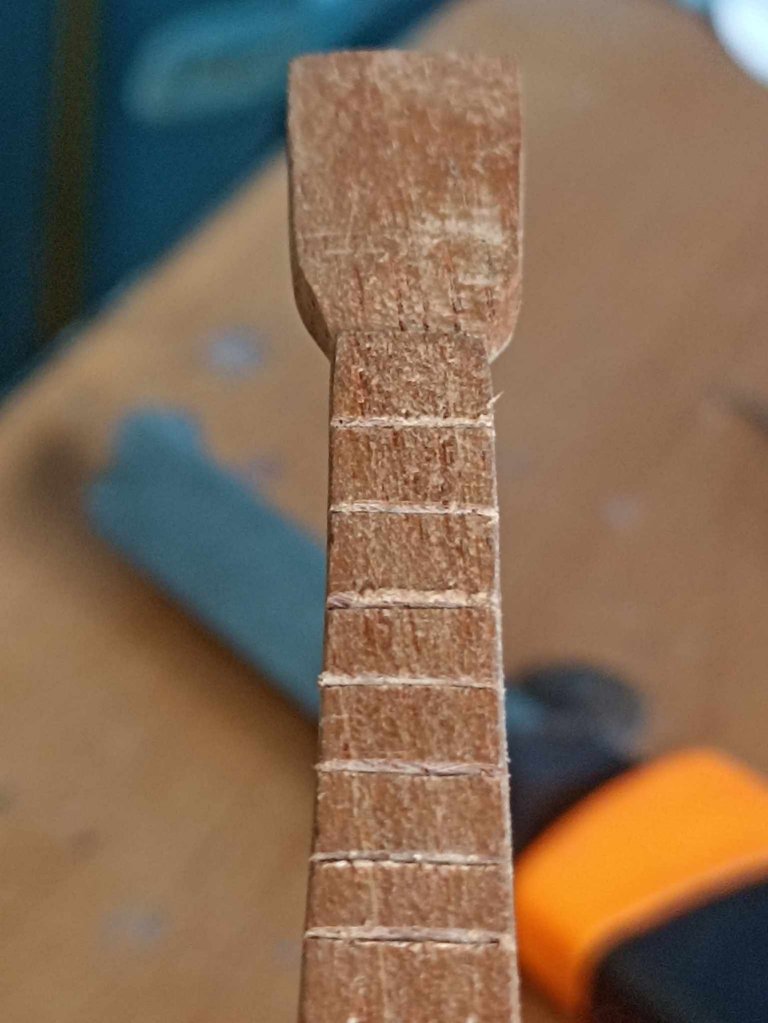 | 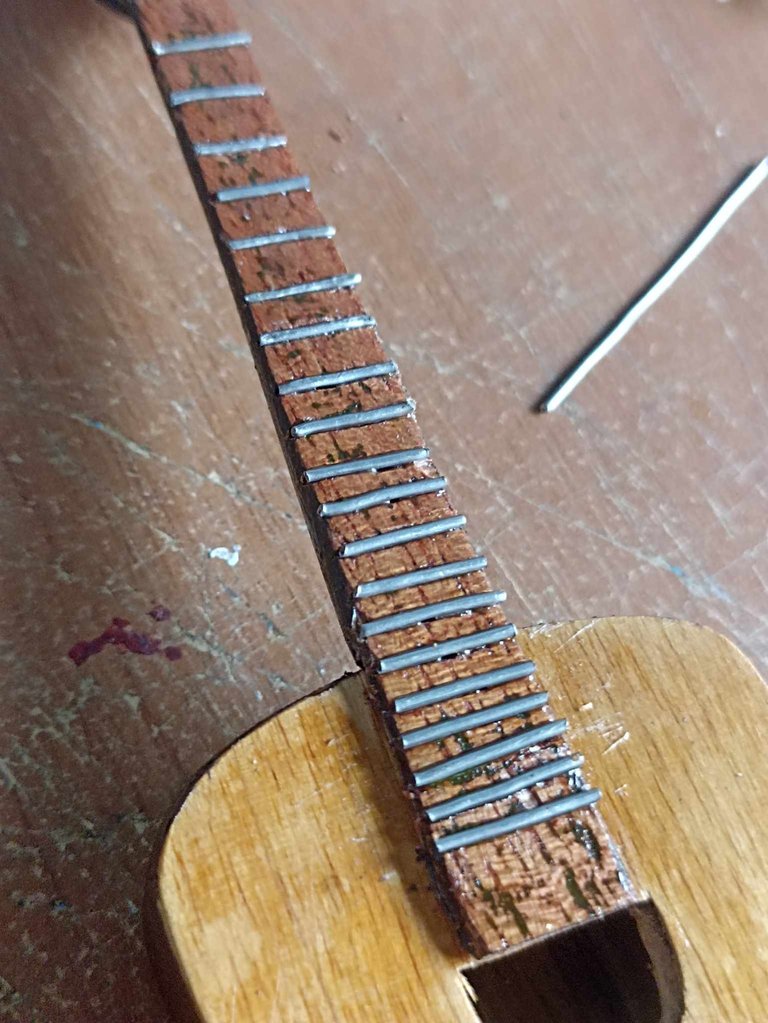 |
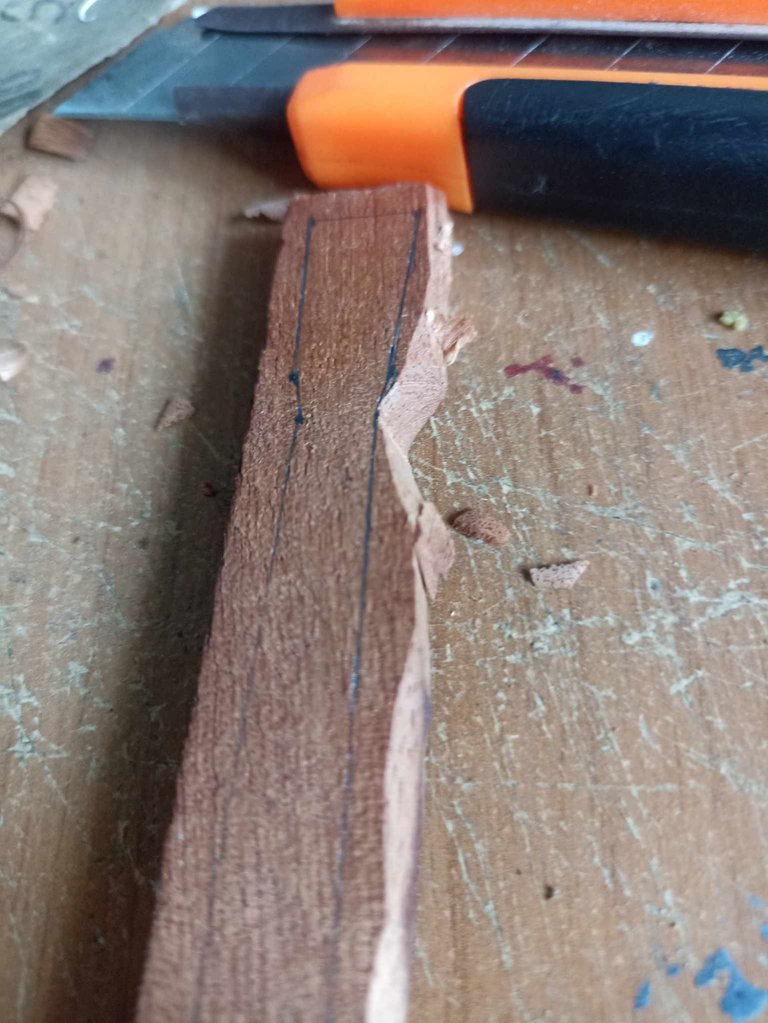
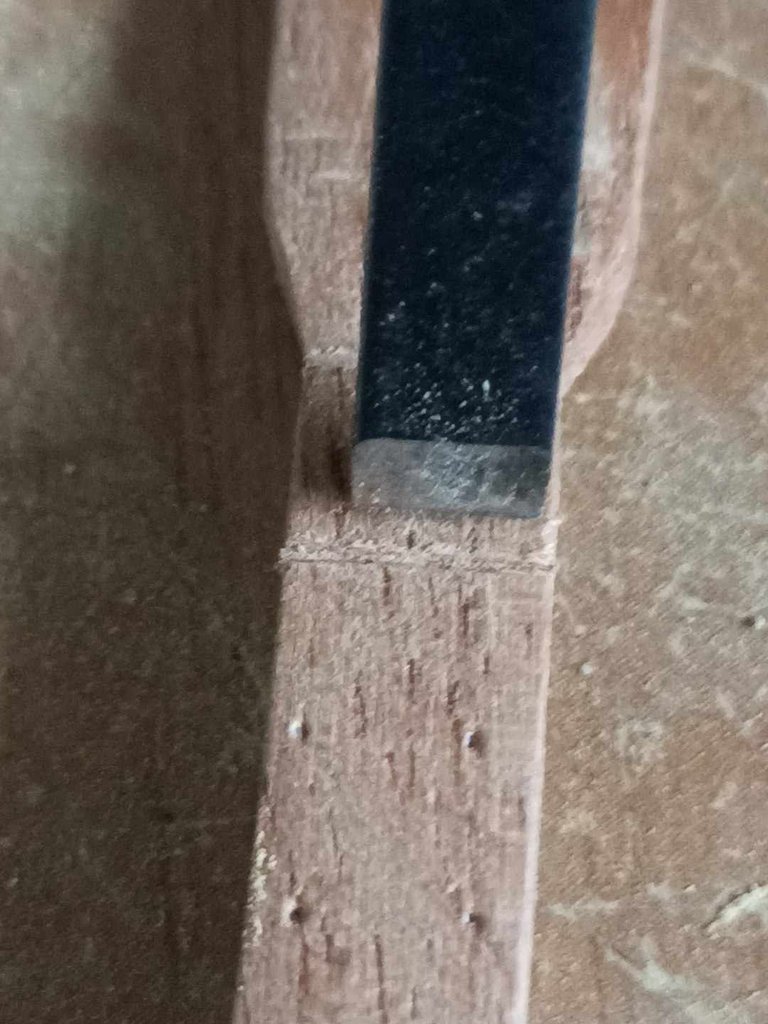
Then I attached the neck to the guitar body, and you could already see how it was coming together. Then I began carving the wood to place the frets, which are used to play the guitar's notes. I made very small cuts, and the frets were made from tin wire, which is easy to manipulate. I glued them together one by one.
Luego uní el mástil al cuerpo de la guitarra ya se podía ver como iba saliendo. Luego comencé a tallar la madera para colocar los trastes los cuales permiten dar las notas en la guitarra, hice los cortes muy pequeños y los trastes los hice con alambre de estaño, que se puede manipular facilemente, los puse uno a uno con pegamento.
 |  |  |
|---|---|---|
 |  | 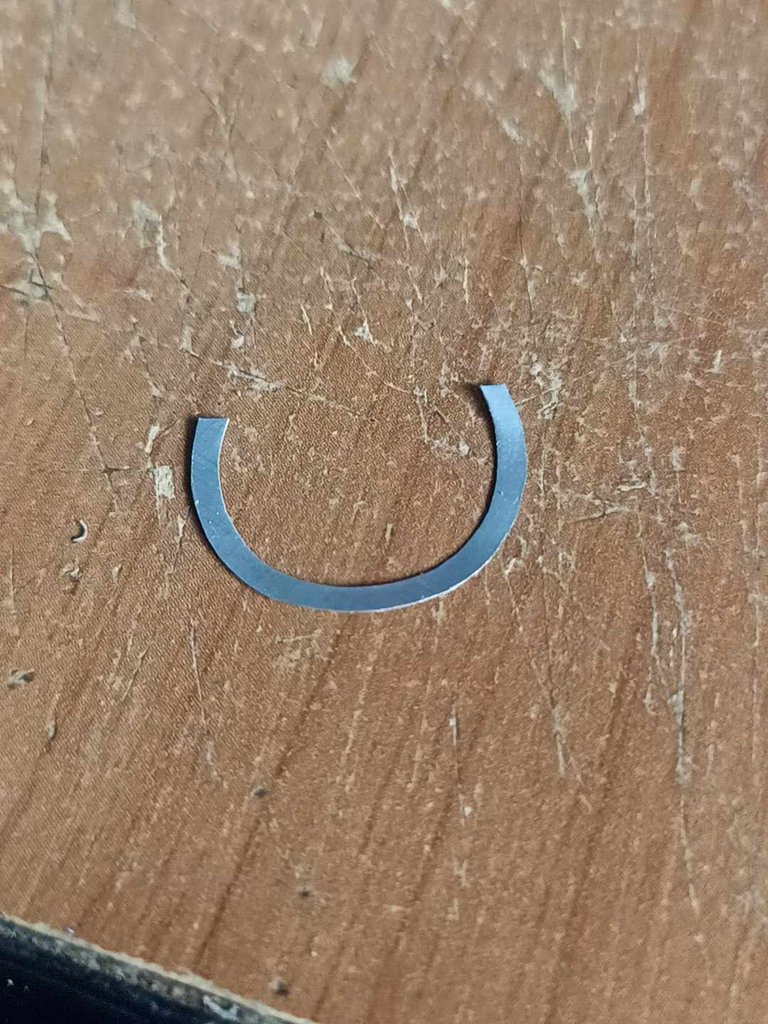 |
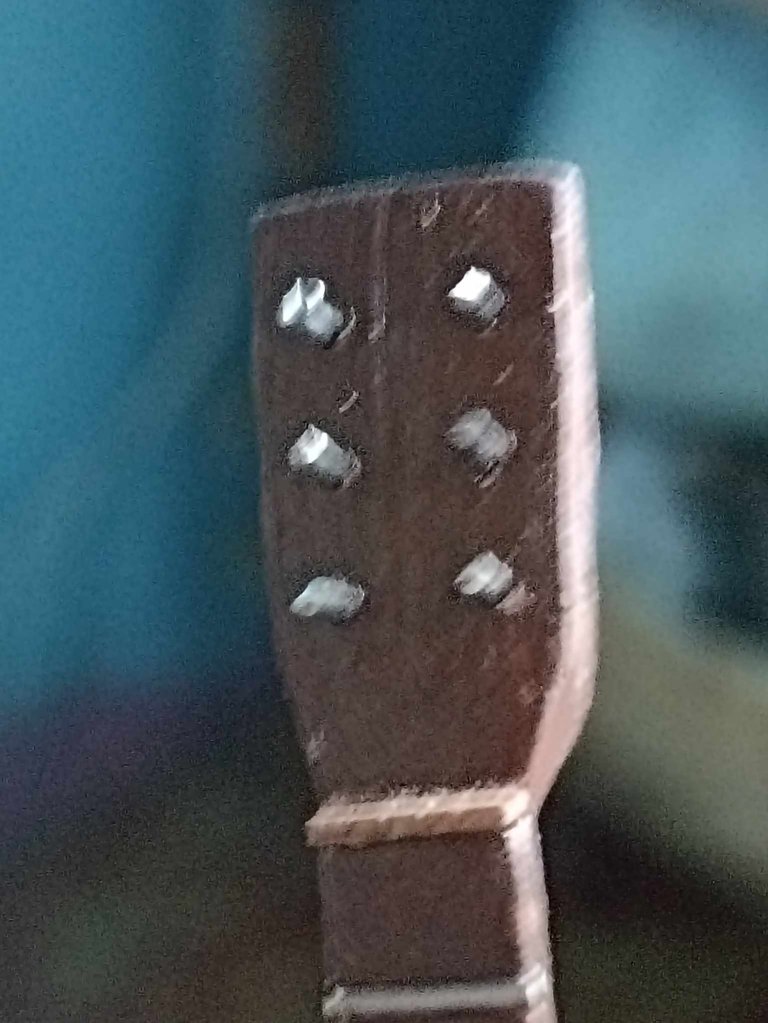
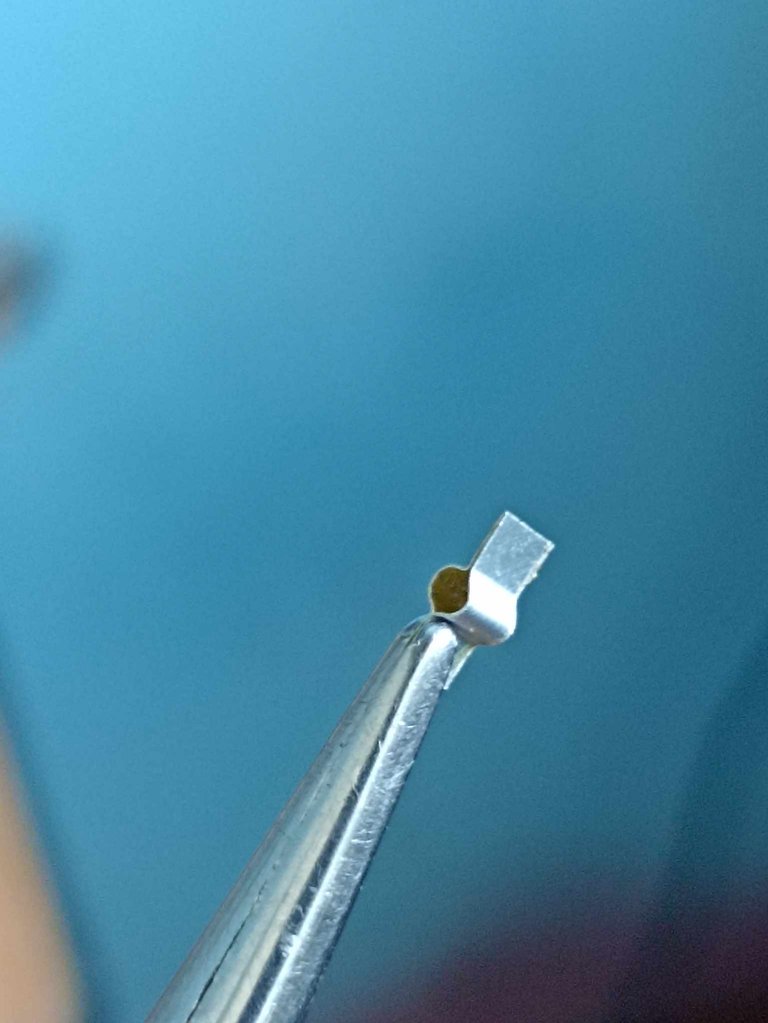
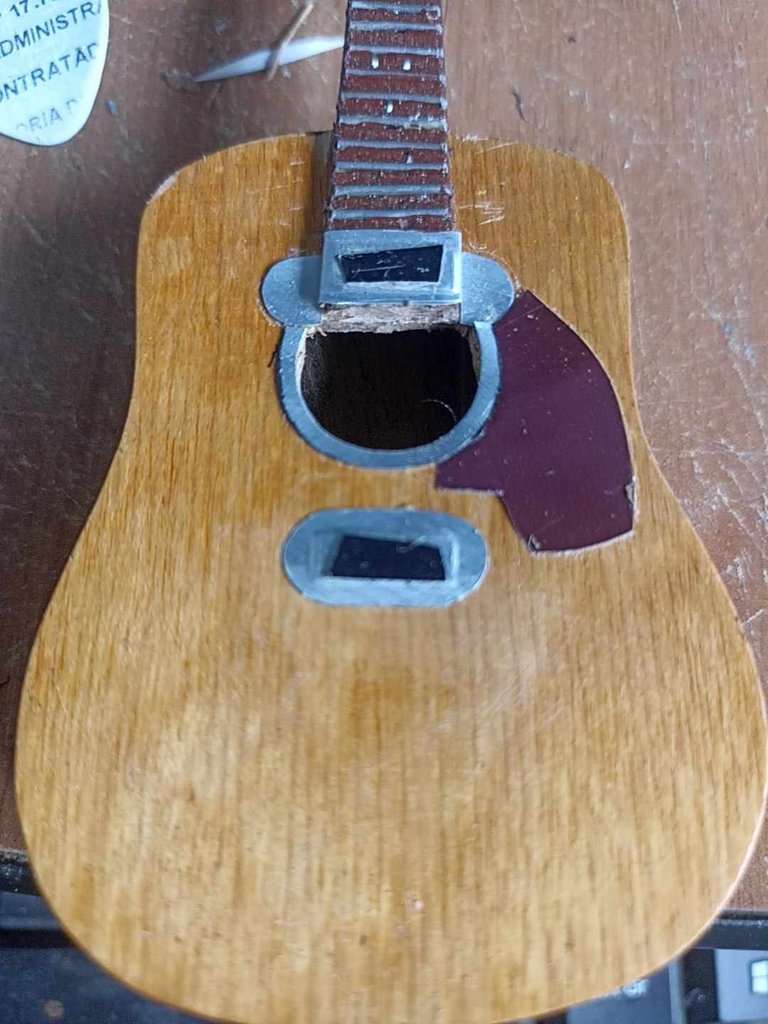
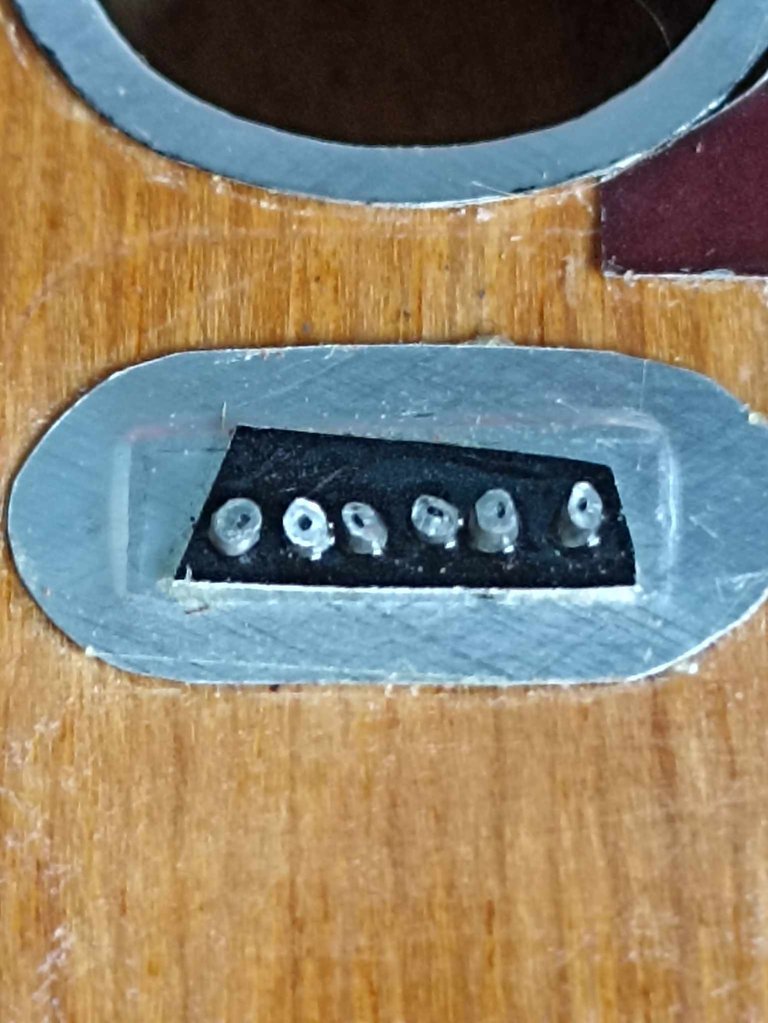
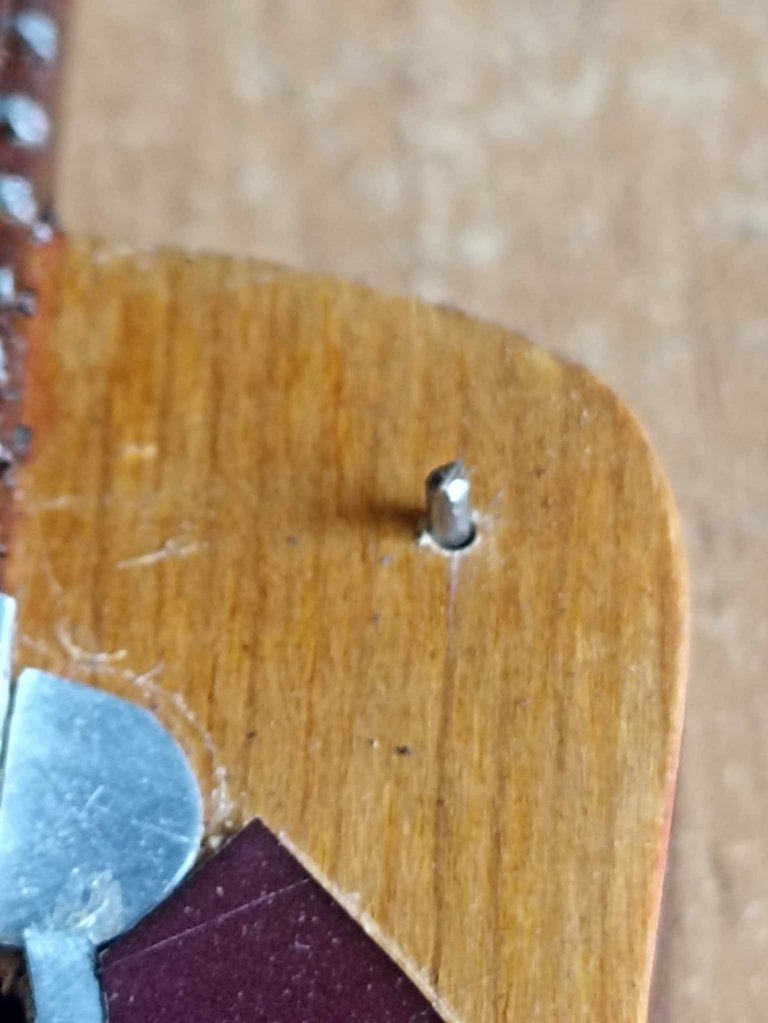
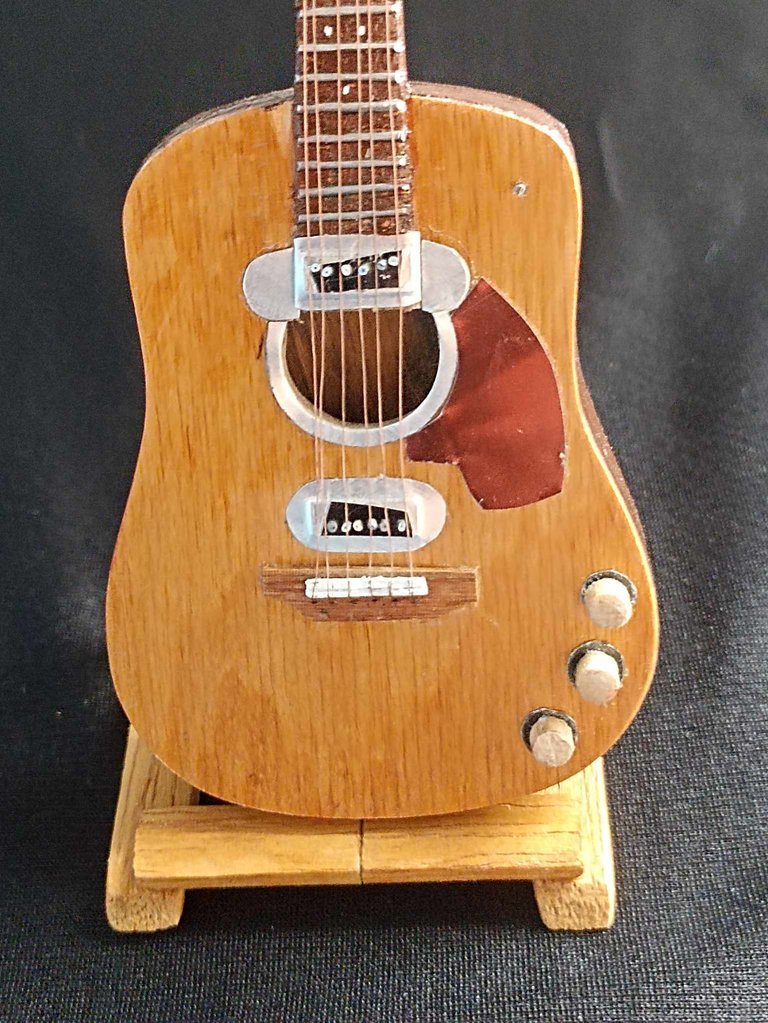
From here on came the good stuff, the smaller accessories, starting with the tuning pegs. I made them with wire I got from some paper clips. I cut six pieces and placed them on the wood. For the knobs, I made tiny, almost microscopic pieces of aluminum that were added one by one until the part was finished. Then I made the microphone pickups that this guitar has, so unique, and finally the pickguard and a half-circle of aluminum that adorns the hole of the guitar.
DE aquí en adelante venía lo bueno, los accesorios más pequeños, empezando por las clavijas de afinación, la hice con alambre que saqué de unos clips de papelería, corte 6 trozos los cuales coloqué en la madera, y para las perillas hice pequeñas piezas de aluminios casi microscópicas que fueron puestas una a una hasta quedar esa parte finalizado. Luego hice las pastillas de micrófono que posee esta guitarra tan particulas y por último el golpeador y un medio círculo de aluminio que adorna el agujero de la guitarra.
 |  |  |
|---|---|---|
 |  |  |
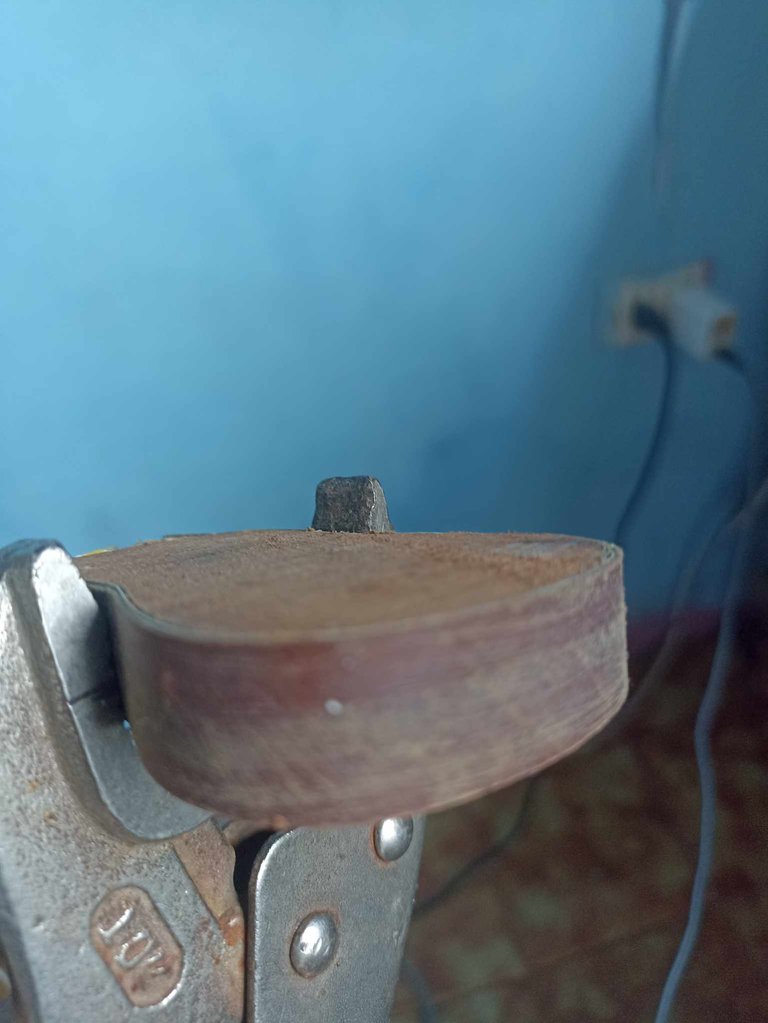
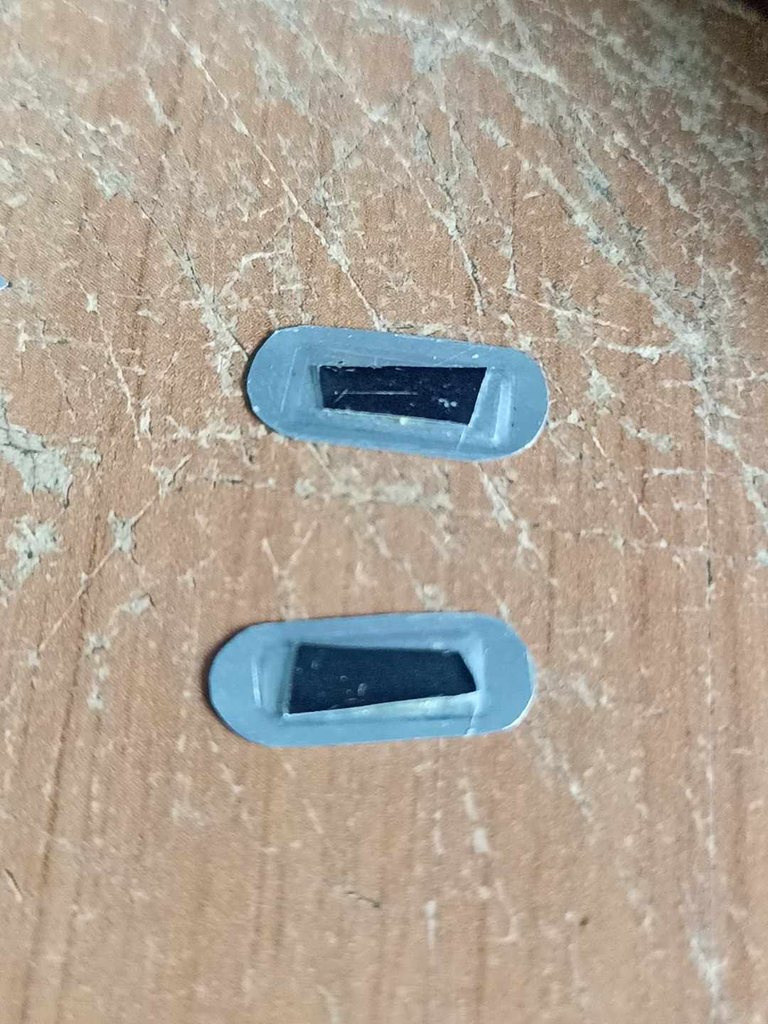
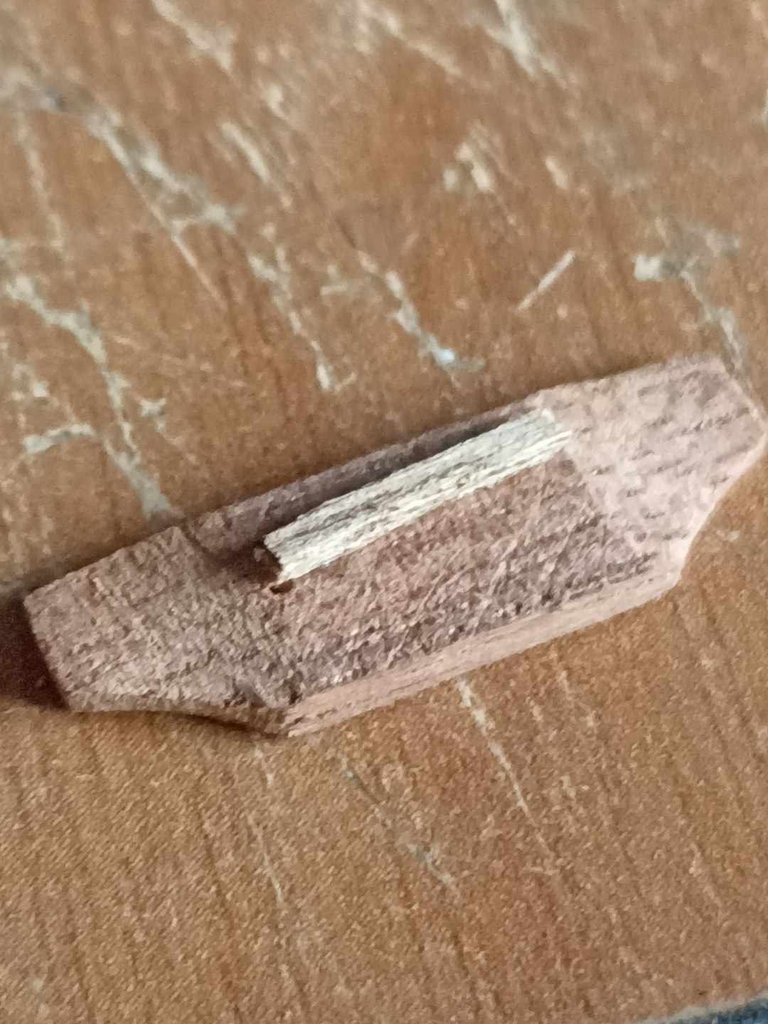
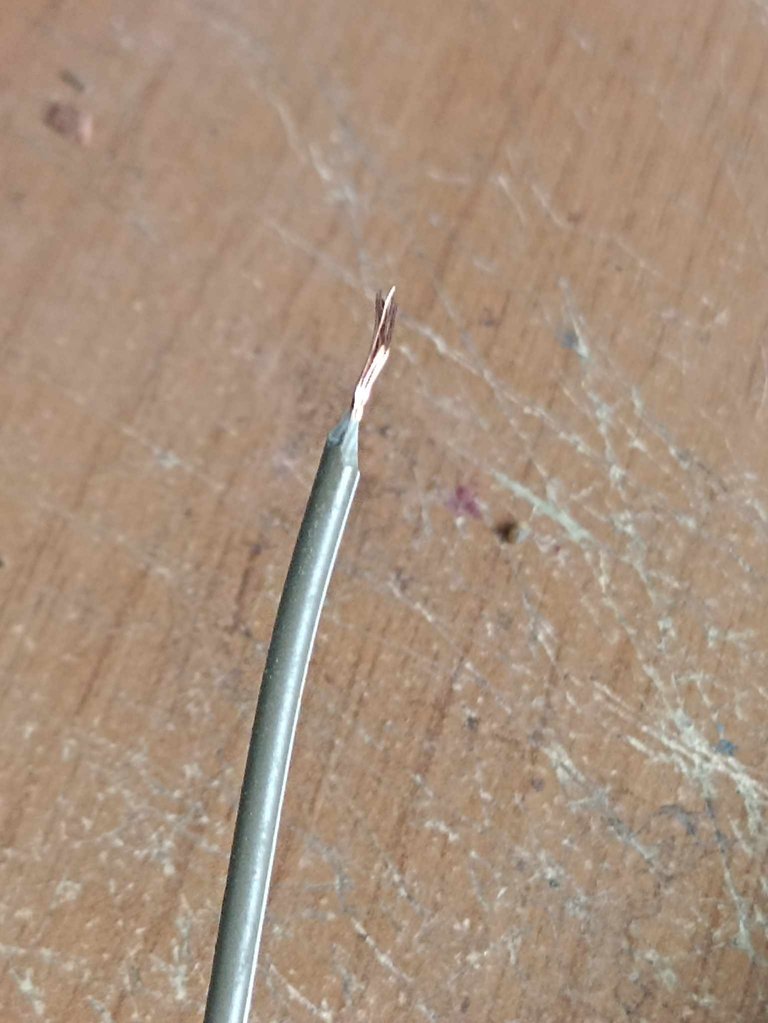
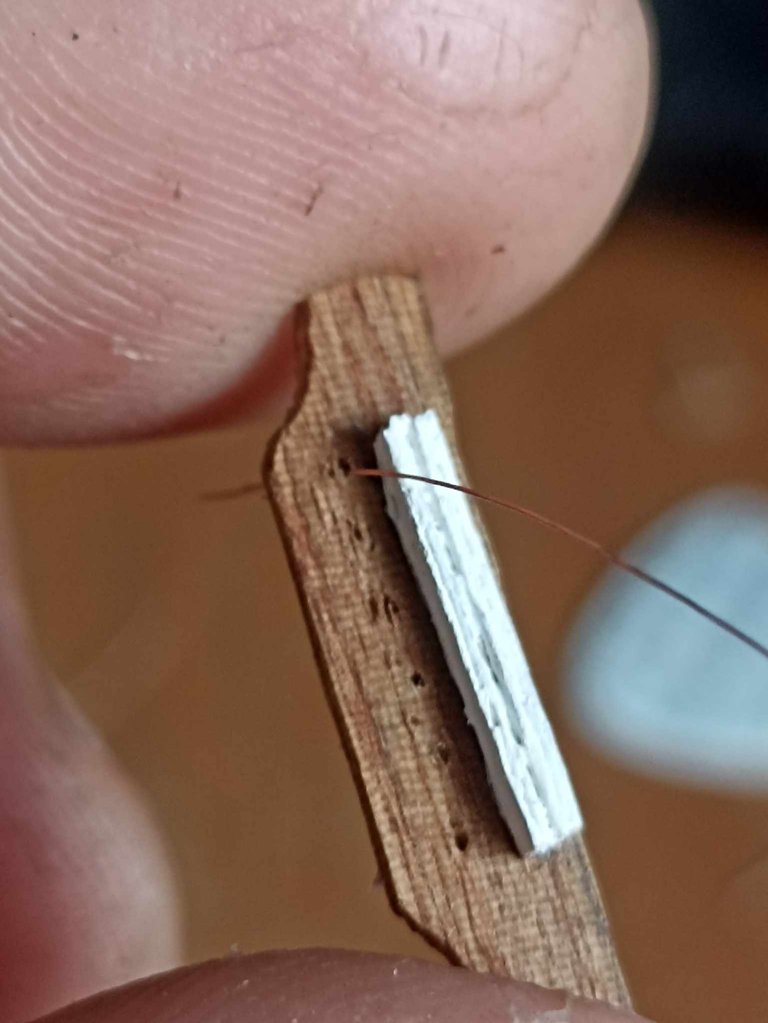
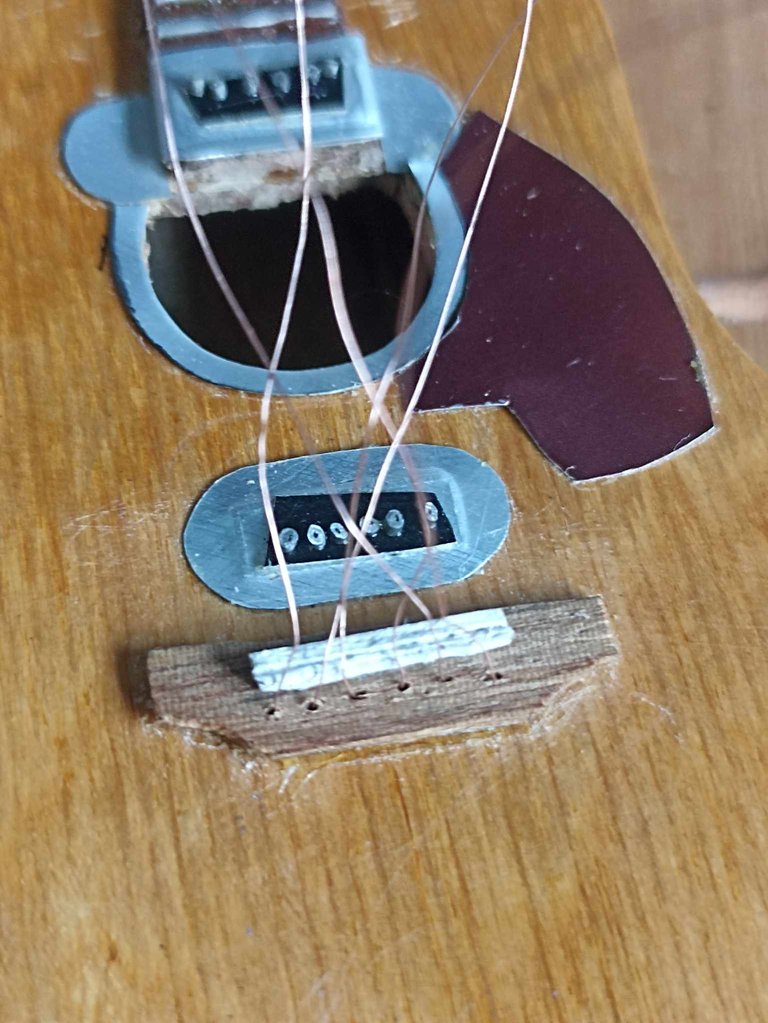
Next, I made the wooden bridge that holds the strings. It was very difficult to do, especially shaping it because the wood broke easily. But I managed to do it, and for the strings, I used copper extracted from a small wire. I made six holes in the bridge with a needle and inserted each of the strings. Then I added the pieces I made earlier, such as the pickups, the pickguard, and the aluminum circle decorating the hole. You can see how I made the small microphones for the pickups, six in total. I made them by cutting small pieces of tin and then glued them together.
Seguidamente hice el puente de madera que sostiene las cuerdas, me costo mucho hacerlo especialmente darle forma porque la madera se partía con facilidad. Pero pude hacerlo, y para las cuerdas utilicé cobre extraído de un cable pequeño, hice 6 agujeros al puente con una aguja y fuí introduciendo cada una de las cuerdas, después fui colocando las piezas que hice anteriormente, como las pastillas de los micrófonos, el golpeador, y el círculo de alumino adornando el agujero. Pueden observar como hice en las pastillas los pequeños micrófonos, 6 en total, los hice cortando pequeñas piezas de estaño y luego los puse en fila con pegamento.
 |  |  |
|---|---|---|
 |  |  |
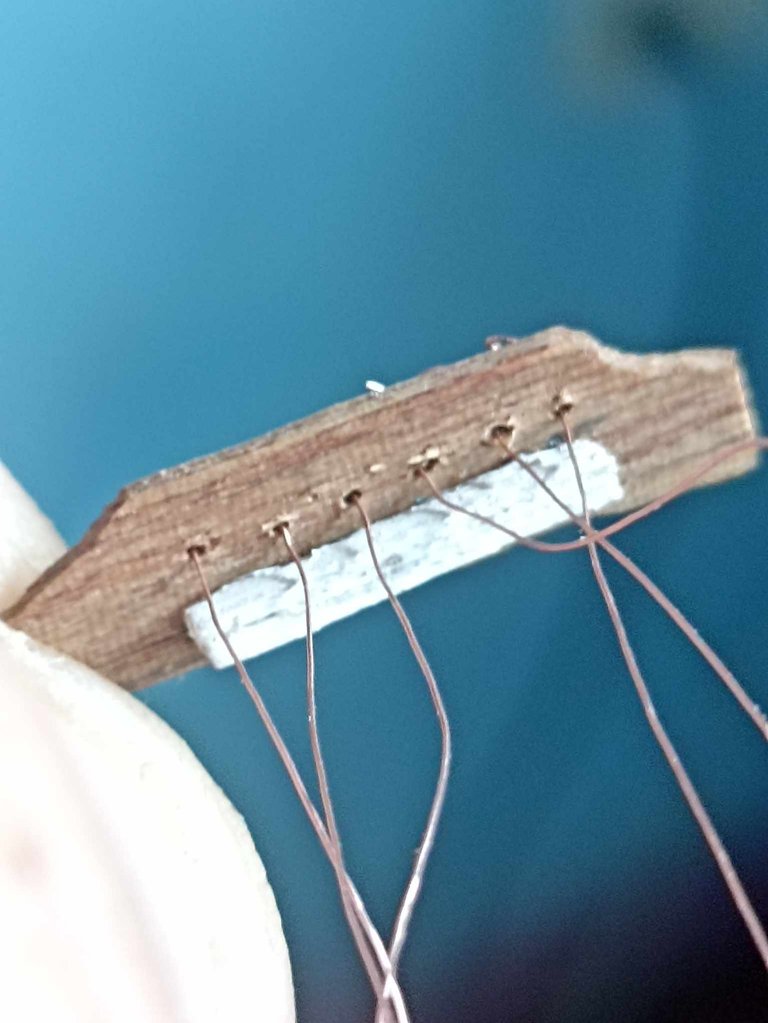
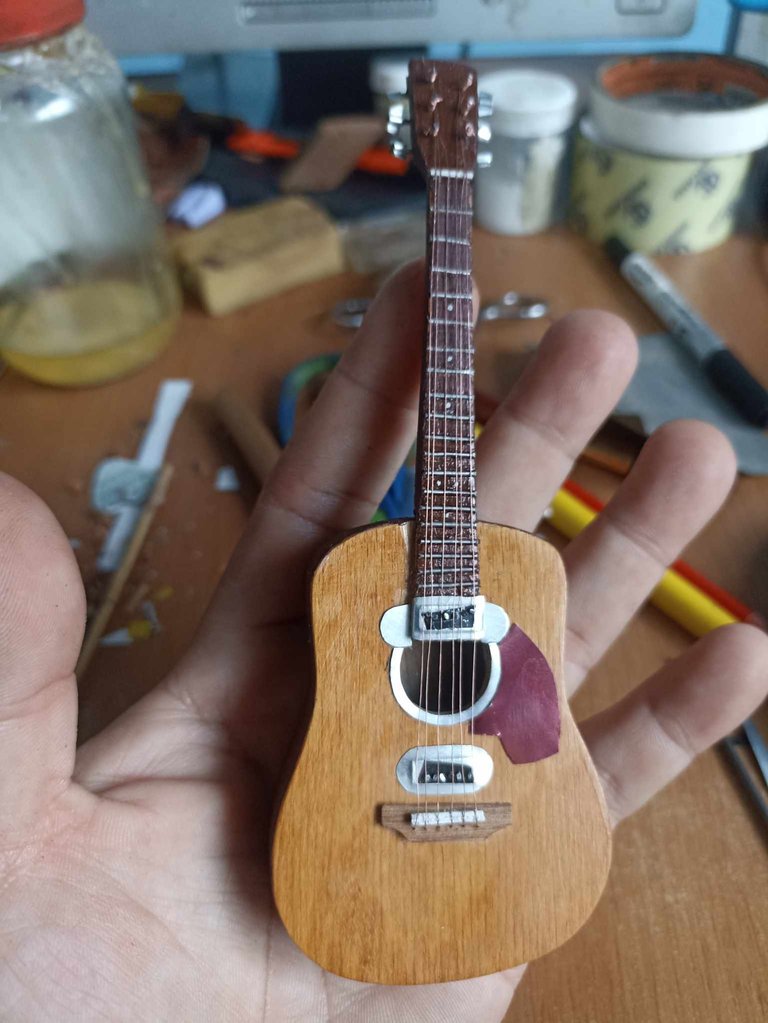
Next, I placed the bridge with the strings in their space on the guitar, and each string was secured at the top with a clamp, just like a real guitar. Then I added a small piece of wire that would be the switch to give the guitar sound. I applied gloss sealant to the entire body to give it a better look. And finally, I made a small stand to rest the guitar on. At the bottom, it has three buttons that I also made out of wood that serve to create sound effects. And that's how Kurt Cobain's famous electro-acoustic guitar was finished.
Después coloqué el puente con las cuerdas en su espacio de la guitarra, y cada cuerda la iba fijando en la parte superior con una pinza, tal cual como una guitarra real. Despues le puse un pequeño corte de alambre que vendría siendo el interruptor para darle sonido a la guitarra, le puse sellador brillante a todo el cuerpo para que tuviera un mejor aspecto. Y por último hice un pequeño paral para poder posar la guitarra, en la parte inferior tiene tres botones que también hice de madera que sirven para dar efectos de sonido, y así quedó la famosa guitarra electroacústica de Kurt Cobain finalizada.

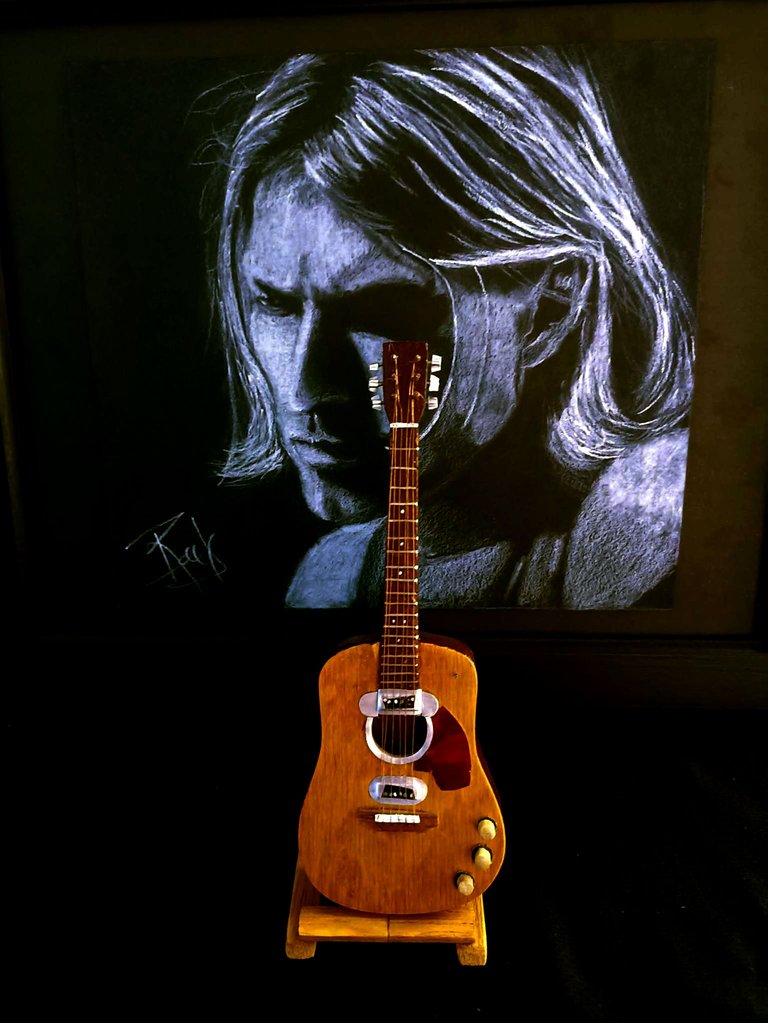
What do you think of the result? After several weeks of being able to finish this project, I'm very satisfied. Maybe I overlooked other things, but since they were such small details, I didn't think about them. One thing I thought about making later was a sleeve, but I didn't have the material. I think I'll leave it for another time. I hope you liked the result. I've always admired Kurt Cobain for his style, his music, and his lyrics. He undoubtedly marked an era that I've been able to capture through this craft. Don't forget to comment on what you think. I welcome suggestions and also ideas for other projects, which I'll gladly carry out. For now, I'll say goodbye. See you soon.
Qué les parece el resultado? después de varias semanas haber podido finalizar este proyecto me ha dejado muy conforme, tal vez pasé por encima otras cosas, pero es que al ser tan pequeños detalles, pues no pensé en ellos, una cosa que se me ocurrió hacer luego fue una funda, pero no tenía material, creo que lo dejaré para otra oportunidad. Espero les haya gustado, el resultado, Kurt Cobain siempre lo he admirado, por su estilo, su música y sus letras, sin duda marcó una época la cual yo he podido plasmar a través de esta artesanía. No olviden comentar que les ha parecido, recibo sugerencias y también ideas para otros proyectos, con gusto los llevaré a cabo, por ahora me despido, hasta muy pronto.
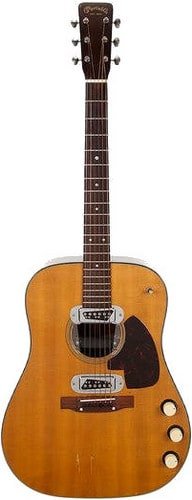
Kurt Cobain's Martin guitar was auctioned for $6 million, becoming the most expensive guitar in history, surpassing the guitar of David Gilmour of Pink Floyd, another of my favorite guitarists.
La guitarra Martin de Kurt Cobain fue subastada por 6 millones de dolares, convirtiéndose en la guitarra más cara de la historia, superando a la guitarra de David Gilmour de Pink Floyd, otro de mis guitarristas favoritos.
Posted Using INLEO
Wow!!!! Un trabajo muy detallado, súper complicado porque todo en pequeño da más trabajo.
Te felicito, quedó espectacular
ME faltaron algunas cosas, pero al ser tan pequeñas por eso las pasé por alto. Estuve por varias semanas hasta finalizarlo, me alegra que te haya gustado como quedó.
Congratulations on completing your guitar, it turned out great. Well done and thanks for walking us through the entire process.
selected by @ibbtammy
Wonderful work!!! Truly amazing 👏🏻👏🏻👏🏻
Thank you so much, I'm glad you liked it. It was a long process, but I really liked the result.