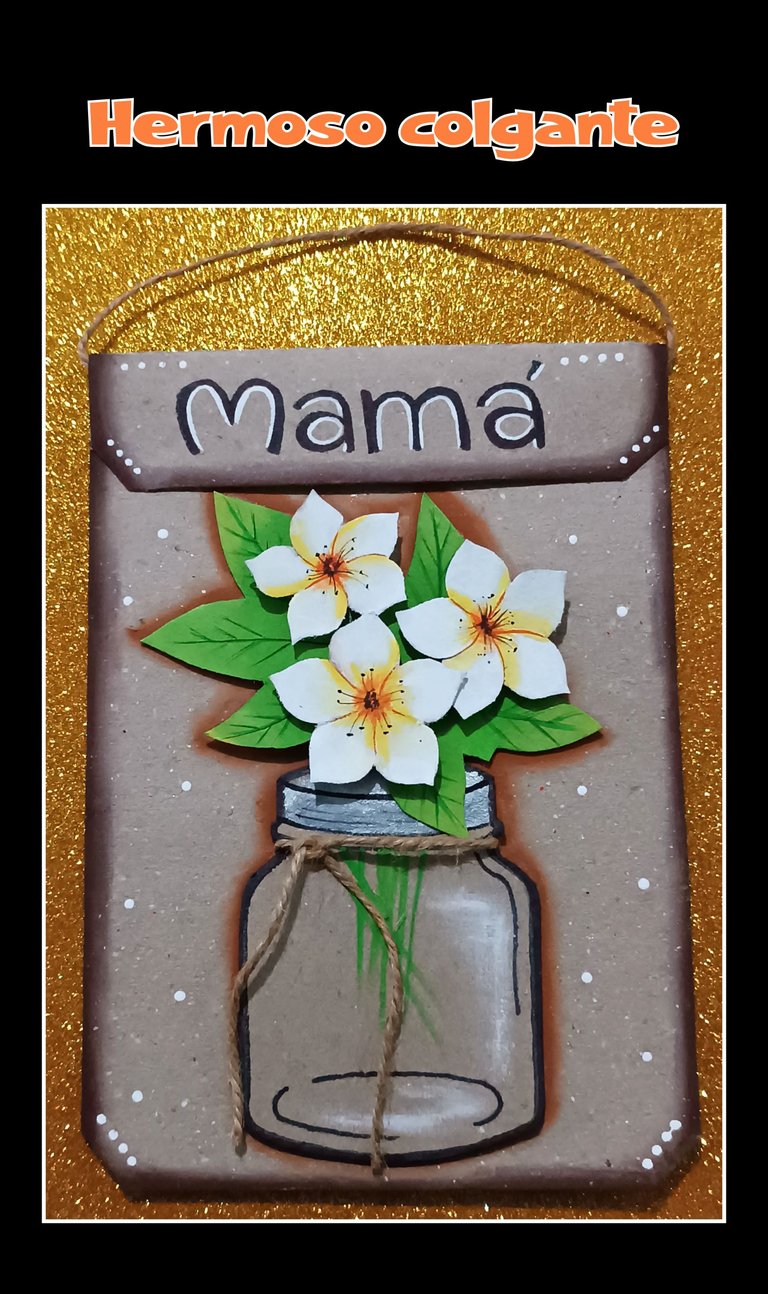
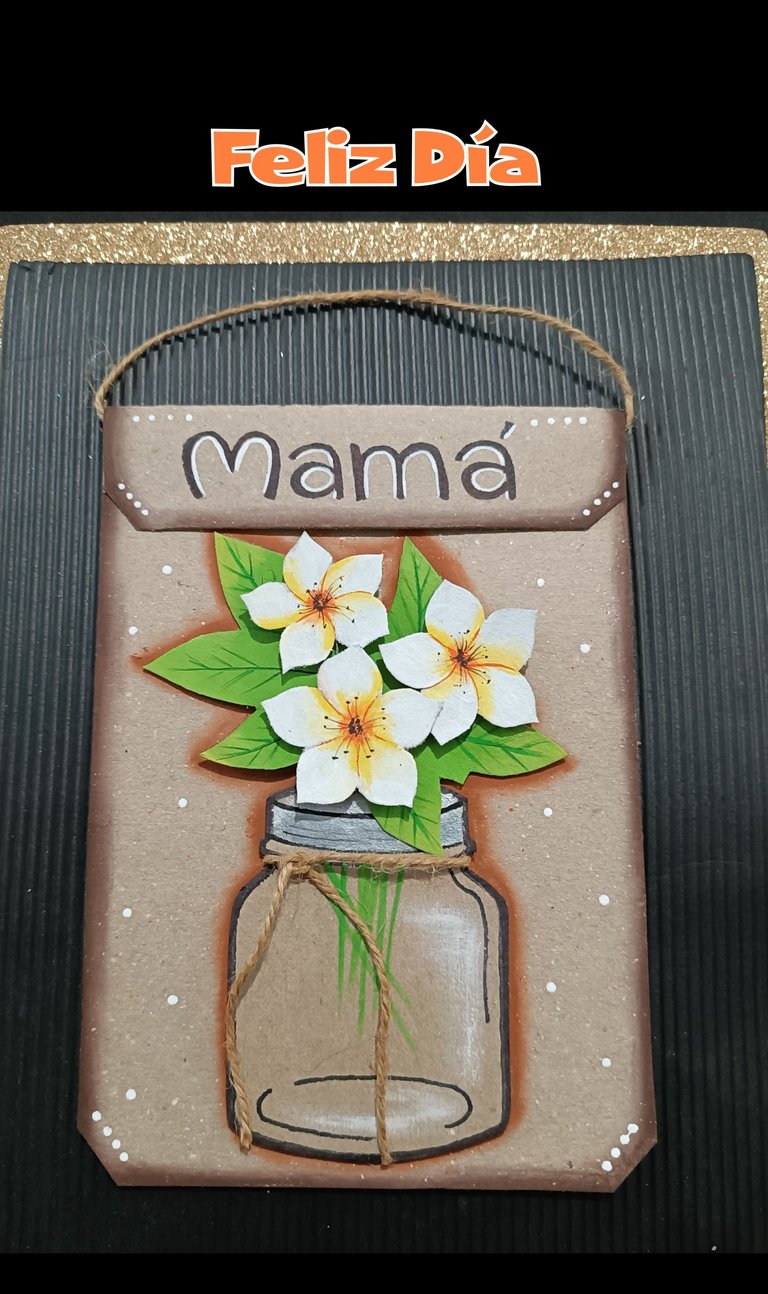
¡Hagamos un hermoso y fácil colgante para regalar a mamá en su día! ESP/ENG. Let's make a beautiful pendant to give to mom on her day! EN/ENG.
Saludos queridos creadores y amigos que hoy me visitan.
¡Entonces acompañame y mira como se hace!.
Necesitas:
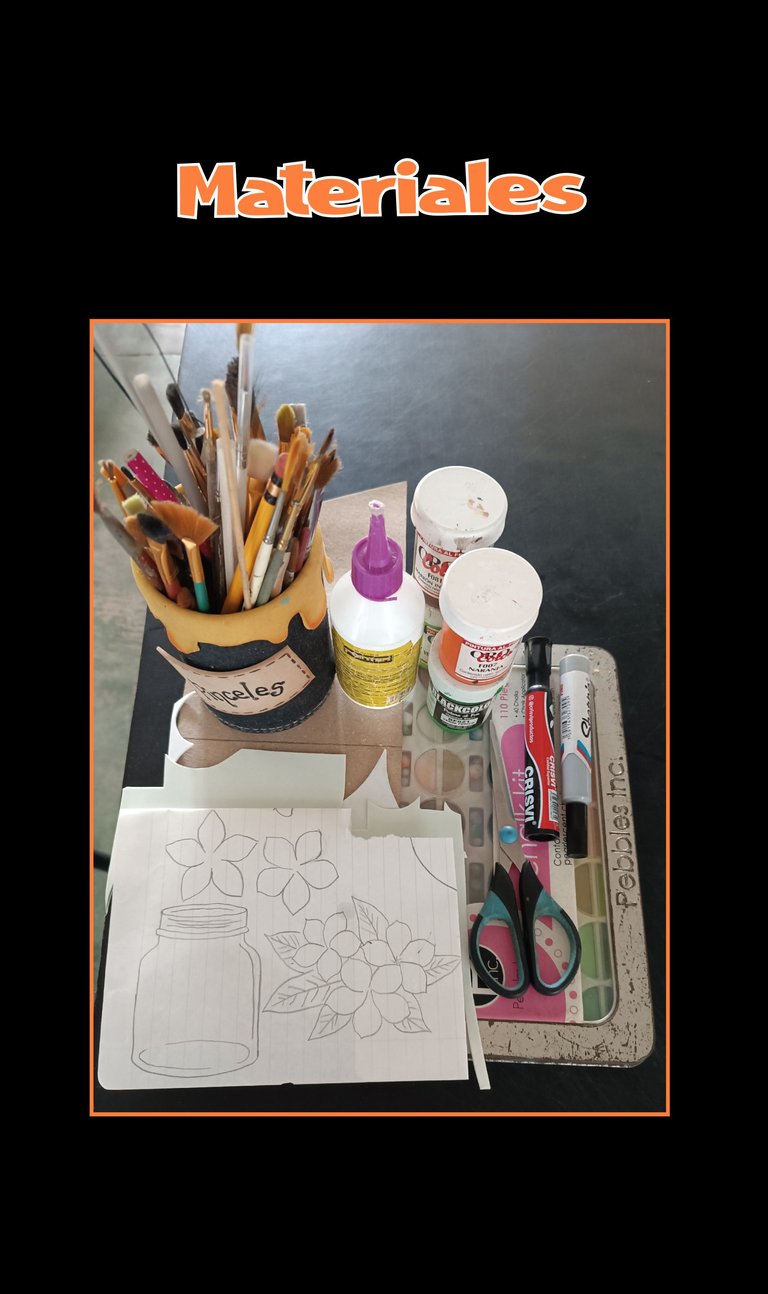
| Cartón o cartulina | Pinturas y pinceles |
|---|---|
| Tijera | Lápiz y marcador |
| Foami | Silicón |
| Molde o dibujo |
Comencemos:
Paso 1:
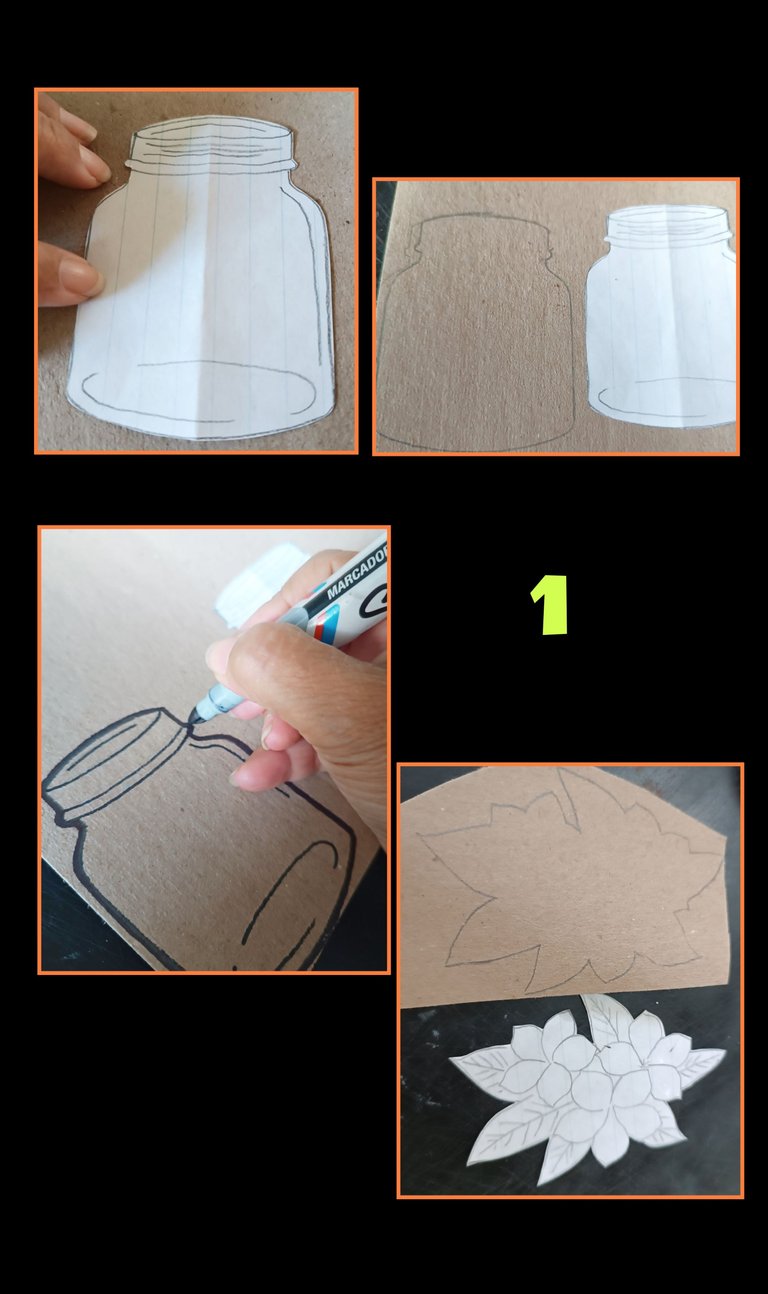
- Dibuja o calca el dibujo de un frasco, luego recorta y marca sobre el cartón, luego con el marcador marca todo el contorno y los rasgos, igualmente harás igual con las flores y hojas.
Paso 2:

- Recorta el frasco y las hojas y flores, luego comienza a pintar las flores con pintura blanco o el color de tu preferencia y deja secar.
- Luego aplica otra mano en las figuras y después comienza aplicando pintura verde en las hojas, también puedes dar un poco de luz al frasco usando un poco de pintura blanca.
Paso 3:
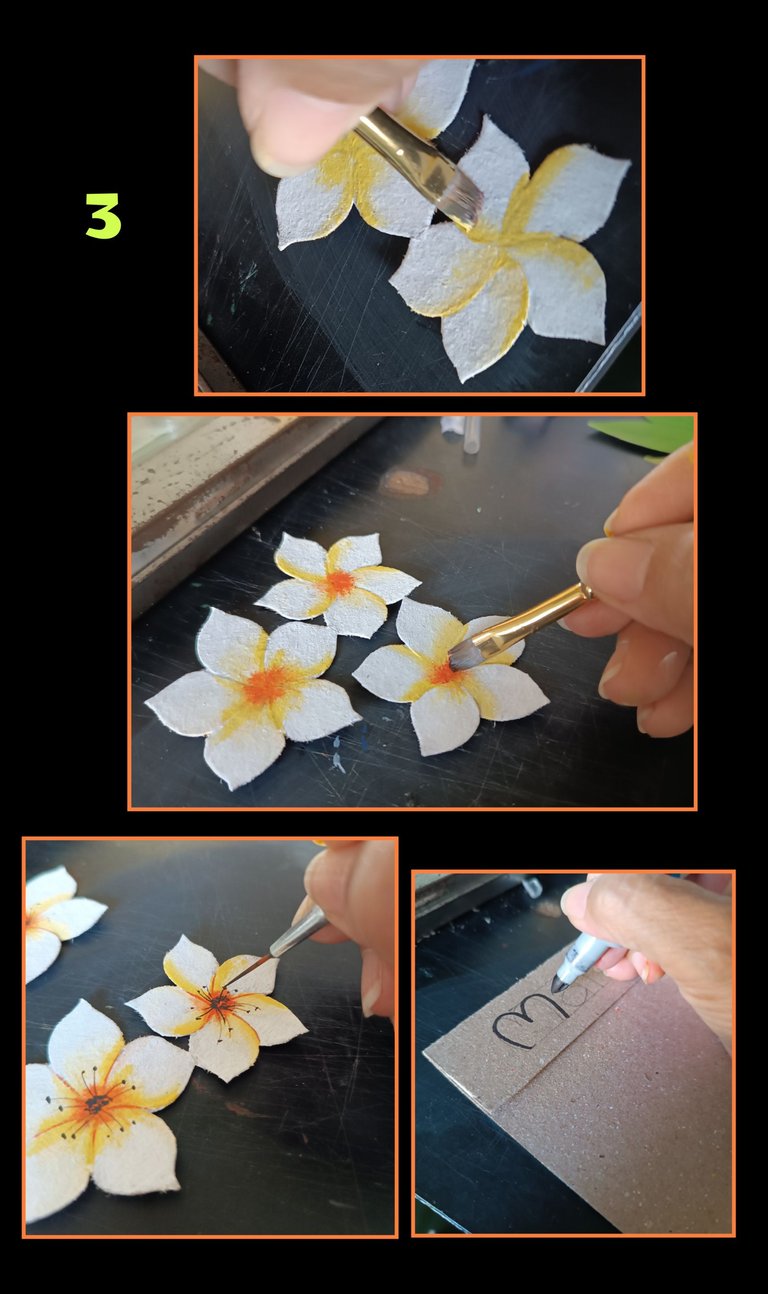
- Humedece el pincel y quita el exceso de agua, luego moja la punta en pintura amarilla y comienza a pintar las líneas de cada pétalo.
- Luego pinta el centro con pintura naranja para dar un poco de profundidad y con un pincel delineador pinta pistilos como se observa en la foto.
- Luego recorta un rectángulo del tamaño que prefieras y dobla una pestaña de 3cm de ancho y escribe la palabra mamá.
Paso 4:

- Después de pintar las hojas, pinta las nervaduras.
- Luego marca el contorno del frascos y flores sobre el cartón y pinta con pintura marrón como se observa en la foto.
- Ahora recorta unos círculos pequeños de foami y pega en la parte trasera de las flores para que queden al relieve y pega sobre las hojas.
Paso 5:
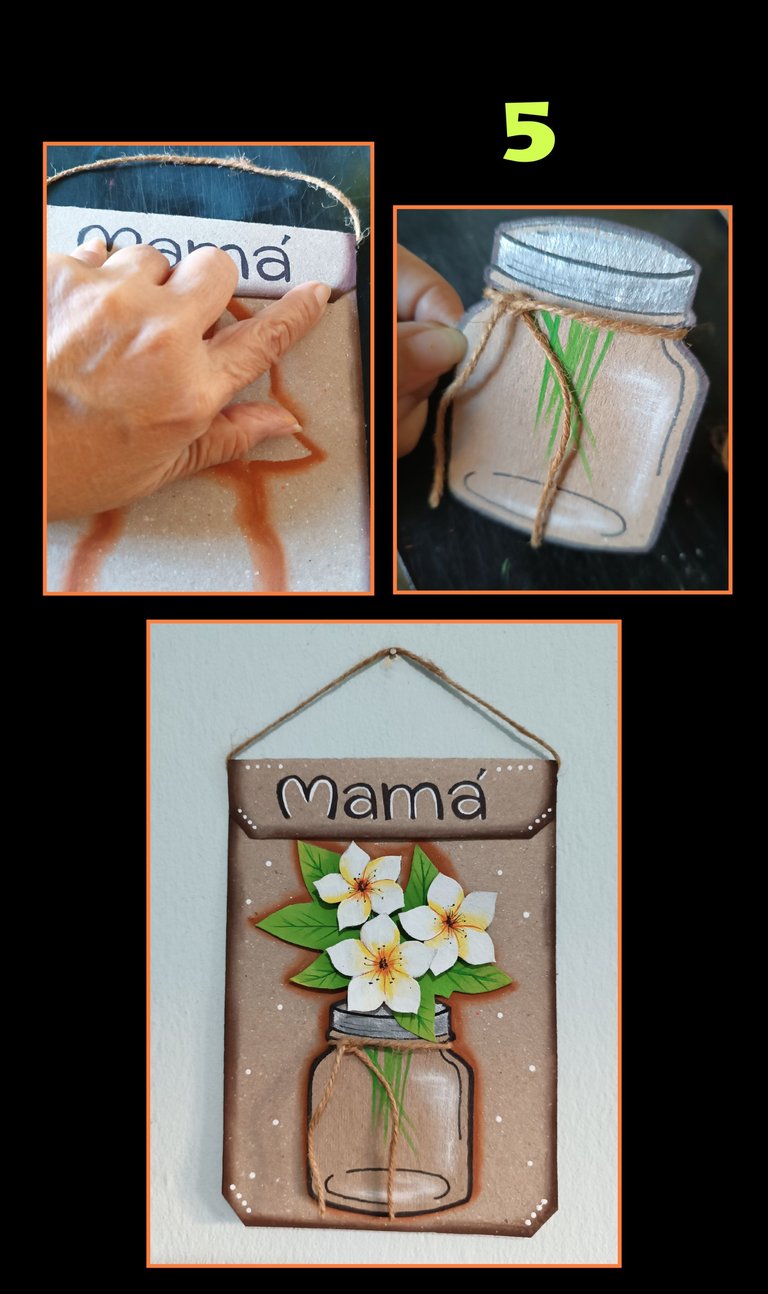
- Ahora coloca un pedazo de mecatillo o cinta e inserta y pega en la parte de adentro de la pestaña, aplica silicón y haz presión hasta que pegue en las esquinas.
- También puedes colocar otro pedazo de mecatillo en el cuello del frasco y anuda.
- Por último pega el frasco y las flores sobre el cartón y decora pintando la orilla y si es de tu gusto pinta unos lunares para darle luz al colgante.
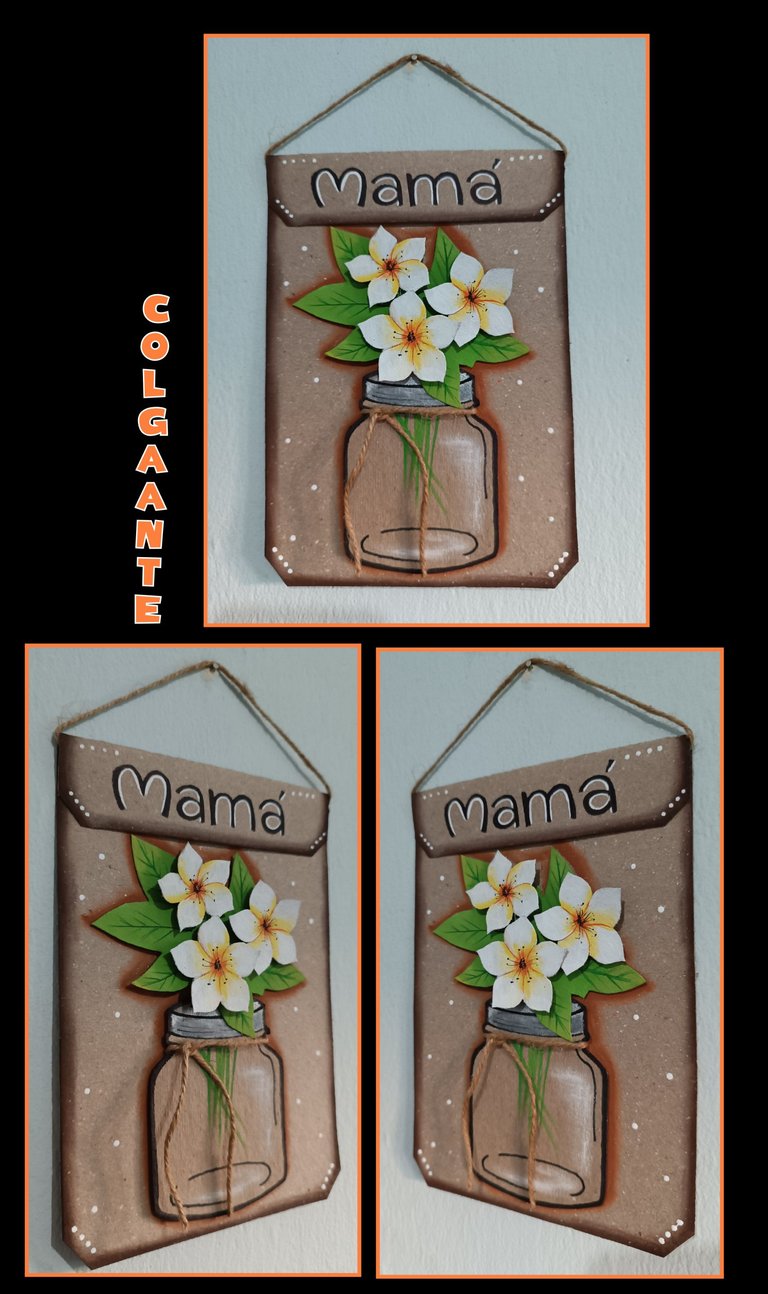
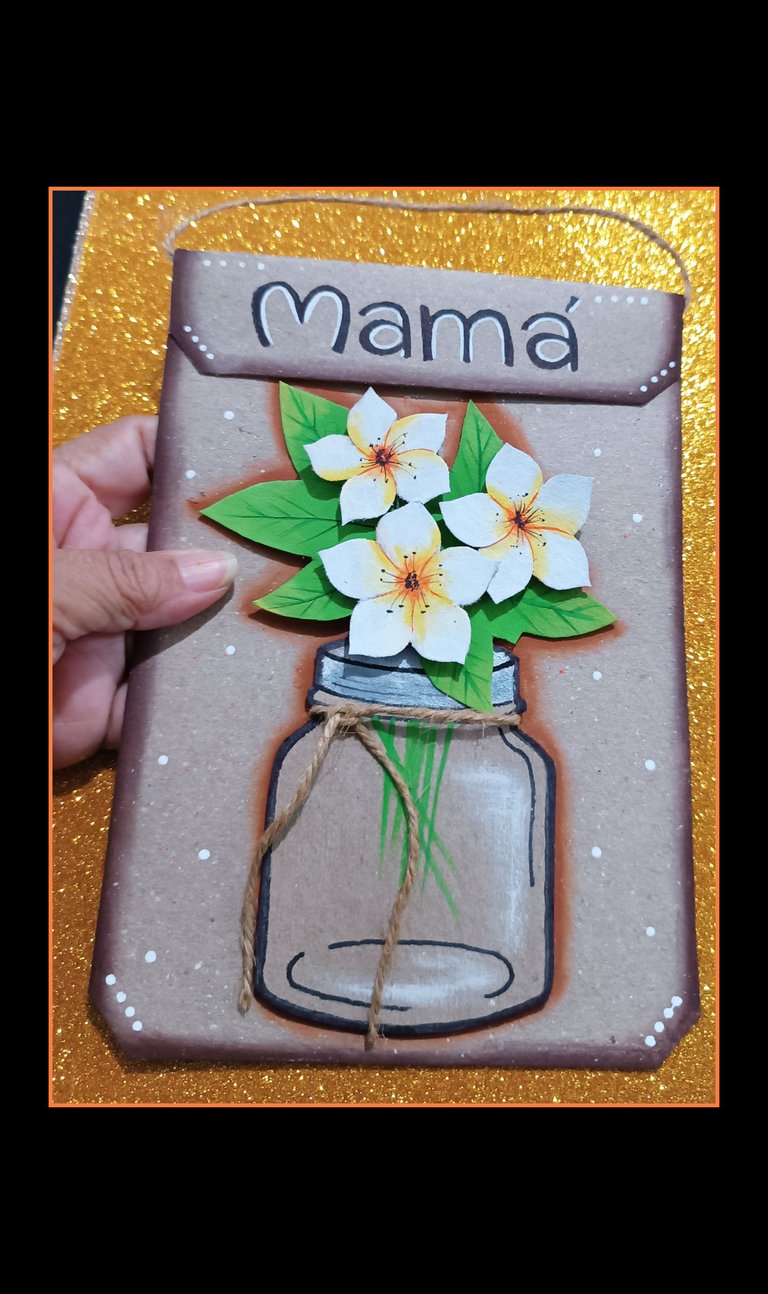
Entonces ahora te muestro el resultado final...
Espero te guste.
Las fotos capturadas con mi Redmi Note 12 y
las edité con GridArt.
Ahora llegó la hora de mi despedida, deseando haya sido de tu agrado mi paso a paso.
Espero te sirva de guía y de provecho.
Saludos y muchas gracias por tu visita y apoyo.
Greetings dear creators and friends who visit me today.
Then join me and see how it's done!.
You need:
| Cardboard or cardboard | Paint and brushes |
|---|---|
| Scissors | Pencil and marker |
| Foami | Silicone |
| Mold or drawing |
Let's get started:
Step 1:
- Draw or trace the drawing of a jar, then cut it out and mark it on the cardboard, then with the marker mark all the outline and features, you will do the same with the flowers and leaves.
Step 2:
- Cut out the jar and the leaves and flowers, then start painting the flowers with white paint or the color of your choice and let dry.
- Then apply another coat on the figures and then start applying green paint on the leaves, you can also give a little light to the jar using some white paint.
Step 3:
- Wet the brush and remove the excess water, then dip the tip in yellow paint and start painting the lines of each petal.
- Then paint the center with orange paint to give a little depth and with an eyeliner brush paint pistils as seen in the photo.
- Then cut out a rectangle in the size of your choice and fold a 3cm wide tab and write the word Mom.
Step 4:
- After painting the leaves, paint the ribs.
- Then mark the outline of the jars and flowers on the cardboard and paint with brown paint as shown in the photo.
- Now cut out some small circles of foami and glue on the back of the flowers so that they are embossed and glue on the leaves.
Step 5:
- Now place a piece of ribbon or ribbon and insert and glue on the inside of the tab, apply silicone and press until it sticks to the corners.
- You can also place another piece of ribbon on the neck of the jar and tie a knot.
- Finally glue the jar and the flowers on the cardboard and decorate by painting the edge and if you like, paint some polka dots to give light to the pendant.
Now I'll show you the final result...
I hope you like it.
The photos were captured with my Redmi Note 12 and
I edited them with GridArt.
Now it's time for me to say goodbye, hoping you have enjoyed my step by step.
I hope you will find it useful and helpful.
Greetings and thank you very much for your visit and support.
The pendant design is simple and lovely. You made it look both thoughtful and elegant. Keep it up.
selected by @stevenson7
Muchas gracias @diyhub por tu apoyo y comentario.
Saludos.
Es un hermoso detalle para obsequiar, gracias por el tutorial, saludos
Gracias amiga por tu comentario.
Igual para ti.
A mí me ha encantado este. Simple, delicado y con un propósito hermoso
Me alegra mucho que te haya gustado, muchas gracias por comentar.
Cómo no agradecer la hermosura !!! Tú trabajo es exquisito. Sigue compartiéndonos tus creaciones 🙏🏻. Abrazos de luz !!!
Saludos amiga, un hermoso detalle para obsequiar a mamá en su día, como siempre un lindo trabajo, gracias por compartir, feliz día de las Madres. 💖
Que tengas una excelente semana!
Gracias amiga por tu lindo comentario.
Bendecido día.
hermoso, me gusto mucho el efecto de las flores, sin duda un lindo detalle para regalar y decorar, gracias por compartir, saludos.
Bendecido día, que bueno saber que te gustó mi trabajo.
Igual para tí.