How to decorate a perfume bottle with foam. [ENG+ESP]
**Hello, friends of the community
Today I bring you a lot of recycling and a lot of beauty. And, as you can see, this time I will show you how to decorate a perfume bottle using fomi and some metal cutting dies. And don't worry or be intimidated by the dies, because in each step I leave a photo of them so that, if you want, you can trace their shape and make your molds on paper. Remember that in the DIY world there are no excuses.
The perfume bottle is empty because it is recycled and I want to turn it into a decoration, but throughout the tutorial the structural integrity of the container is respected, so you can apply what I will teach you on a full one. This way you take advantage and turn a simple perfume bottle into a beautiful and colorful gift. Let's stop wasting time and get to know the materials.
Hola, amigos de la comunidad
Hoy les traigo mucho reciclaje y mucha belleza. Y es que, como podrán observar, en esta ocasión les mostraré cómo decorar un frasco de perfume utilizando fomi y algunos troqueles metálicos de corte. Y no se preocupen ni se intimiden por los troqueles, que en cada paso les dejo la foto de ellos para que, en caso de que lo quieran, calquen su forma y hagan sus moldes en papel. Recuerden que en el mundo DIY no hay excusas.
El frasco de perfume está vacío porque es reciclado y quiero convertirlo en una decoración, pero durante todo el tutorial se respeta la integridad estructural del envase, así que pueden aplicar lo que les enseñaré sobre uno lleno. Así aprovechan y convierten un simple frasco de perfume en un hermoso y colorido obsequio. Pero bueno, dejémonos de perder el tiempo y pasemos a conocer los materiales.
Materials // Materiales
| English | Español |
| ✔️ Silver, dark blue and fuchsia frosted fomi | ✔️ Fomi escarchado plateado, azul oscuro y fucsia |
| ✔️ Smooth light blue and green fomi | ✔️ Fomi liso azul claro y verde |
| ✔️ Perfume bottle | ✔️ Frasco de perfume |
| ✔️ Flower-shaped hole punch | ✔️ Perforadora con forma de flor |
| ✔️ Metal cutting die in the shape of a flower | ✔️ Troquel metálico de corte con forma de flor |
| ✔️ Metal cutting die with butterfly shape | ✔️ Troquel metálico de corte con forma de mariposa |
| ✔️ Metal cutting die with embroidery shape | ✔️ Troquel metálico de corte con forma de bordado |
| ✔️ Metal cutting die in the shape of leaves | ✔️ Troquel metálico de corte con forma de hojas |
| ✔️ Scissors | ✔️ Tijeras |
| ✔️ Hot silicone | ✔️ Silicona caliente |

Step by step // Paso a paso
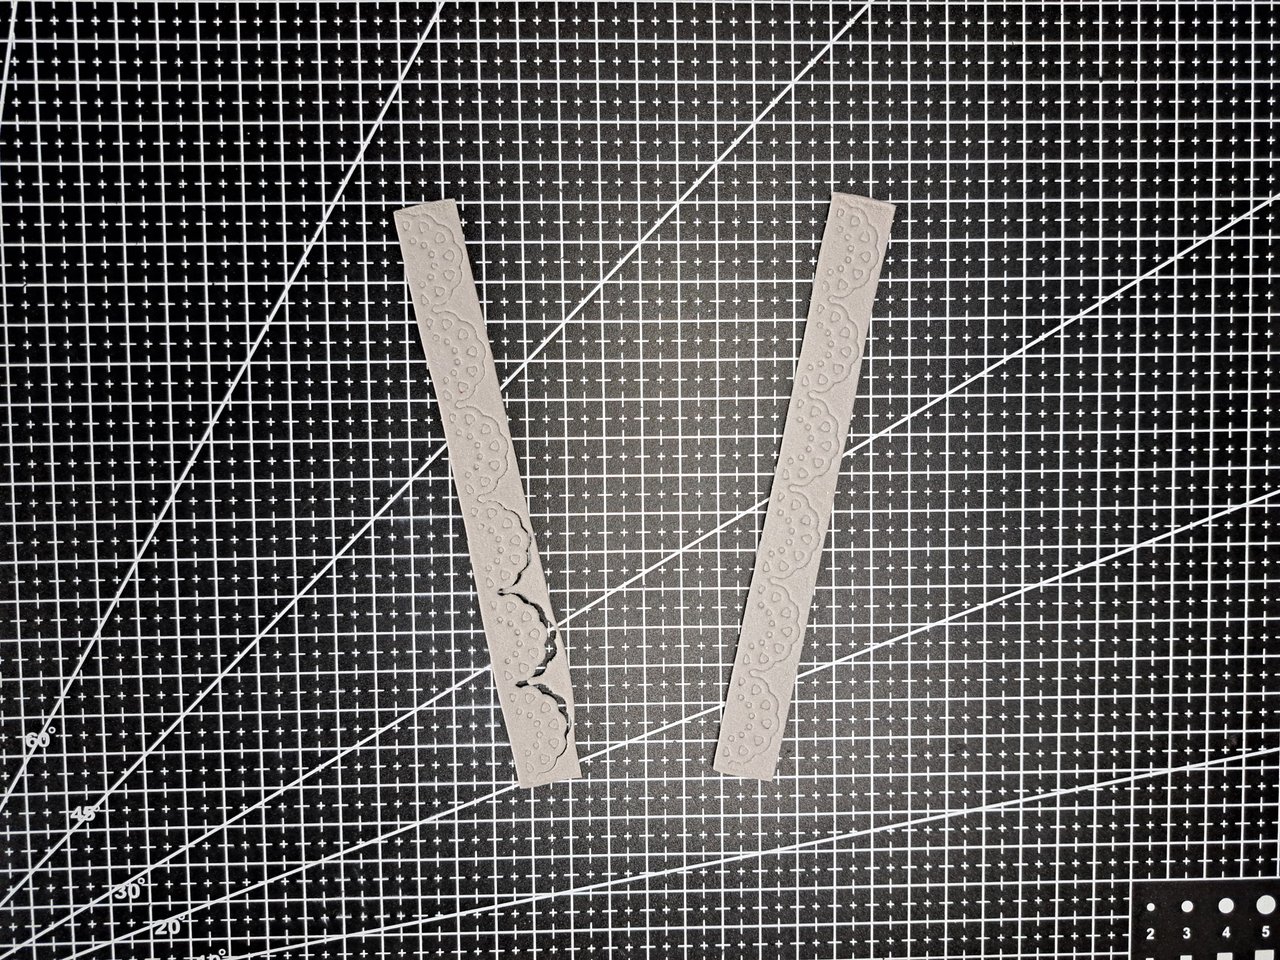
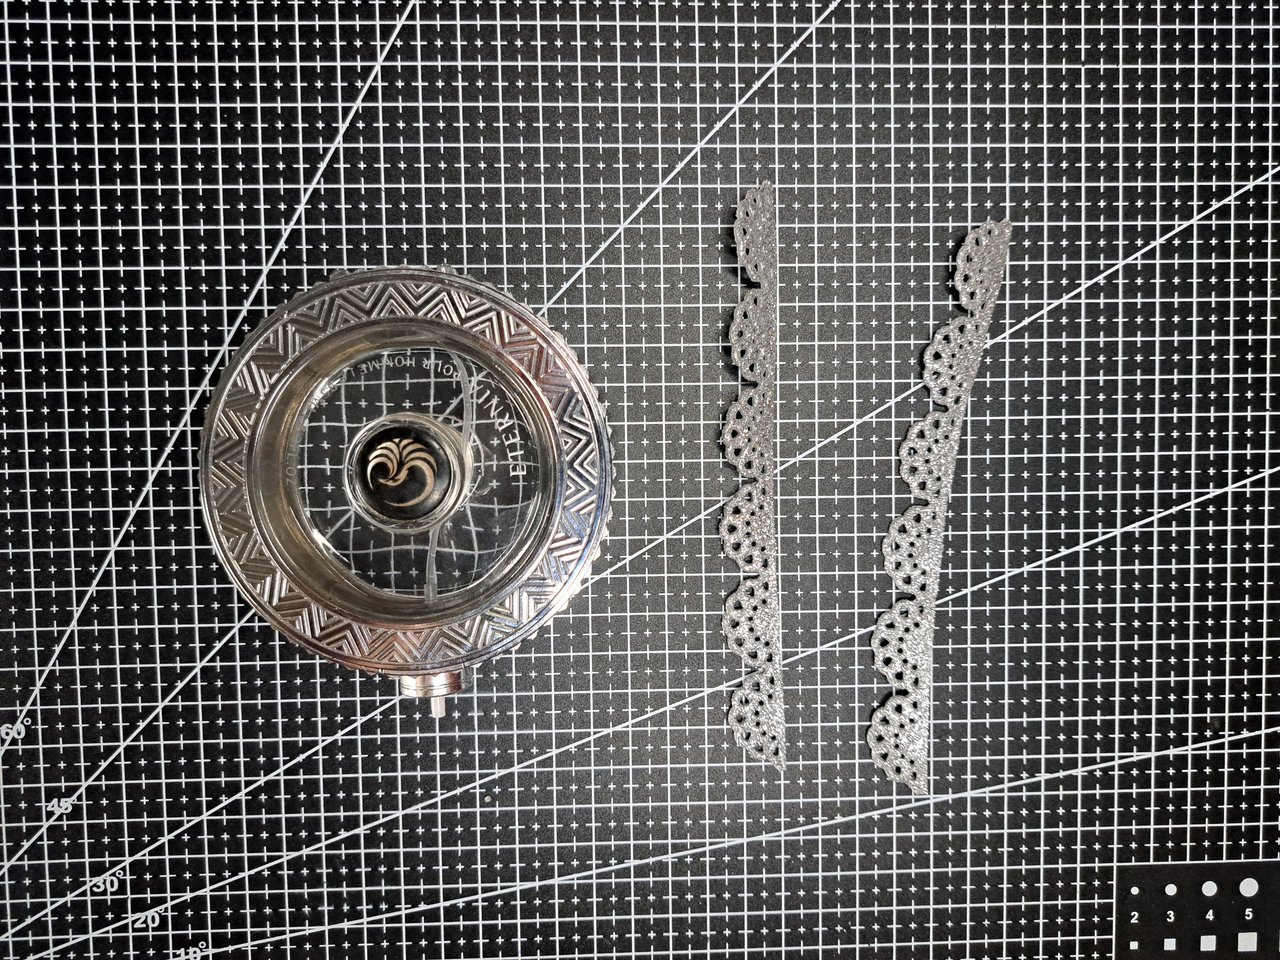
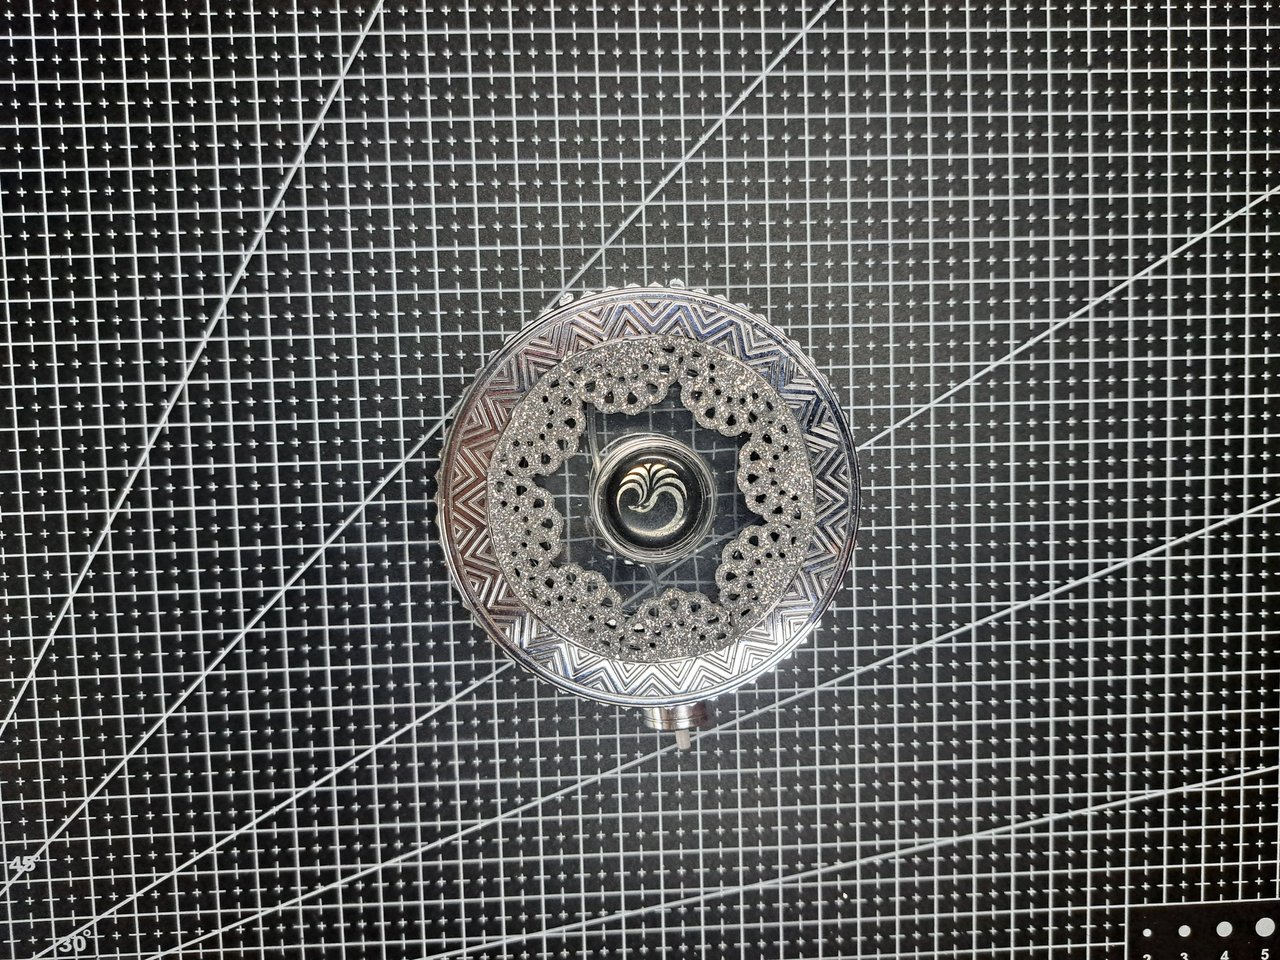
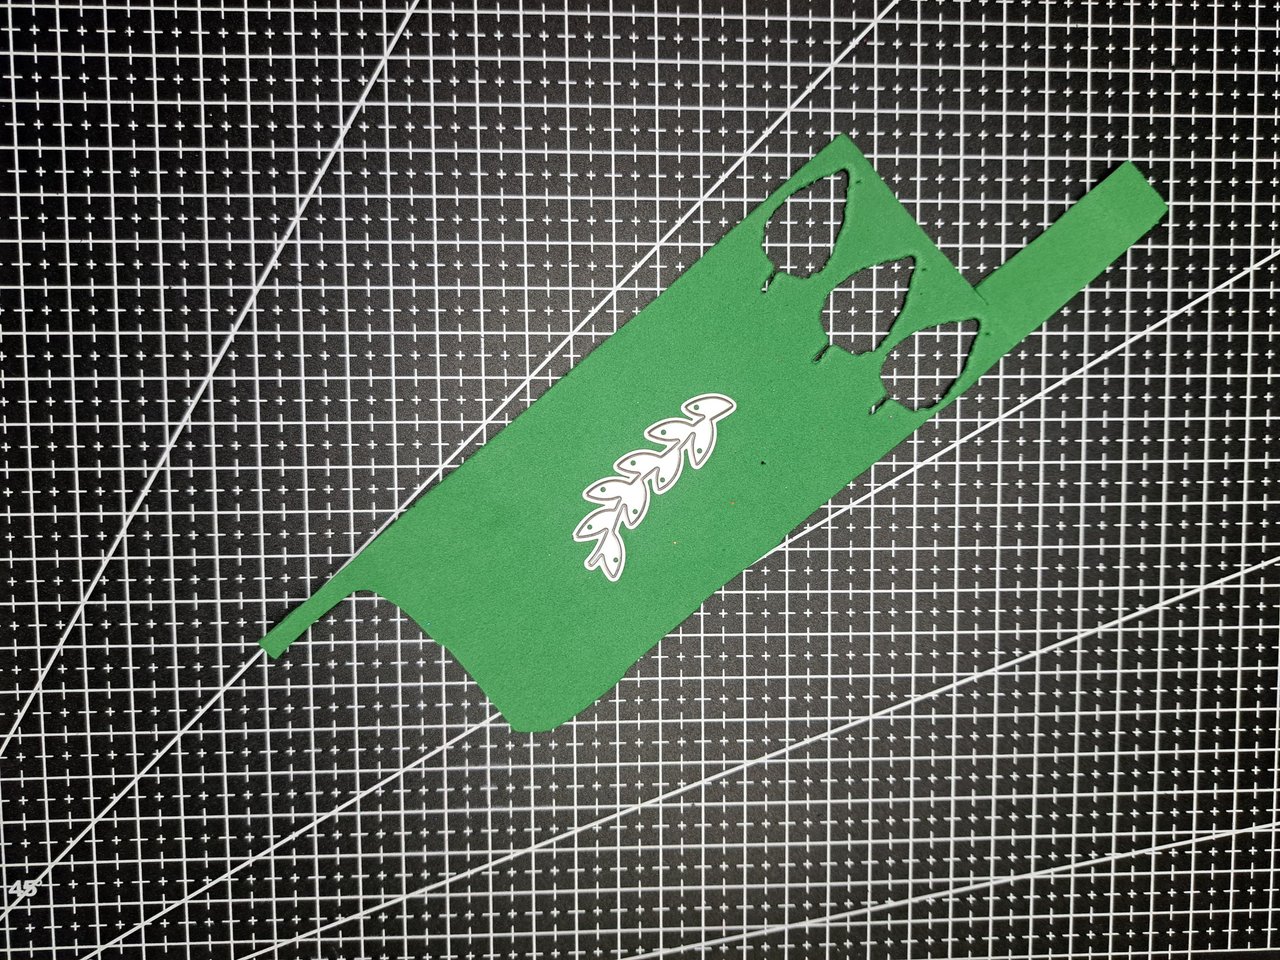
1️⃣ I will start by cutting out two strips of silver frosted fomi to shape it with the embroidery shaped die and then glue it to the inside of the perfume bottle, covering the transparent part of the bottle. The embroidery pattern can vary, but make sure it is a wavy pattern that allows it to arch to form a circle.
Comenzaré recortando dos tiras de fomi escarchado plateado para darle forma con el troquel con forma de bordado y luego pegarla en el interior del envase de perfume, cubriendo la parte transparente de este. El patrón de bordado puede variar, pero hay que asegurarse de que sea un patrón ondulado que permita arquearse para formar un círculo.
 |  |
 |  |
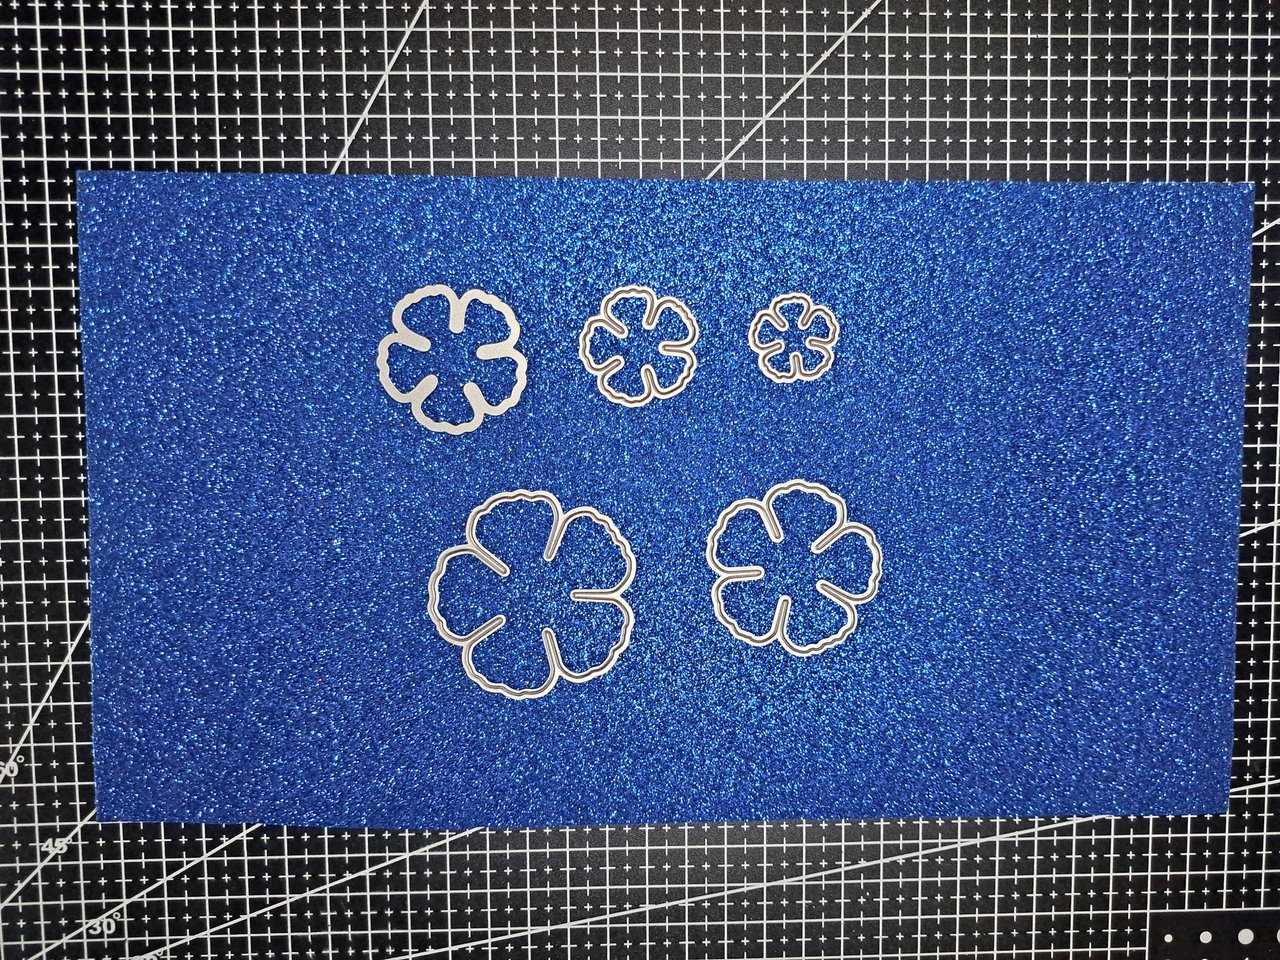
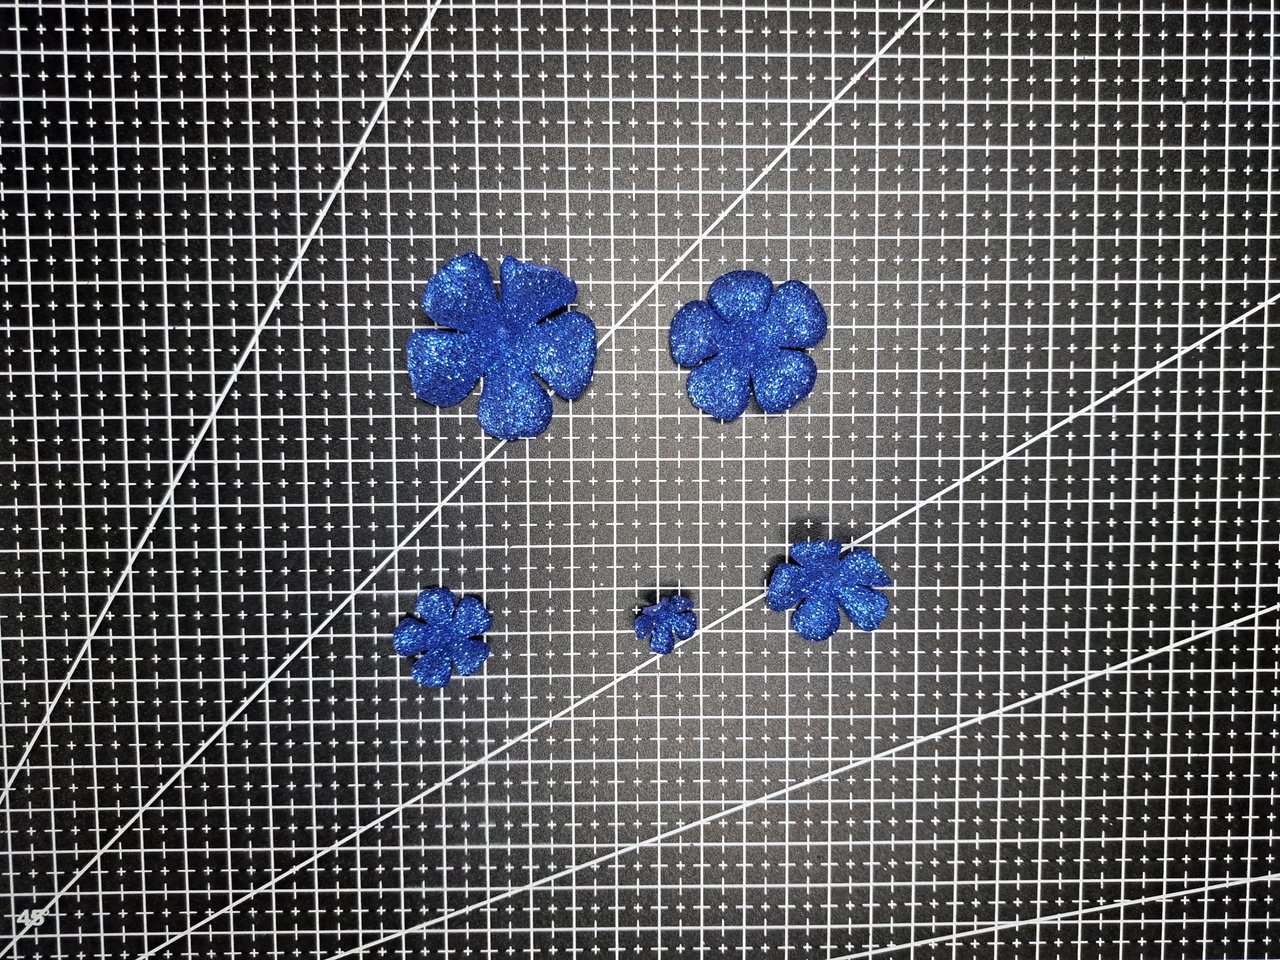
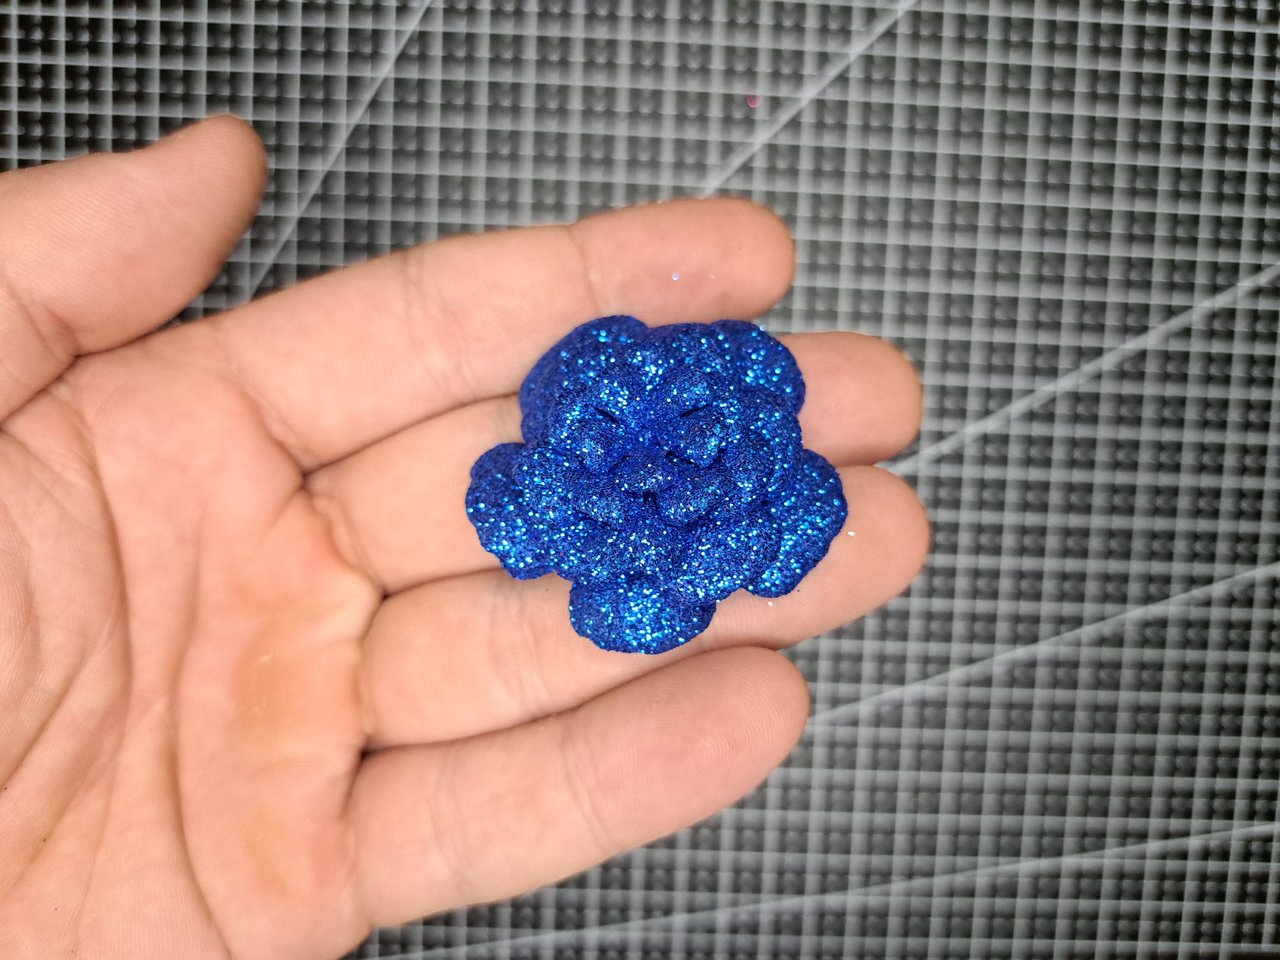
2️⃣ Using the flower-shaped dies, I will cut out 5 pieces of blue frosted fomi, which I will submit to a thermoforming process to give it volume. When the fomi cools, I will glue each of the pieces on top of each other, respecting the order of size to form the main blue rose.
Utilizando los troqueles con forma de flor, recortaré 5 piezas de fomi escarchado azul, las cuales someteré a un proceso de termoformado para darle volumen. Cuando enfríe el fomi, pegaré cada una de las piezas encima de otra, respetando el orden de tamaño para conformar la rosa azul principal.
 |  |
 |  |
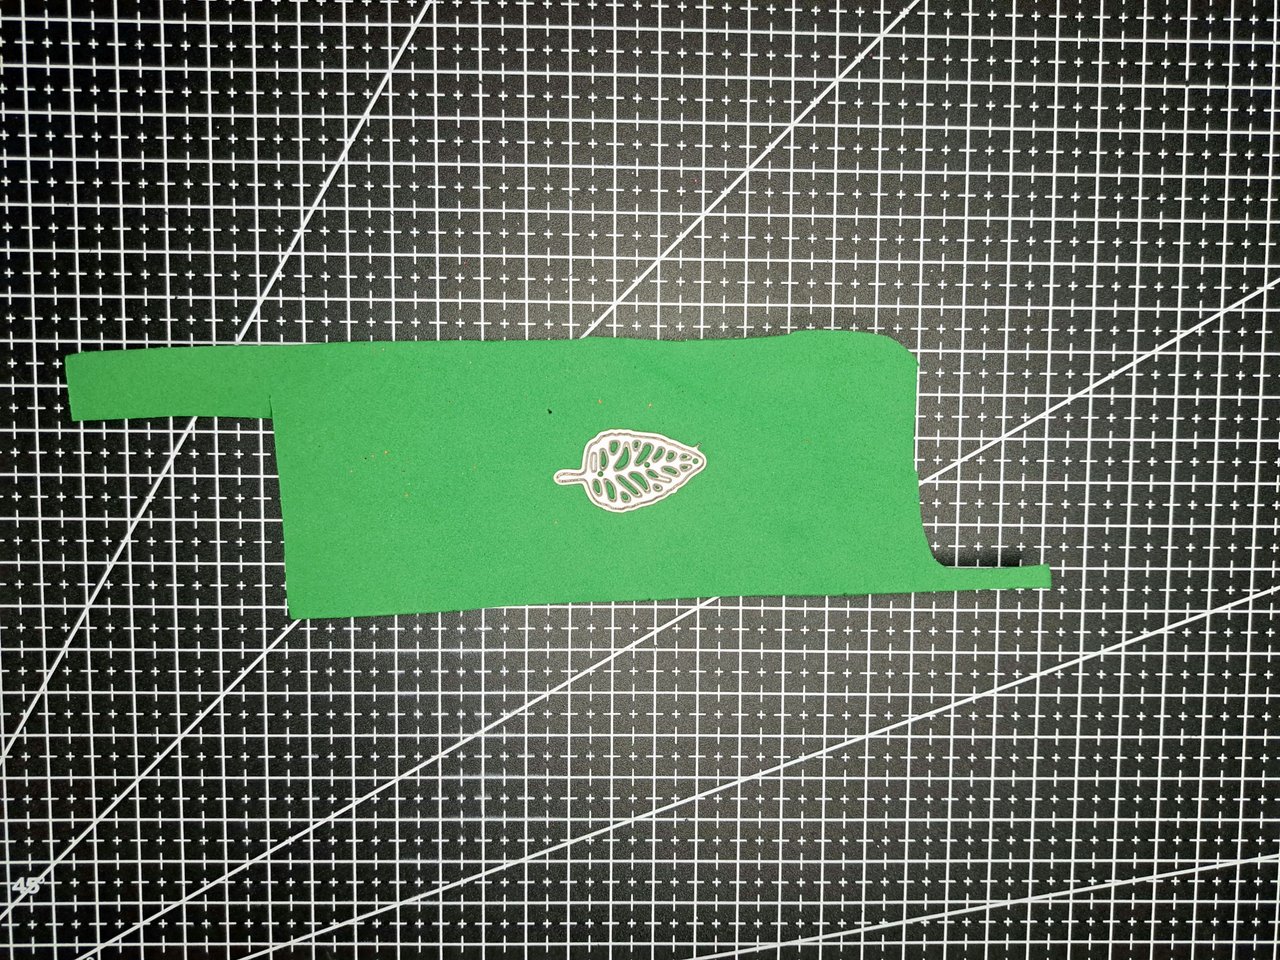
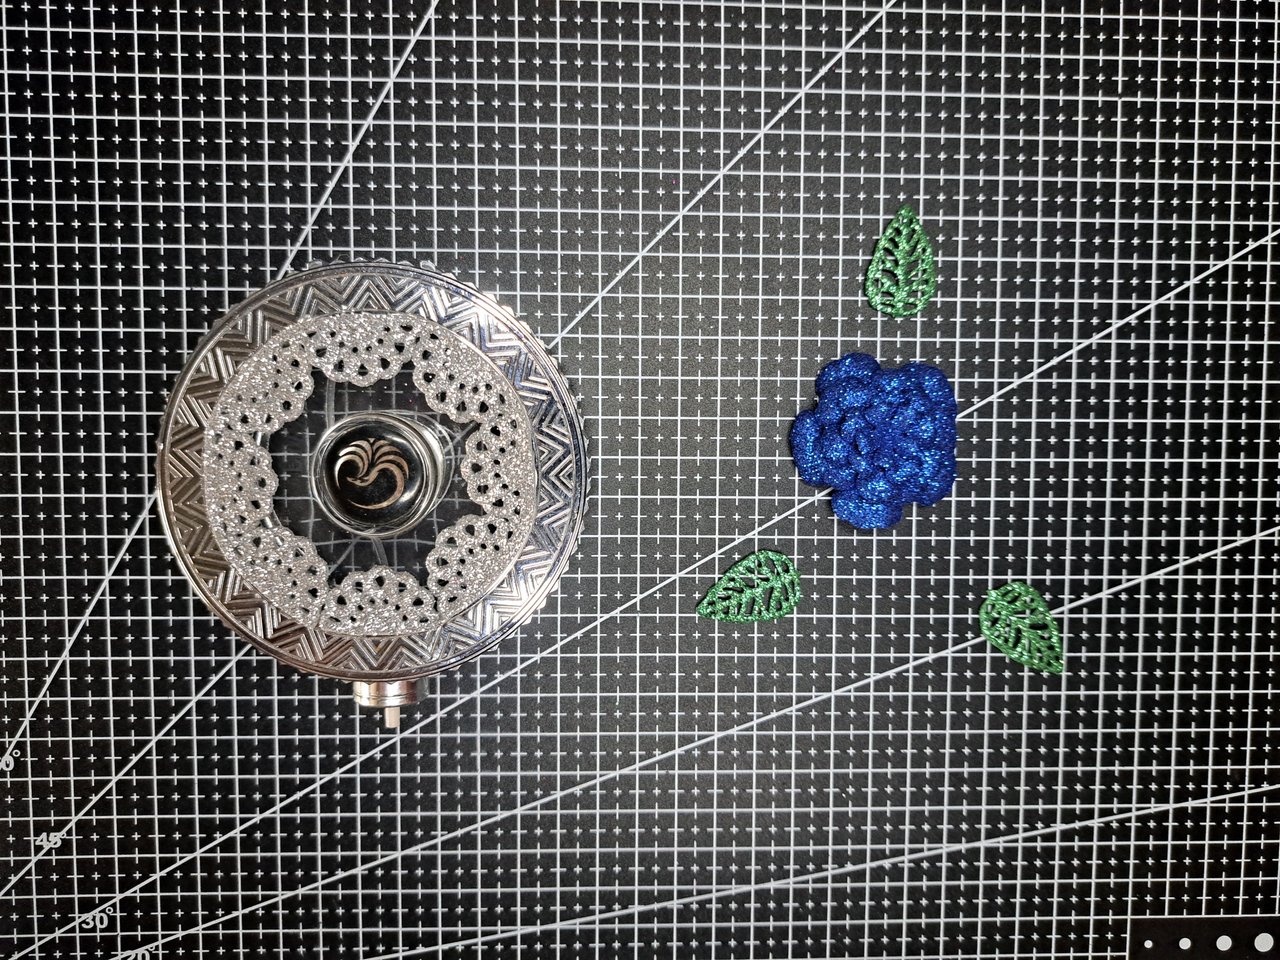
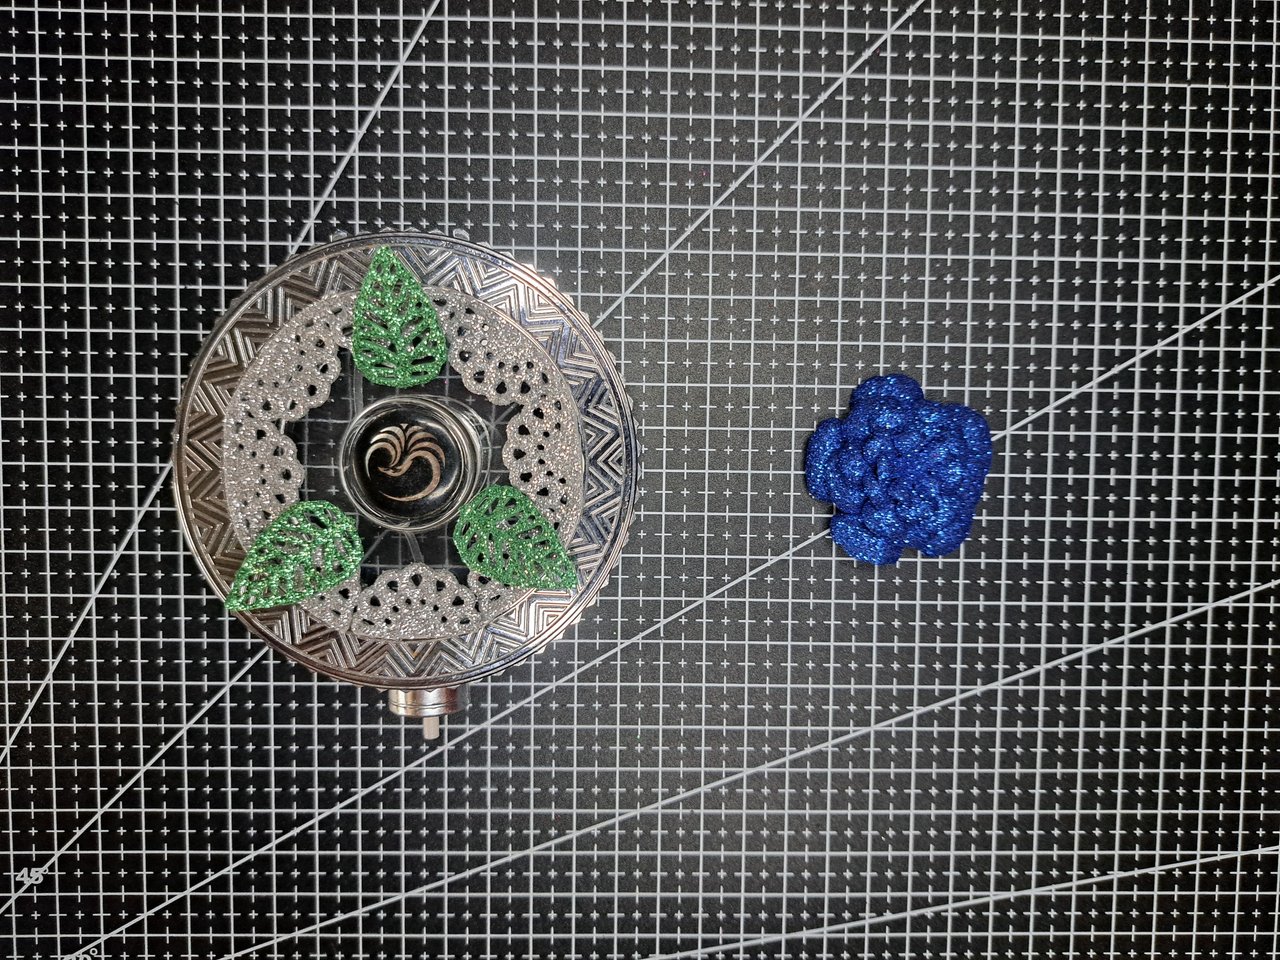
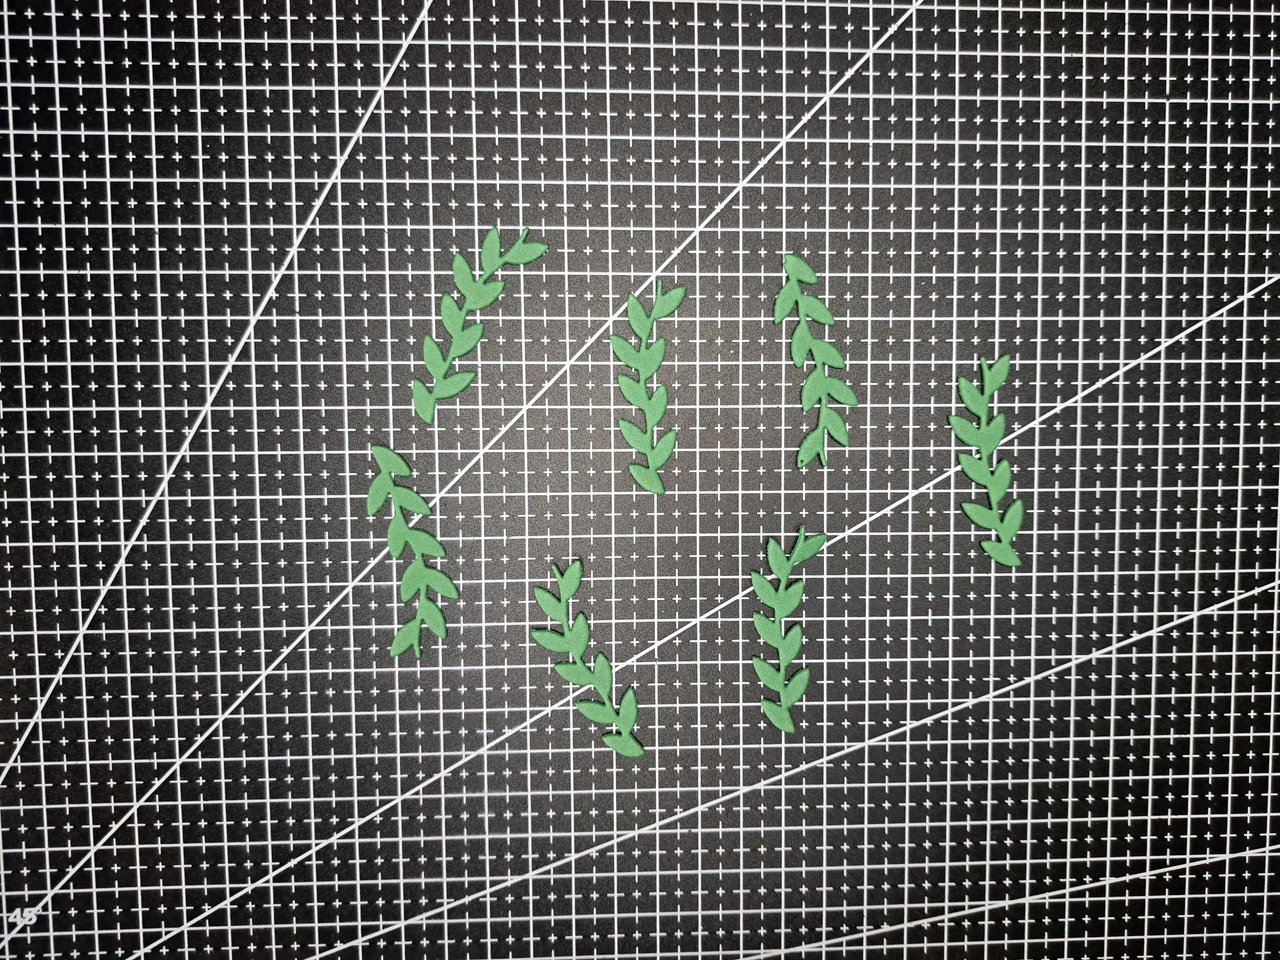
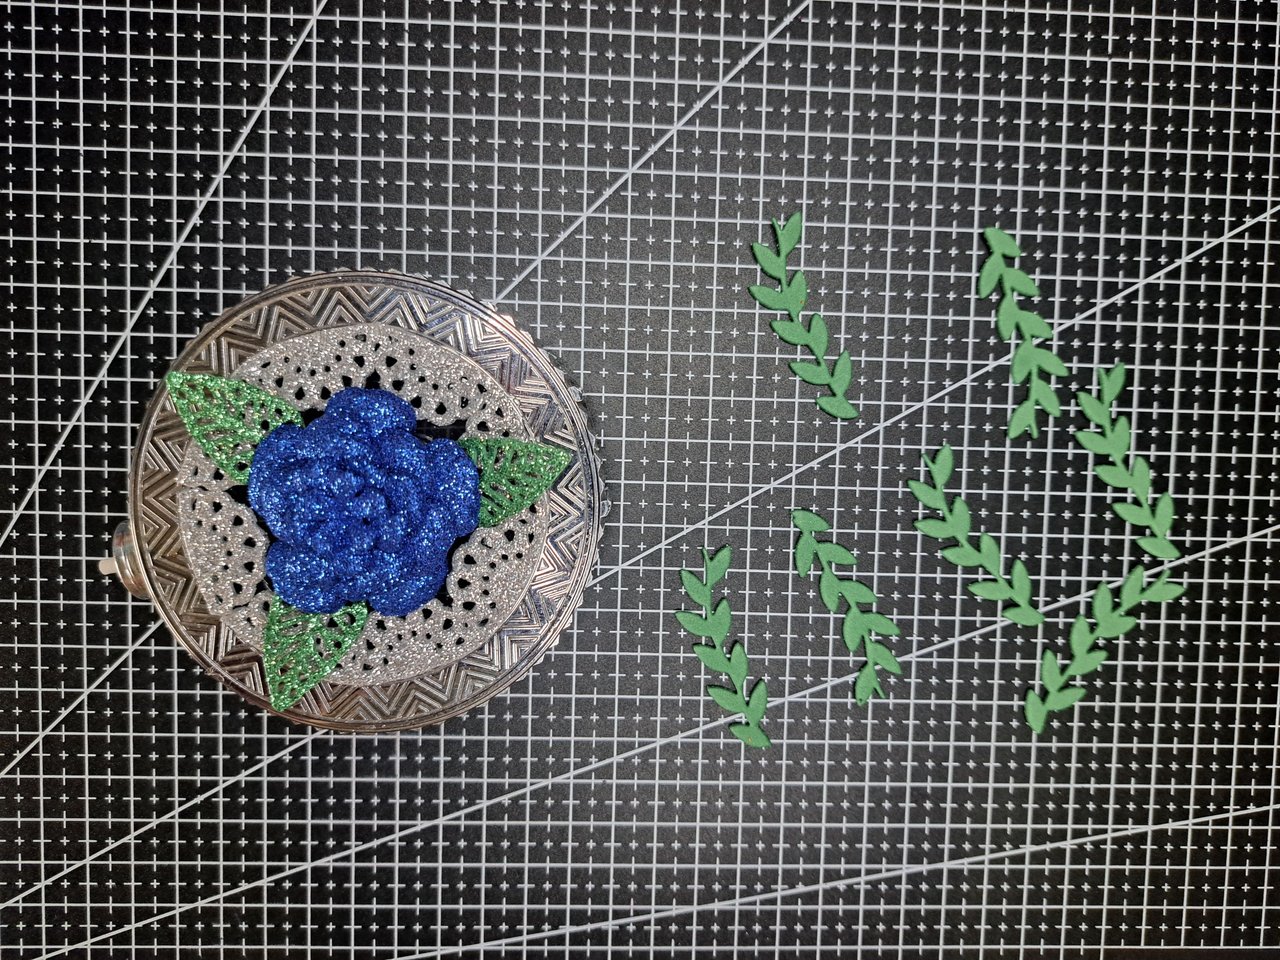
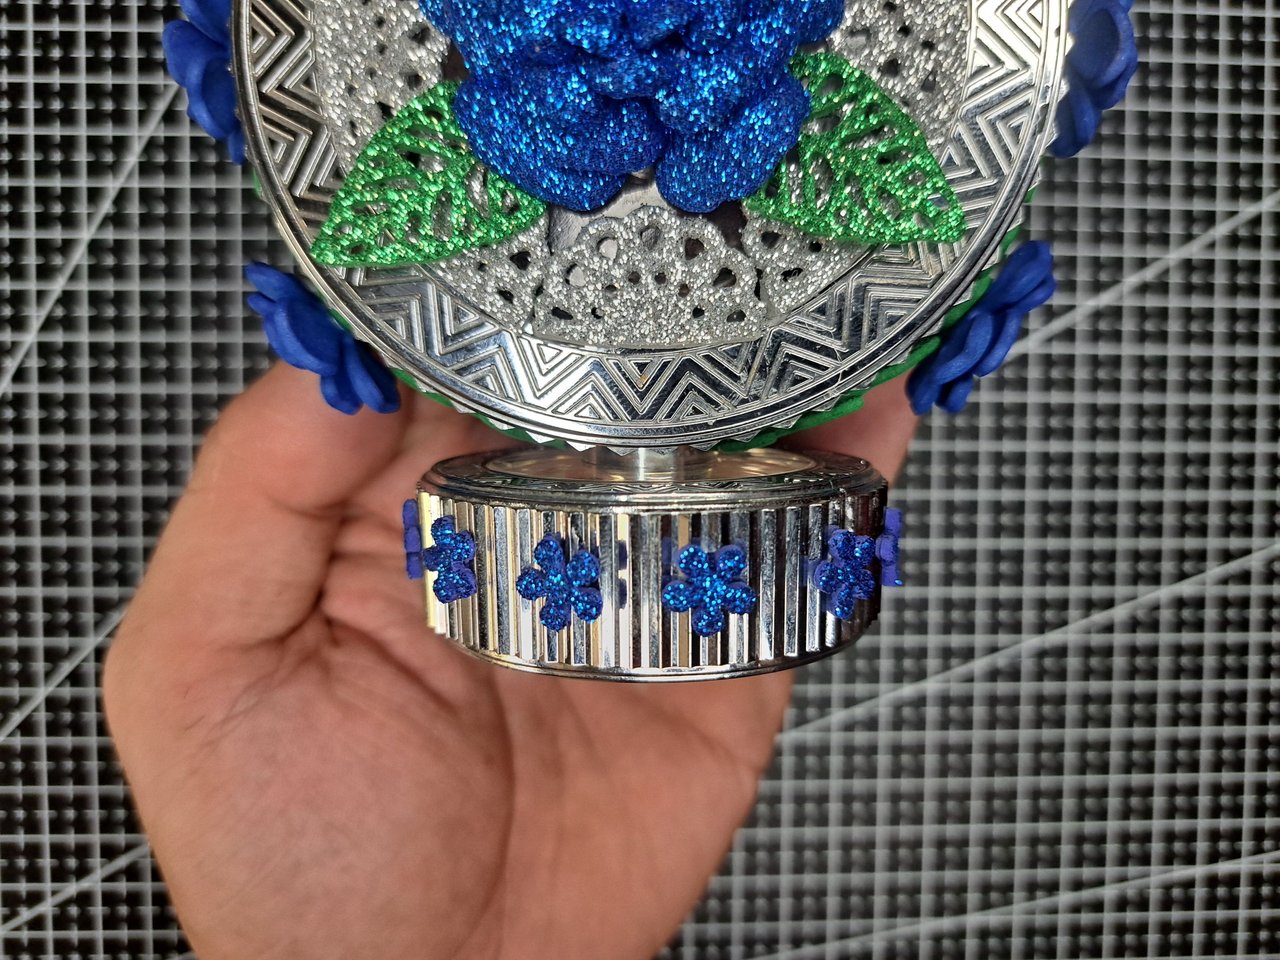
3️⃣ With the leaf-shaped die I will cut out three green pieces and glue them on top of the silver embroidery forming a triangle. On top of it all, I will glue the blue rose in the center, covering the whole area.
Con el troquel en forma de hoja recortaré tres piezas verdes y las pegaré encima del bordado plateado formando un triángulo. Encima de todo, pegaré la rosa azul en el centro, quedando cubierta toda el área.
 |  |  |
 |  |
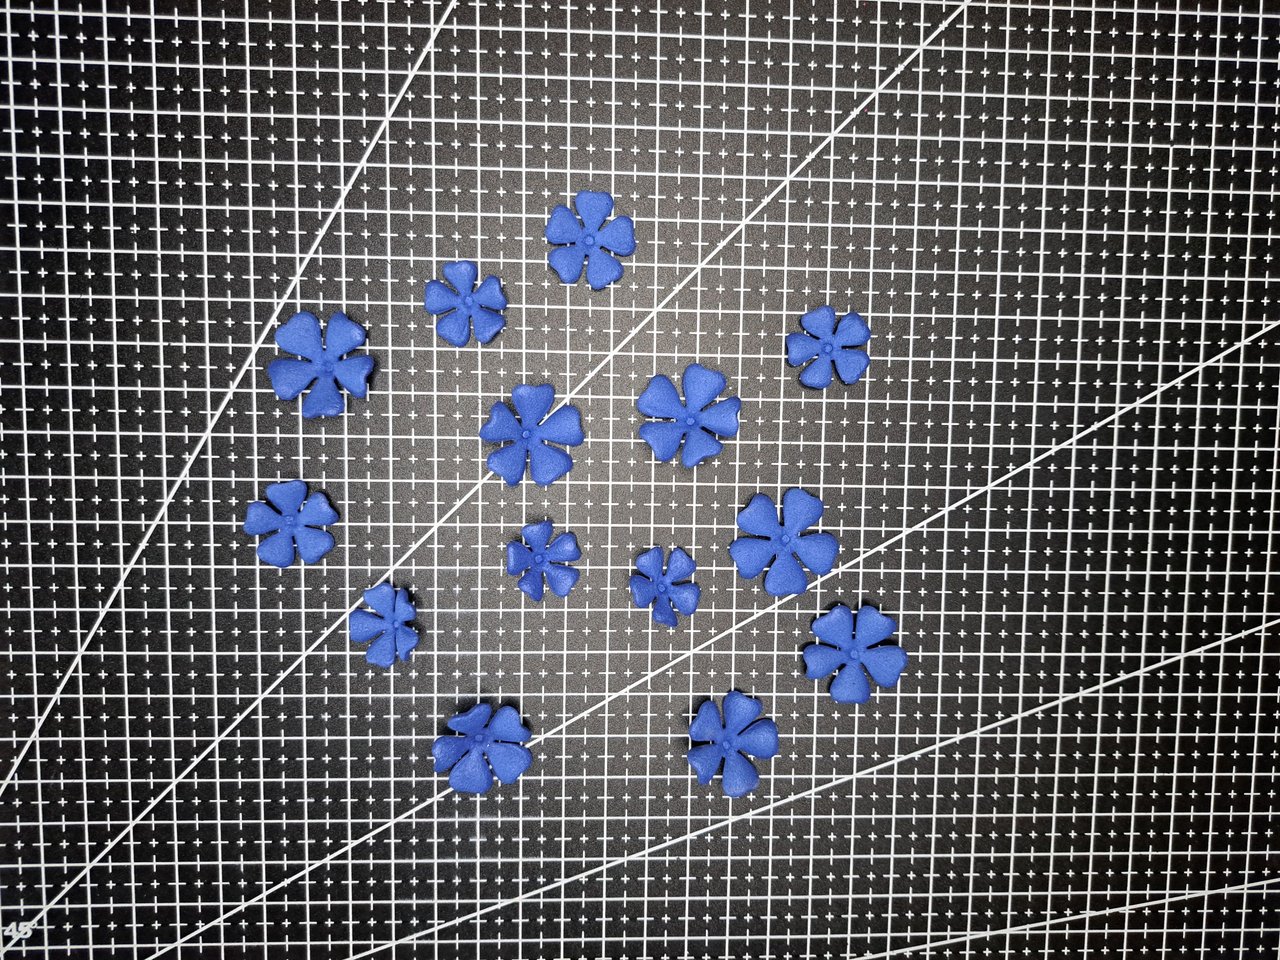
4️⃣ Next I will repeat the previous process to form new flowers and leaves. But this time the leaves will have a different shape and, instead of a large rose, I will create 7 small flowers with only two layers of petals. Even so, each layer of petals will undergo a thermoforming process and then I will join them together to form the 7 flowers.
A continuación repetiré el proceso anterior para conformar nuevas flores y hojas. Pero esta vez las hojas tendrán otra forma y, en vez de una rosa grande, crearé 7 flores pequeñas de solo dos capas de pétalos. Aun así, cada capa de pétalos las someteré a un proceso de termoformado y luego las uniré para formar las 7 flores.
 |  |  |
 |  |
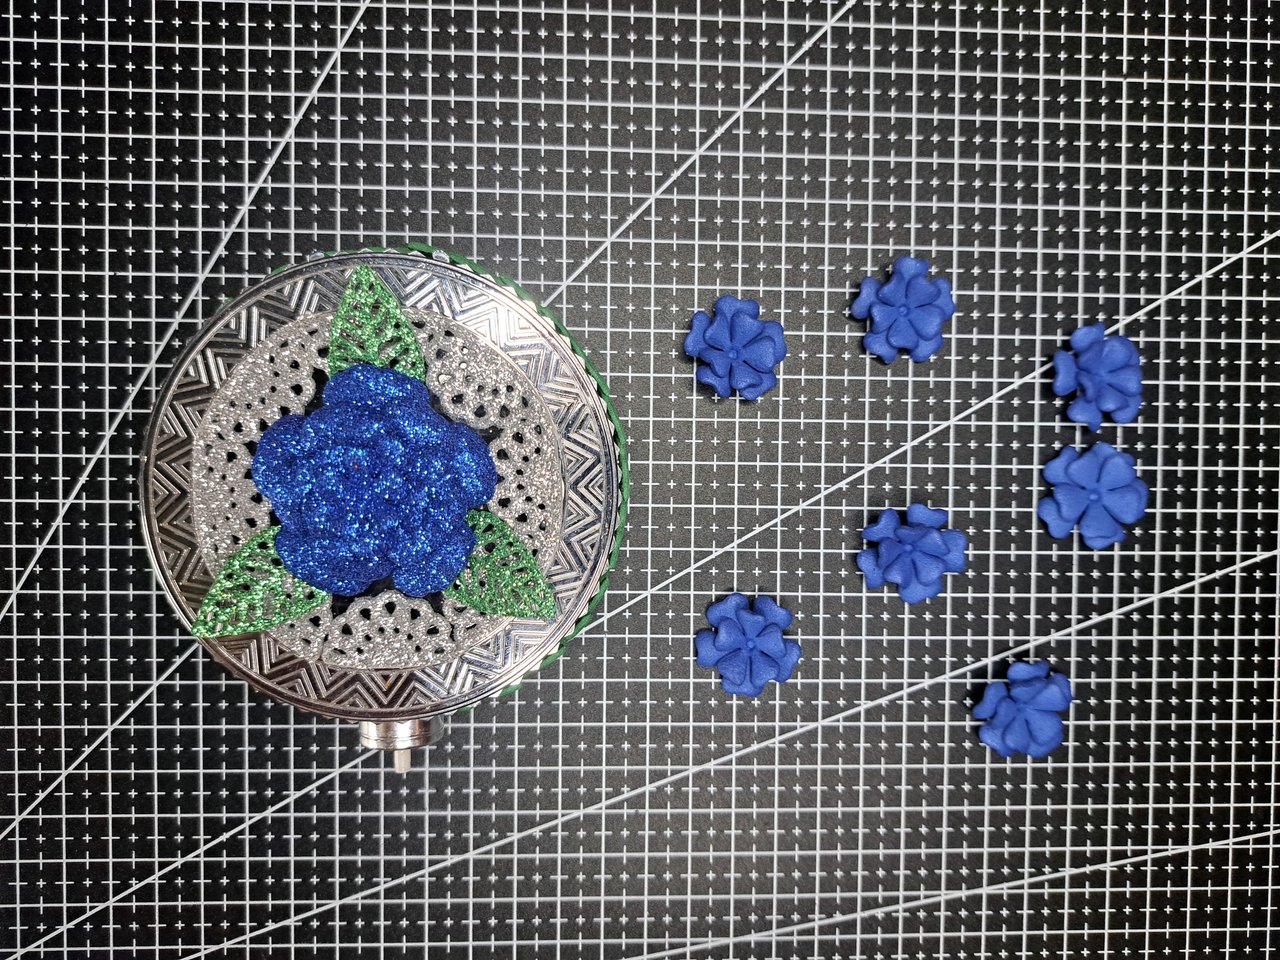
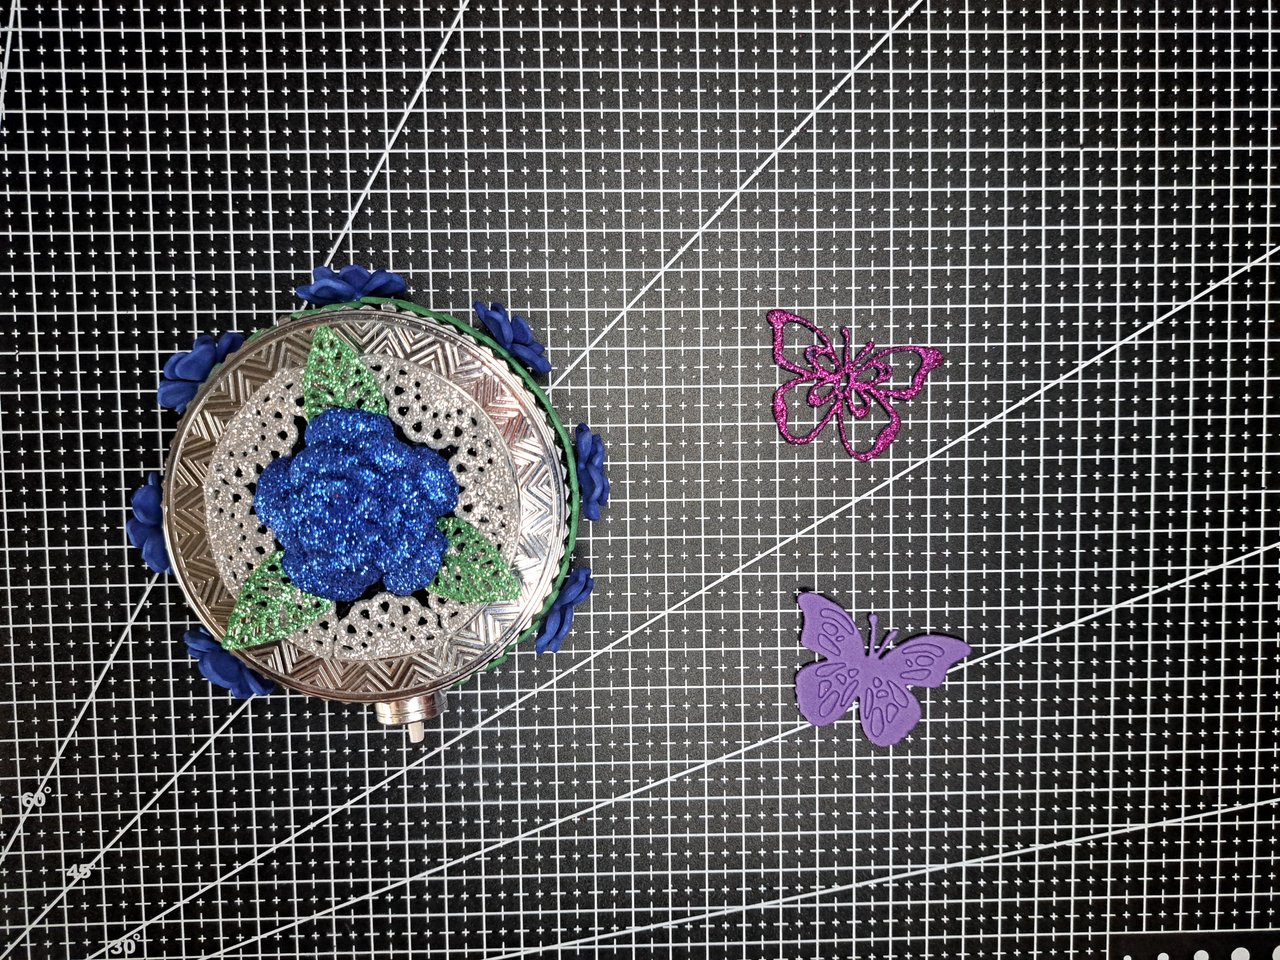
5️⃣ I will glue the new thin leaves all around the edge of the container, forming a vine that will cover that area. On top of the vine of leaves I will glue each of the 7 flowers, leaving a space between them.
Las nuevas hojas finas las pegaré por todo el borde del envase, formando una enredadera que cubrirá esa área. Encima de la enredadera de hojas pegaré cada una de las 7 flores, dejando un espacio entre ellas.
 |  |
 |  |
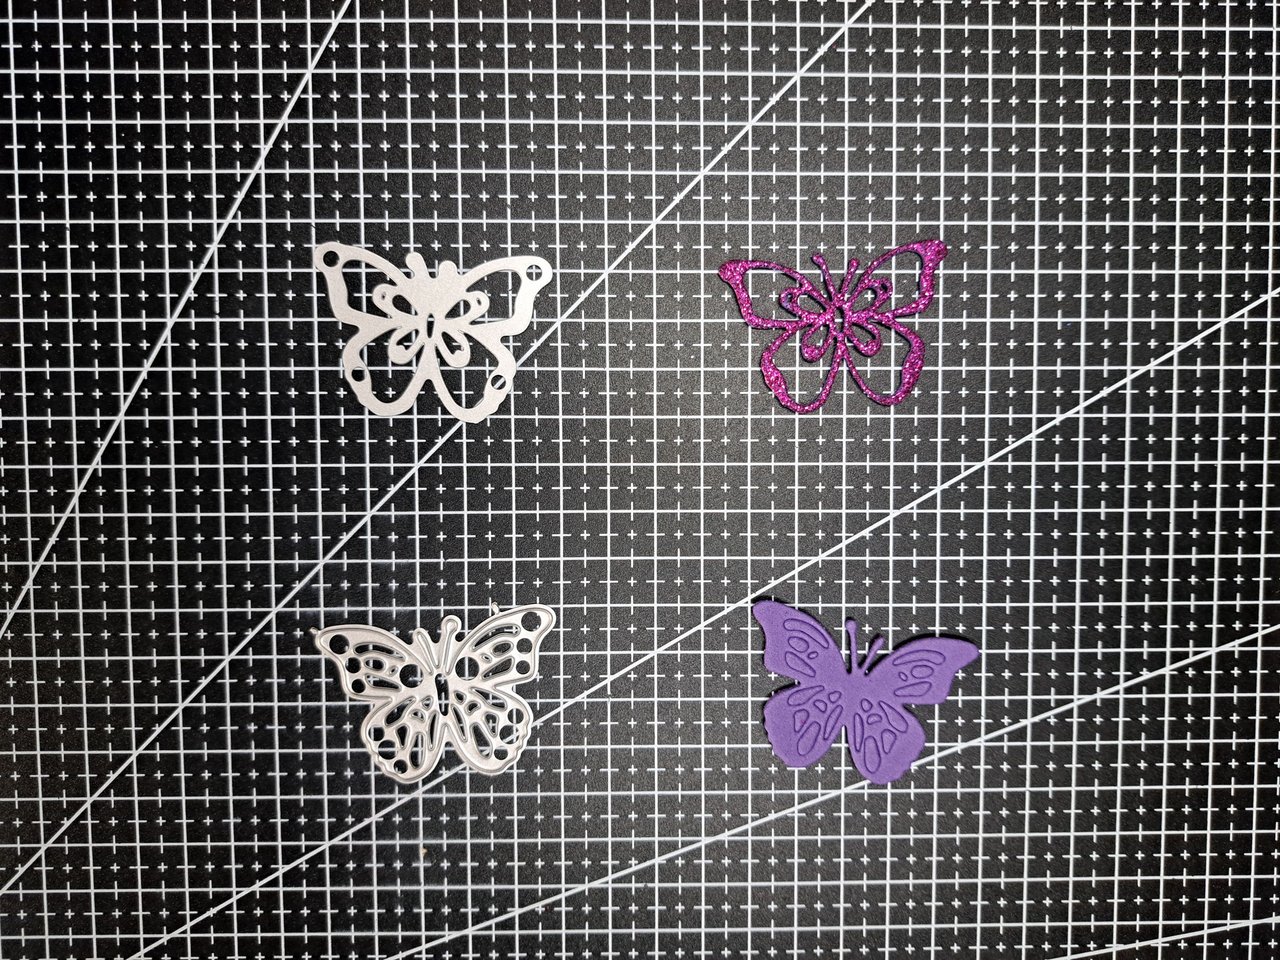
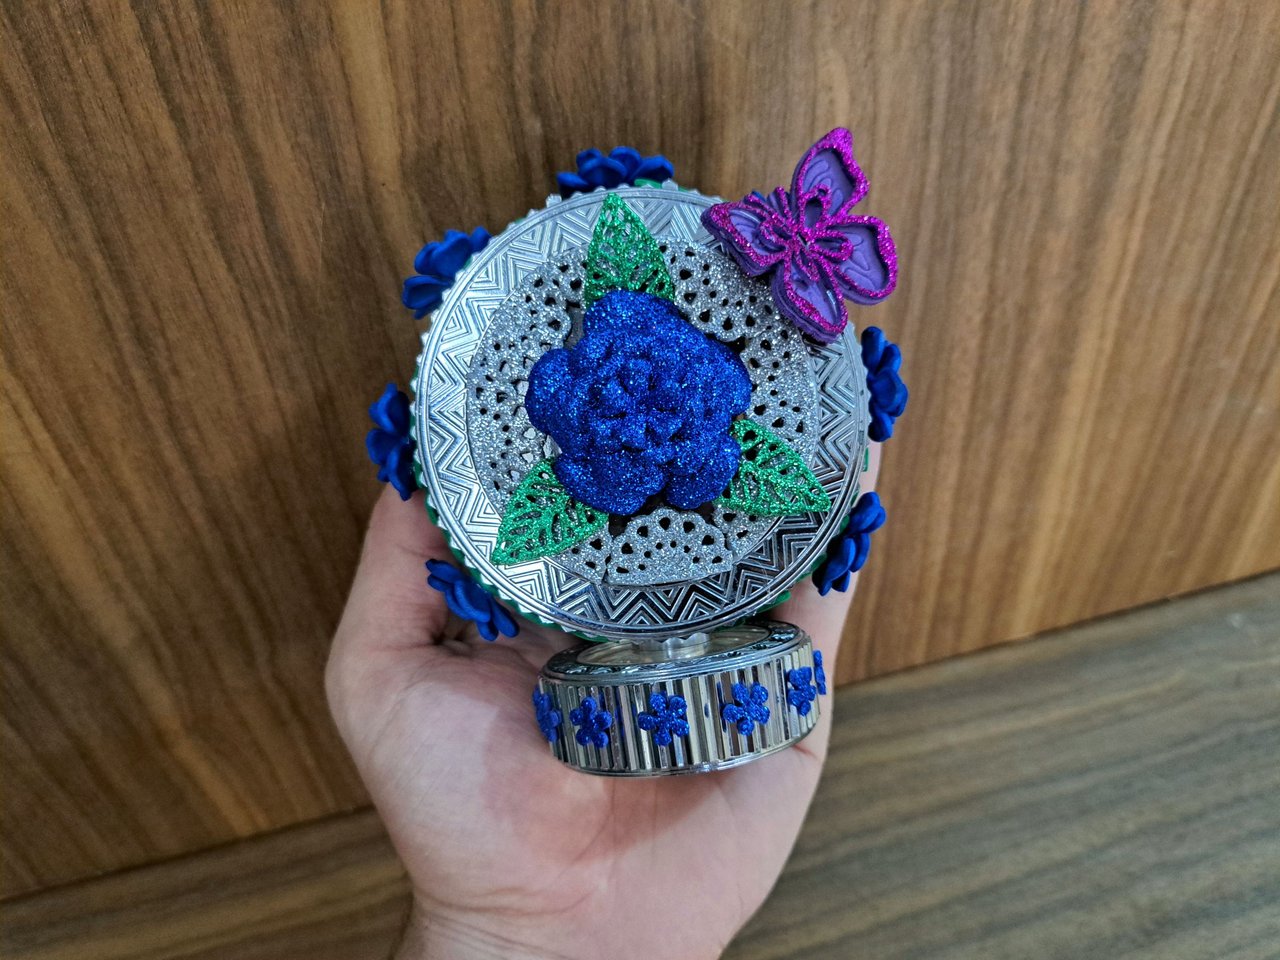
6️⃣ Now I will use the butterfly die to cut out the two parts. These parts will be glued to the upper right corner of the ornament. To make them more eye-catching, I cut out the smooth bottom part and the ribbed top part.
Ahora emplearé el troquel con forma de mariposa para recortar las dos partes. Dichas partes irán pegadas en la esquina superior derecha del adorno. Para hacerlas más llamativas, recorté la parte inferior lisa y la superior estriada.
 |  |
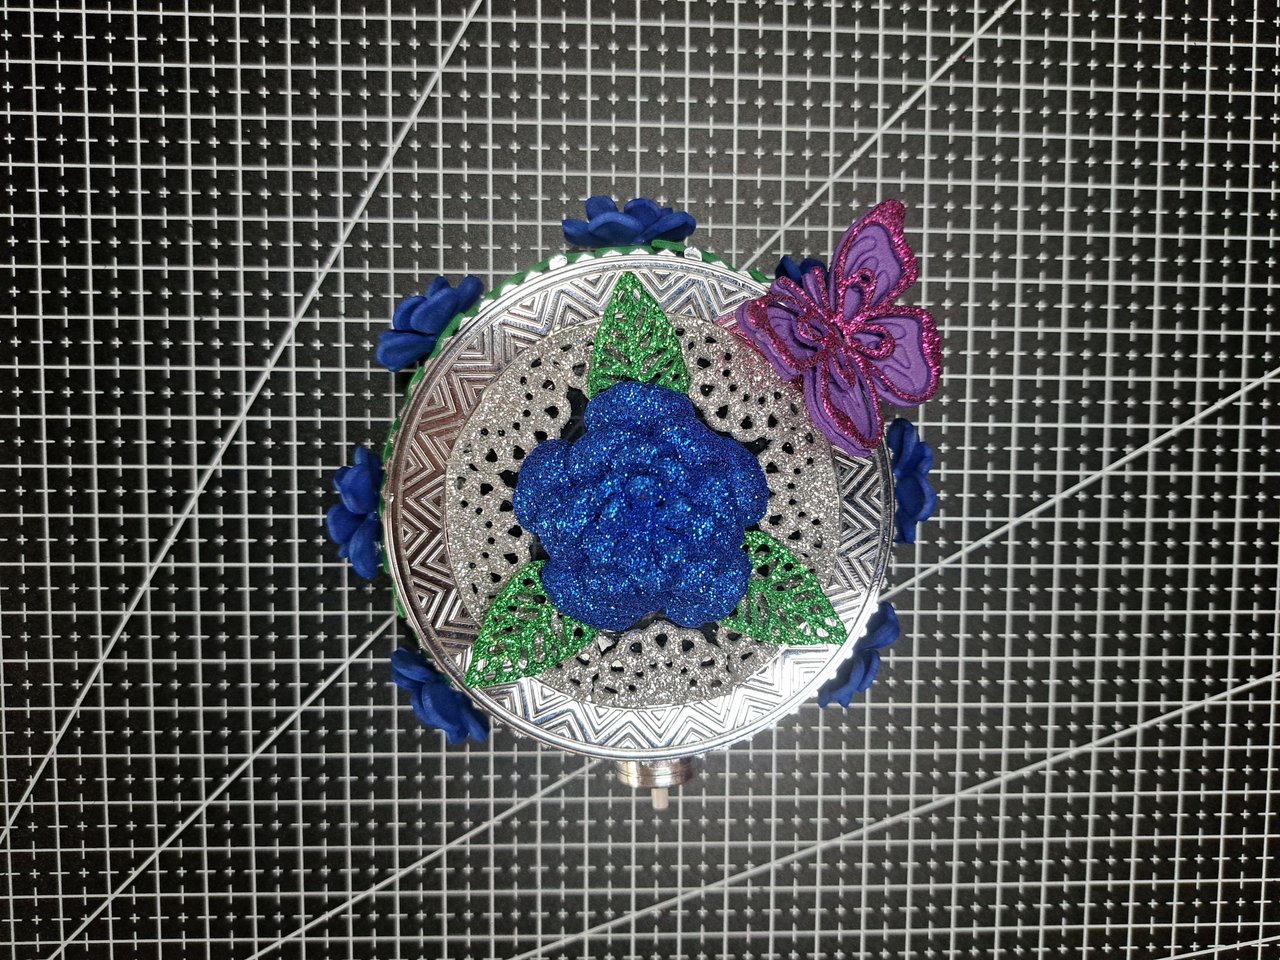 |  |
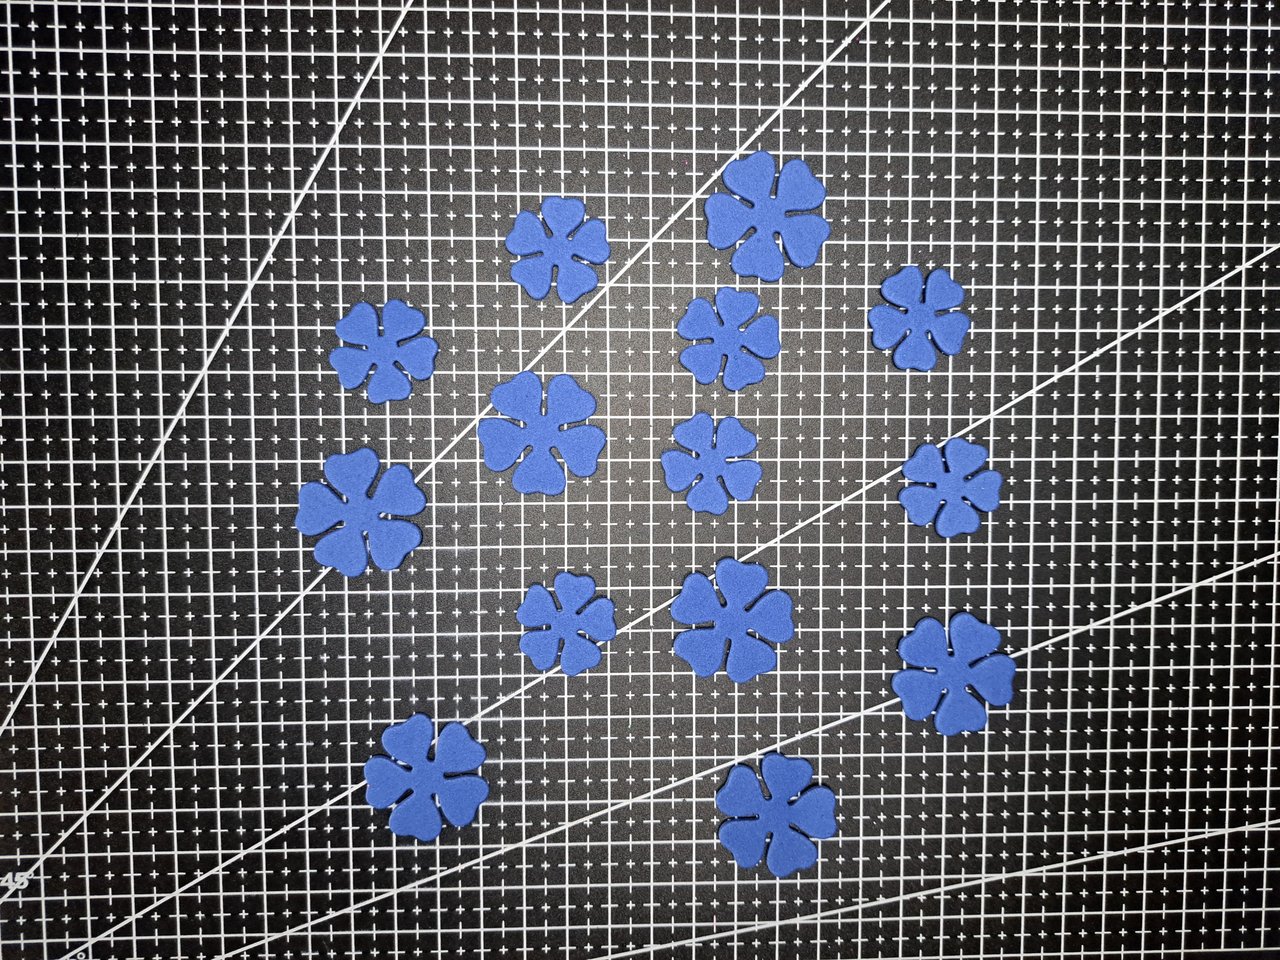
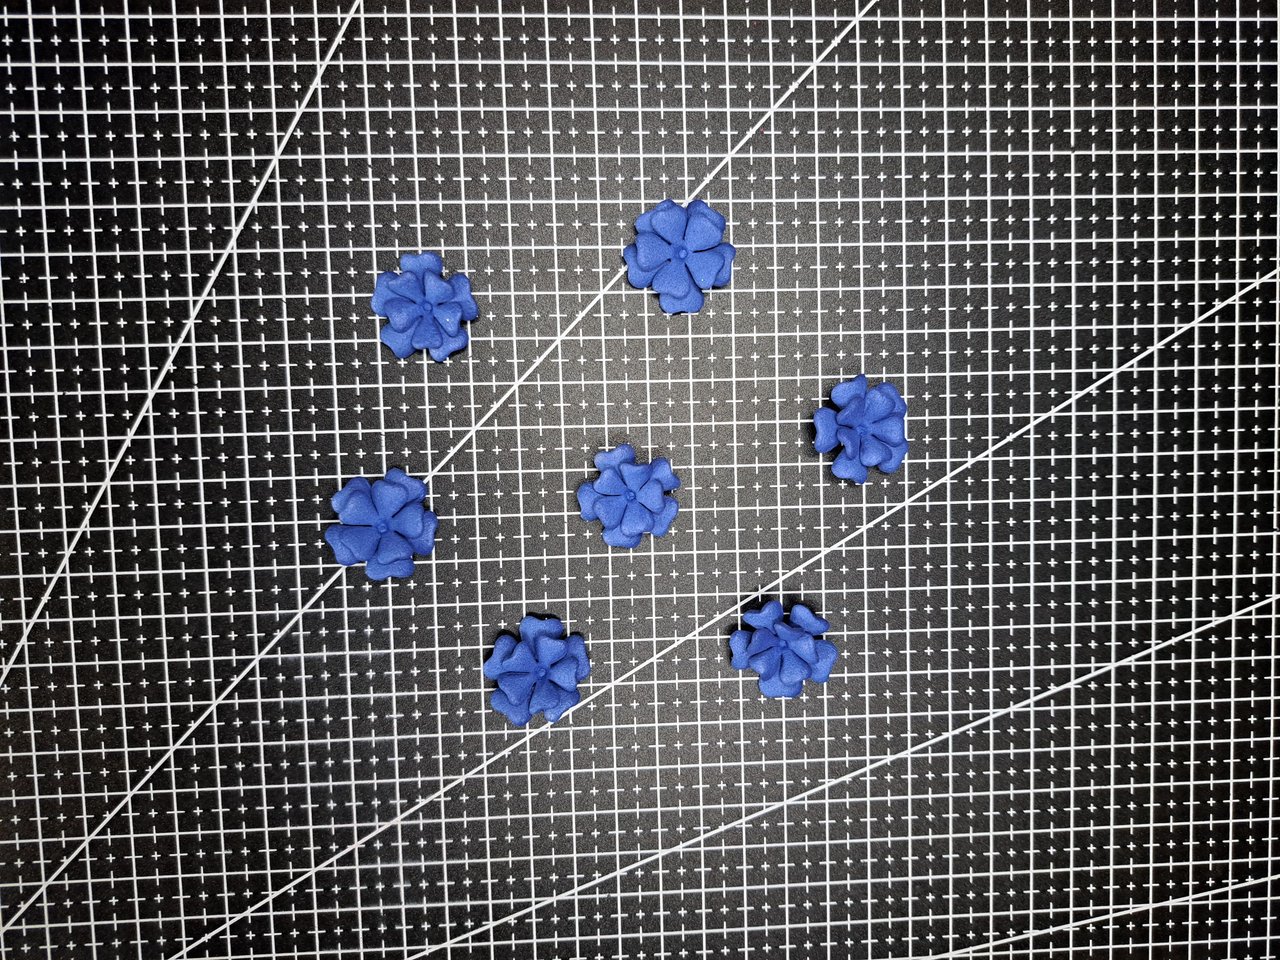
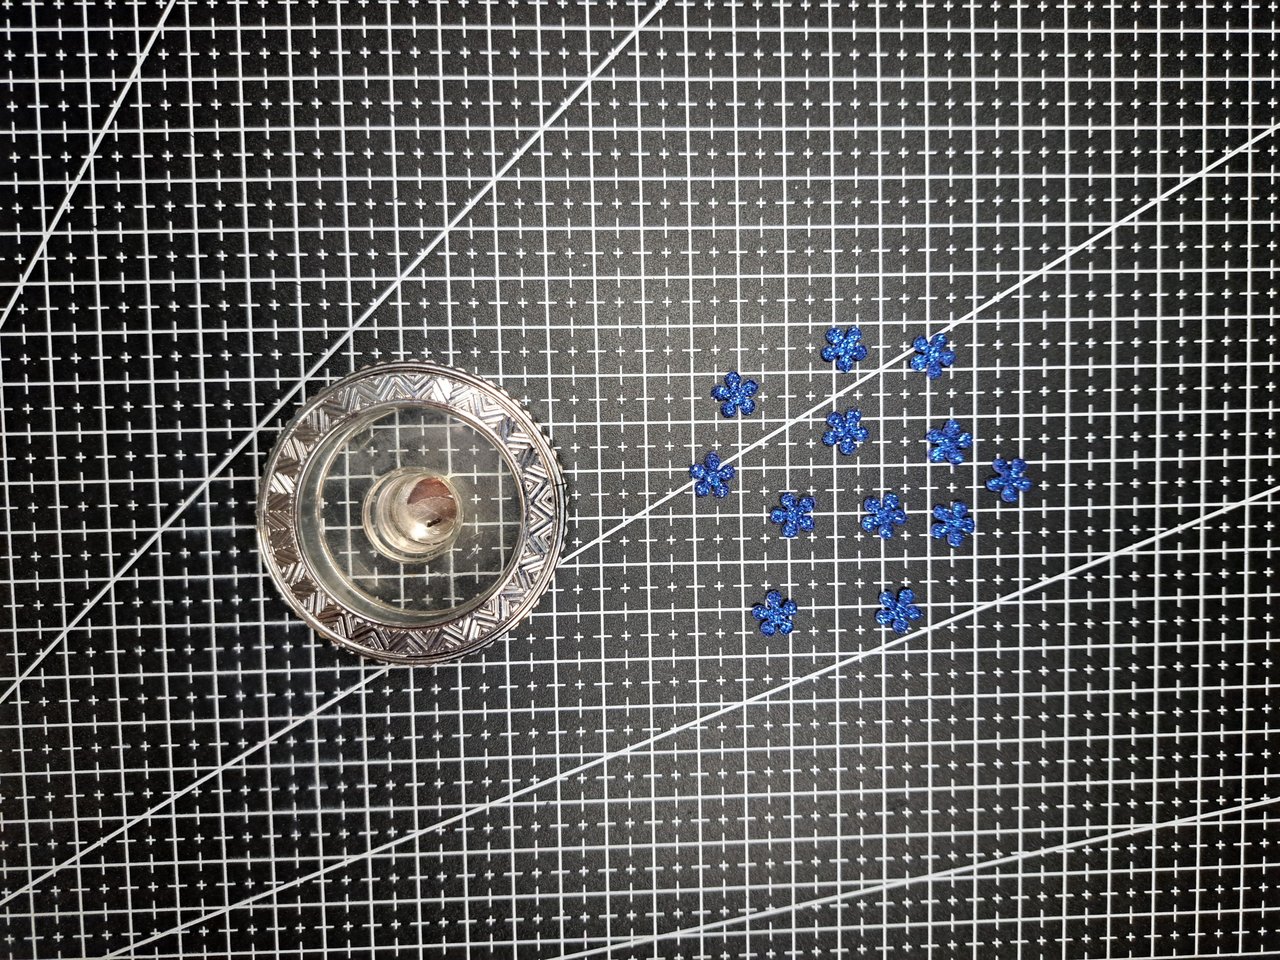
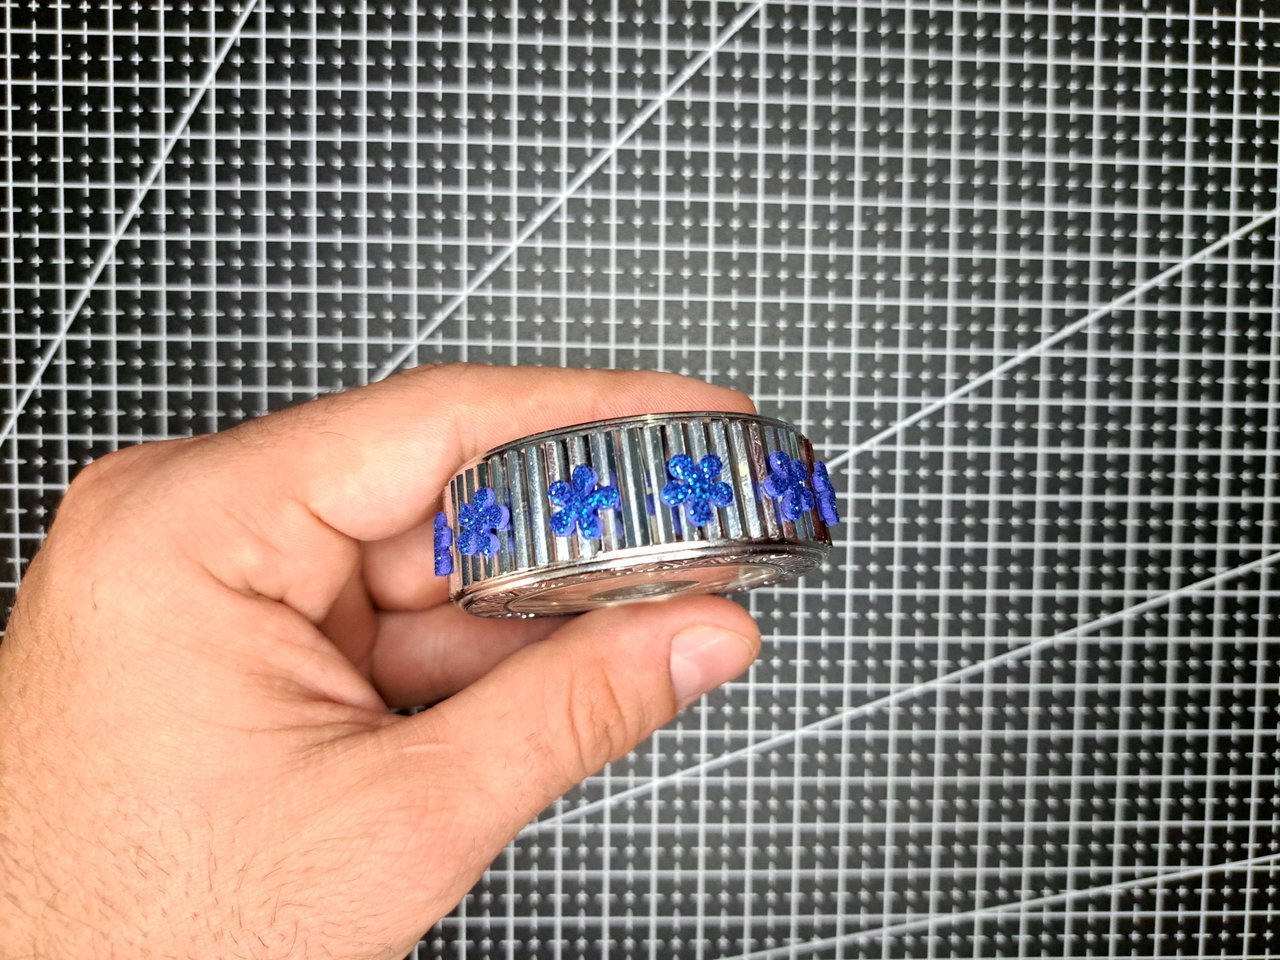
7️⃣ Finally, I will use the flower-shaped hole punch to cut out several blue flowers and then glue them all over the base of the ornament. Then I'll attach the base to the top and it's ready to go.
Para finalizar, utilizaré la perforadora con forma de flor para recortar varias flores azules y luego pegarlas por toda la base del adorno. Luego uniré la base con la parte superior y ya quedará listo.
 |  |
 |  |
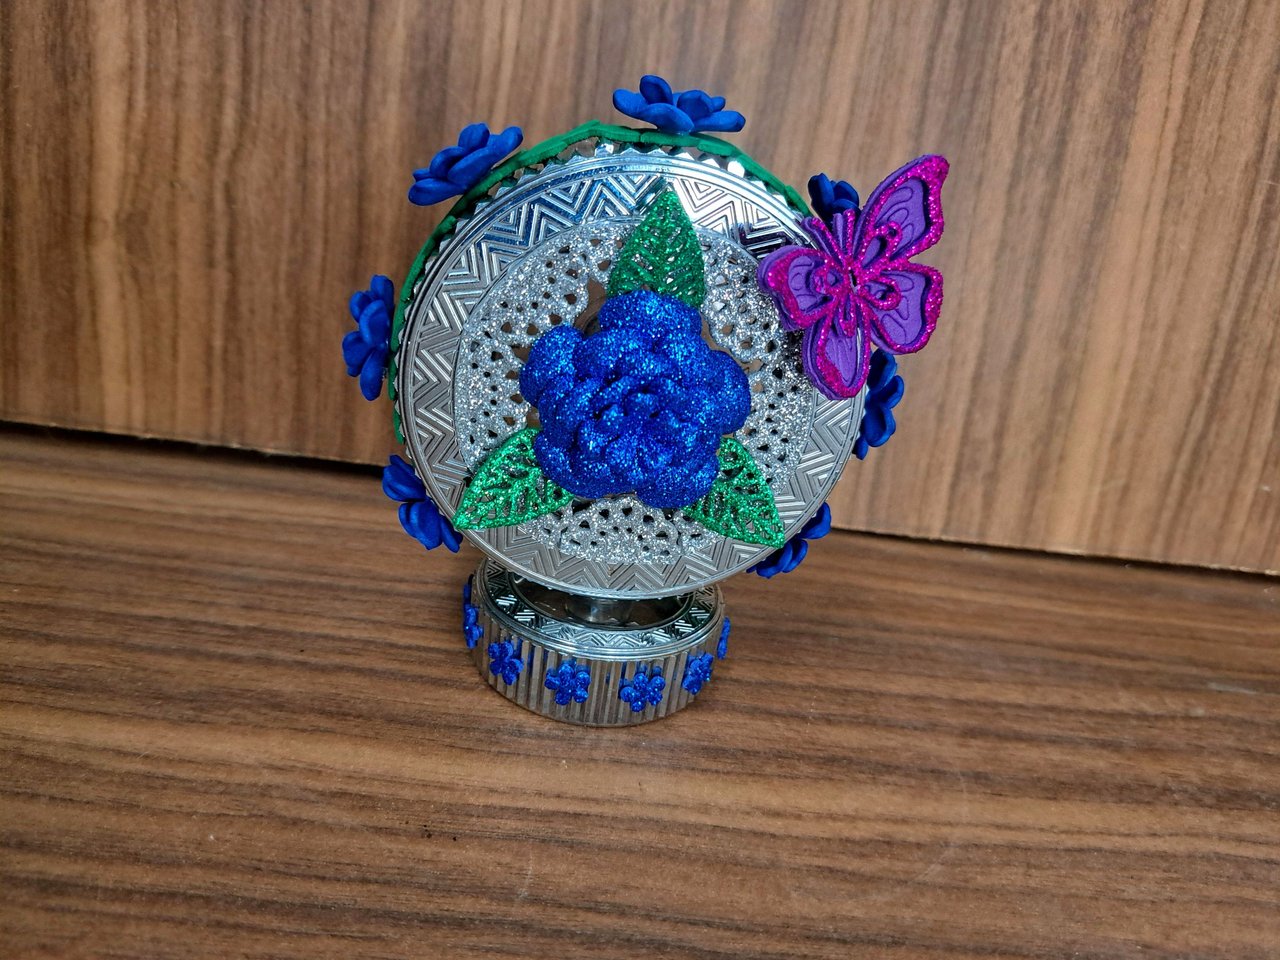
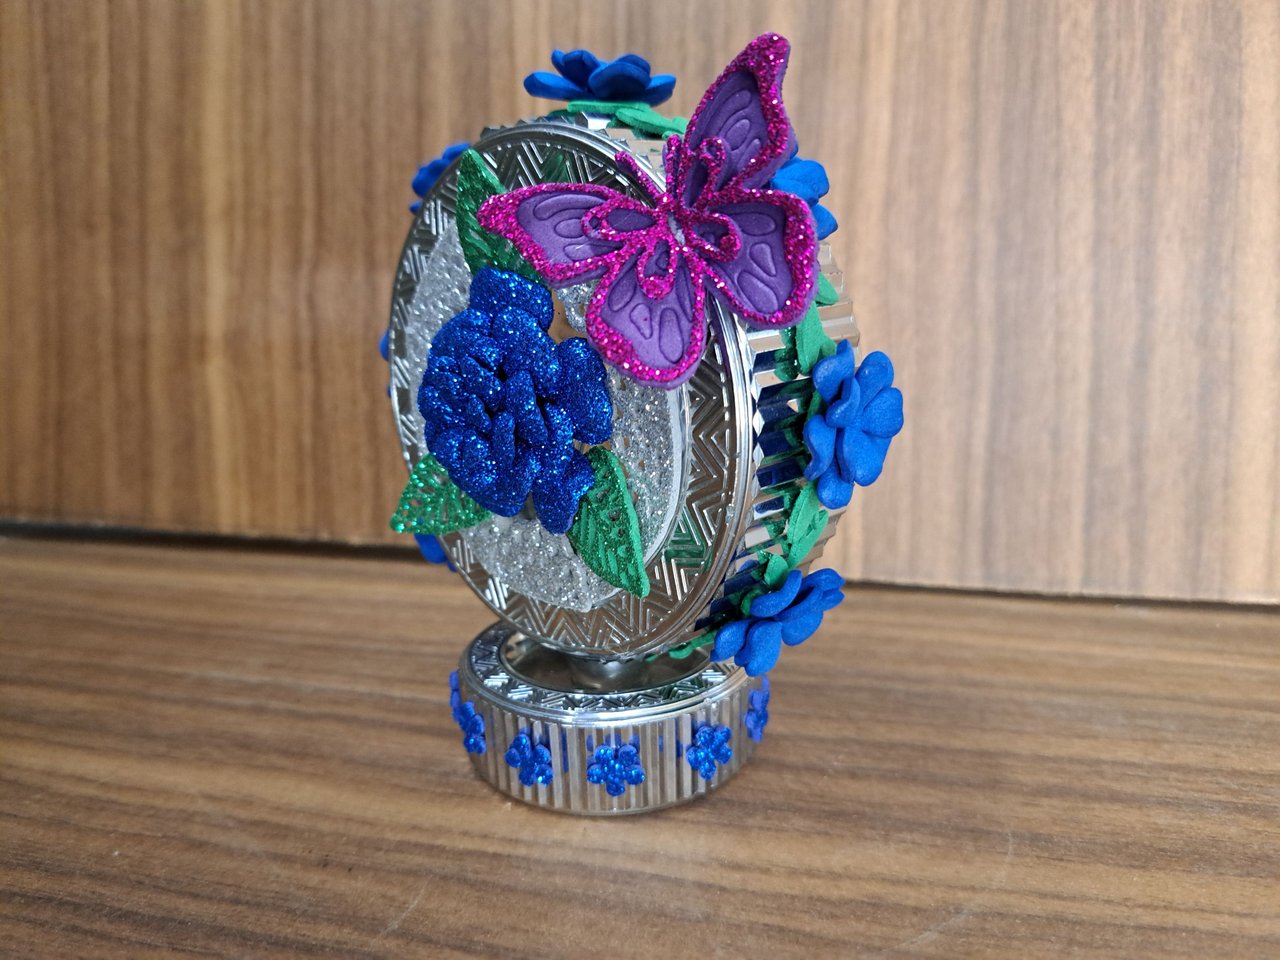
Finished Work // Trabajo Terminado
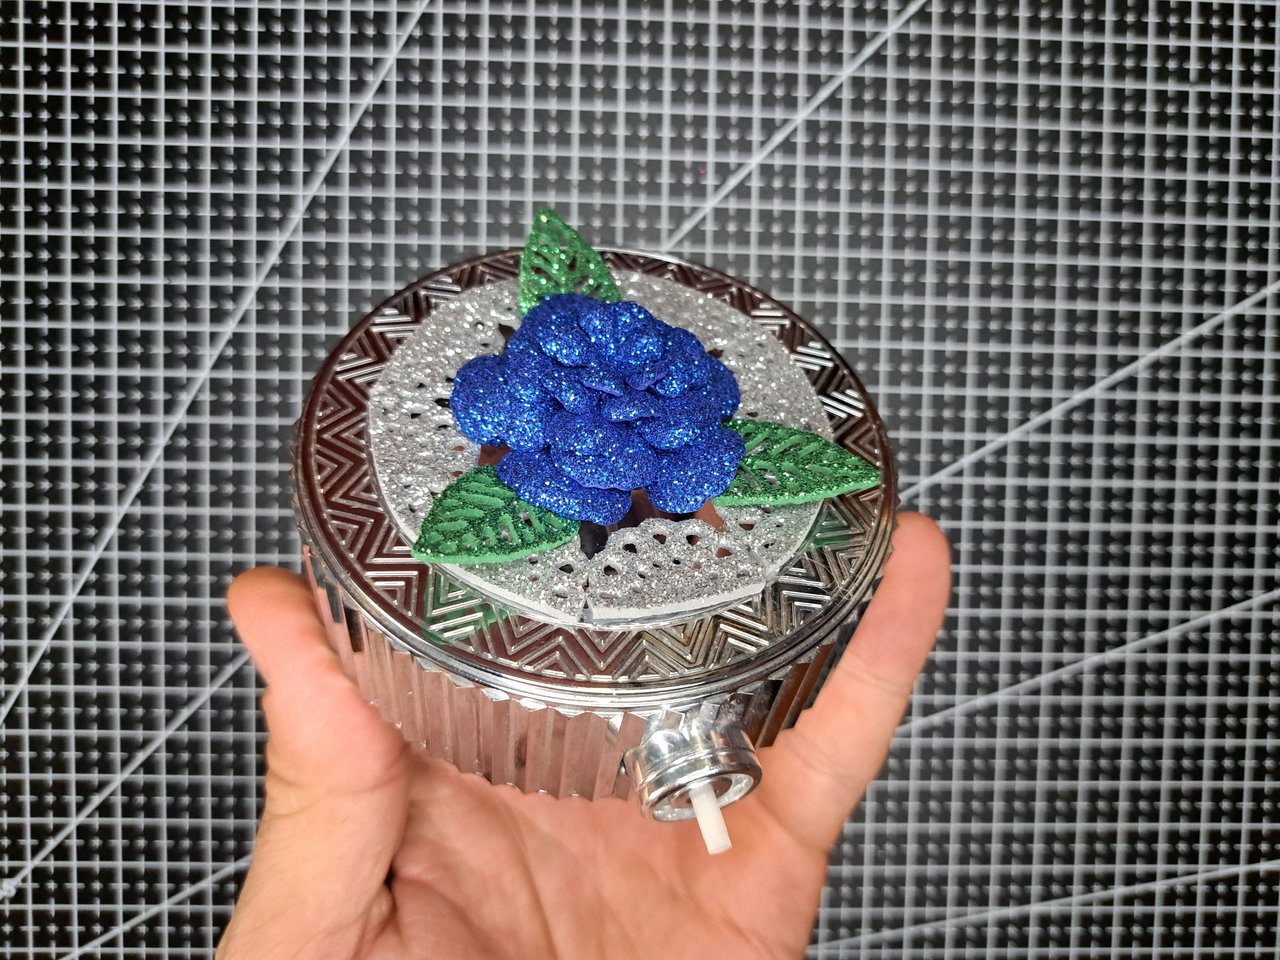
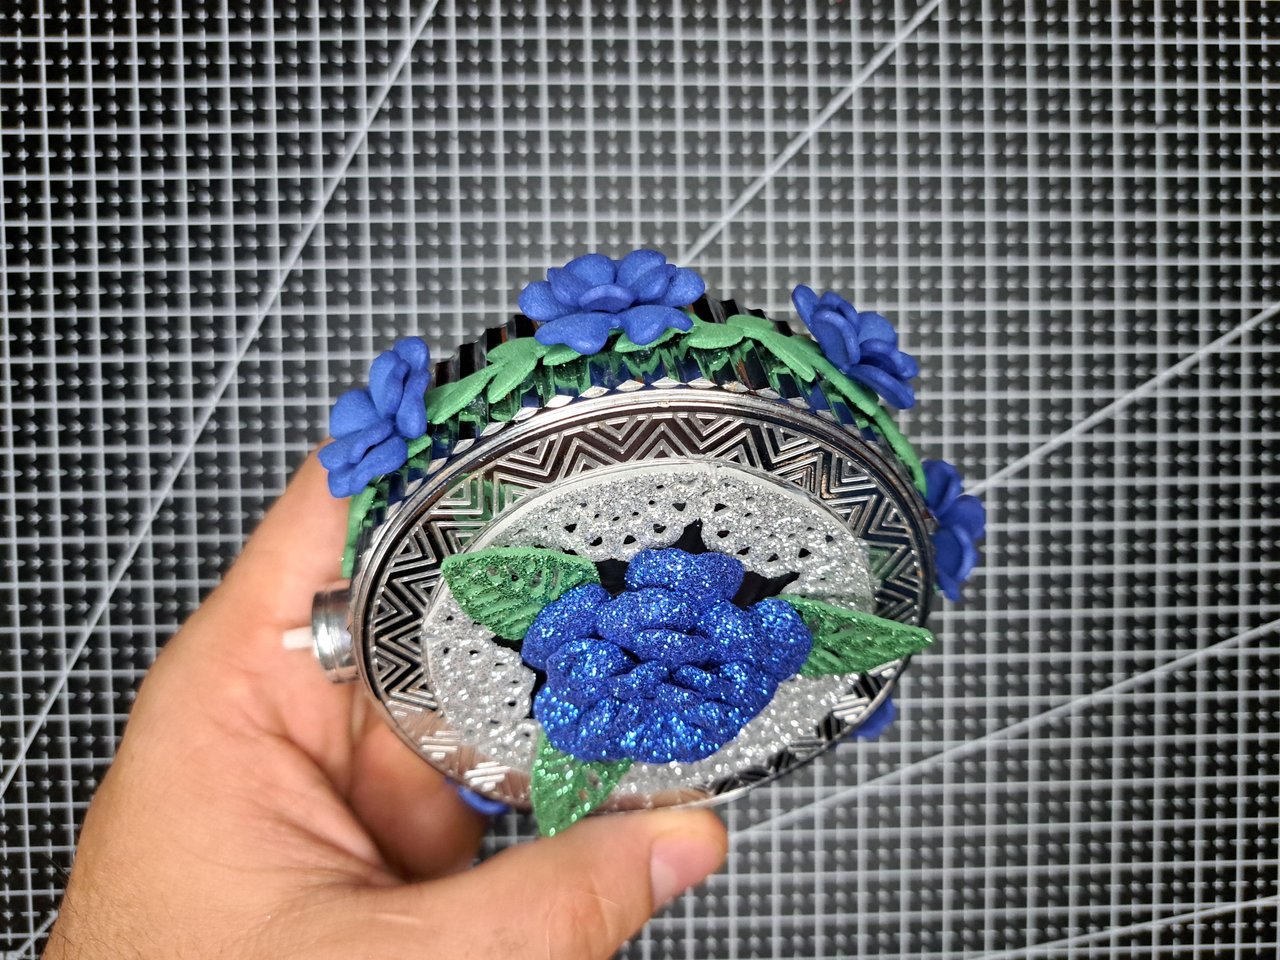
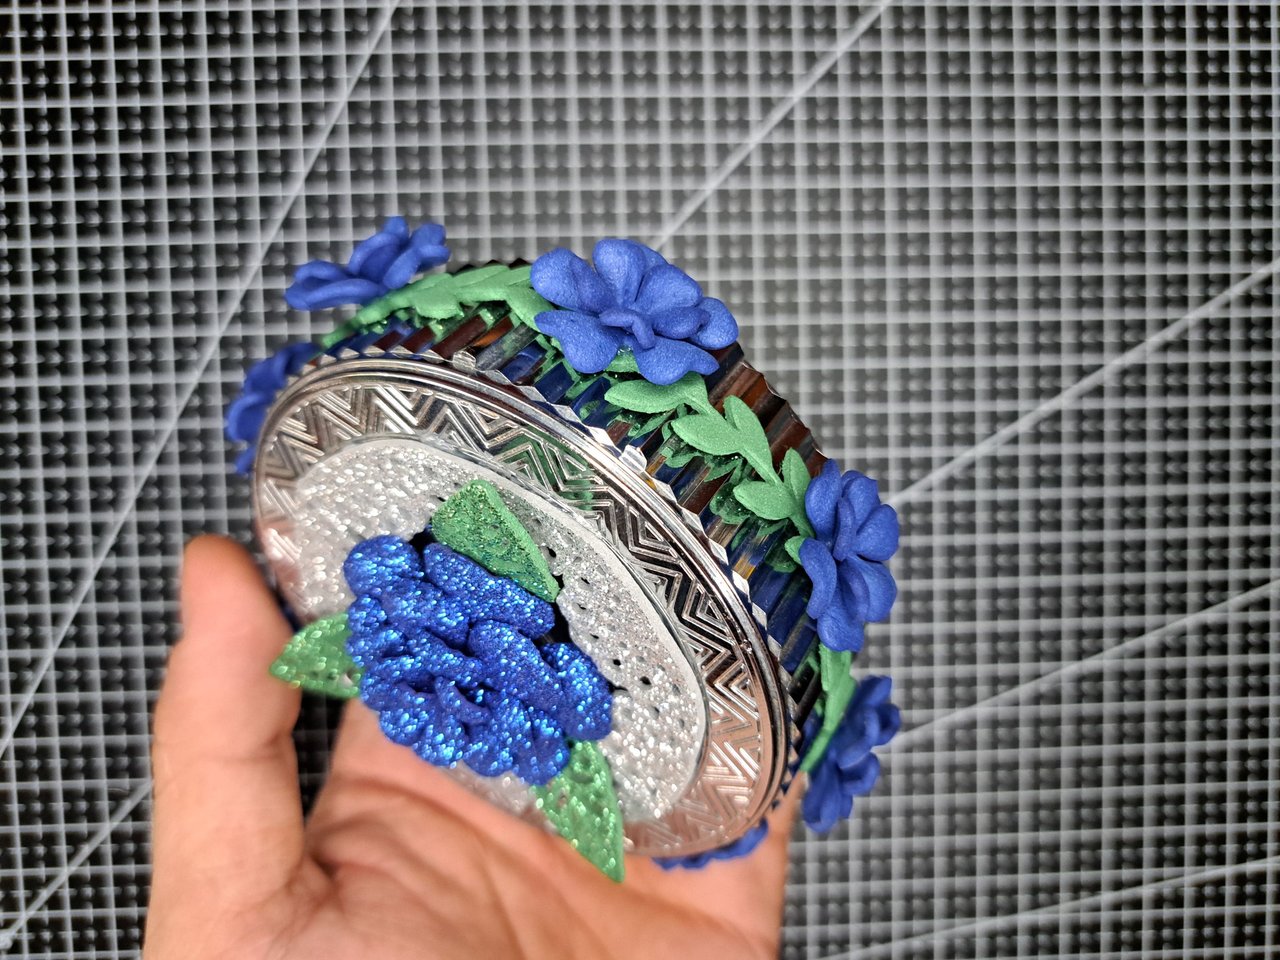
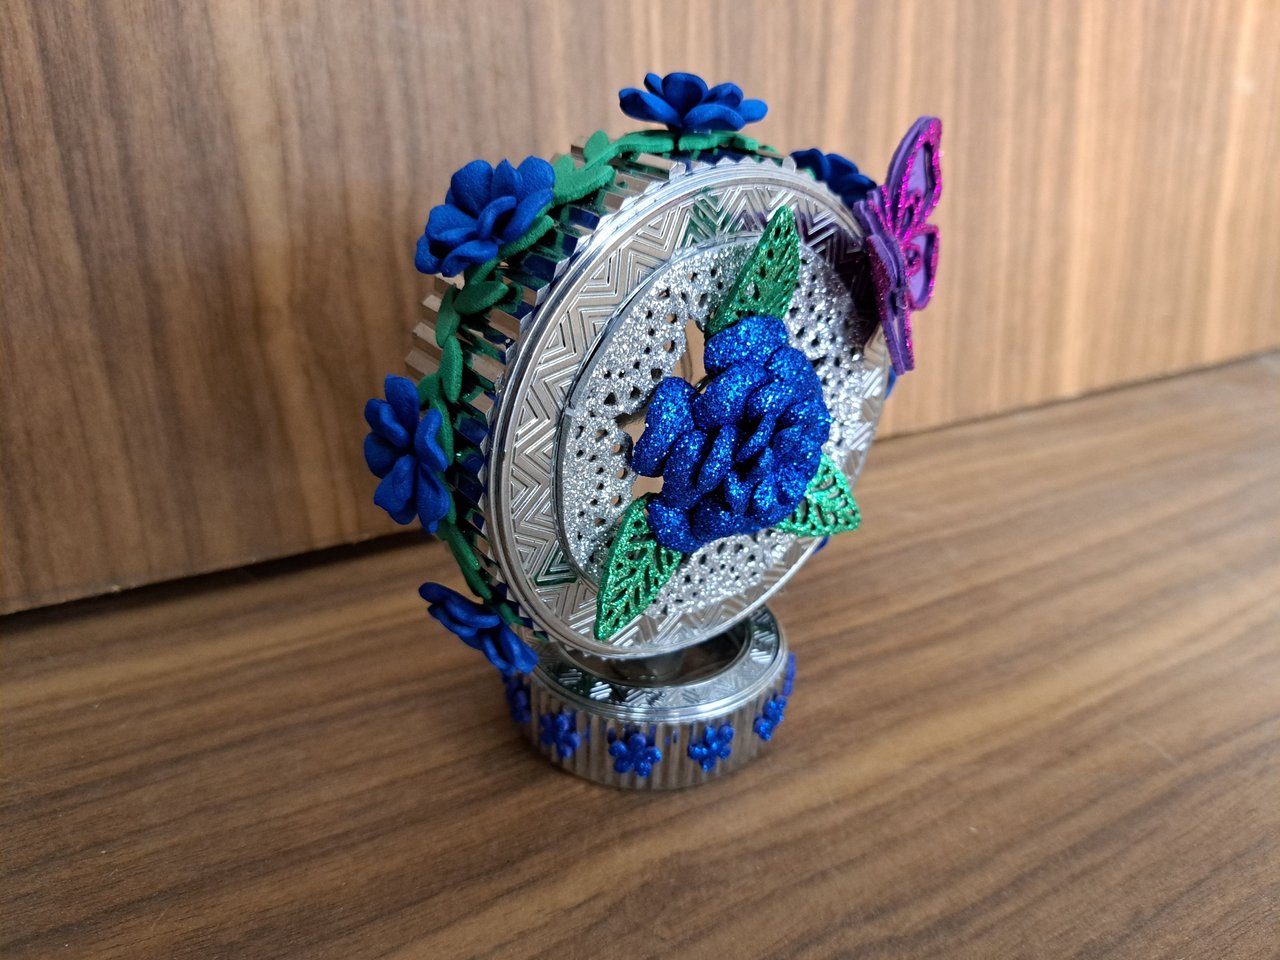
And that would be all. I hope you liked this creation. Remember that by not modifying the structure of the perfume bottle, you can decorate one that is full and turn it into a beautiful gift. I, for my part, say goodbye, but not before leaving you some images of how the ornament turned out at the end.
Y eso sería todo. Espero que les haya gustado esta creación. Recuerden que al no modificar la estructura del frasco de perfume, pueden decorar uno que esté lleno y convertirlo en un hermoso regalo. Yo, por mi parte, me despido, no sin antes dejarles algunas imágenes de cómo quedó el adorno al final.
 |  |
 |  |  |

Credits and Resources // Créditos y Recursos
Cover page created in Canva
Translated by DeepL
Images captured with my Samsung Galaxy A53


Posted Using INLEO
Que bonita decoración, es una excelente idea para hacer un regalo también cuando no encuentras el modo de envolverlo. Me encanta, simple y hermoso a la vez.
Así mismo. Y cuando se acaba el perfume queda un lindo adorno.
The result is very beautiful, the color combination is also very suitable, the design is also very neat.
Thanks 🤗
Yes you're welcome.
Un excelente trabajo hermano, quedó muy bien decorado, un trabajo fino la verdad. Ese sería un buen regalo, no hay duda alguna. Saludos
Muchas gracias 🫂.