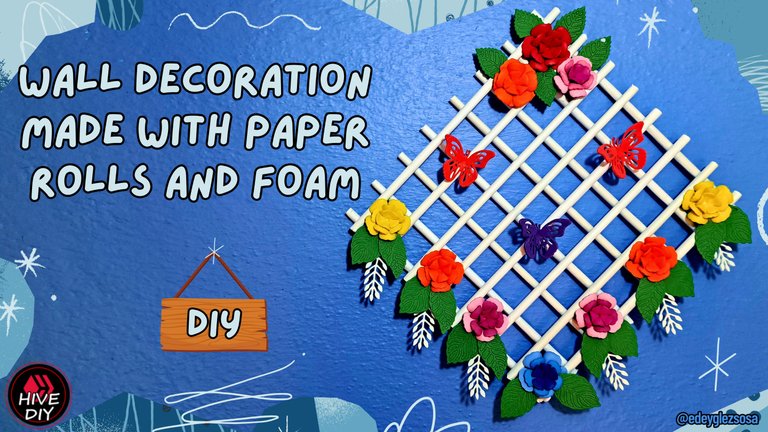
DIY: Wall decoration made with paper rolls and foam. [ENG+ESP]
Greetings, beautiful and creative community.
I hope that when you read this, you are doing well, and if not, I hope that this colorful creation brings a little joy to your lives. As you may have already read in the title, today I bring you a simple tutorial that will help you create a colorful and eye-catching wall decoration.
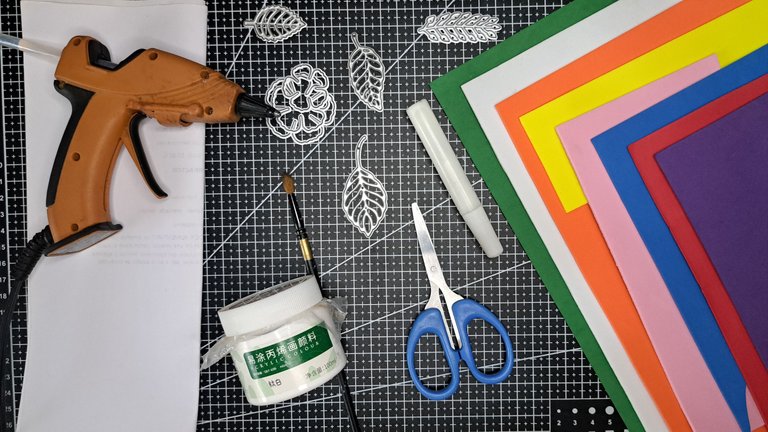
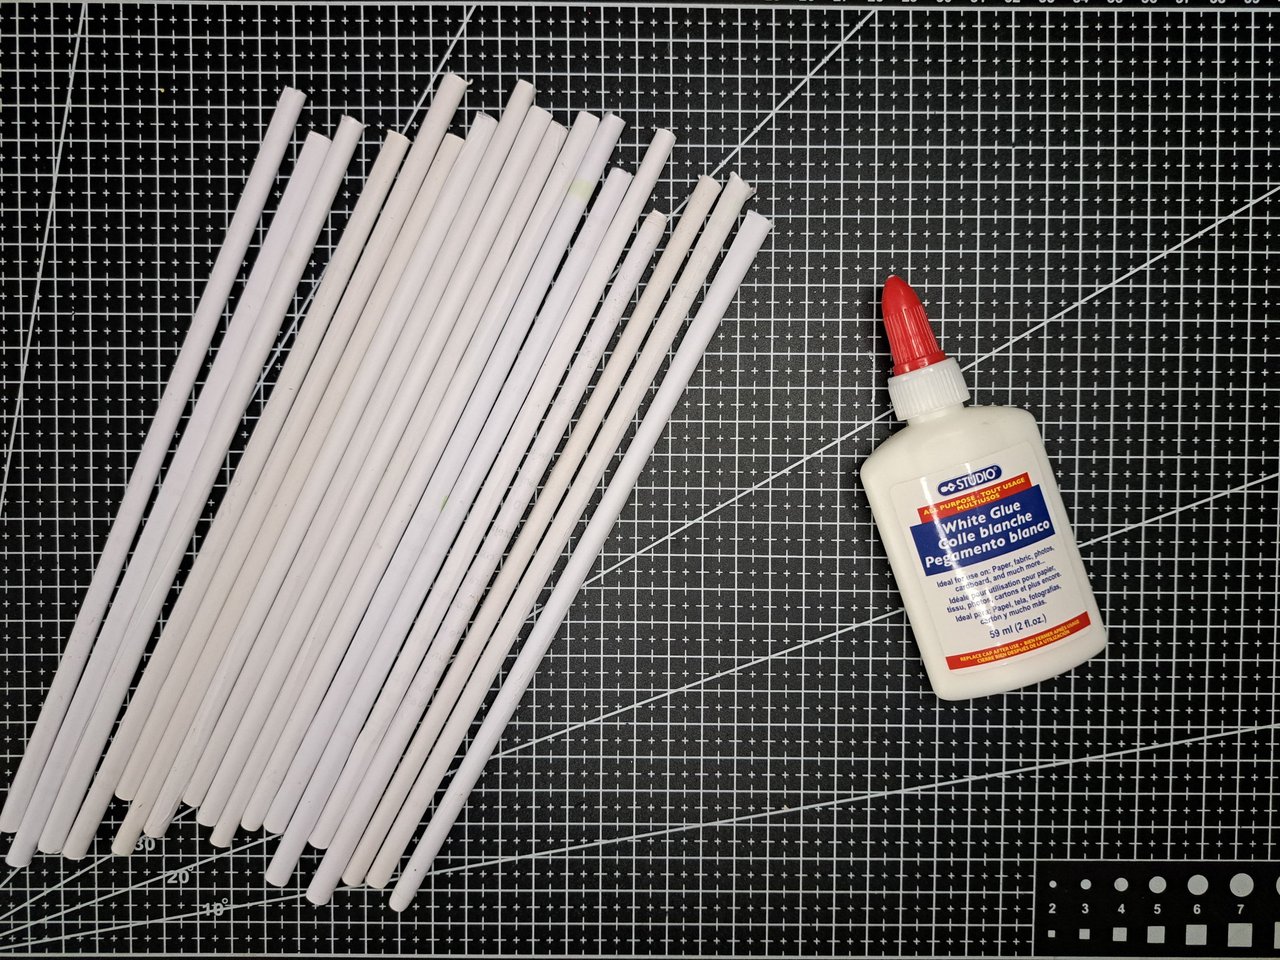
To create this craft, I used recycled paper and foam as the main materials. I will work with the foam using some metal cutting dies, which make my work much easier. But remember that not having these tools is no excuse not to try, as you can also cut out the shapes of the leaves and flowers with scissors. Always keep in mind that for a creative soul, the only limit is your imagination.
Saludos, hermosa y creativa comunidad.
Espero que al momento de leer esto se encuentren bien, y si no es así, espero que esta colorida creación les traiga un poco de alegría a sus vidas. Como ya habrán podido leer en el título, el día de hoy les traigo un sencillo tutorial, el cual les ayudará a crear una colorida y llamativa decoración para pared.
Para la creación de esta manualidad he utilizado como materiales principales el papel reciclado y el foami. Este último lo trabajaré con la ayuda de algunos troqueles metálicos de corte, los cuales facilitan mucho mi trabajo. Pero recuerden que no poseer esas herramientas no es excusa para no intentarlo, ya que con unas tijeras también podrán recortar las formas de las hojas y flores. Siempre tengan presente que para un alma creativa el límite es la imaginación.
Materials // Materiales
| English | Español |
| ✔️ Recycled paper sheets | ✔️ Hojas de papel reciclado |
| ✔️ Green, white, orange, yellow, pink, blue, red, and purple foam board | ✔️ Fomi verde, blanco, naranja, amarillo, rosa, azul, rojo y violeta |
| ✔️ Metal flower-shaped dies | ✔️ Troqueles metálicos con forma de flor |
| ✔️ Metal dies shaped like leaves | ✔️ Troqueles metálicos con forma de hojas |
| ✔️ White paint and paintbrush | ✔️ Pintura blanca y pincel |
| ✔️ White glue for paper | ✔️ Cola blanca para papel |
| ✔️ Scissors | ✔️ Tijeras |
| ✔️ Hot silicone | ✔️ Silicona caliente |
Step by step // Paso a paso
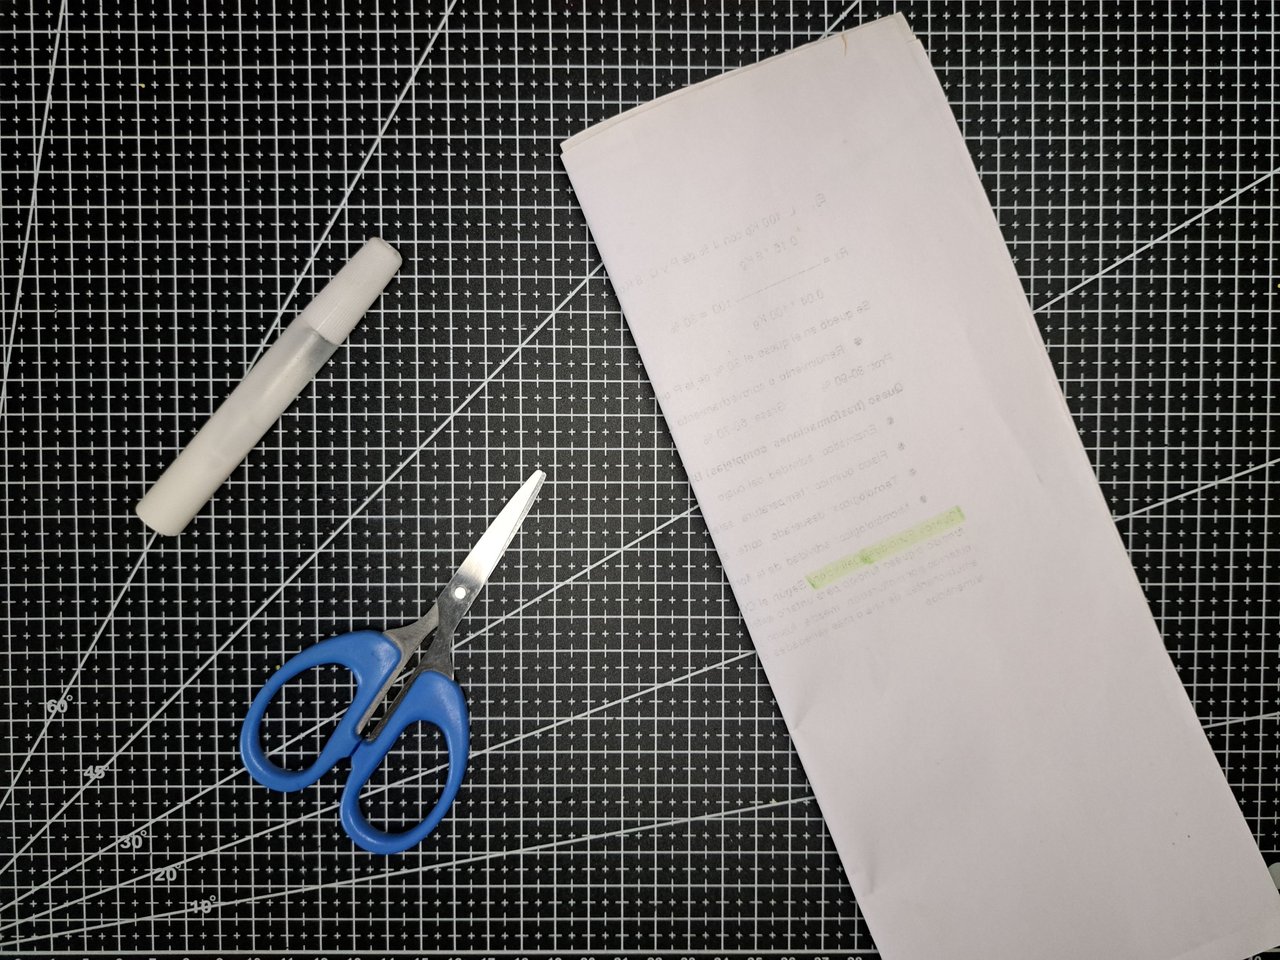
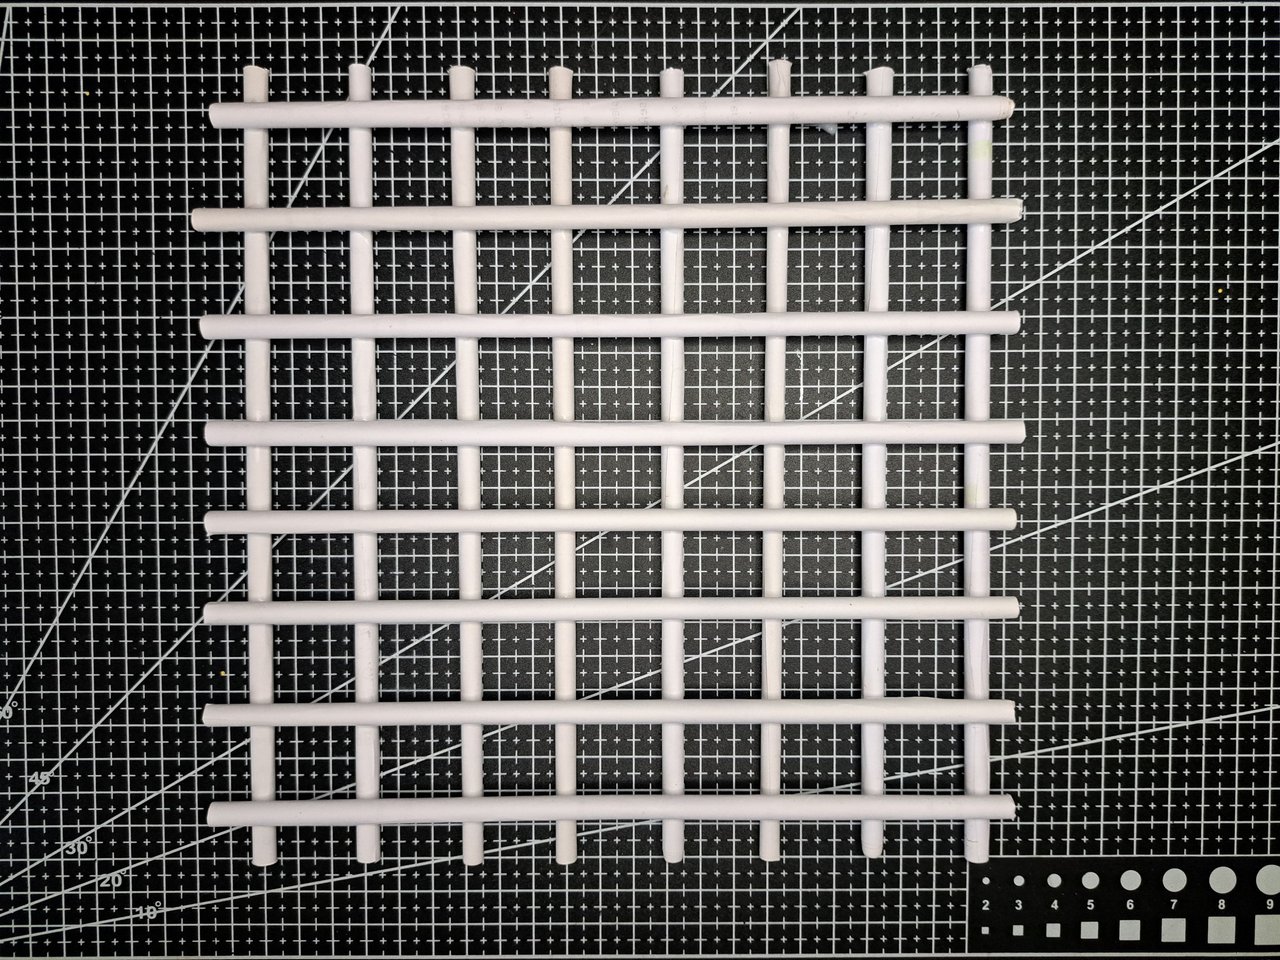
1️⃣ The first thing to do is cut the sheets of paper in half and then adjust their diameter to 23 cm. To roll up the sheets, I used a skewer, but you can use any other object. Once dry, place each of the 16 paper rolls in position to glue them.
Lo primero que se debe hacer es recortar las hojas de papel a la mitad y luego ajustar su diámetro a 23 cm. Para envolver las hojas he utilizado un palillo de brochetas, pero pueden utilizar cualquier otro objeto. Una vez secos, cada uno de los 16 rollitos de papel los colocamos en su posición para pegarlos.
 |  |  |
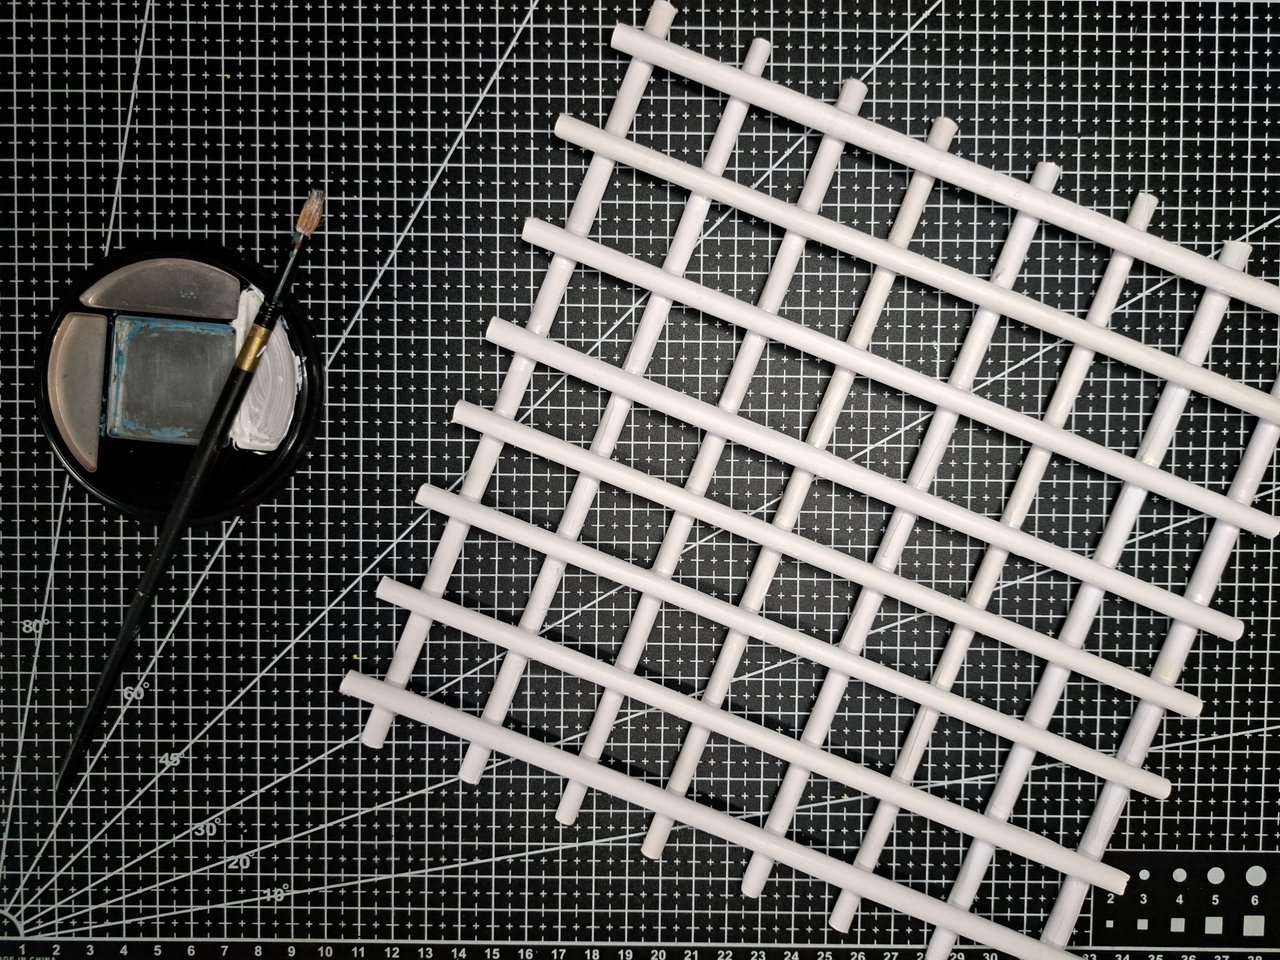
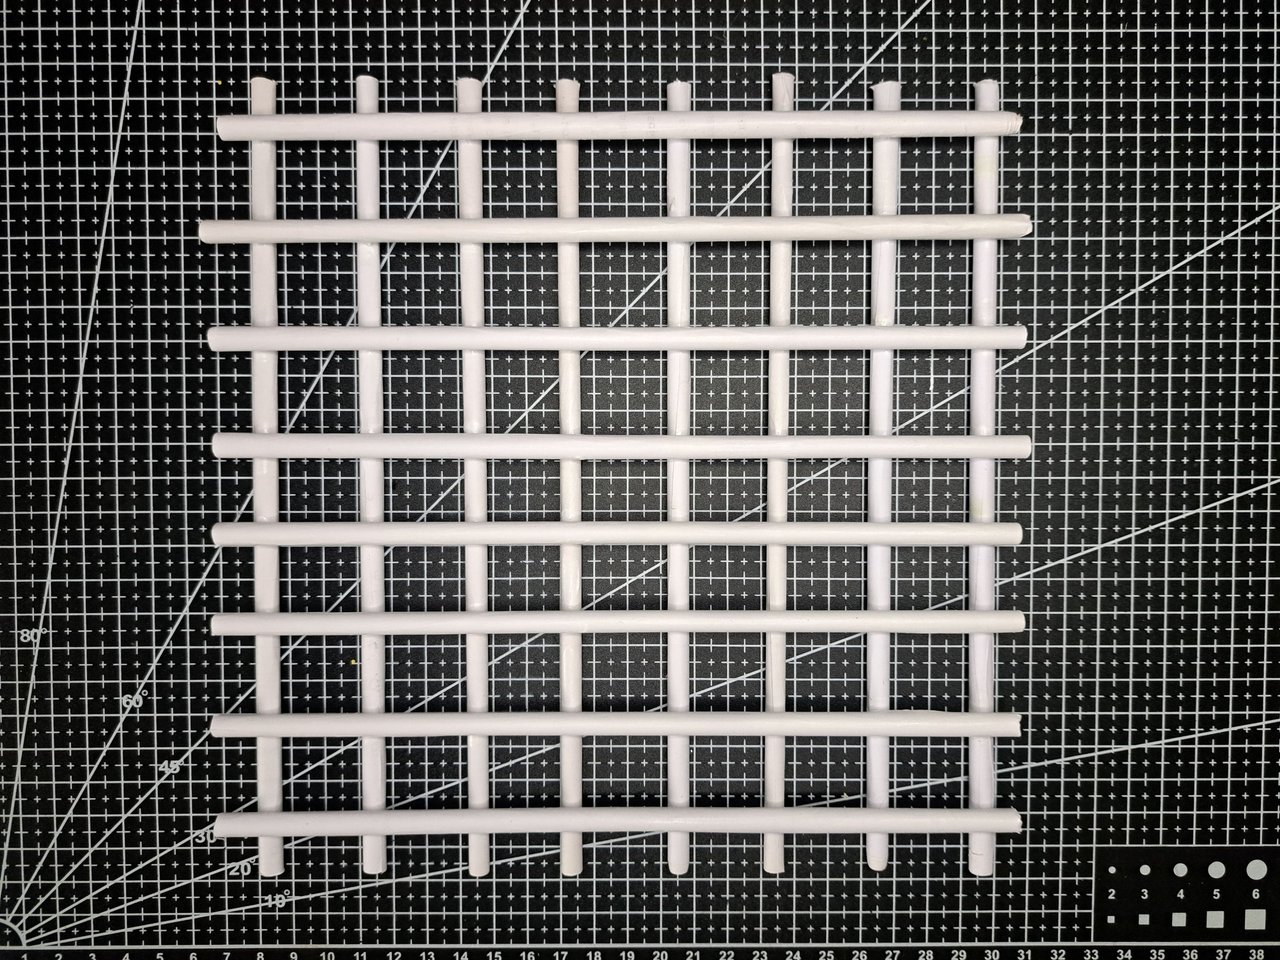
2️⃣ Another type of adhesive is used to reinforce the joints that hold the paper rolls together. Once dry, all the rolls are painted white, as the recycled paper has various shades of white and traces of graphite and ink.
Con otro tipo de pagamento, se refuerzan las uniones que fijan los rollitos de papel. Una vez secos, se pintan todos los rollitos con pintura blanca, ya que al ser papel reciclado, este posee varios tonos de blancos distintos y restos de grafito y tinta.
 |  |
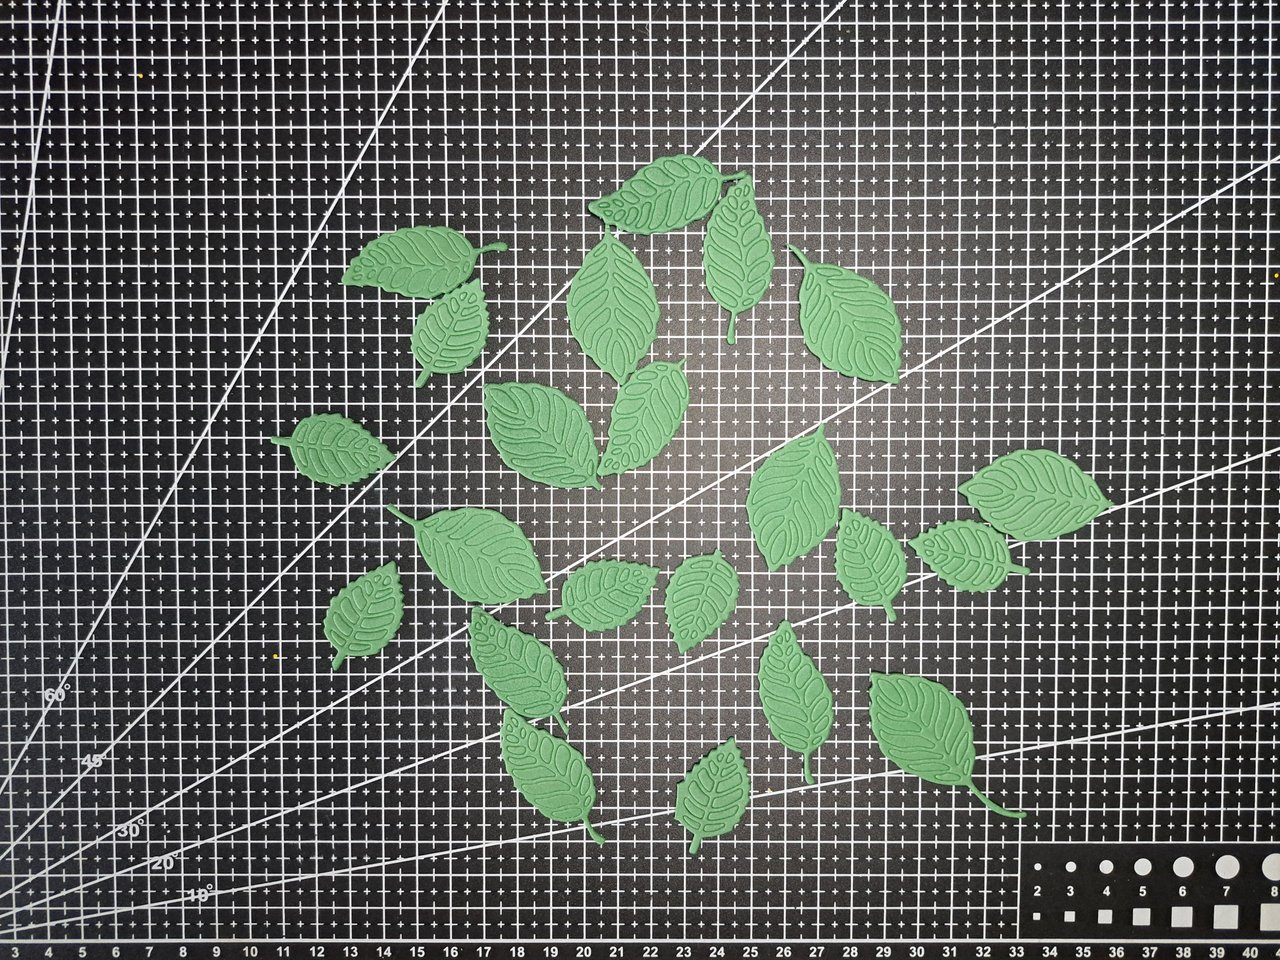
3️⃣ Using metal cutting dies, cut out the silhouettes of the leaves that will be used in the decoration. In my case, I cut out leaves of different sizes, but if you use scissors, you can create all the leaves of the same size and shape.
Con ayuda de los troqueles metálicos de corte, se recortarán las siluetas de las hojas que se utilizarán en el adorno. En mi caso, yo recorté hojas de distintos tamaños, pero en caso de hacerlo con unas tijeras, pueden crear todas las hojas del mismo tamaño y forma.
 | |
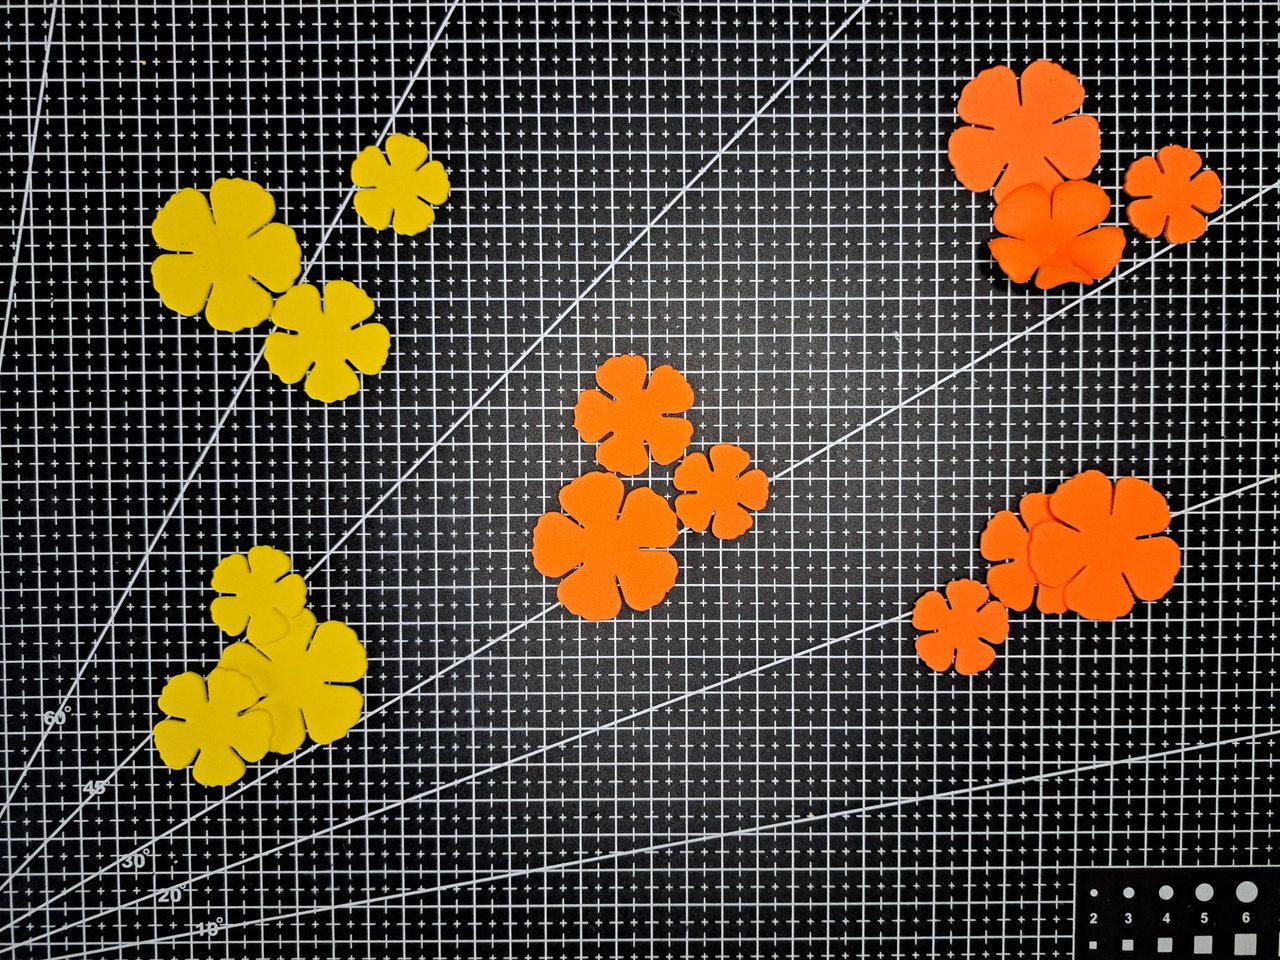
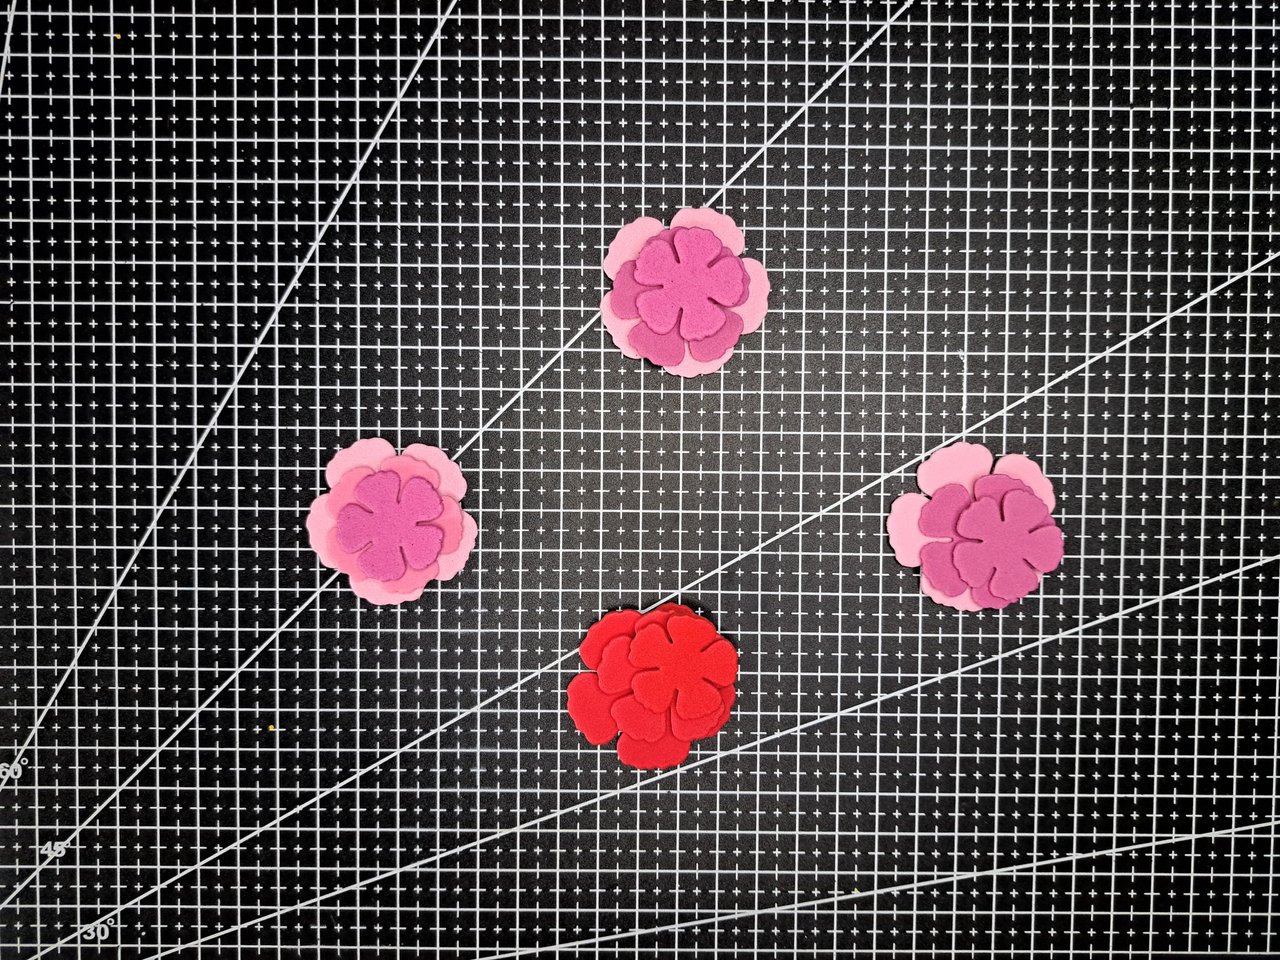
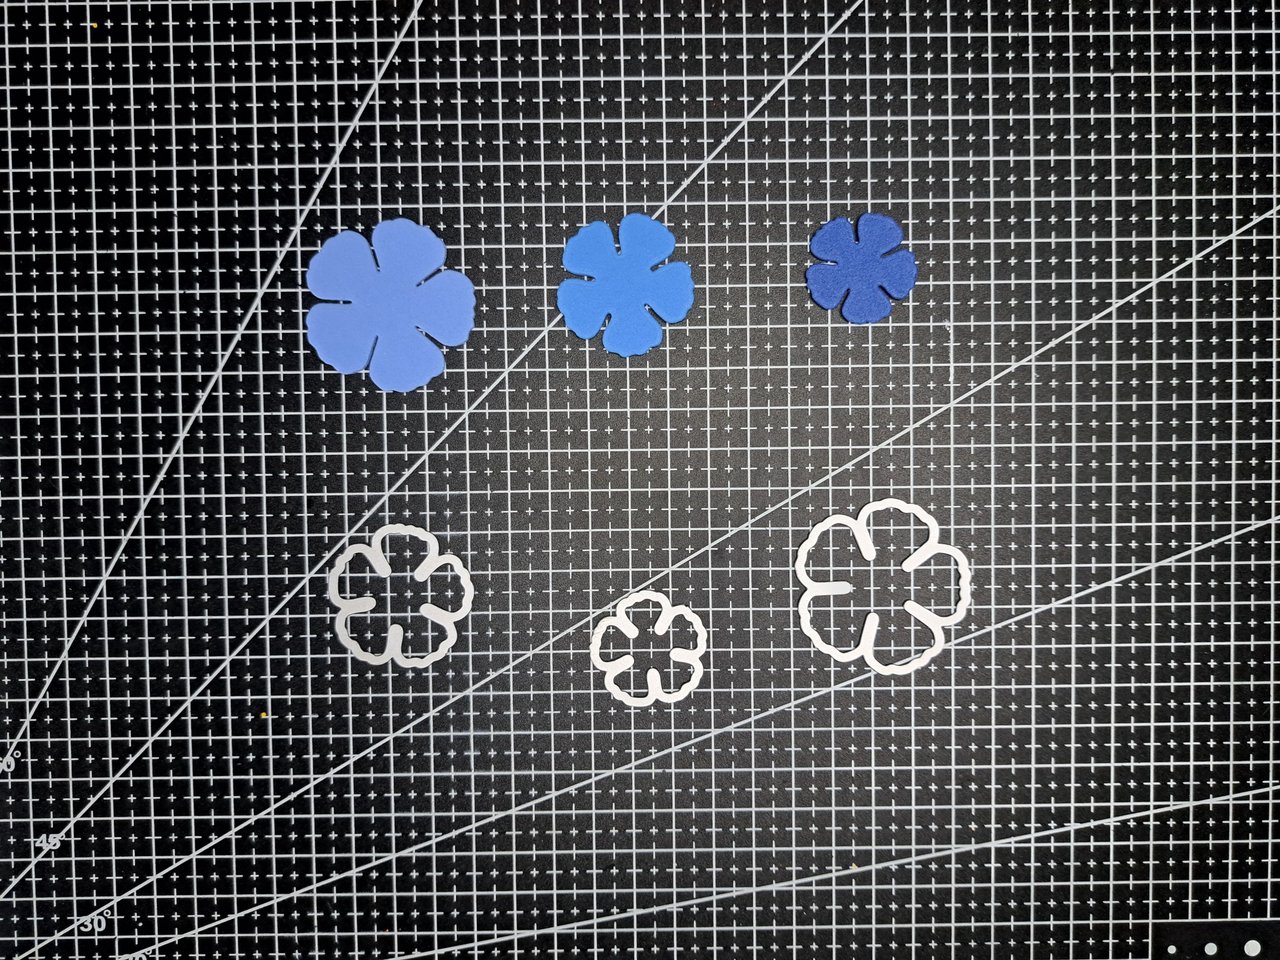
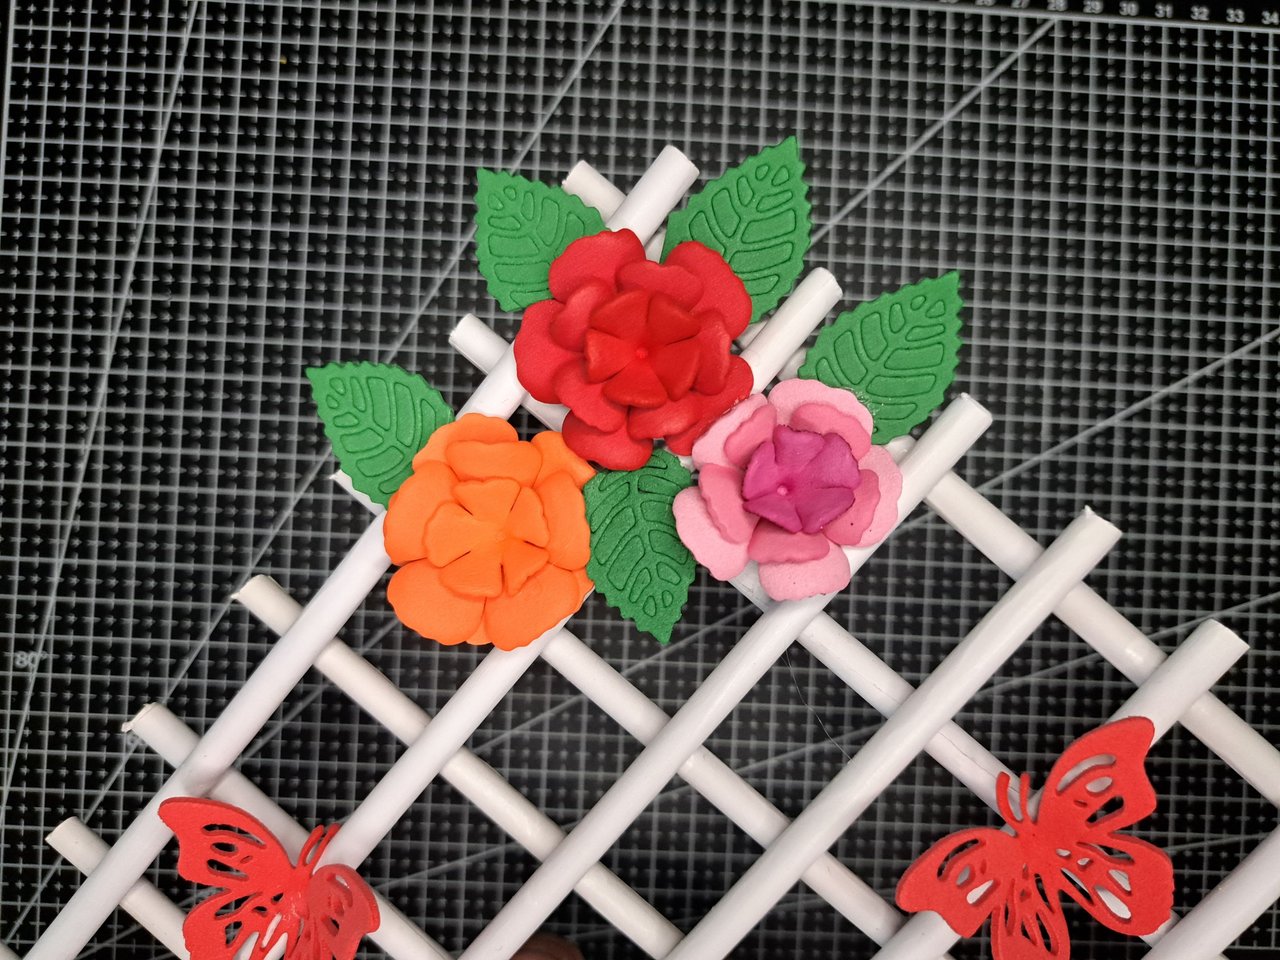
4️⃣ Using the flower-shaped metal dies, I cut out the pieces needed to create two yellow flowers, three orange flowers, two pink flowers, one red flower, and one blue flower. For the pink and blue flowers, I used foam cutouts, which is why they ended up with two or even three different shades.
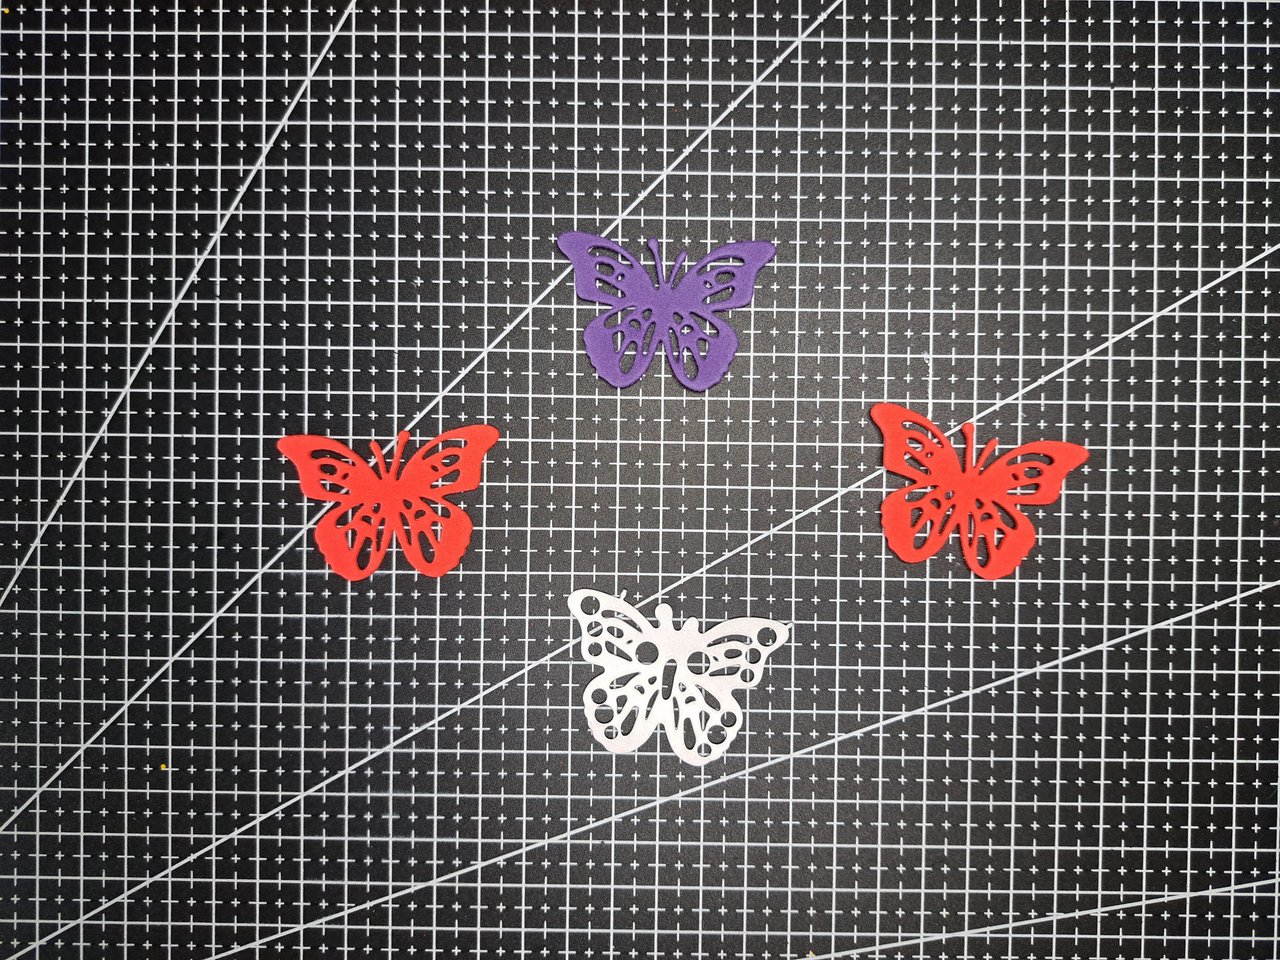
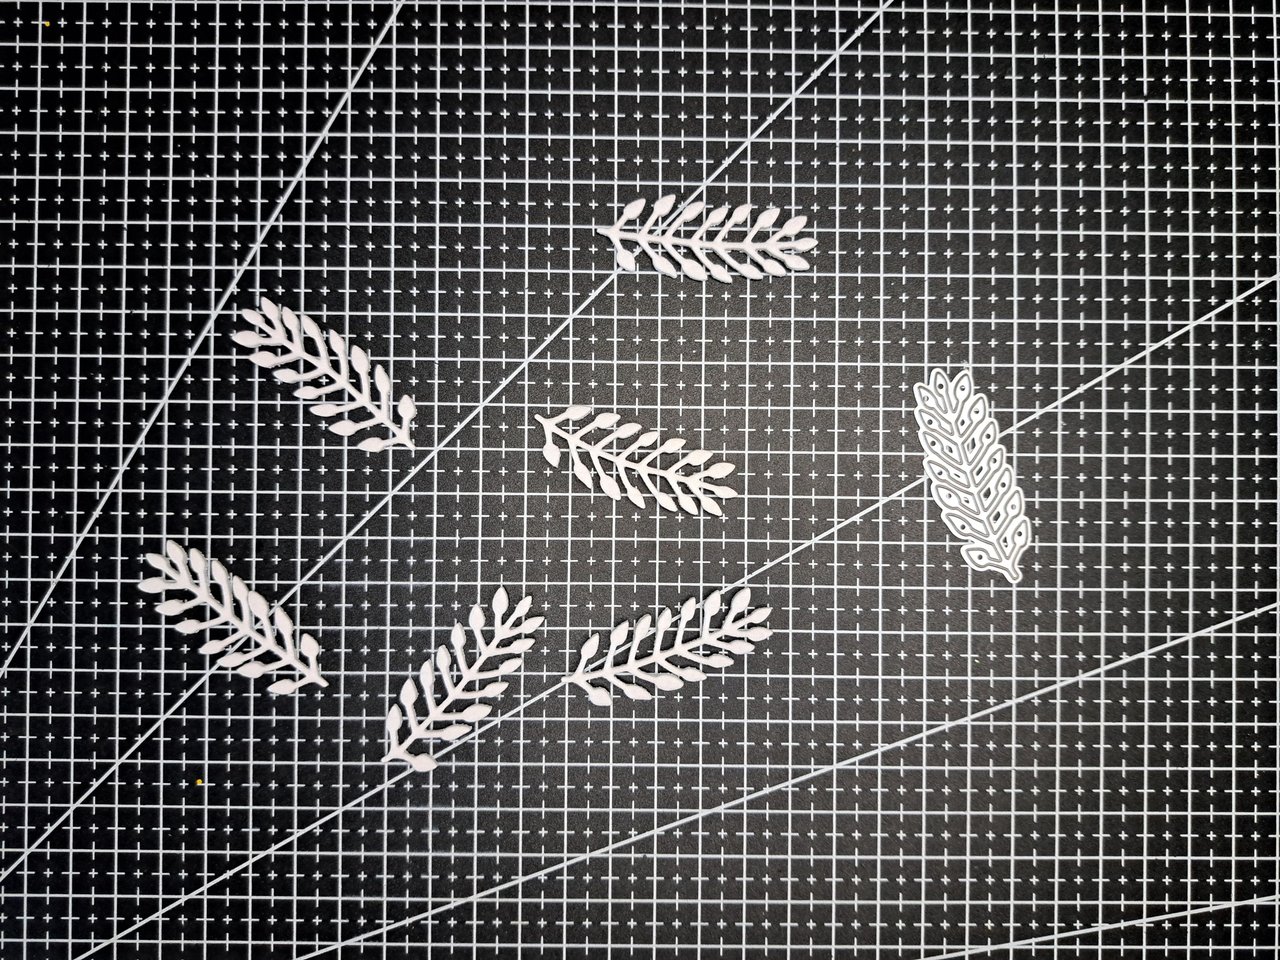
Taking advantage of the fact that I already had the die cutter set up, I also cut out the designs for 3 butterflies (2 red and 1 purple) and 6 white spikes.
Con los troqueles metálicos con forma de flor, recorté las piezas necesarias para crear 2 flores amarillas, 3 flores naranjas, 2 flores rosadas, 1 flor roja y 1 flor azul. En el caso de las flores rosadas y azules, utilicé recortes de fomi y es por ello que quedaron con dos y hasta tres tonos distintos.
Aprovechando que ya tenía la troqueladora armada, también recorté los diseños de 3 mariposas (2 rojas y una violeta) y 6 espigas de color blanco.
 |  |
 |  |  |
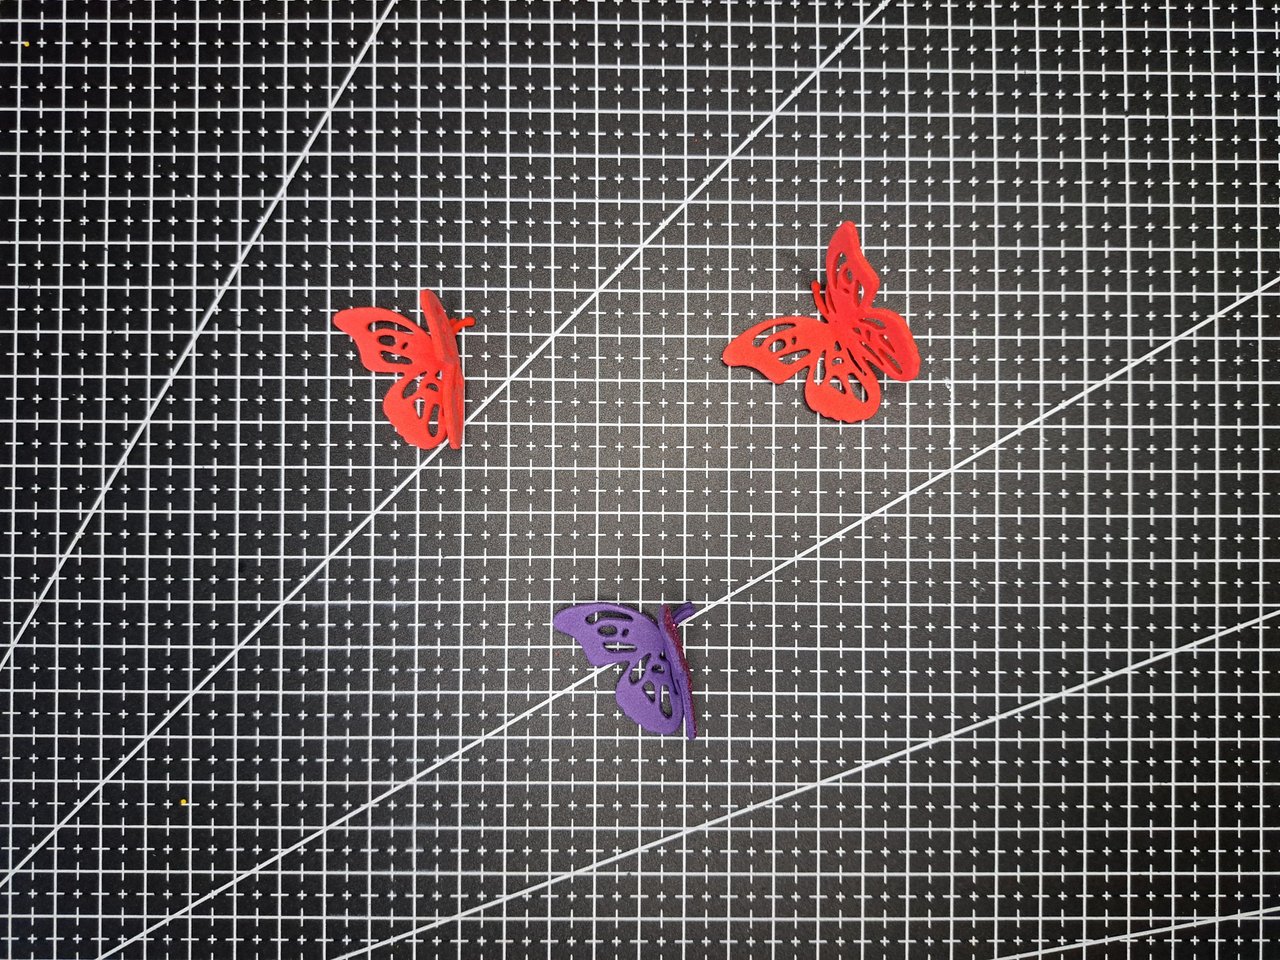
5️⃣ Next, things will heat up, as the flowers and butterflies need to undergo a thermoforming process. In the case of the flowers, each layer of petals is heated and pressed inward with the head of a brush. As for the butterflies, only the central part needs to be heated with the wings closed.
A continuación, las cosas se calentarán, ya que es necesario someter a un proceso de termoformado a las flores y las mariposas. En el caso de las flores, cada capa de pétalo se calienta y se presiona hacia dentro con la cabeza de un pincel. En cuanto a las mariposas, solo es necesario calentar la parte central con las alas cerradas.
 |  |
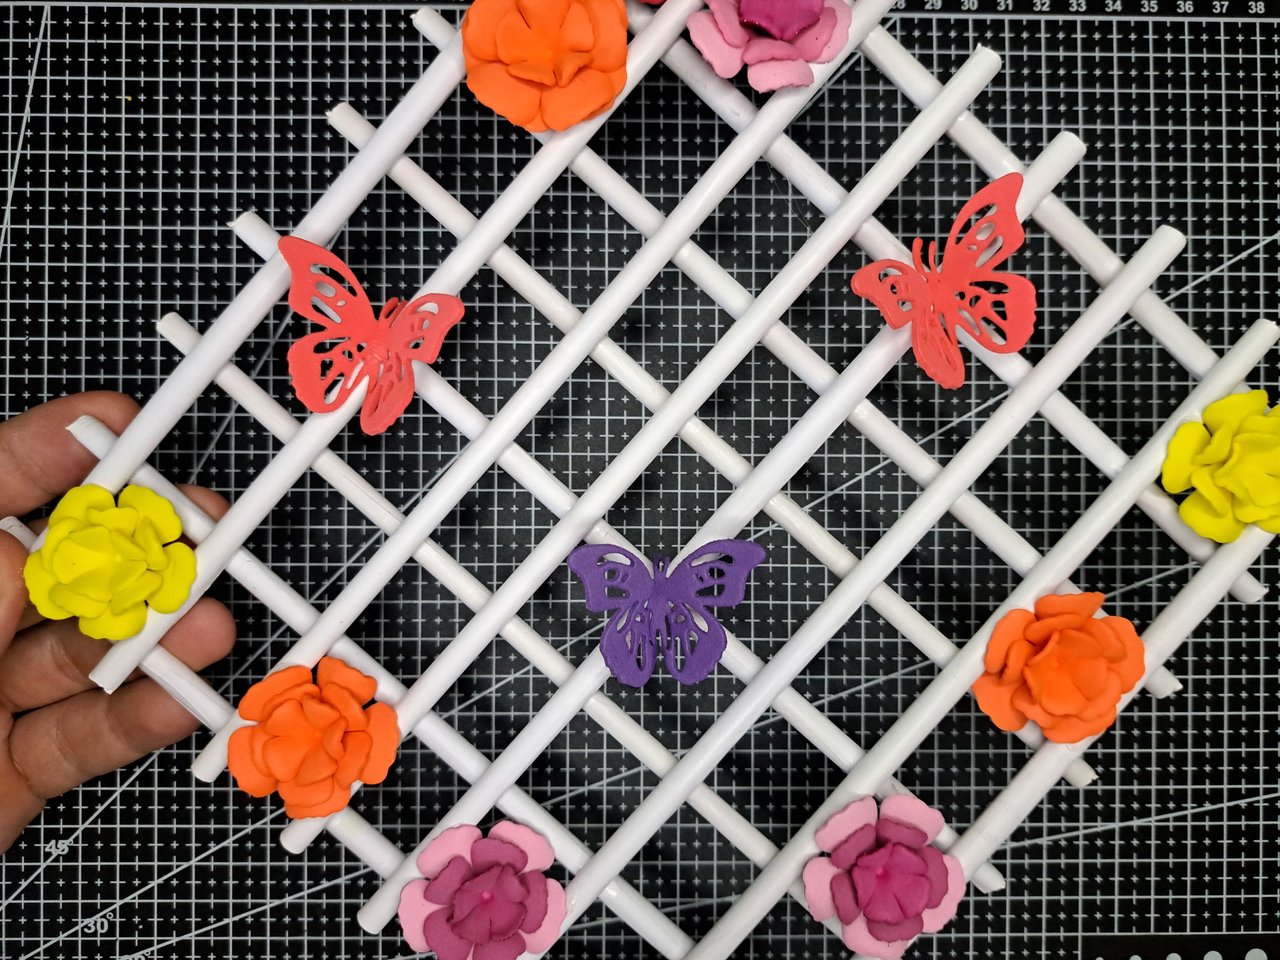
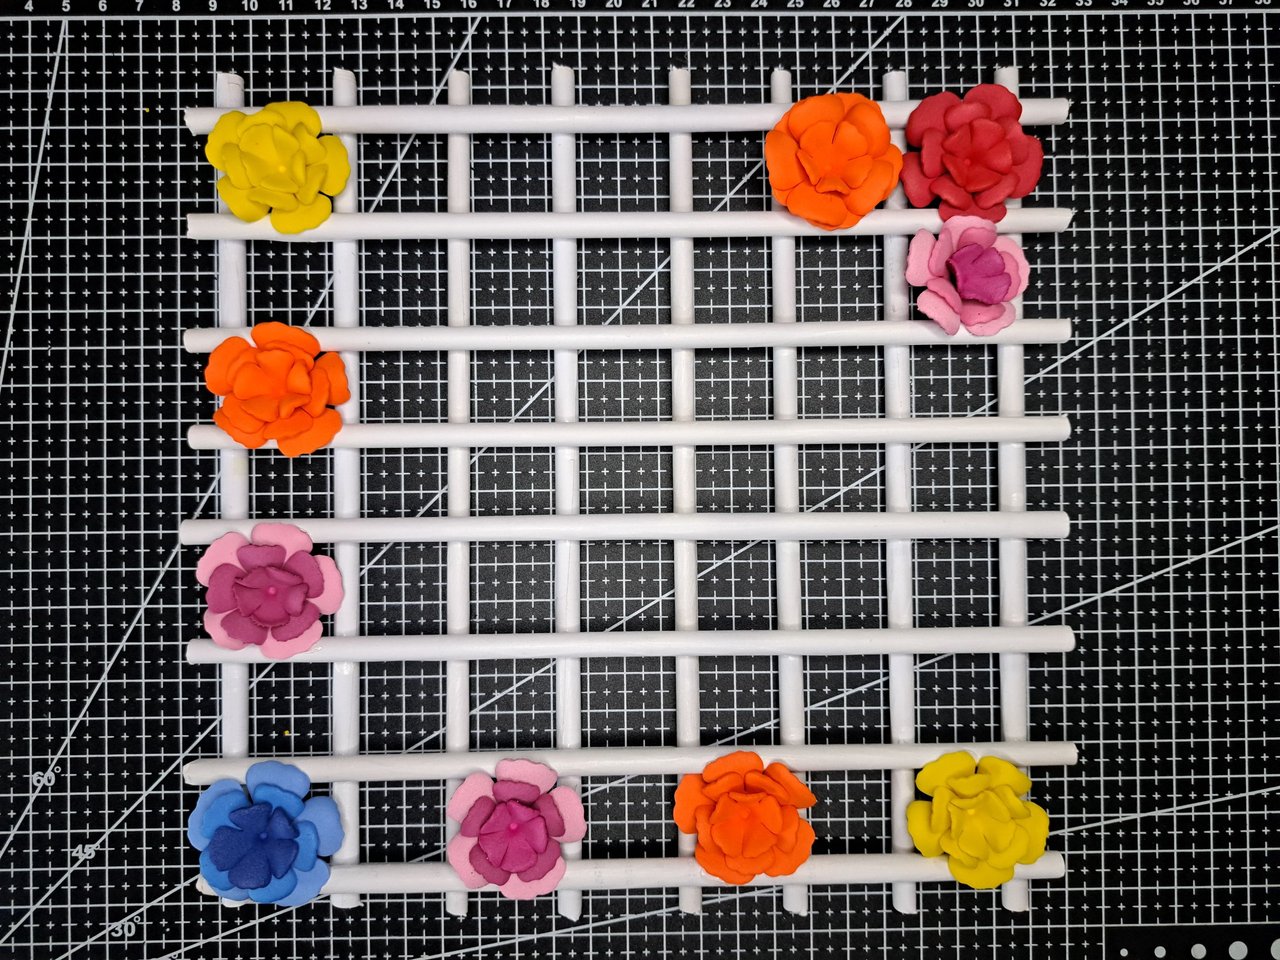
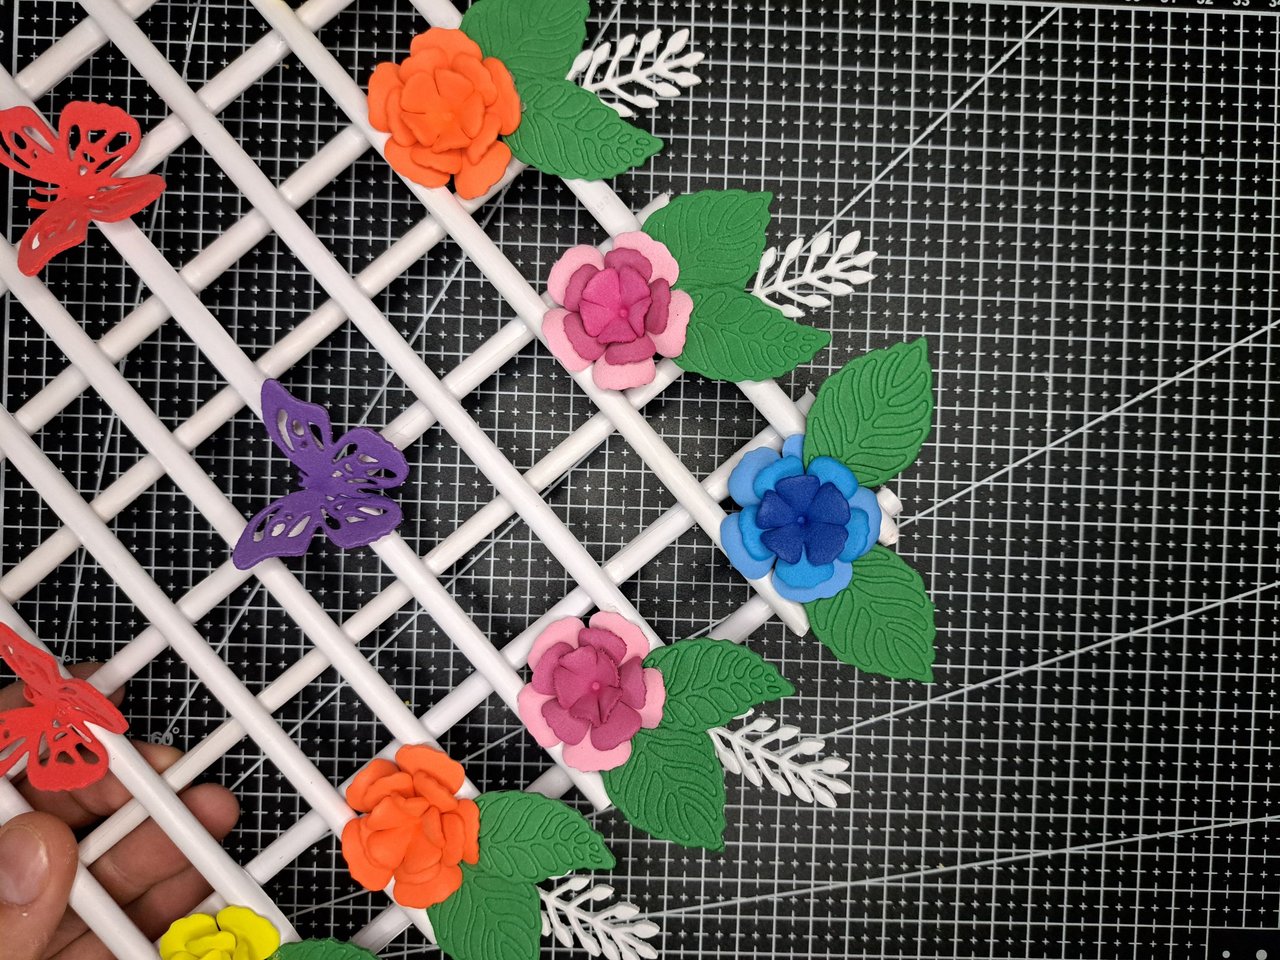
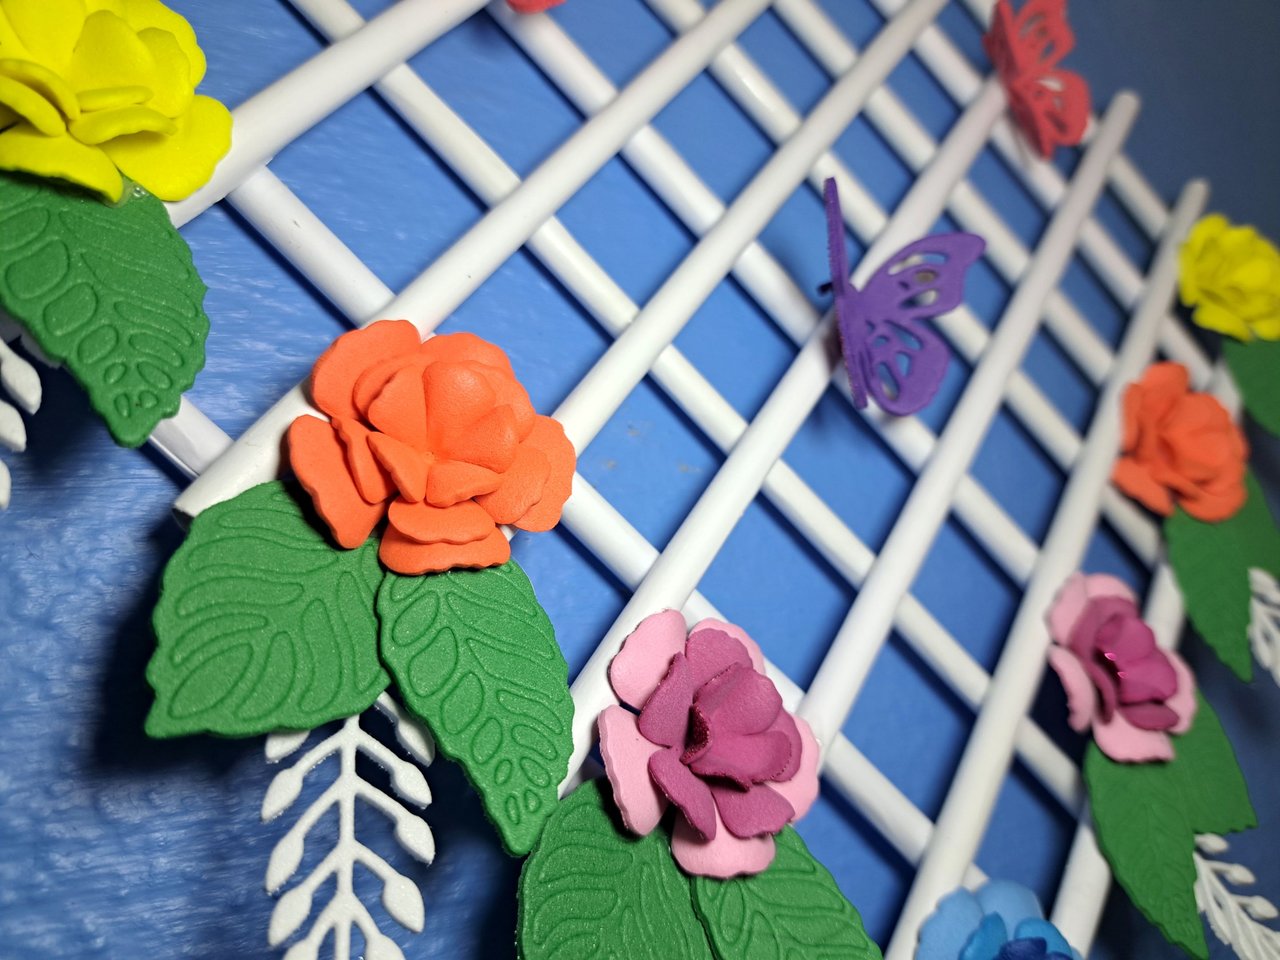
6️⃣ After assembling the flowers, place them on the paper roll grid to identify their position. Note that I said place and not glue, because to place the leaves, you should only glue the side of the flower that faces the center. The butterflies will be glued in place, as there is nothing underneath them.
Luego de armar las flores, colócalas sobre la rejilla de rollitos de papel para identificar su posición. Si te fijas, dije colocar y no pegar, pues para colocar las hojas se debe pegar solo el lado de la flor que da hacia la zona central. Las mariposas sí se pegarán en su lugar, ya que no llevan nada debajo de ellas.
 |  |
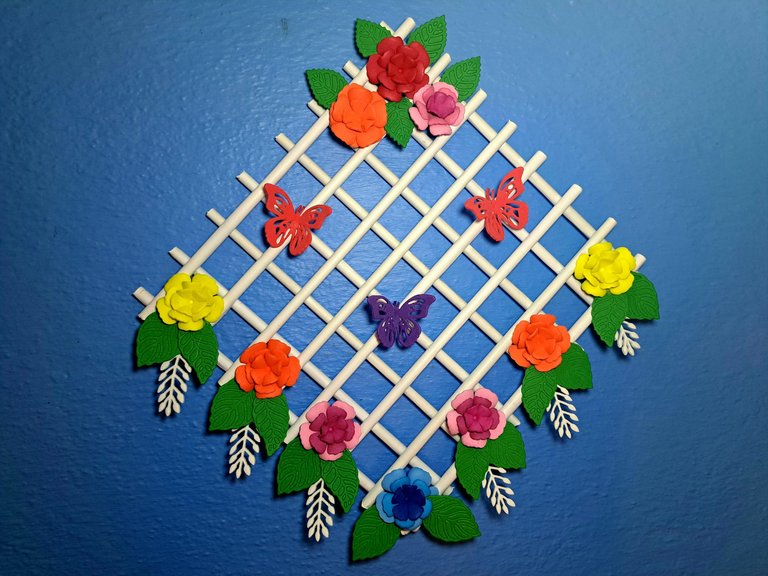
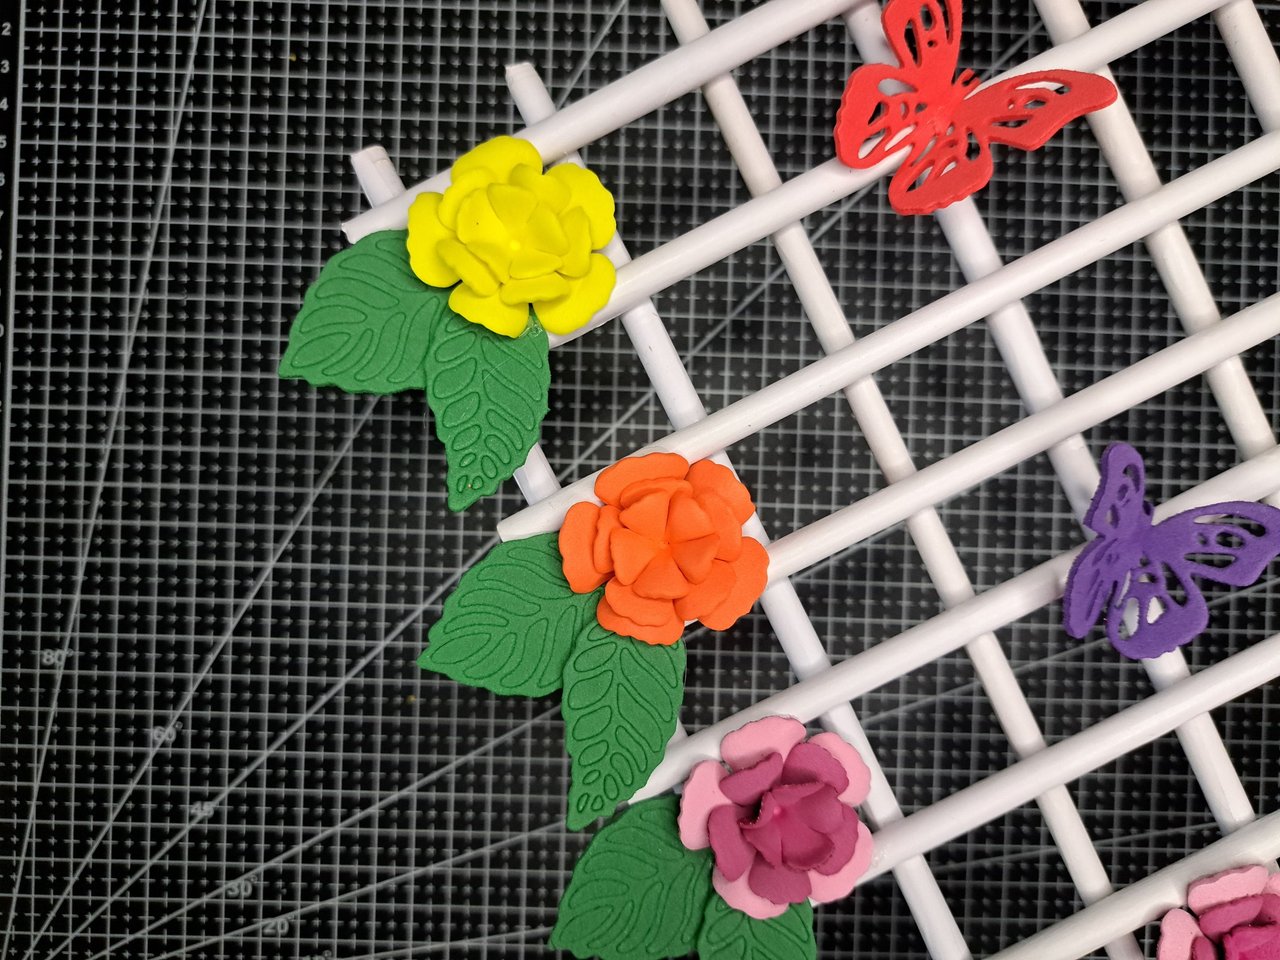
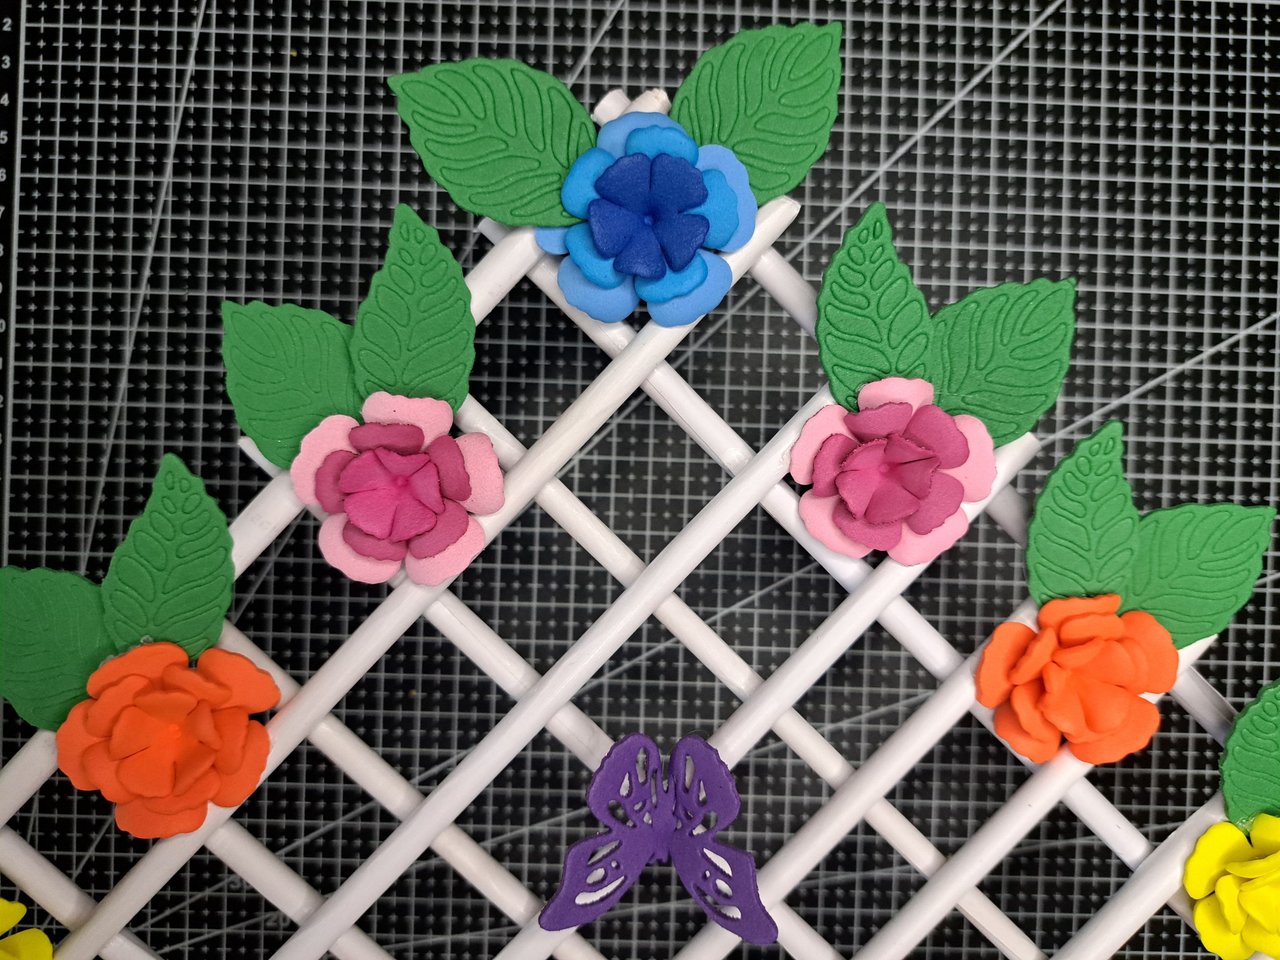
7️⃣ The last step is to place each of the leaves under the flowers, creating a repeating pattern that embellishes and gives a better finish. The white spikes will be glued under the leaves, and it will be ready.
El último paso consiste en colocar cada una de las hojas debajo de las flores, creando un patrón repetitivo que embellece y da un mejor acabado. Por debajo de las hojas se pegarán las espigas blancas y ya estaría listo.
 |  |
 |  |
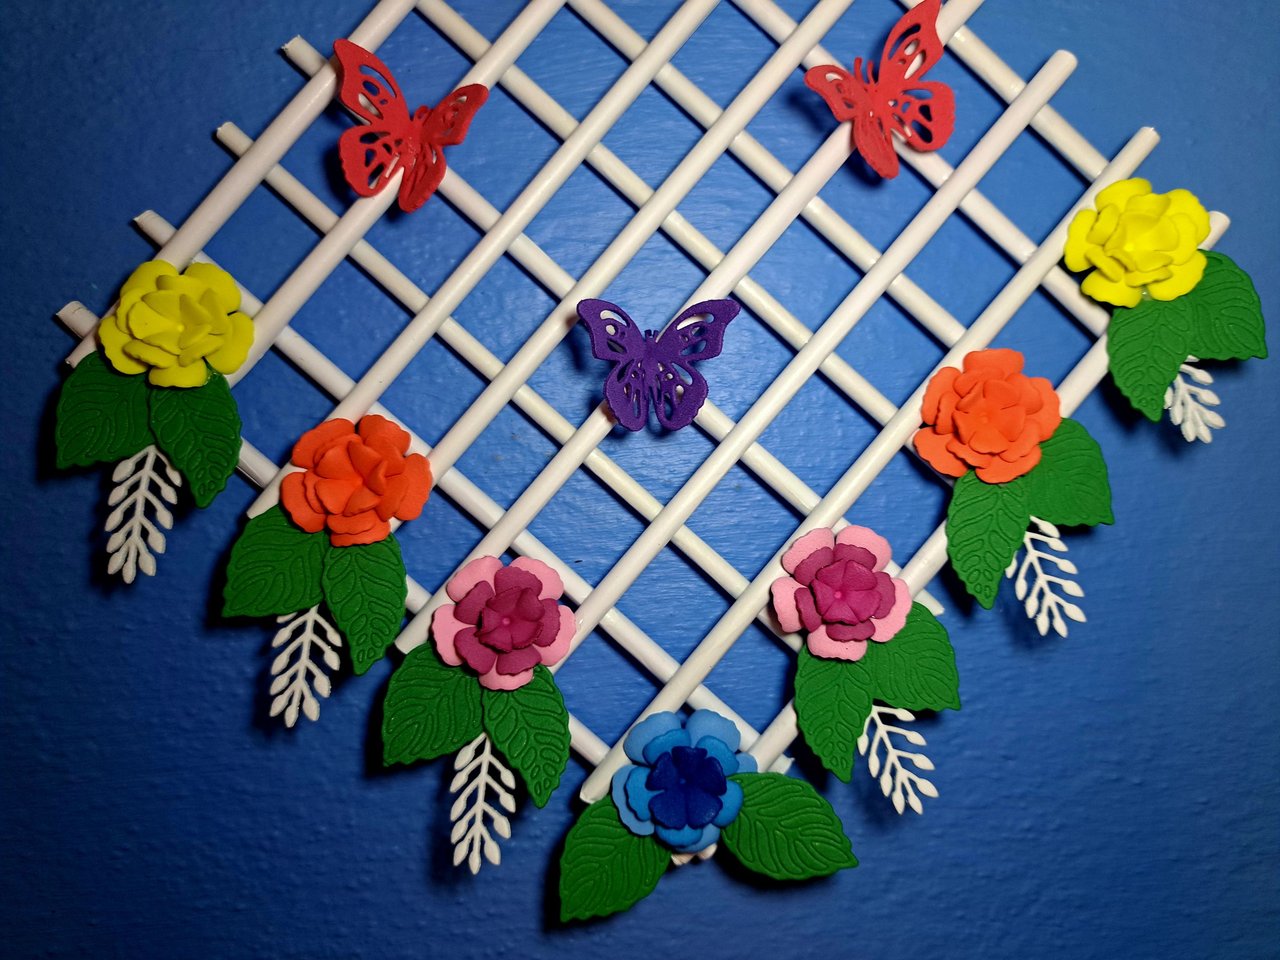
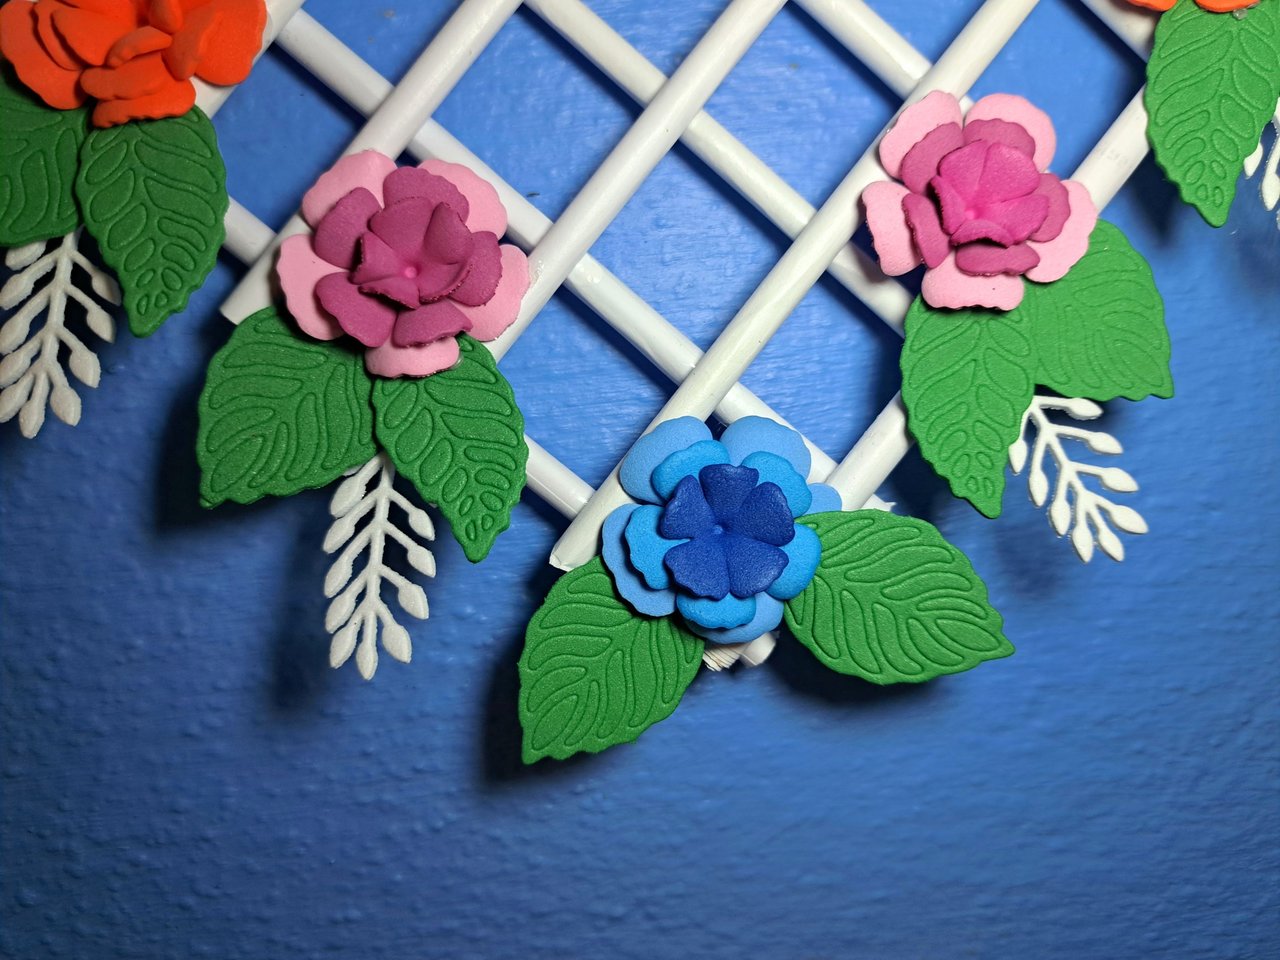
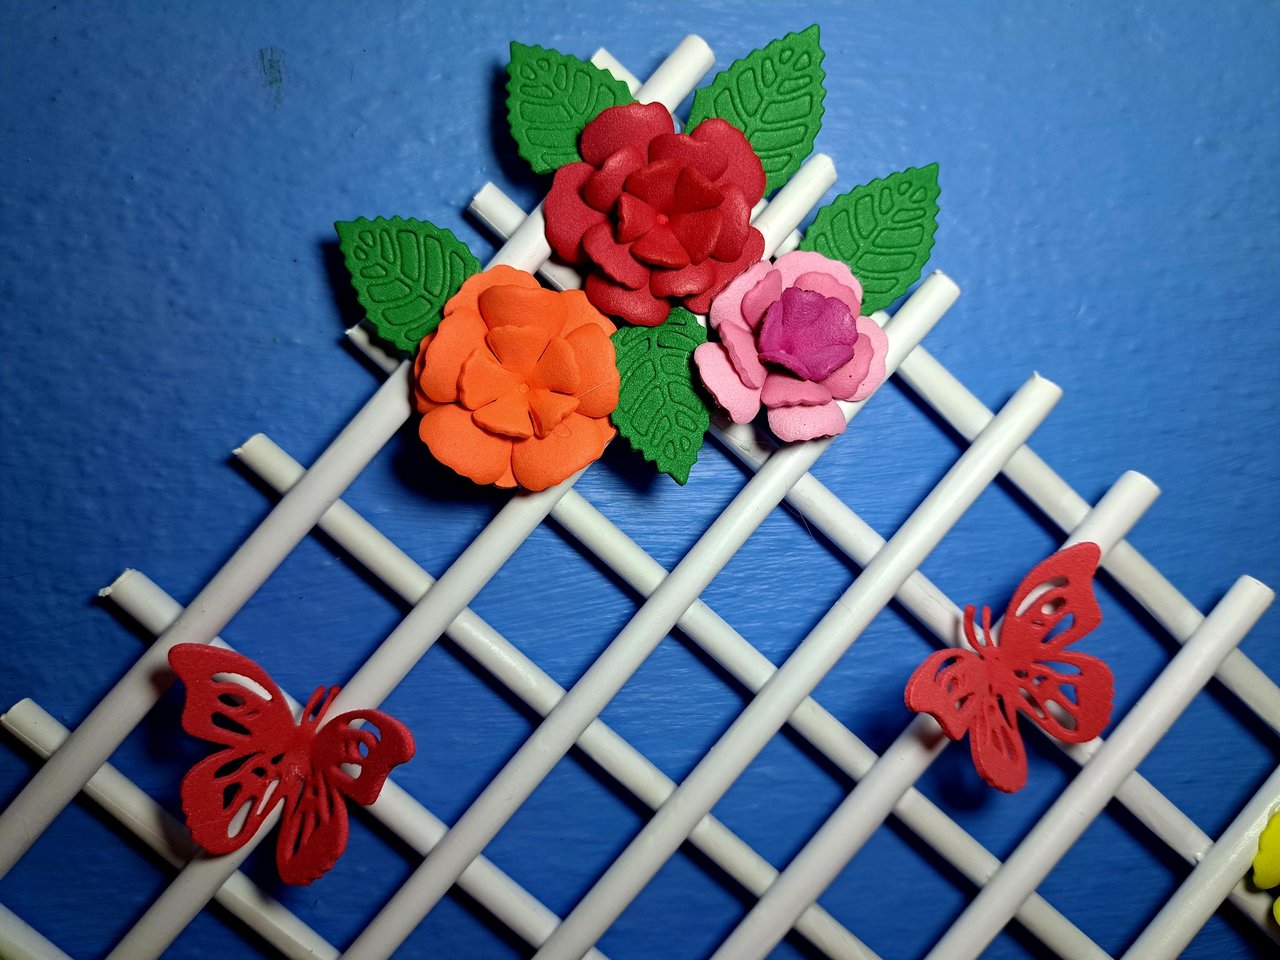
Finished Work // Trabajo Terminado
Well, that's all for today. I hope you liked this new creation and that you feel inspired to create your own. Let me know in the comments if you have any suggestions or questions about the tutorial I just shared. Remember that I will be happy to read and respond to your comments.
Y bueno, eso sería todo por hoy. Espero que les haya gustado esta nueva creación y que se animen a crear la suya propia. Déjenme saber en los comentarios cualquier sugerencia o duda que tengan respecto al tutorial que les acabo de compartir. Recuerden que yo estaré encantado de leerles y responderles.
 |  |
 |  |

Credits and Resources // Créditos y Recursos
Cover page created in Canva
Translated by DeepL using VPN
Images captured with my Samsung Galaxy A53


Posted Using INLEO
A lovely and creative wall decor. its so beautiful to see how simple materials like the paper rolls turn into something valuable.
selected by @stevenson7
That's the magic of recycling. You can make beautiful things with just a few materials. Thank you for your support.
Muy bonito trabajo. Si tengo la oportunidad quisiera hacer uno para decorar
Hazlo, agrégale tú toque y compártenos tú experiencia. Estoy seguro de que quedará hermoso.
https://www.reddit.com/r/crafting/comments/1lgtyi3/wall_decoration_made_with_paper_rolls_and_foam/
This post has been shared on Reddit by @edeyglezsosa through the HivePosh initiative.
Estas decoraciones son muy bonitas para ciertos espacios, el trabajo que hiciste se ve muy simétrico y agradable a la vista, además de que las fotos del paso a paso se ven geniales también.
Congratulations @edeyglezsosa! You have completed the following achievement on the Hive blockchain And have been rewarded with New badge(s)
Your next target is to reach 29000 upvotes.
You can view your badges on your board and compare yourself to others in the Ranking
If you no longer want to receive notifications, reply to this comment with the word
STOP