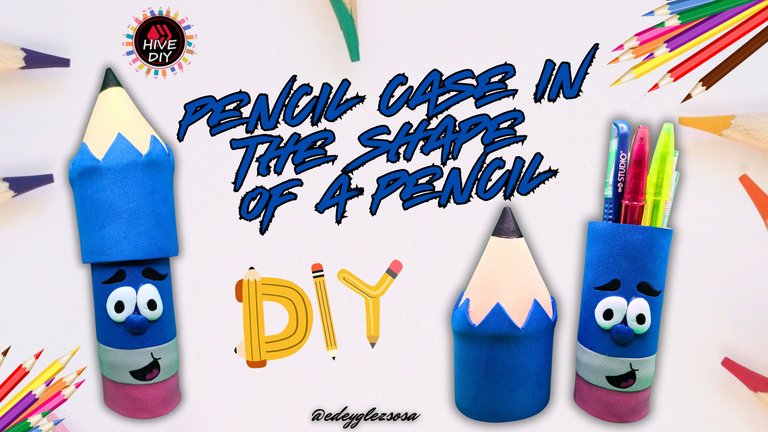
DIY: Pencil case in the shape of a pencil. [ENG+ESP]
Hello-hello, crafty friends.
Once again I'm here sharing with you another of my creations and this time I want to show you how to make a beautiful pencil case in the shape of a pencil. Quite a tongue twister, isn't it? But if you want to make it more complicated, you can call it a pencil case in the shape of a pencil, where pencils will be kept. I think it sounds better in Spanish, though. 😅
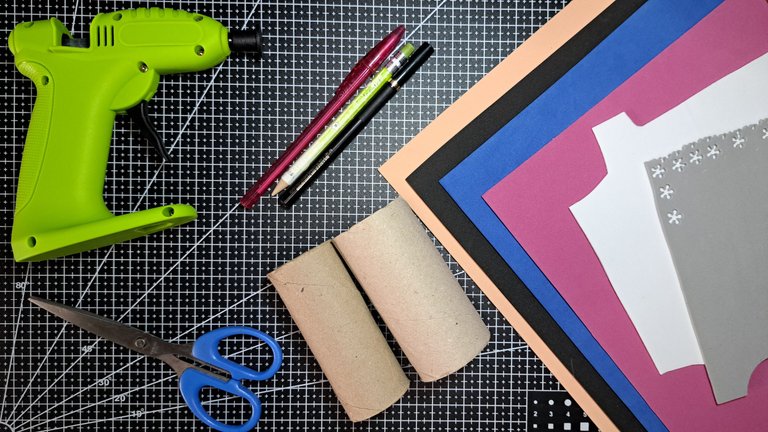
But don't be fooled by its appearance, as the procedure is really simple and no large amounts of materials or complex tools will be needed. Personally, I consider this a very good thing, as the essence of DIY is to do things by yourself, as the acronym in English well indicates. So don't miss the opportunity to create your own case to surprise a little school child with a beautiful gift. Let's get started...
Hola-hola, amigos artesanos.
Una vez más estoy por acá compartiéndoles otra de mis creaciones y en esta ocasión quiero enseñarles cómo confeccionar un hermoso estuche para lápices con forma de lápiz. Vaya trabalenguas, ¿verdad? Pero si quieren complicarlo más, pueden llamarlo estuche para lápices con forma de lápiz, donde se guardarán lápices. Aunque creo que en español suena mejor. 😅
Pero no se dejen engañar por su aspecto, ya que el procedimiento es realmente sencillo y no harán falta grandes cantidades de materiales o herramientas complejas. Personalmente, considero que esto es muy bueno, pues la esencia del DIY es hacer las cosas por uno mismo, como bien indican las siglas en inglés. Así que no pierdan la oportunidad de crear su propio estuche para sorprender a algún pequeño escolar con un hermoso regalo. Comencemos…
Materials // Materiales
| English | Español |
| ✔️ Blue, pink, gray, gray, black, white and skin colored fomi | ✔️ Fomi azul, rosado, gris, negro, blanco y color piel |
| ✔️ Cardboard tubes | ✔️ Tubos de cartón |
| ✔️ Black and red marker | ✔️ Marcador negro y rojo |
| ✔️ Scissors and pencil | ✔️ Tijeras y lapiz |
| ✔️ Hot silicone | ✔️ Silicona caliente |
Step by step // Paso a paso
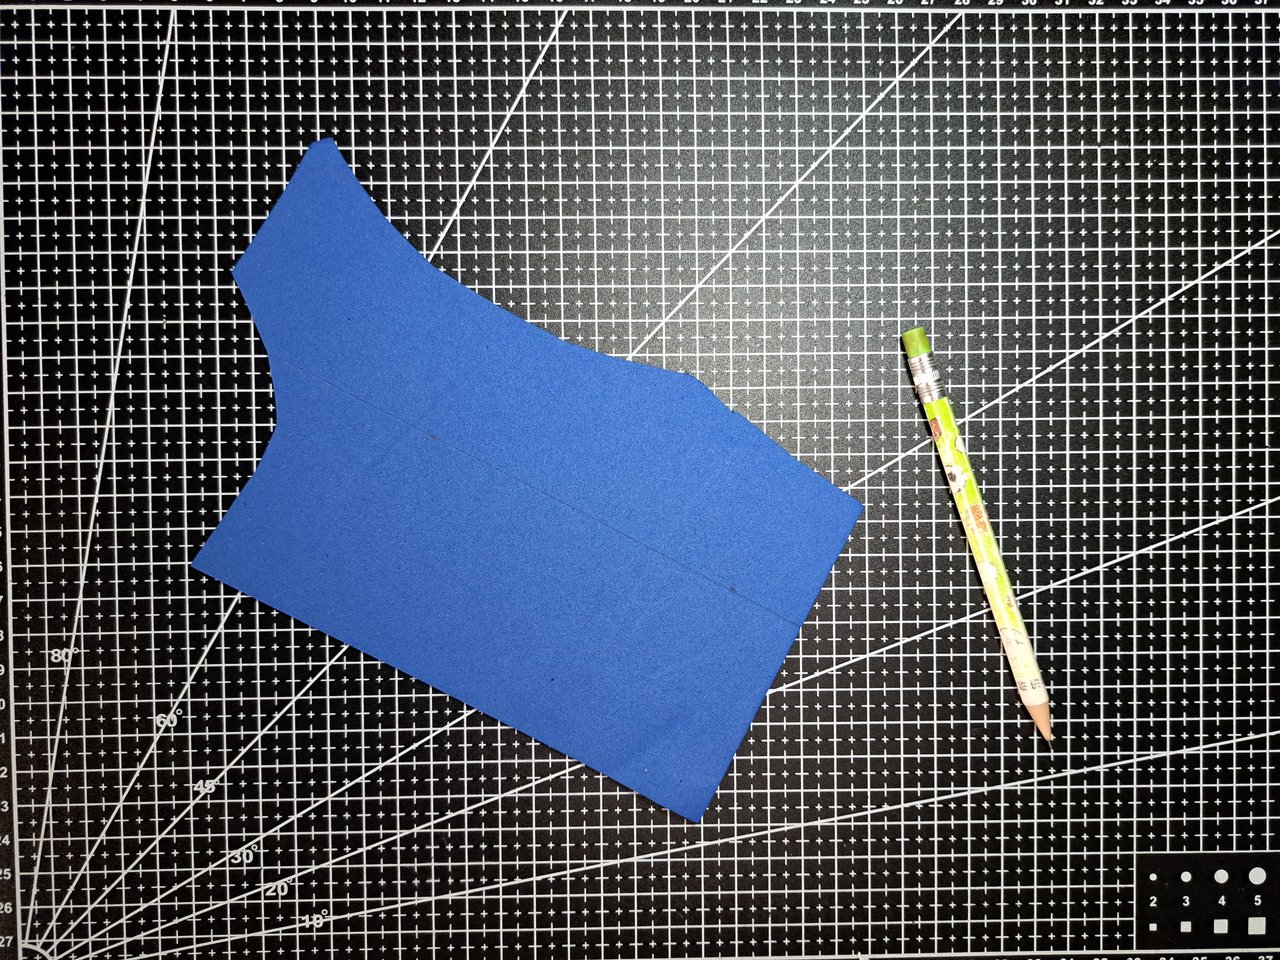
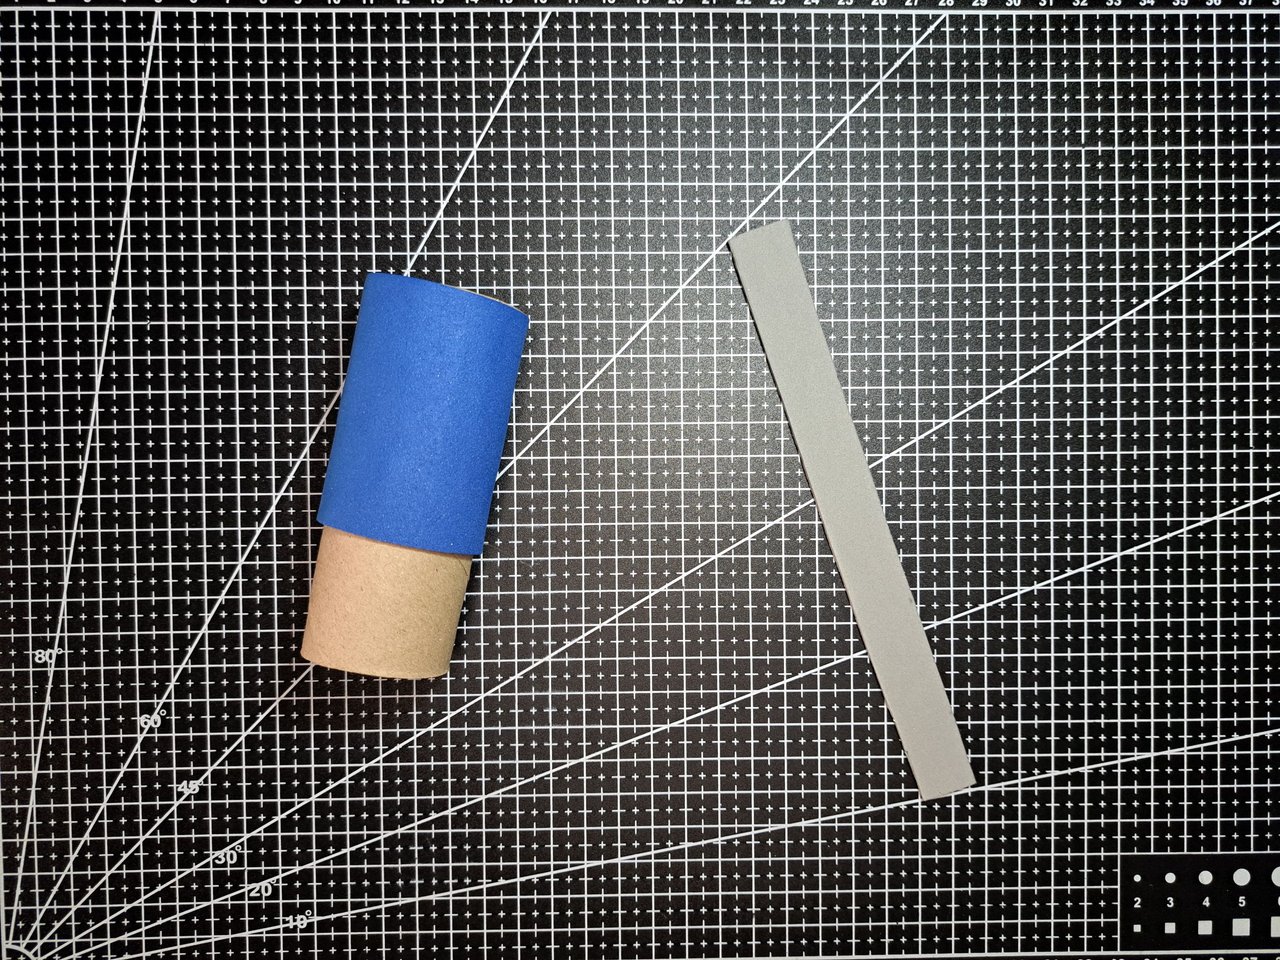
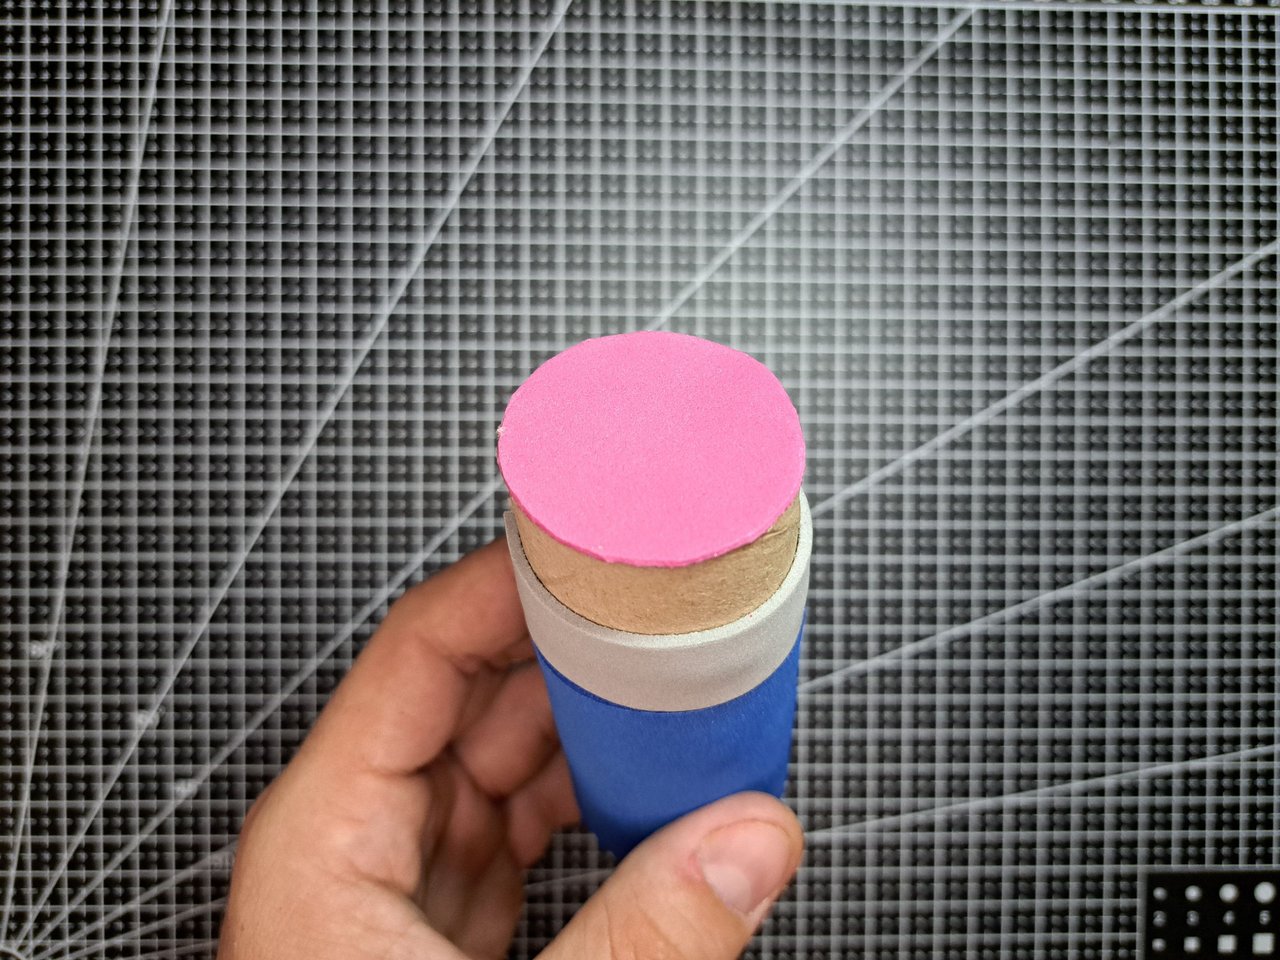
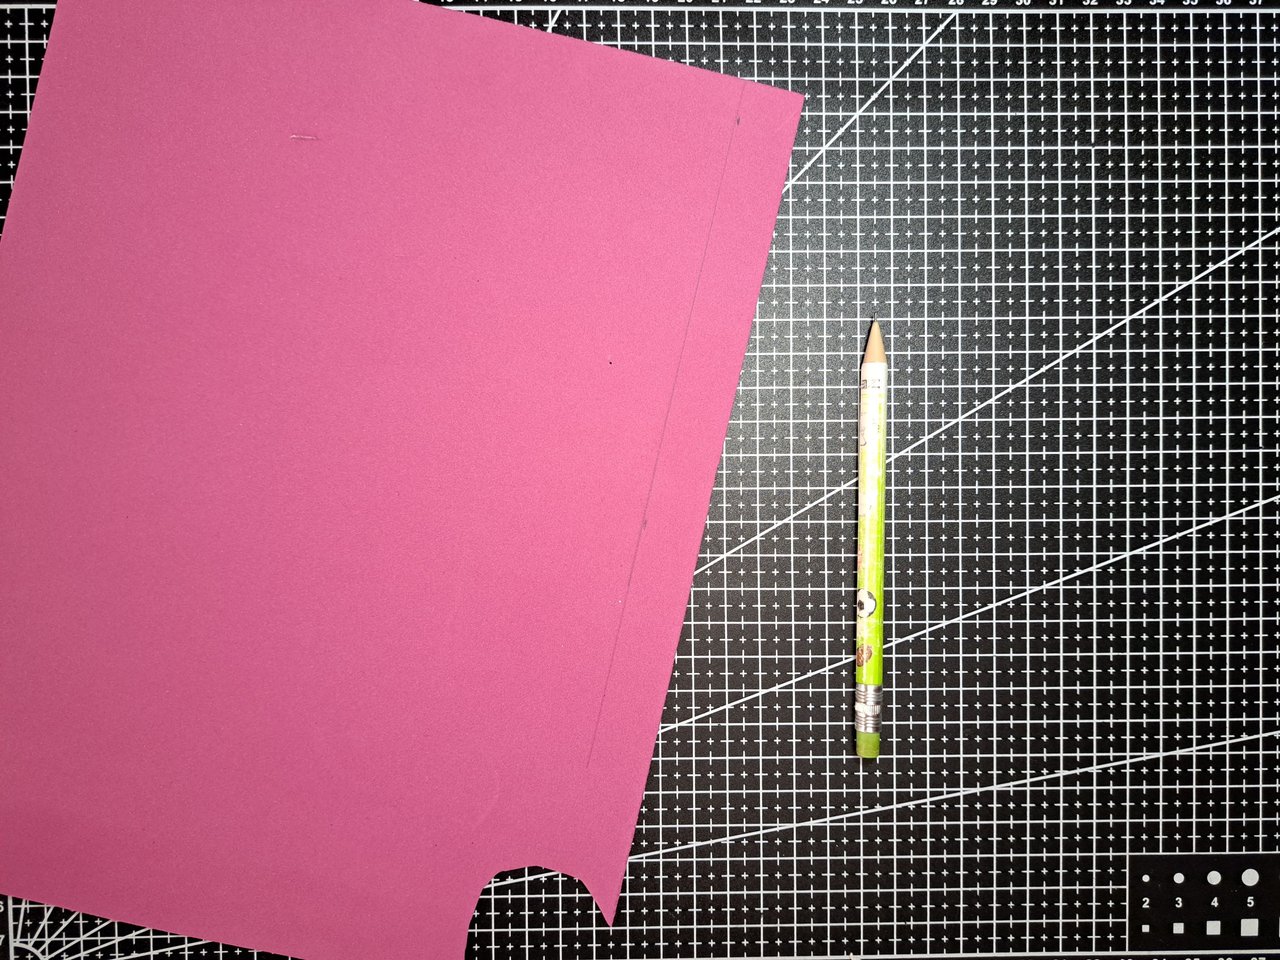
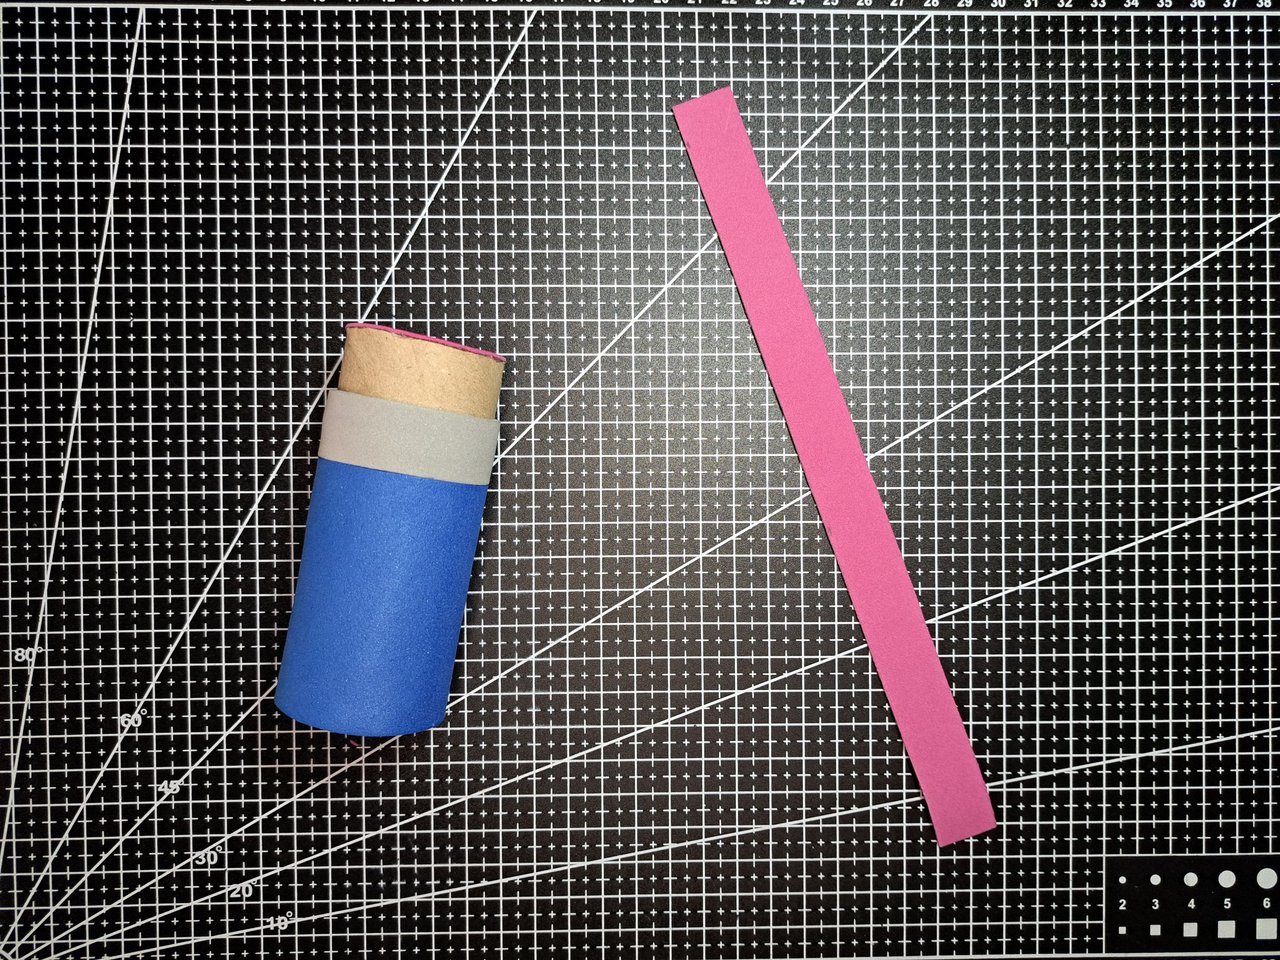
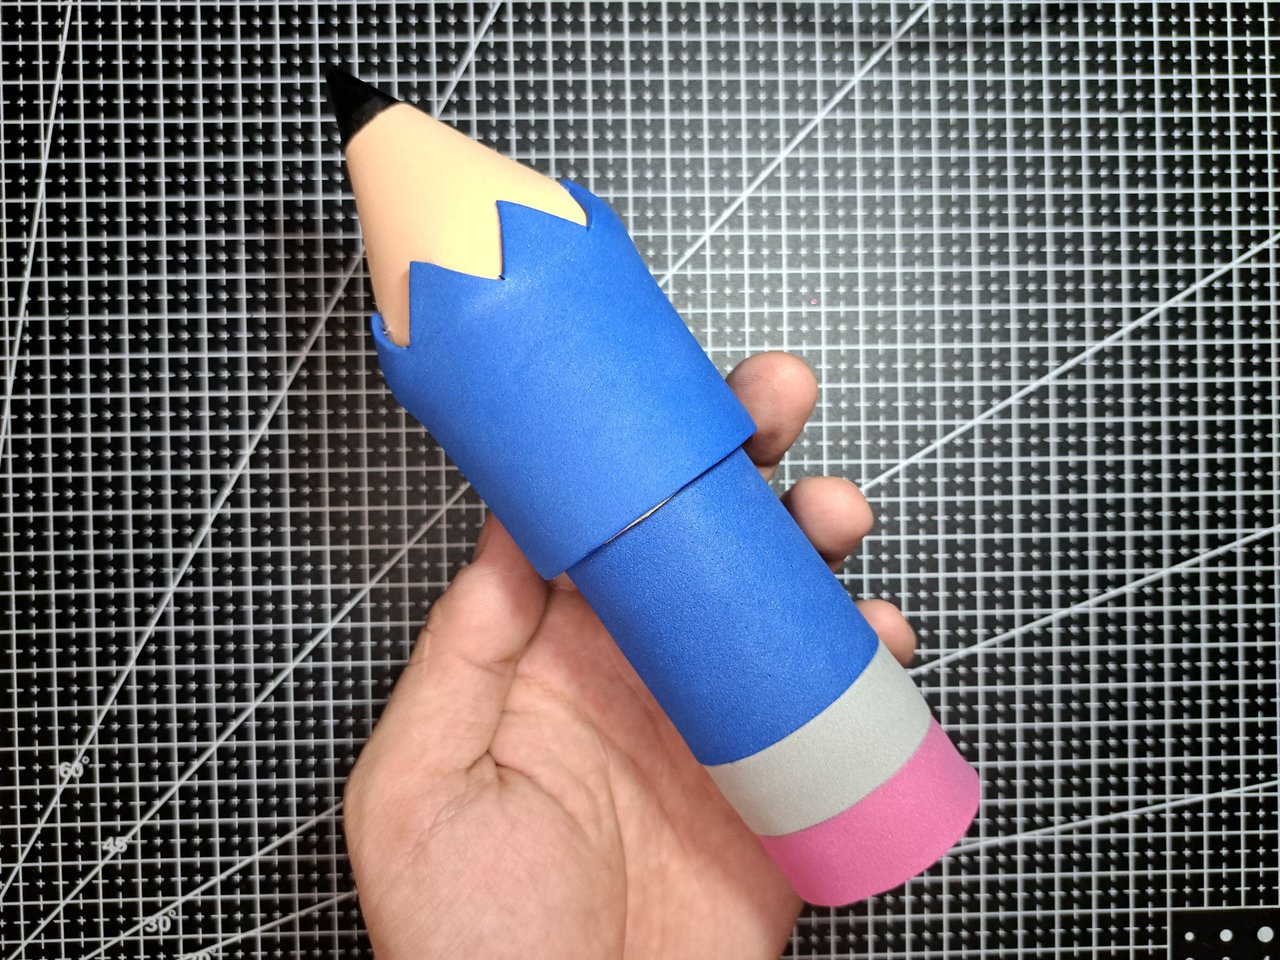
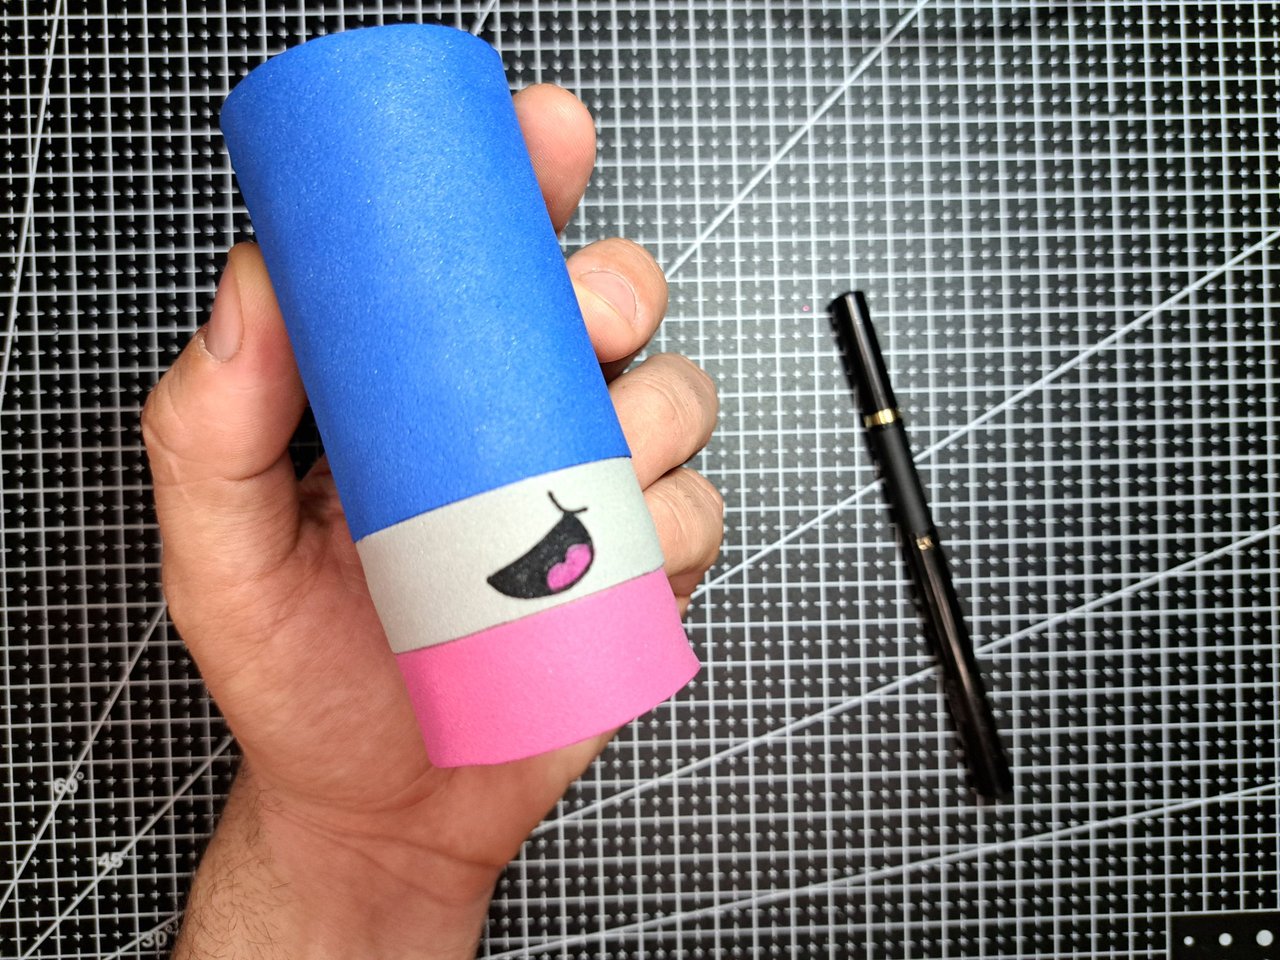
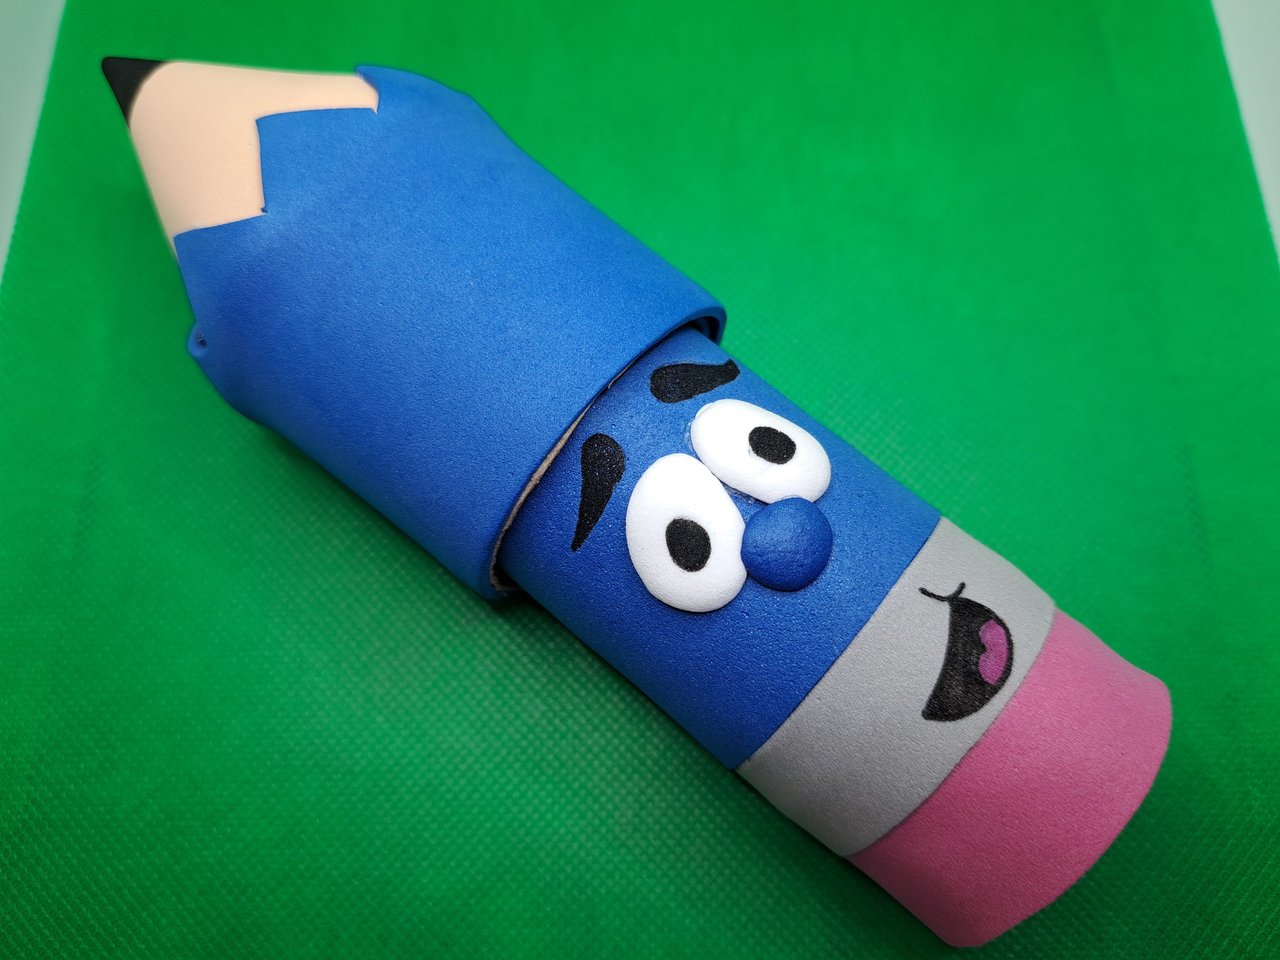
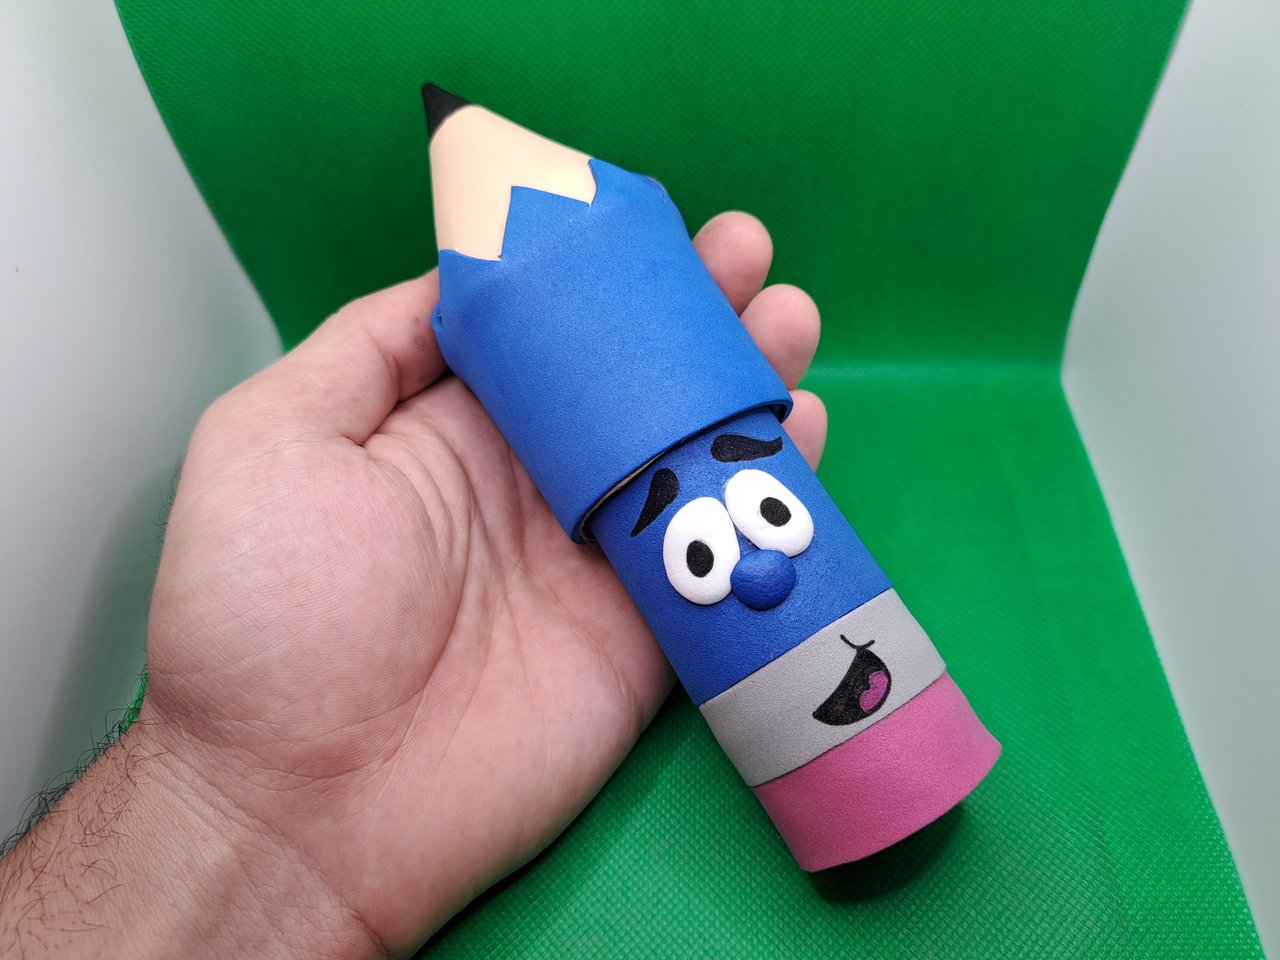
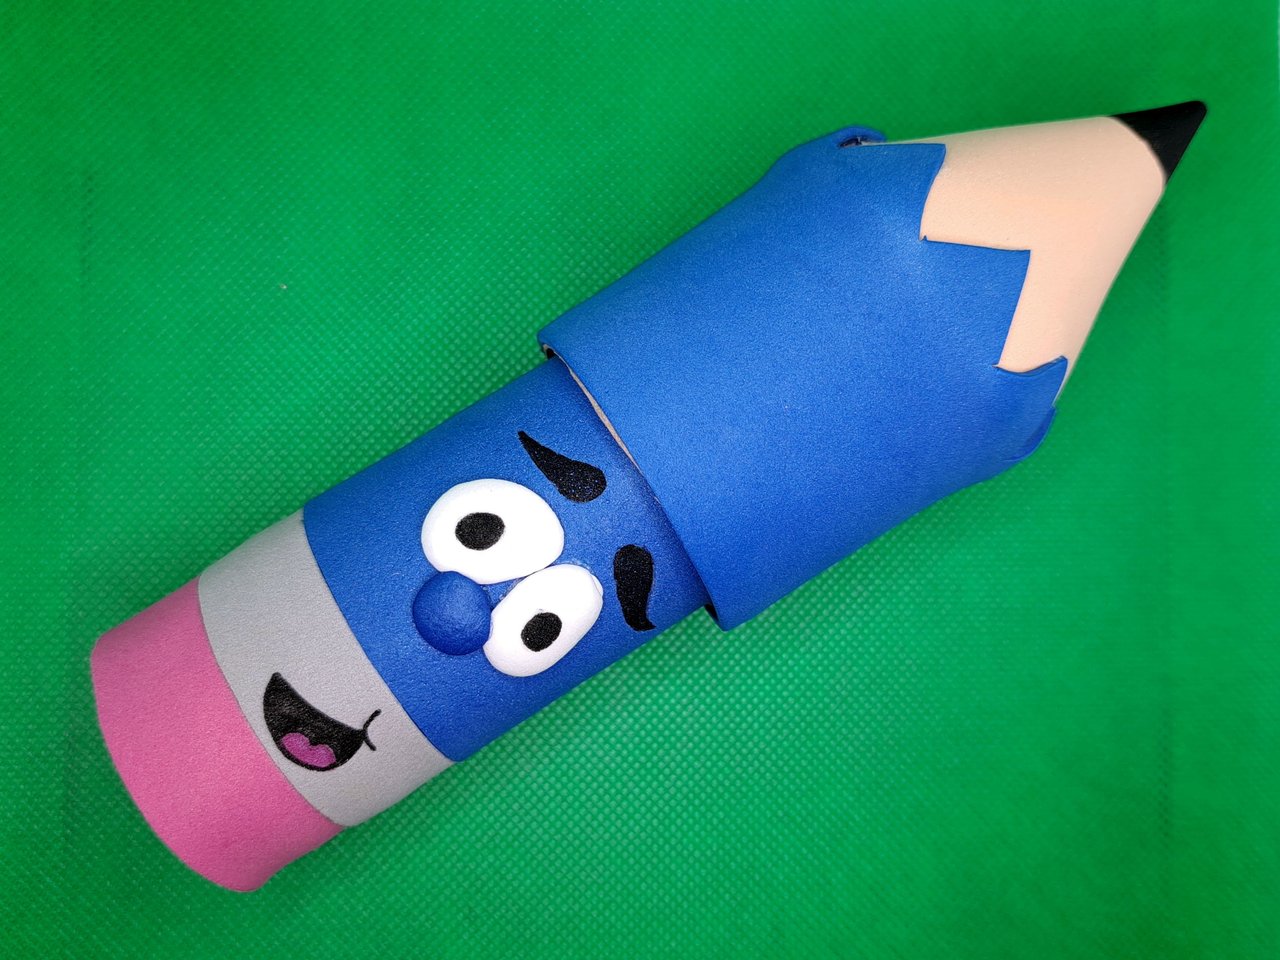
1️⃣ The first thing to do is to mark the side of the cardboard tube to divide it into 3 sections. Mine measured 12 cm, so I divided it into 6.5 cm, 3.5 cm and 2.5 cm. To cover these areas, mark and cut out three pieces of blue, gray and pink fomi, respectively. First glue the blue piece that corresponds to the pencil body. Underneath, glue the gray one, which would be the pencil cap, and underneath the smallest part, the pink one, which would be the eraser.
Lo primero será marcar el costado del tubo de cartón para dividirlo en 3 secciones. El mío medía 12 cm, por lo cual lo dividí en 6.5 cm, 3.5 cm y 2.5 cm. Para cubrir esas áreas se deben marcar y recortar tres piezas de fomi azul, gris y rosa, respectivamente. Primero se pega la pieza azul que corresponde al cuerpo del lápiz. Debajo se pega la gris, que vendría siendo el casquillo del lápiz, y debajo la parte más pequeña que es la rosa, que sería la goma.
 |  |
 |  |  |
 |  |
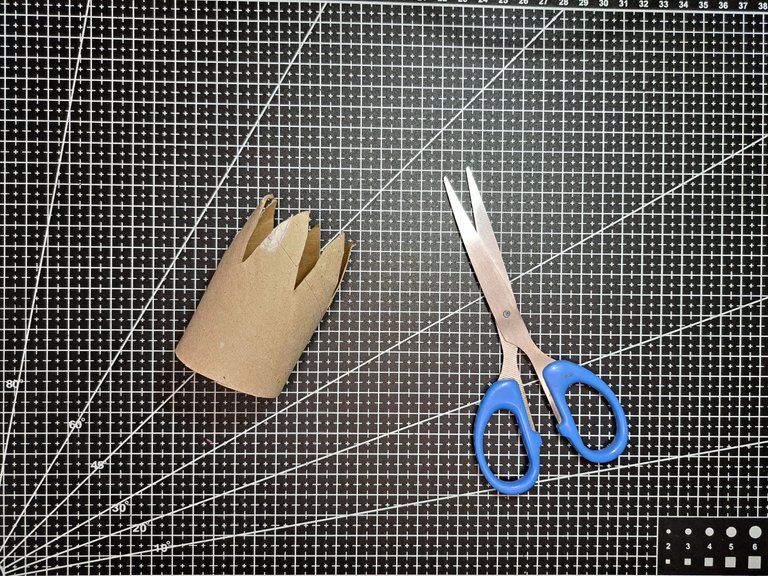
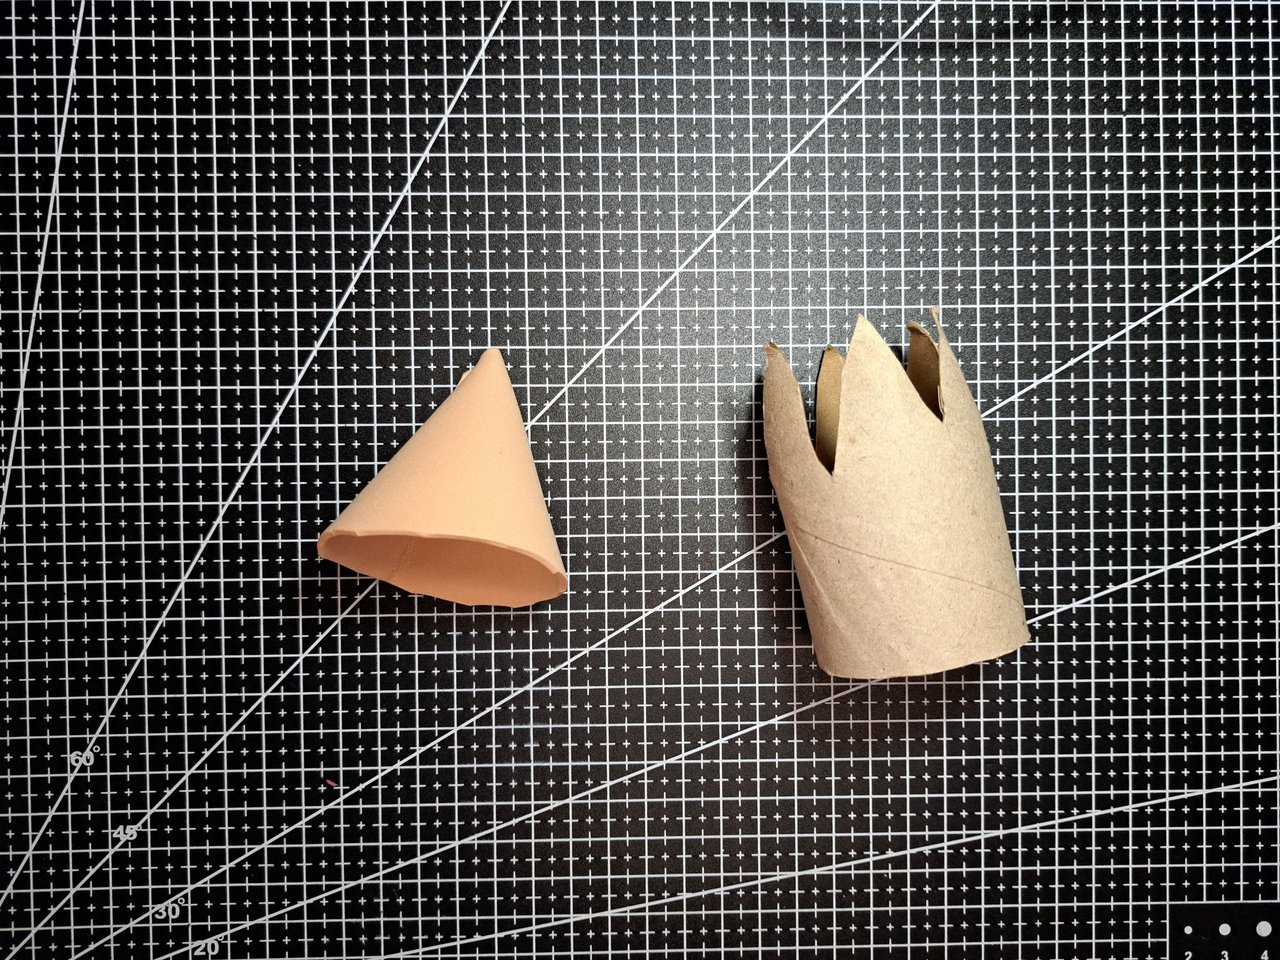
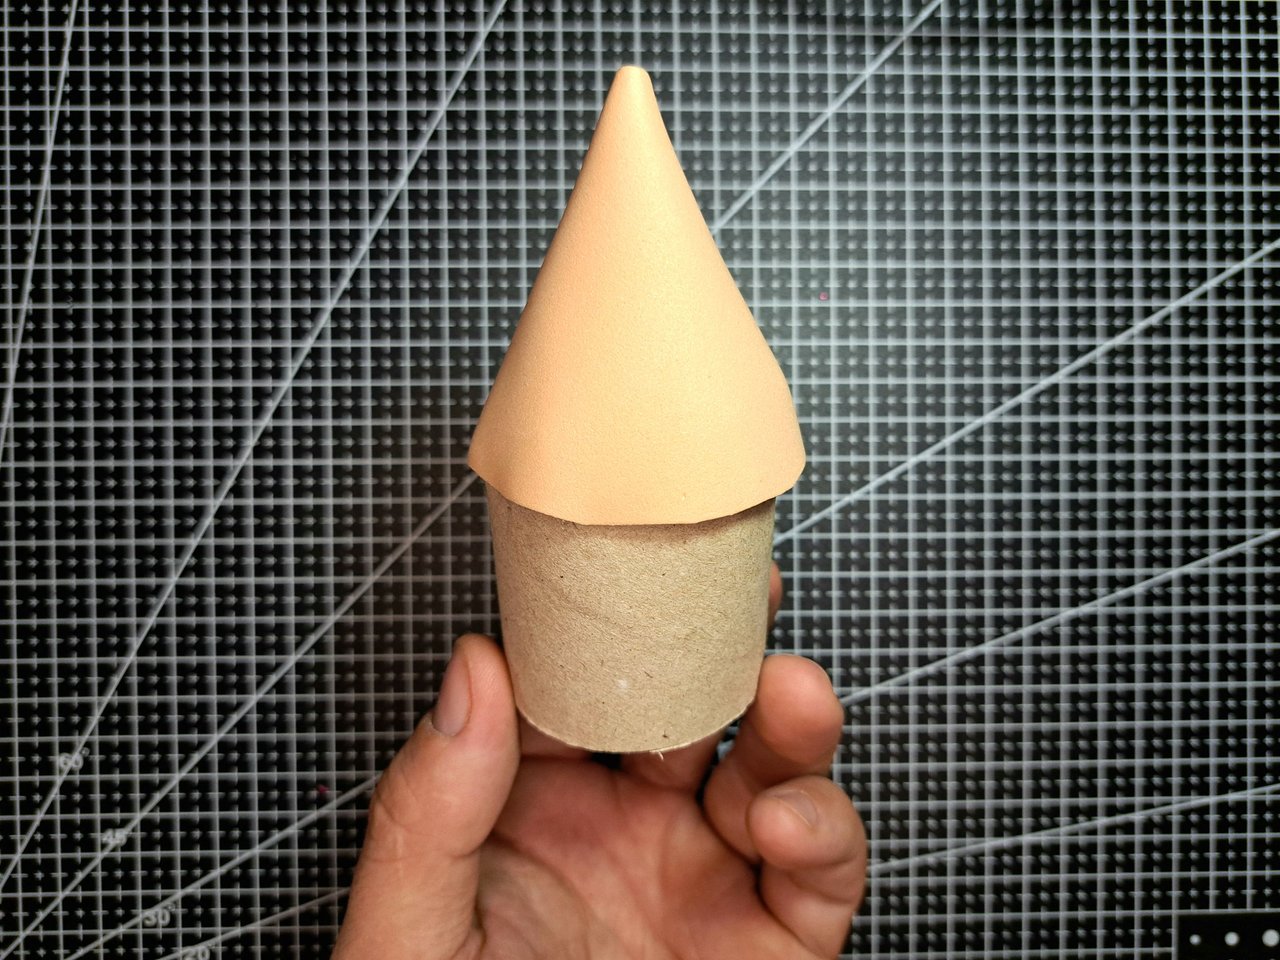
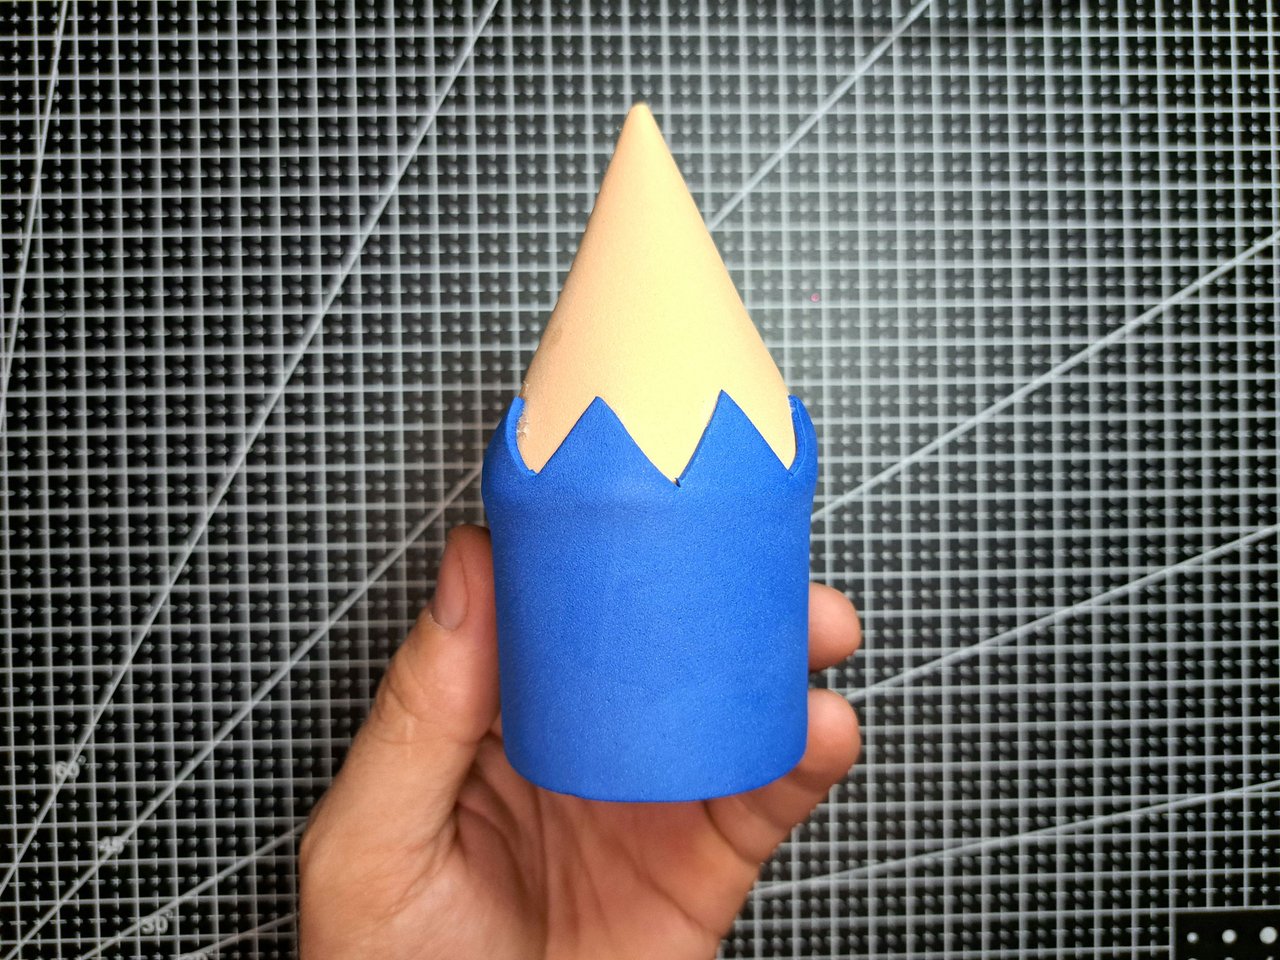
2️⃣ For the upper part of the case, a wider cardboard tube or one of the same diameter as the base will be used, but it must be opened. Using scissors, make triangular cuts to close one of its ends, which will then be covered with a smooth skin-colored fomi cone.
Para la parte superior del estuche se utilizará un tubo de cartón más ancho o uno de igual diámetro que el de la base, pero se debe abrir. Utilizando unas tijeras, se le harán unos cortes triangulares para cerrar uno de sus extremos, el cual posteriormente se cubrirá con un cono de fomi liso color piel.
 |  |  |
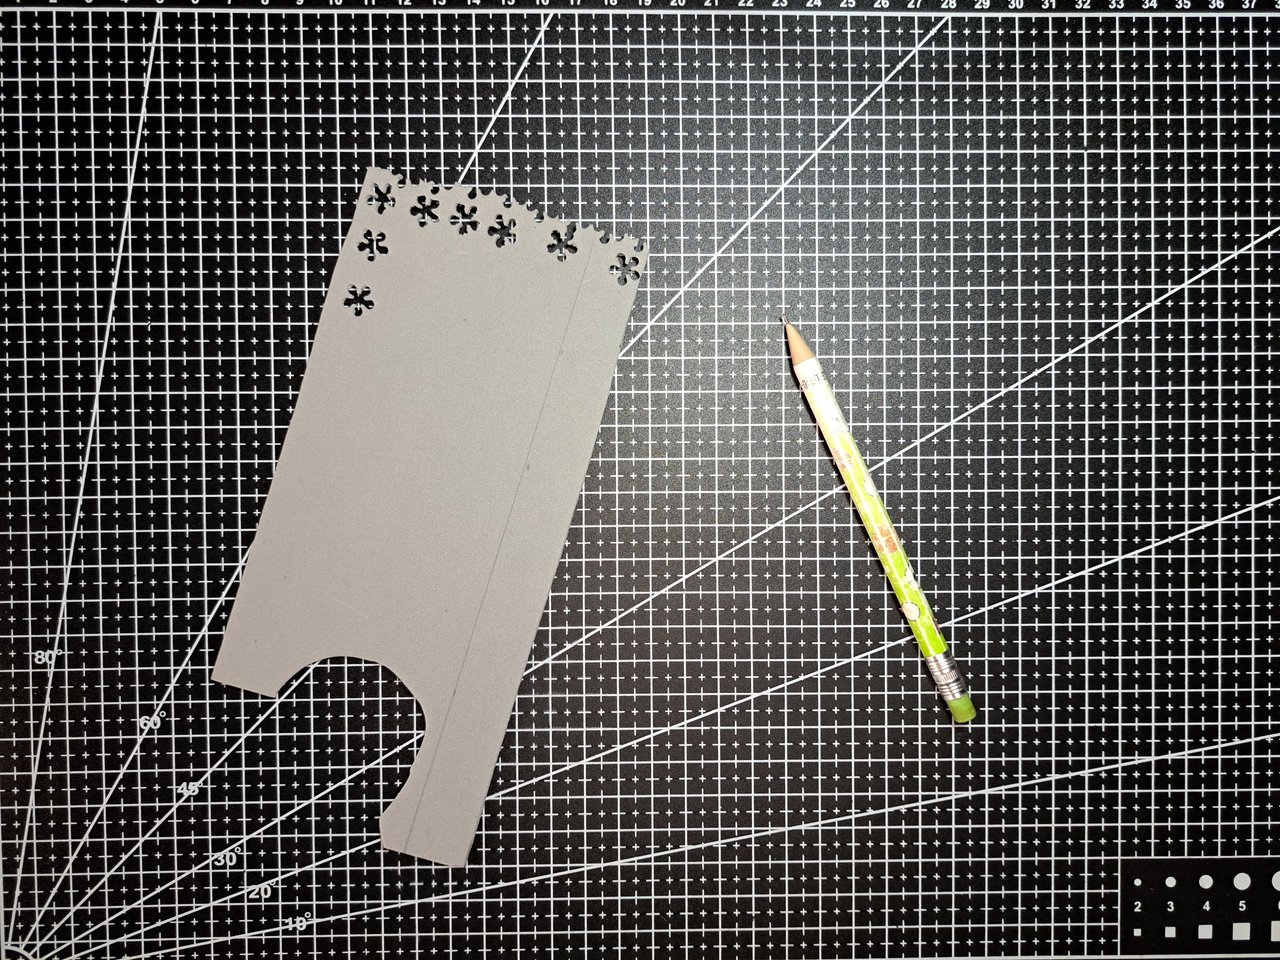
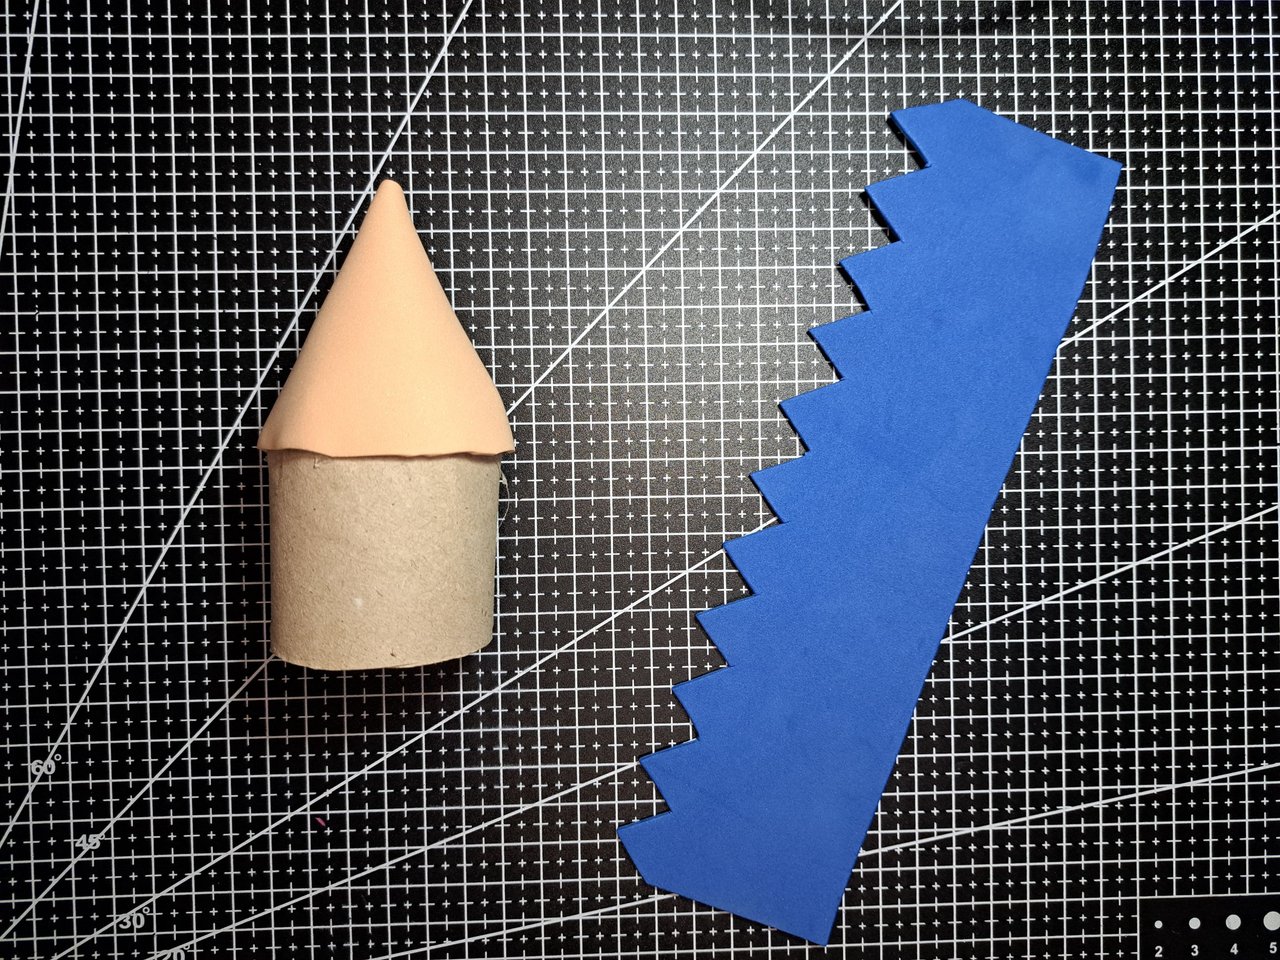
3️⃣ To finish with the lid of the case, cut a large piece of 6 cm wide, to which triangles of 2 cm base are cut on one of its sides. This piece of fomi should be glued around the cardboard of the lid, covering all the exposed area and then gluing the tips of the triangles on top of the skin-colored fomi cone.
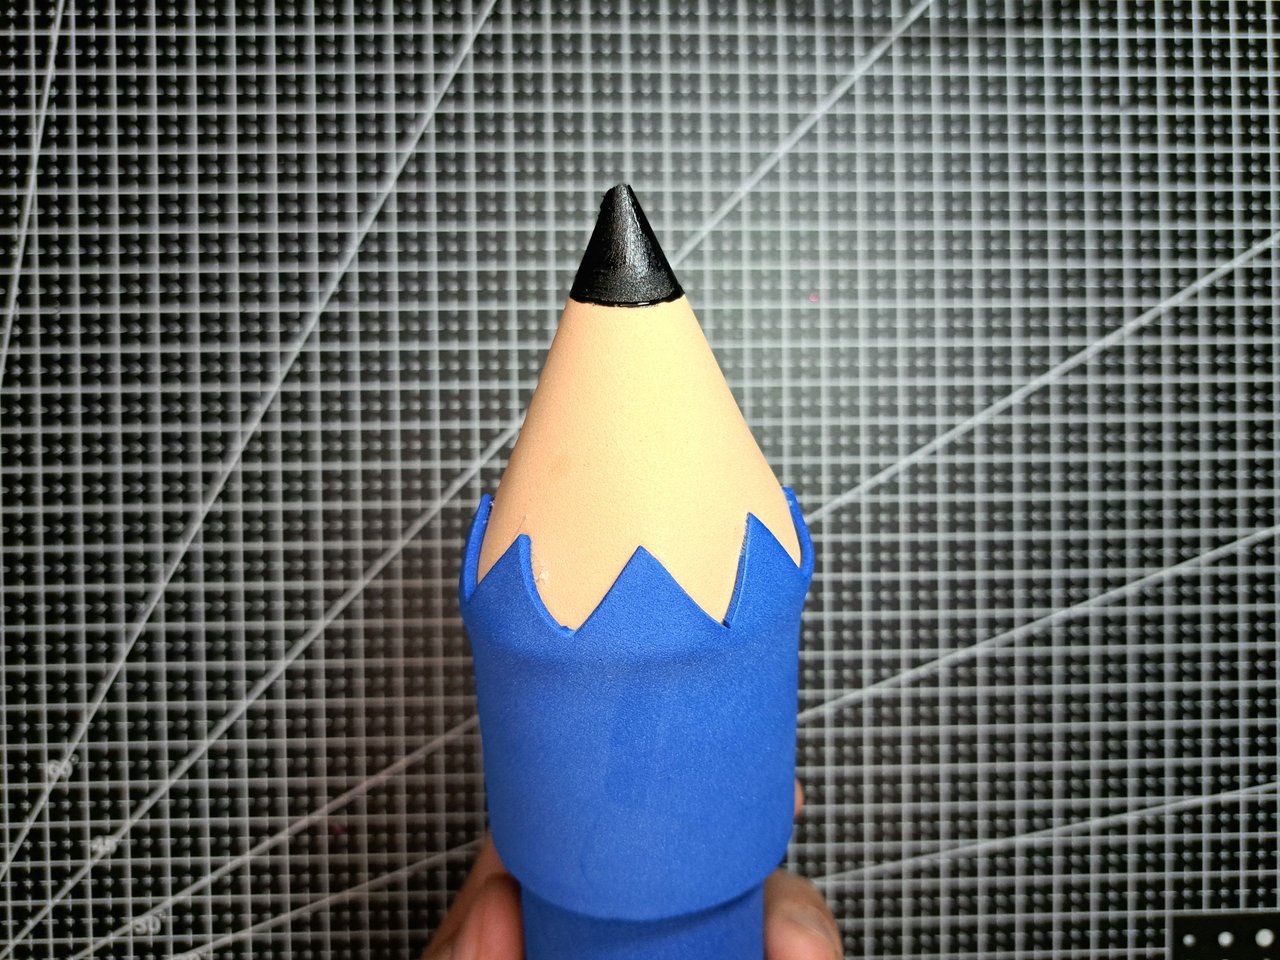
For an additional touch, paint the tip of the cone black to create the graphic tip of the pencil. If you don't have paint available, you can use black colored fomi and create a smaller cone that is then glued on the tip.
Para terminar con la tapa del estuche, se debe recortar una pieza grande de 6 cm de ancho, a la cual se le recortan triángulos de 2 cm de base en uno de sus laterales. Esta pieza de fomi se debe pegar alrededor del cartón de la tapa, cubriendo toda el área expuesta y luego pegando las puntas de los triángulos encima del cono de fomi color piel.
Para dar un toque adicional, se pinta la punta del cono de color negro para crear la punta gráfica del lápiz. En caso de no contar con pintura, se puede utilizar fomi de color negro y crear un cono más pequeño que luego se pega en la punta.
 |  |
 |  |
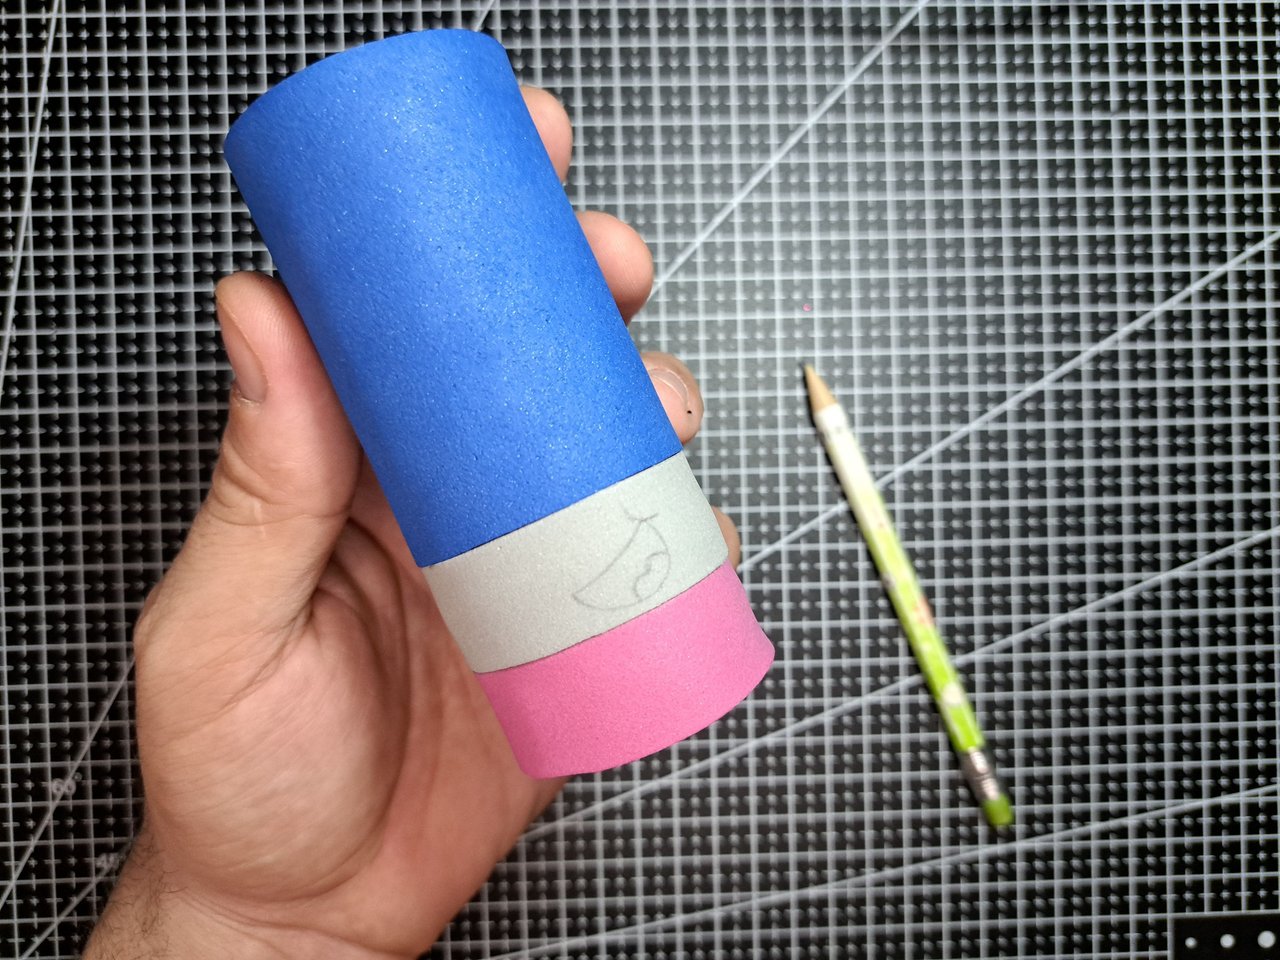
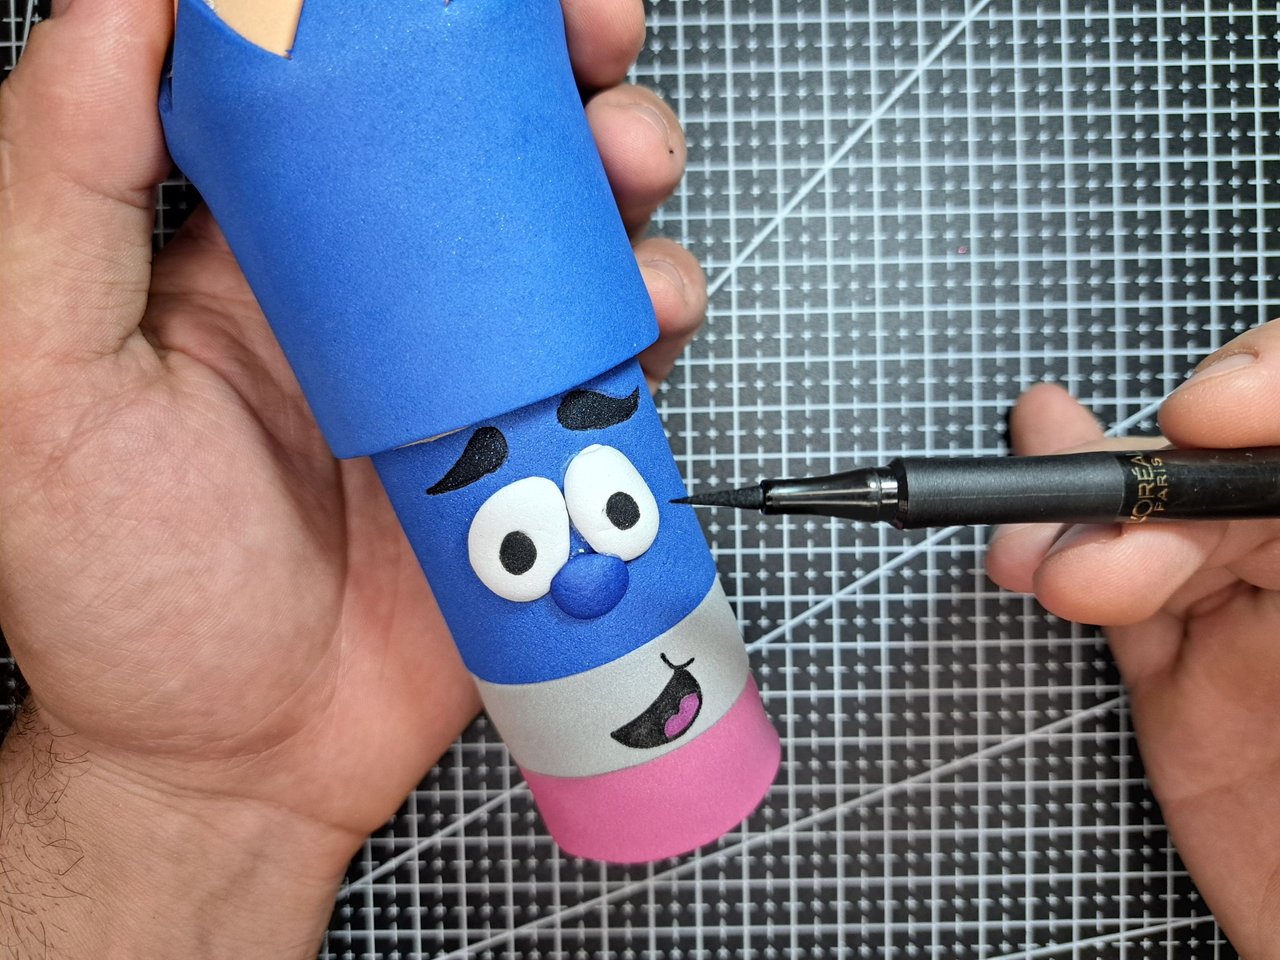
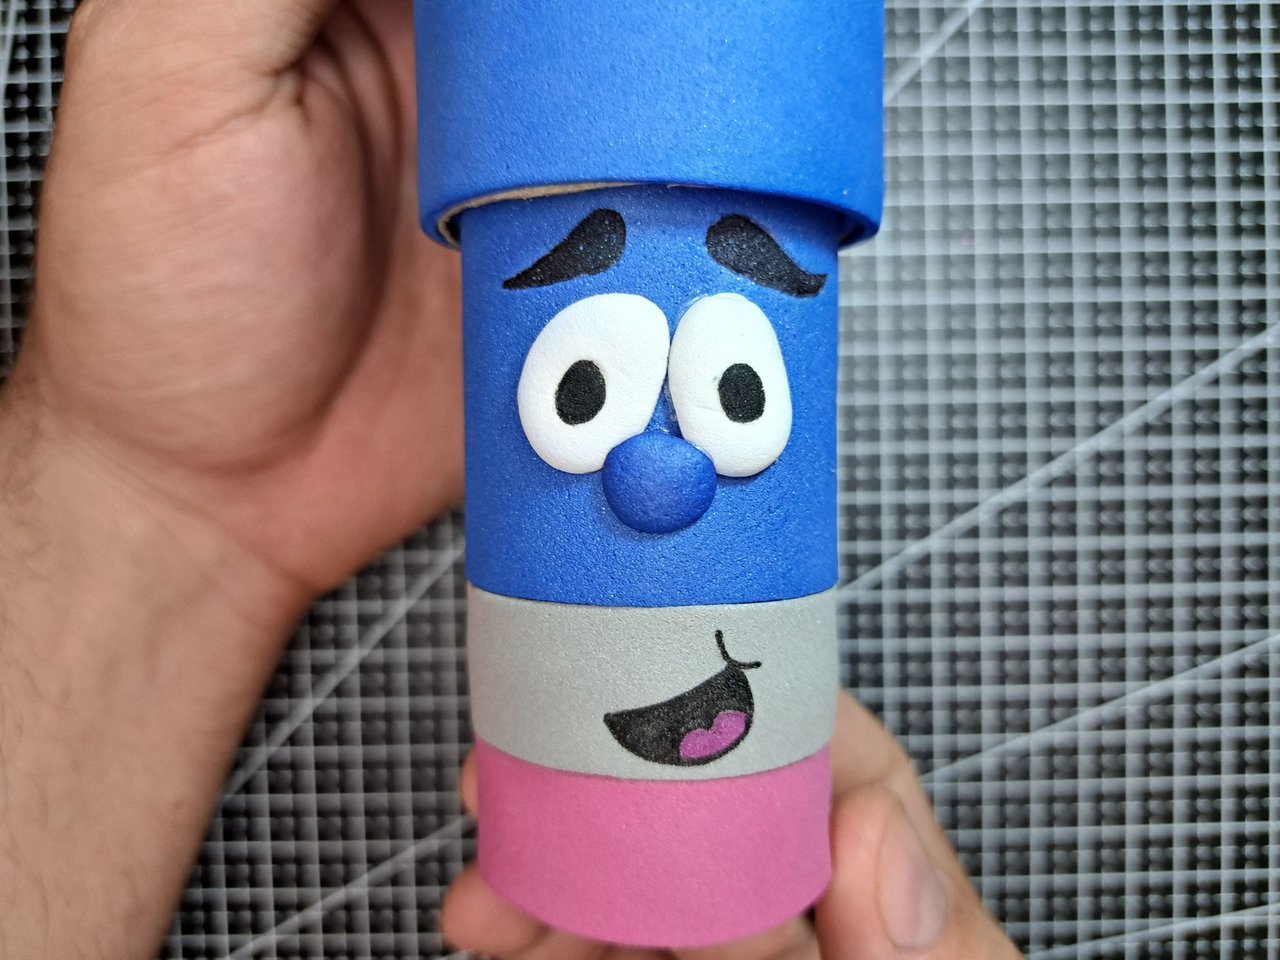
4️⃣ The mouth of the pencil will be drawn on top of the eraser cap. To draw it, first mark its outline with a light pencil, then paint the tongue in red and the rest of the mouth in black.
La boca del lápiz estará dibujada encima del casquillo de la goma. Para dibujarla, primero se marca su contorno con un lápiz claro, y encima se pinta la lengua de color rojo y el resto de la boca de color negro.
 |  |
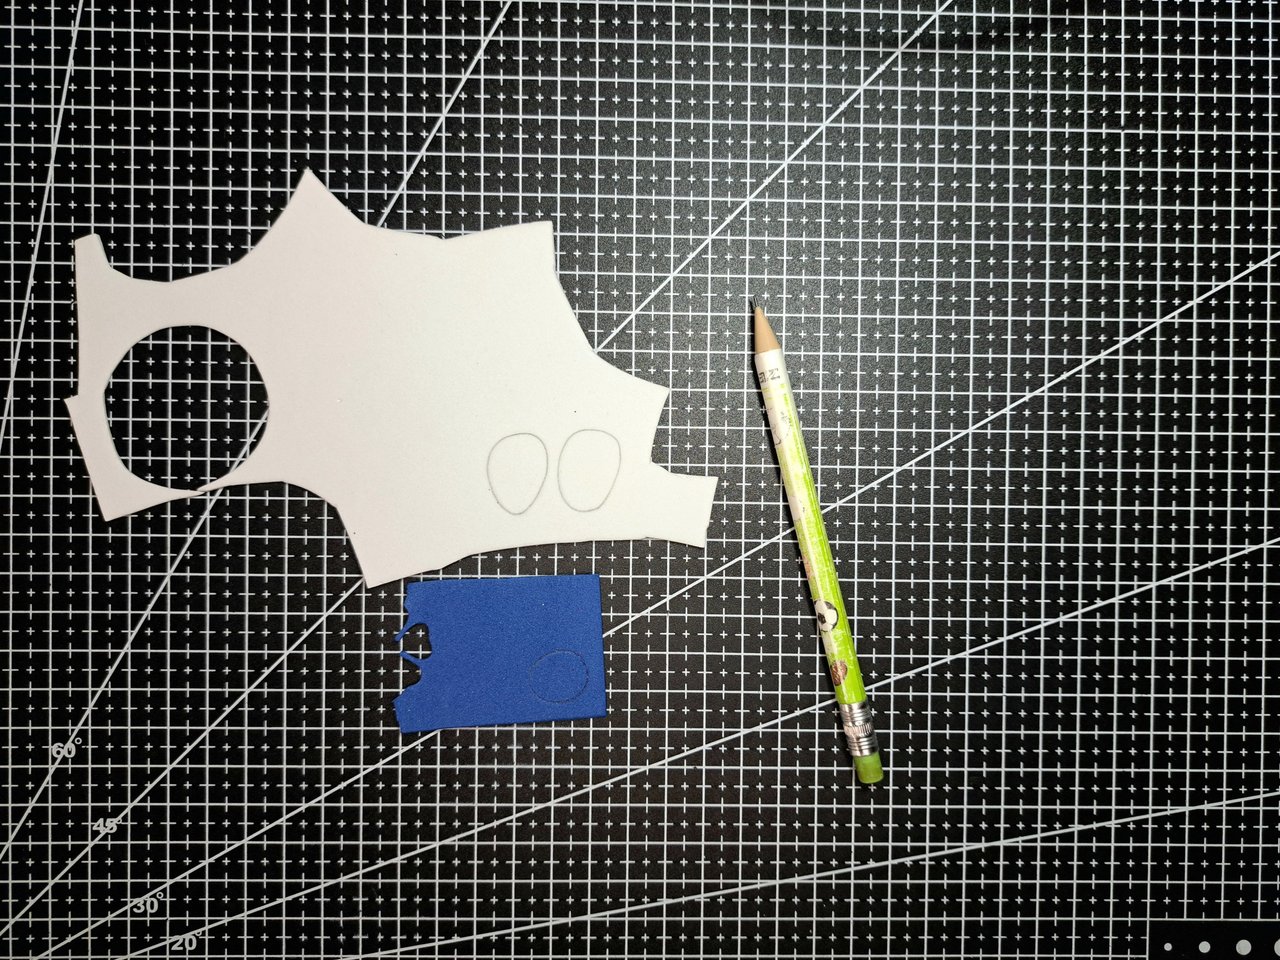
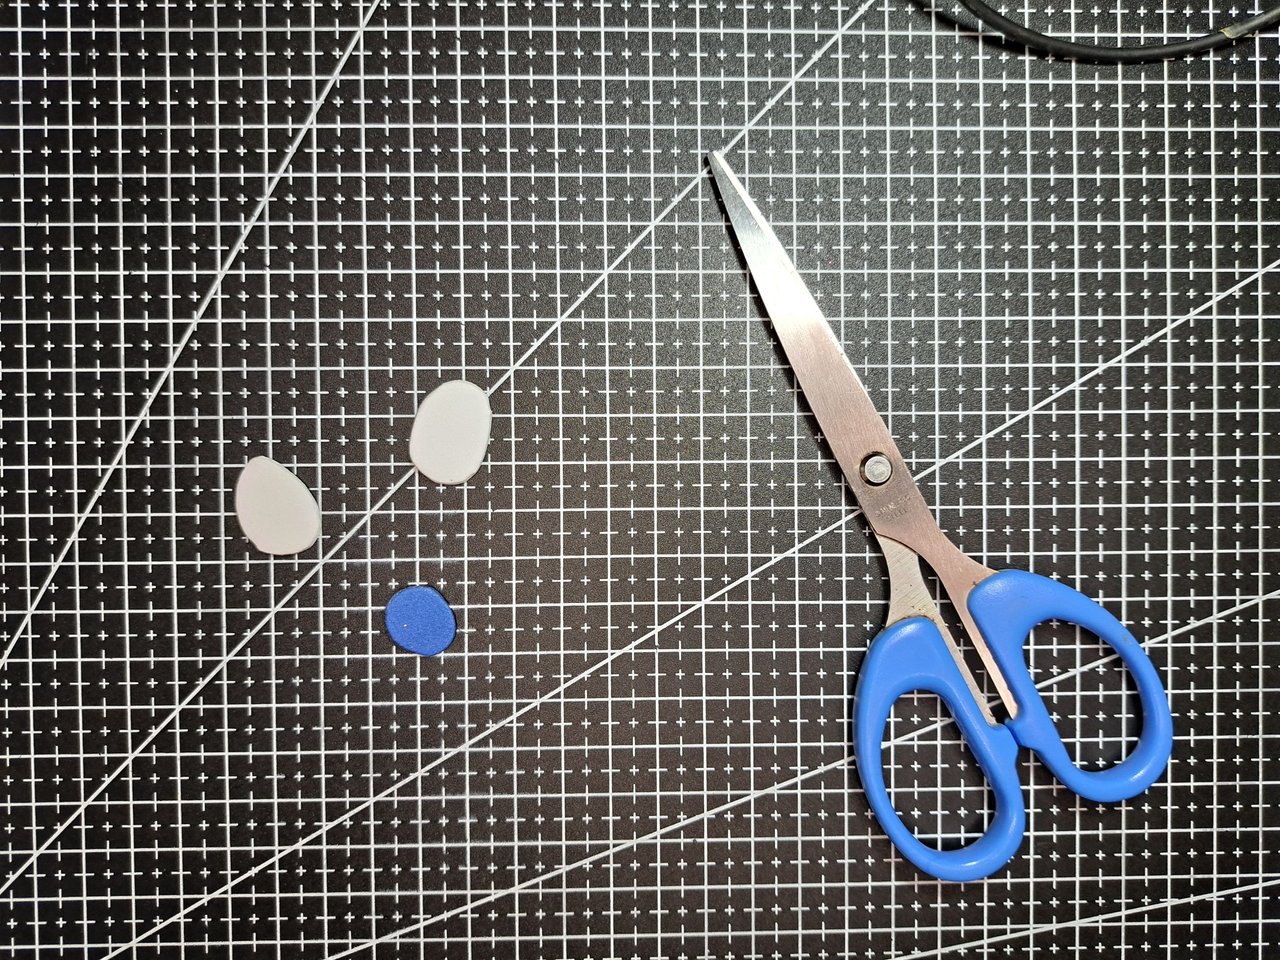
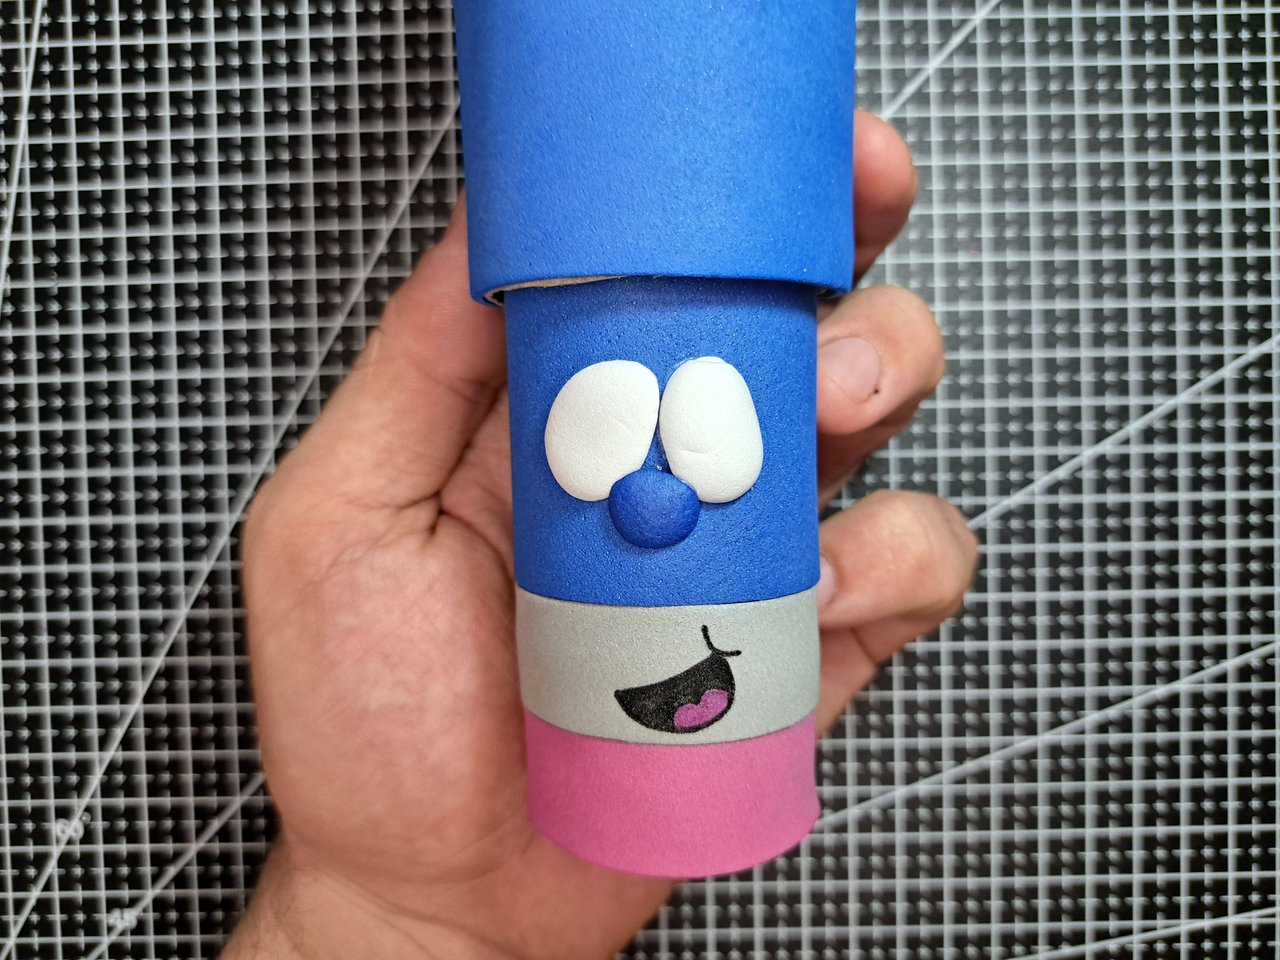
5️⃣ In the case of the eyes, white fomi will be used and blue fomi for the nose. To give it a more striking touch, the cut out pieces of fomi will be heated and, once they swell, they will be glued right in the center of the blue stripe.
To finish, black paint or a black marker will be used to draw the eyebrows and pupils, leaving the pencil face and the pencil case as such.
En el caso de los ojos, se empleará fomi blanco y fomi azul para la nariz. Para darle un toque más llamativo, se calentarán las piezas de fomi recortadas y, una vez que se hinchen, se pegarán justo en el centro de la franja azul.
Para finalizar, se utilizará pintura negra o un marcador negro para dibujar las cejas y las pupilas, quedando listo el rostro del lápiz y el estuche como tal.
 |  |  |
 |  |
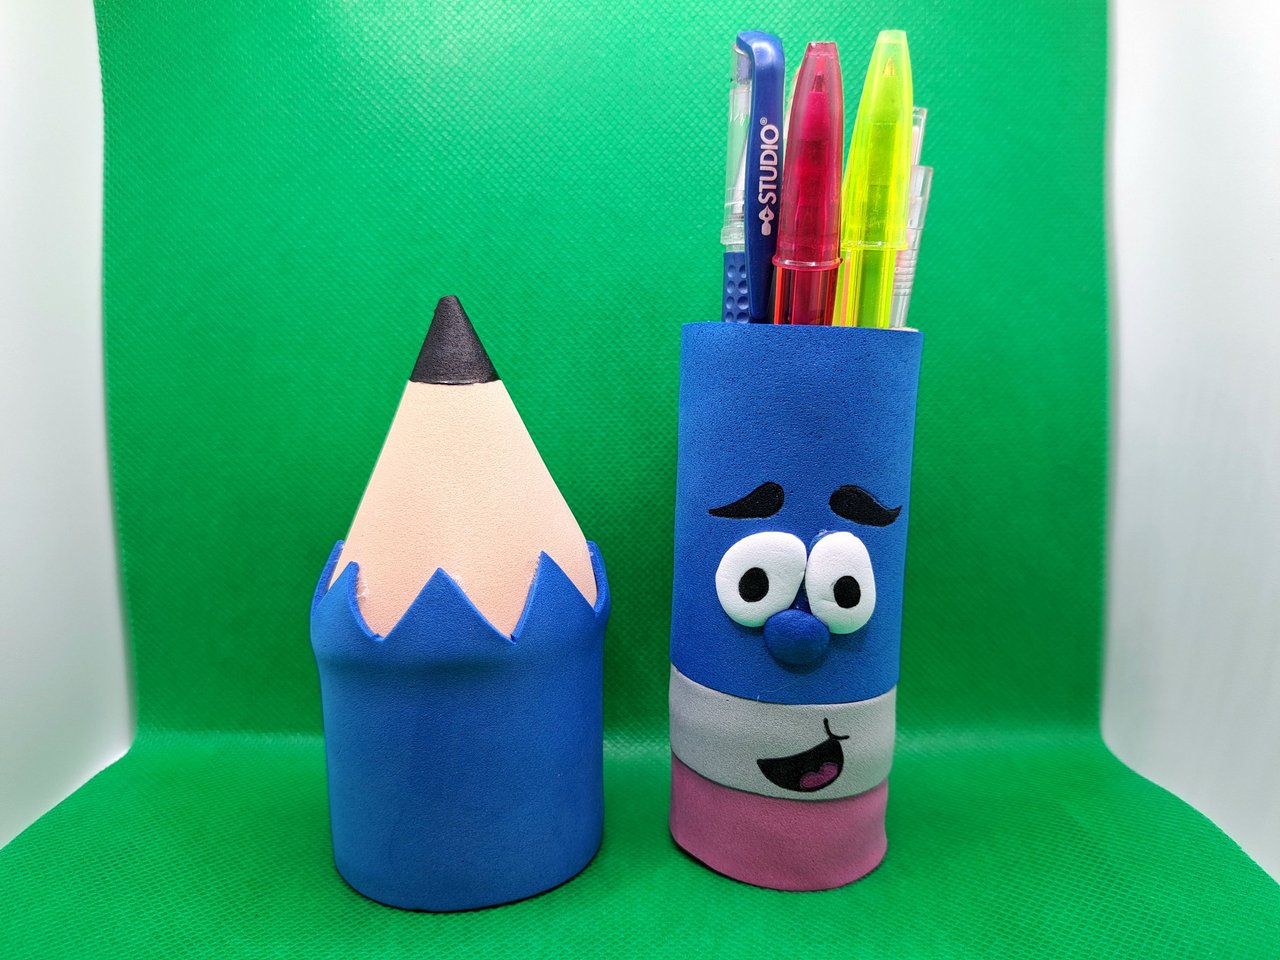
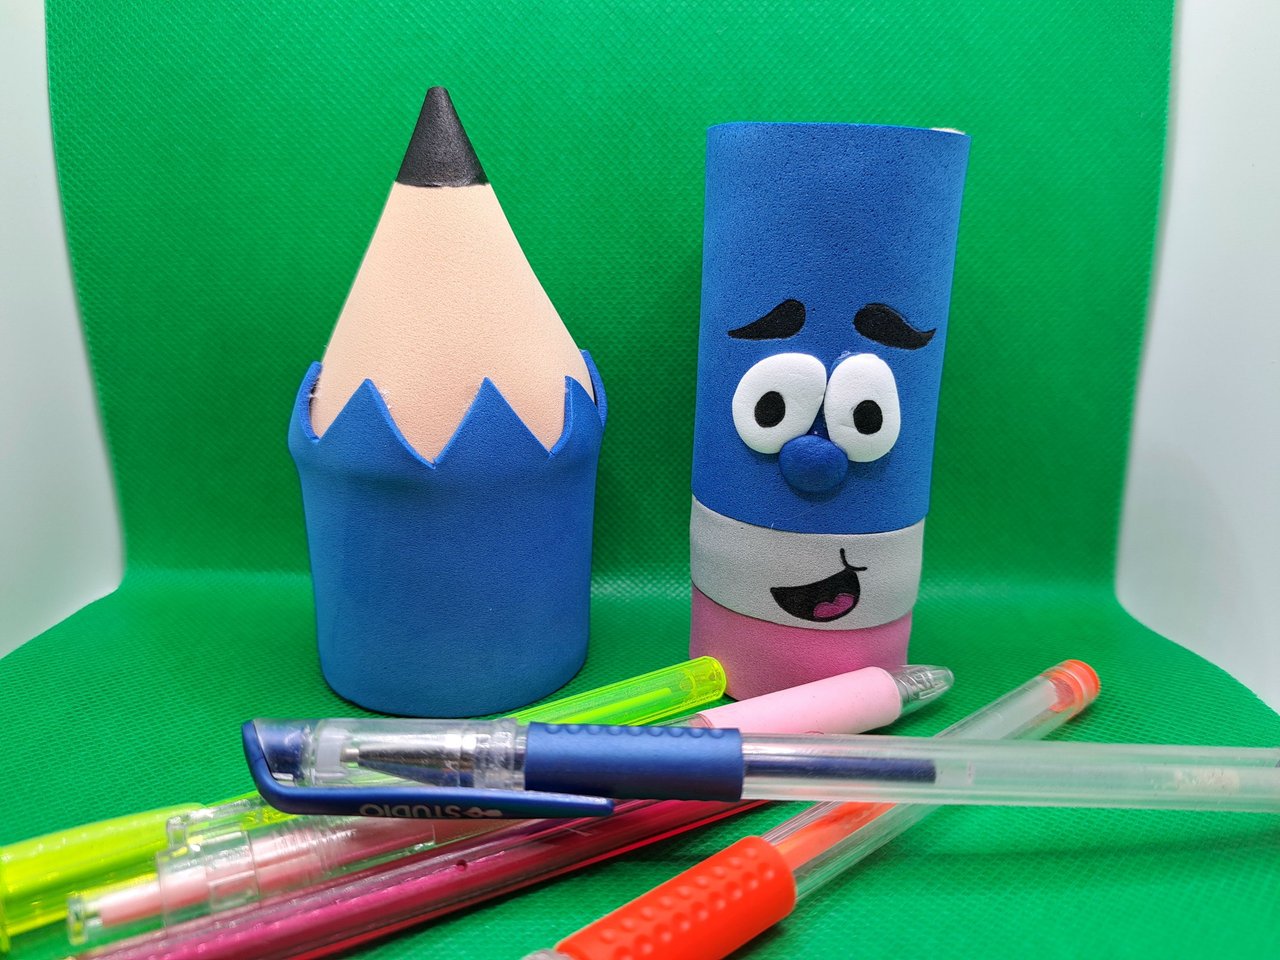
Finished Work // Trabajo Terminado
As you may have noticed, the procedure is simple and it is not necessary to use complex materials to create this pencil case with pencil fomi. I hope you liked this craft and that the tutorial is easy to understand, because for now I am very happy to have shared with you this creation.
Como habrán podido notar, el procedimiento es simple y no es necesario utilizar materiales complejos para poder crear este estuche para lápices con fomi de lápiz. Espero que les haya gustado esta manualidad y que el tutorial sea de fácil comprensión, pues yo por ahora me despido muy contento de haber compartido con ustedes esta creación.
 |  |
 |  |  |

Credits and Resources // Créditos y Recursos
Cover page created in Canva
Translated by DeepL
Images captured with my Samsung Galaxy A53
Inspiration Source


Posted Using INLEO
It was very useful and beautiful, it is incredible how you reuse the rolls of paper to make something so well achieved. Good job.
Anything at hand can be useful when it comes to crafts. Some people's trash and others' treasure.
Your pencil shaped pencil case is really smart and cool too. The design really mirrors a real pencil, making it a fun and effective. Good work.
selected by @stevenson7
Thank you for the compliment and for the support.
Genial, 💯 una alternativa para tener ordenando nuestros bolígrafos y marcadores, te quedado fantástico!
Muchas gracias.
Me ha gustado mucho este estuche para guardar los lápices , si sería un hermoso regalo para niños en edad escolar . La técnica de inflar el foami para lograr que los ojos queden como en relieve hace más bonita la expresión de la cara ❤️
Me gusta trabajar con el fomi porque es un material muy versátil y con un poco de calor se pueden obtener formas muy divertidas. Gracias por comentar.
Wow! So creative! I like your DIY pencil case design. 👏🥰 Thanks for sharing!
Pero si está muy bonito y su carita tan tierna, 20 puntos por este hermoso trabajo amigo. 🥰🫂
Muy buena creacion, se me hace muy simpatico el rostro que le diseñaste jeje te quedo muy lindo ❤️ (el trabalenguas tambien jaja)
Jajaja. Gracias, @elbuhito, me alegra mucho saber que te gustó el estuche y el trabalenguas también ☺.
Te quedo bello
Lo que más me gusta es que tiene mucha personalidad☺️ un hermoso e impecable trabajo✨
pero si es chiquitito jajaja pensé que sería más grande, la foto me engañó, y al ver los materiales me gustó mucho más el acabado, hiciste un trabajo fabuloso y muy práctico, gracias por compartir esta gran idea, saludos!
Esto está hermoso amigo, me gusta mucho la creatividad que le imprimiste a esto para hacer algo tan único y bonito.
Gracias Bro. Espero que a la persona que se lo regale le de un buen uso.
Congratulations, your post has been curated by @dsc-r2cornell. You can use the tag #R2cornell. Also, find us on Discord
Felicitaciones, su publicación ha sido votada por @ dsc-r2cornell. Puedes usar el tag #R2cornell. También, nos puedes encontrar en Discord
cool and unique👍
Thanks 🤗
Portable and efficient, I like it and I think I will give it a shot at home. Thanks for sharing and wishing you all the best friend.
Me encantó la idea, gracias por compartir. ✌️
https://www.reddit.com/r/somethingimade/comments/1kxg5i2/i_made_my_own_pencil_holder_in_the_shape_of_a/
This post has been shared on Reddit by @edeyglezsosa through the HivePosh initiative.