Como hacer decoración para espacio gamer / How to make decoration for gamer space
Hello friends, this time I present to you how to make a small decoration for lovers of nfts games and the holozing community or as I myself have named it a three for one, since they are three projects in one.
Materiales / Materials
Este lo realicé en un programa para PC de código gratuito llamado[ flash8 ]
I made this one in a freeware PC program called [flash8]
Proyecto #1 / Project #1
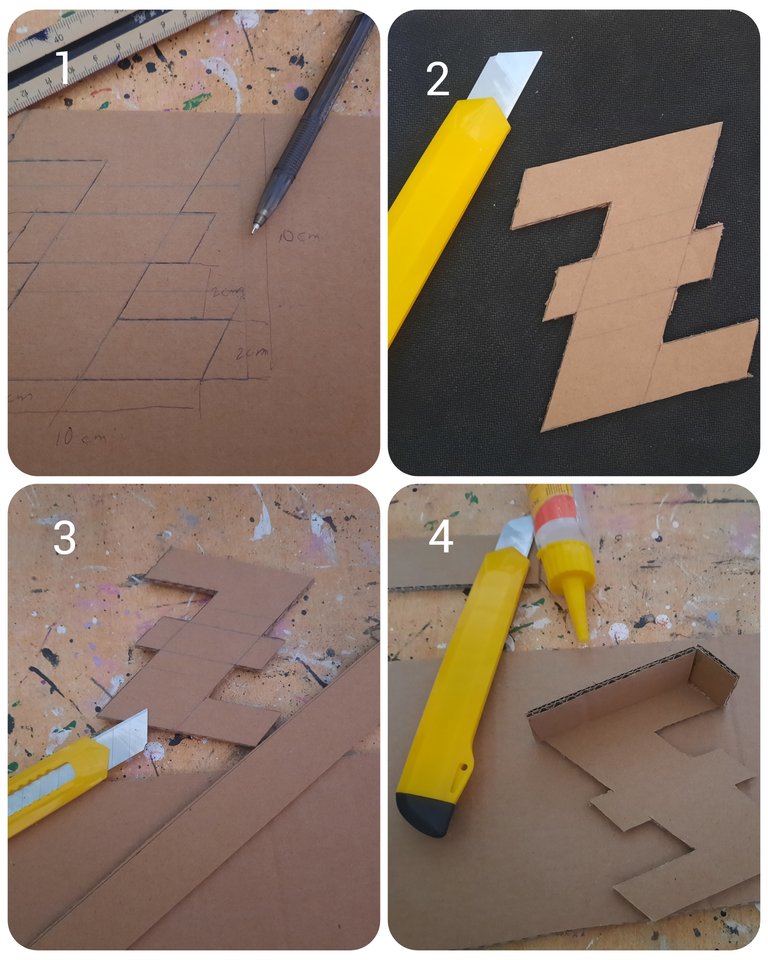
Primero: Dibujé en el cartón la plantilla de la letra z esta tiene un tamaño de 10 x 10 cm,ustedes pueden hacer del tamaño que deseen, lo dejo a su consideración.
First: I drew the template of the letter Z on the cardboard. It has a size of 10 x 10 cm. You can make it whatever size you want, I leave it to your consideration.
Segundo: Corté lo trazado con un cuter teniendo mucho cuidado de no salirme de las líneas.
Second: I cut what I had drawn with a cutter, being very careful not to go outside the lines.
Tercero: Recorte también con el cuter unas tiras de a aprximamadamente 3 cm de ancho, estas me serviran para hacer la letra de forma tridimensional.
Third: I also cut out some strips of approximately 3 cm wide with the cutter. These will help me make the letter in three dimensions.
Cuarto: Fui tomando la medida del contorno de la letra, recortando las tiras y pegandolas a la plantilla.
Fourth: I measured the outline of the letter, cutting out the strips and gluing them to the template.
Este paso se repite hasta tener todos los bordes pegados en su lugar y quedar algo así.
This step is repeated until all the edges are glued in place and it looks something like this.
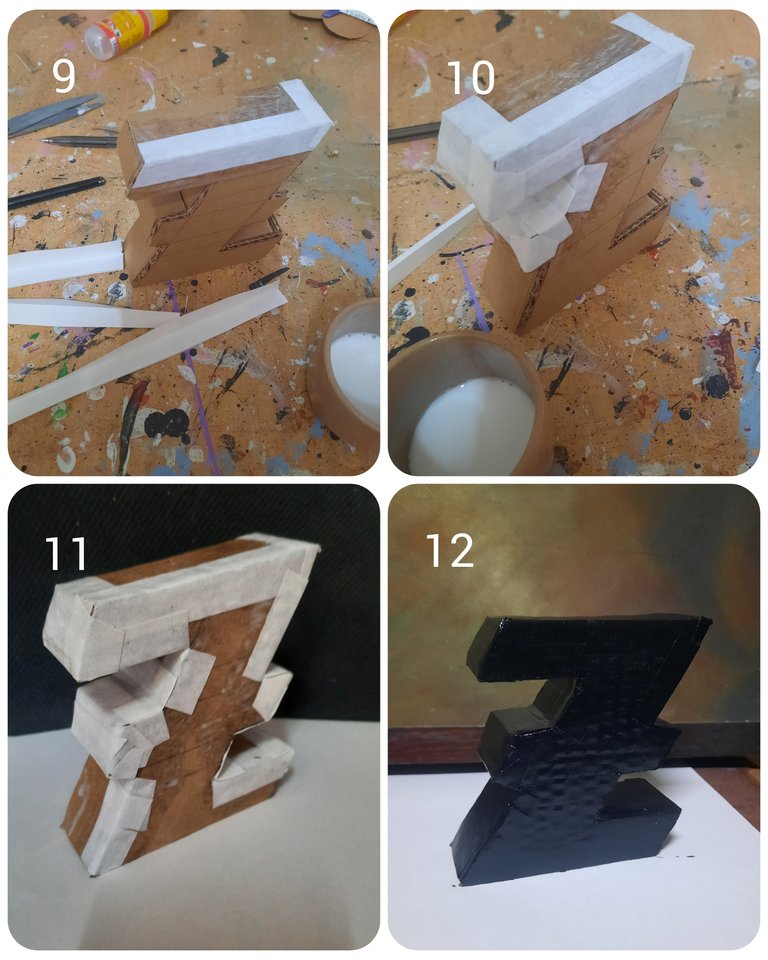
Paso 9,10 y 11: Recorte varias tiras de papel de unos 2 cm y las doble a la mitad para islas pegando poco a poco a los bordes de la pieza y así darle a esta un mejor acabado.
Steps 9, 10 and 11: I cut out several strips of paper about 2 cm long and folded them in half to make the islands, gluing them little by little to the edges of the piece to give it a better finish.
Paso 12 : Pinte la pieza ya seca de negro y después le rocíe con el esprey plateado no muy de serva para que me quede difuminado y le de una apariencia no tan metalizada.
Step 12: Paint the already dry piece black and then spray it with the silver spray, not too much so that it is blurred and gives it a less metallic appearance.
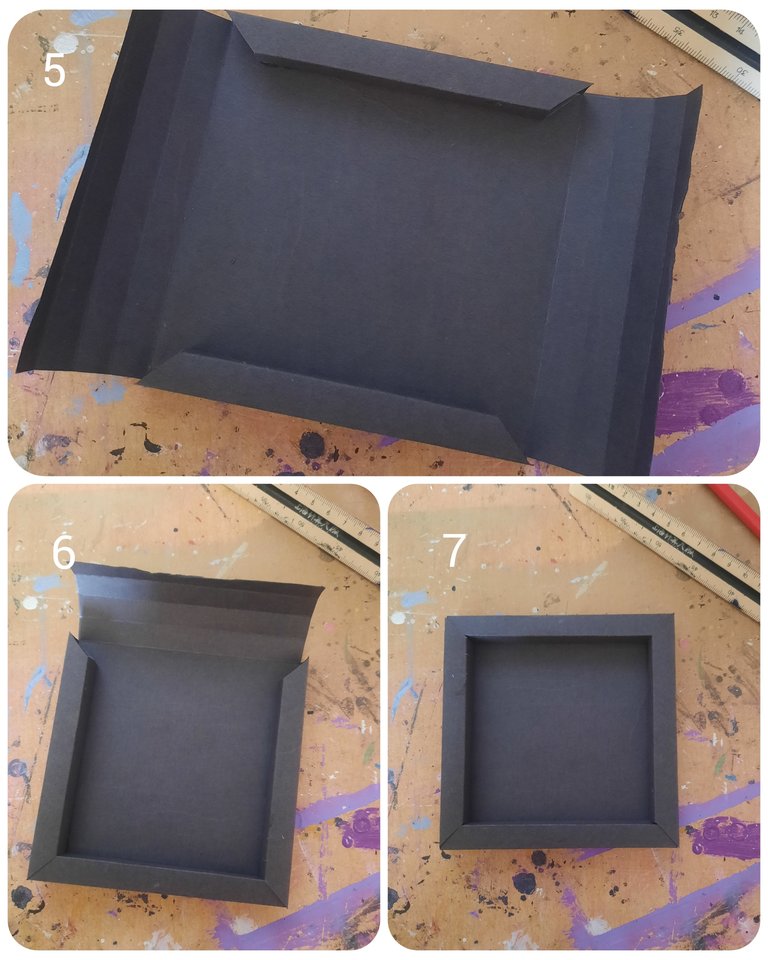
Proyecto #2 / Project #2
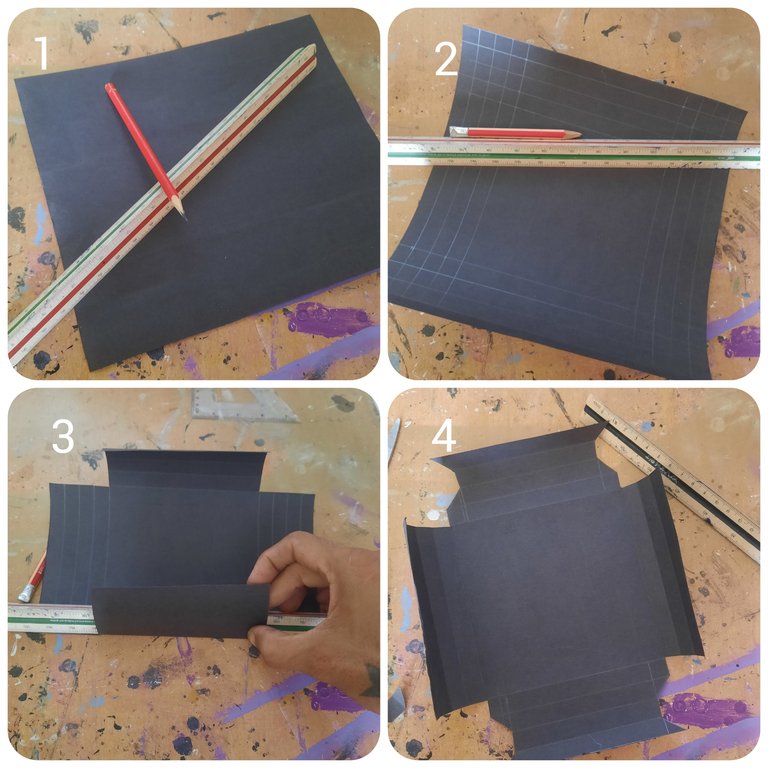
Primero : Recorte una cartulina de color negro a la medida de 22 x 22 cm .
First: Cut a black cardboard to the size of 22 x 22 cm.
Segundo : Marque con la ayuda de la regla y a una distancia de 1 cm 4 líneas paralelas a cada lado de la cartulina.
Second: Using the ruler and at a distance of 1 cm, mark 4 parallel lines on each side of the cardboard.
Tercero: recorte los cuadrados que se hicieron en las esquinas que deben tener una medida de 4 x 4 cm y después con la ayuda de la regla y guiándome por las líneas ya tratadas doble cada parte.
Third: Cut out the squares that were made in the corners, which should measure 4 x 4 cm, and then, using the ruler and following the lines already made, fold each part.
Cuarto : En dos de los lados que estén paralelos recorte desde el borde superior de forma oblicua hasta el sentro es ta especie de exsagono por la mitad.
Fourth: On two of the parallel sides, cut this kind of hexagon in half from the top edge obliquely to the center.
Pasos 5,6 y 7 : Solo queda doblar cada lado y pegarlos a la cara interna de la cartulina. Recuerda siempre hacer estos paso por lados paralelos. Debe quedar así.
Steps 5, 6 and 7: All that remains is to fold each side and glue them to the inside of the cardboard. Always remember to do these steps on parallel sides. It should look like this.
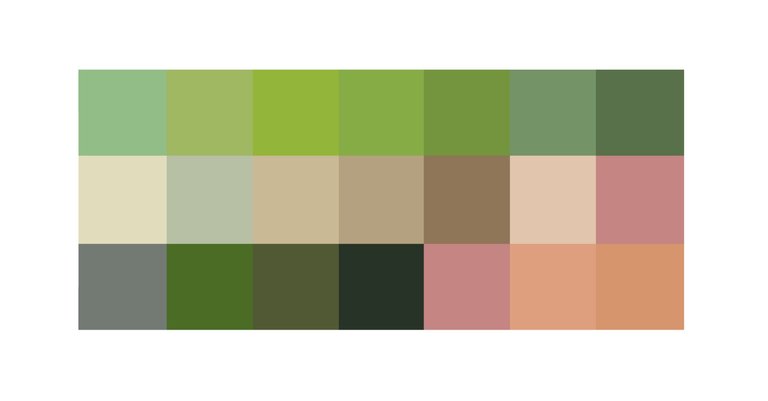
Proyecto #3 / Project #3
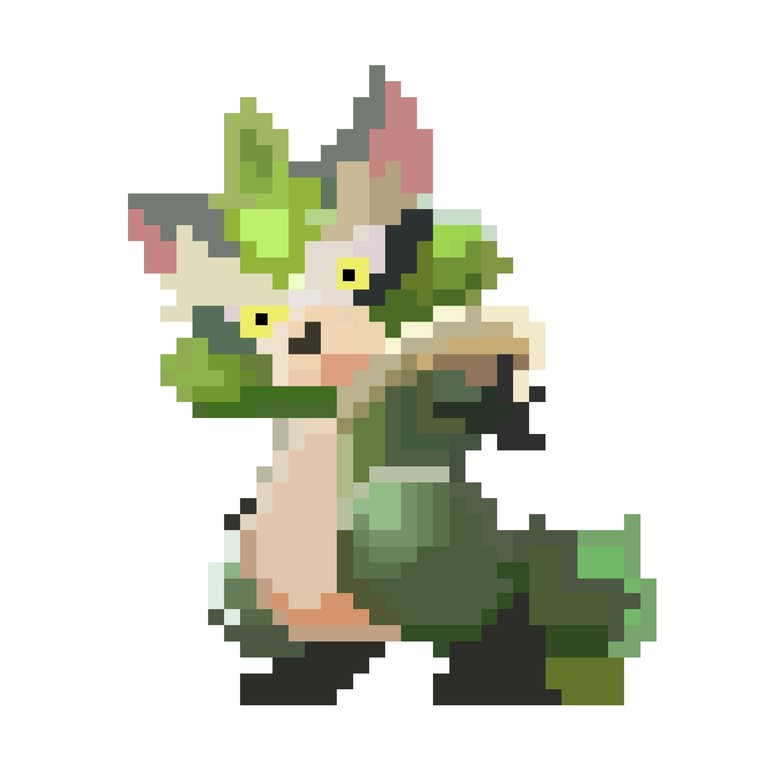
Para hacer a este personaje utilicé como muestra una imagen sacada de la comunidad holozing y me apoyé en un programa para PC aunque hay varias Apk que pueden hacer esto de forma más fácil.
To make this character I used as a sample an image taken from the holozing community and I relied on a PC program although there are several Apk that can do this in an easier way.
Primero: Dibuje una cuadricula la cual tiene una medida de 48 x 48 pixeles y comencé a marcar los bordes del personaje tomando como muestra los colores que posee la imagen de muestra.
First: I drew a grid which has a measurement of 48 x 48 pixels and I began to mark the edges of the character taking as a sample the colors that the sample image has.
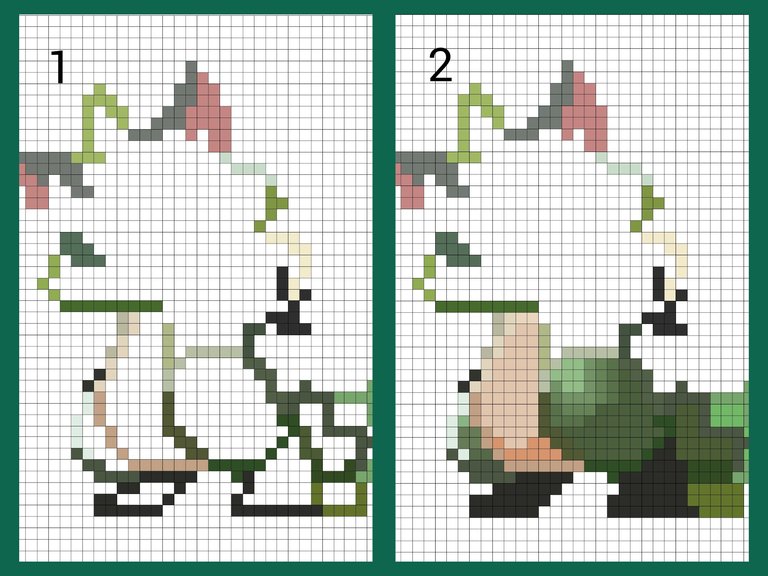
Teniendo ya enmarcado los bordes del mismo fuy dibujando las piernas primero , después las manos y por último la cabeza. Y me quedo este divertido dibujo de WRACKOO.
Having already framed the edges of the same, I drew the legs first, then the hands and finally the head. And I got this fun drawing of WRACKOO.
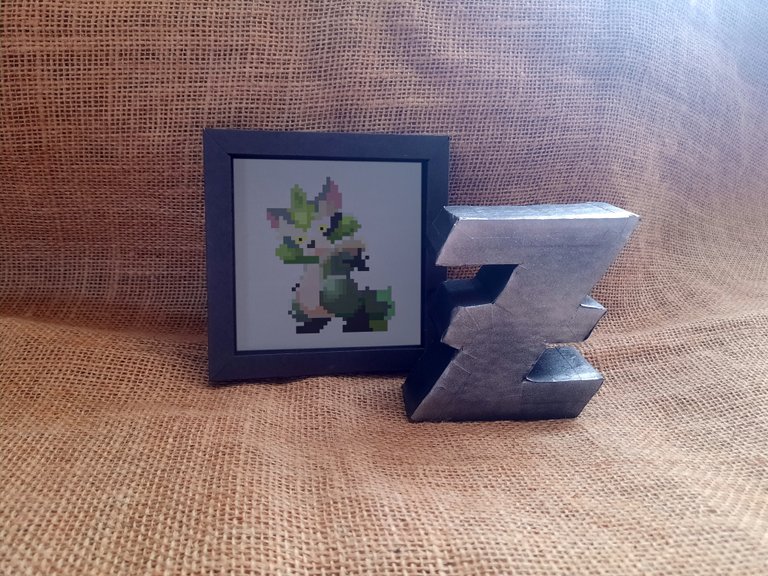
Ya con el dibujo hecho lo imprimí al tamaño de mi marco y conforme esta composición. La cual pueden realizar y decorar su espacio gamer con algo único y hecho por ustedes mismos.
Once I had the drawing done, I printed it to the size of my frame and created this composition. You can make it and decorate your gamer space with something unique and made by yourselves.
Espero les guste.
I hope you like it.
Puede seguirme también por:
You can also follow me on:
https://www.facebook.com/profile.php?id=61571714787079&mibextid=ZbWKwL
Congratulations @dfamilyele3! You have completed the following achievement on the Hive blockchain And have been rewarded with New badge(s)
Your next payout target is 50 HP.
The unit is Hive Power equivalent because post and comment rewards can be split into HP and HBD
You can view your badges on your board and compare yourself to others in the Ranking
If you no longer want to receive notifications, reply to this comment with the word
STOPCheck out our last posts: