Tejiendo un regalo especial para una amiga/ Knitting a special gift for a friend(ESP/ENG)
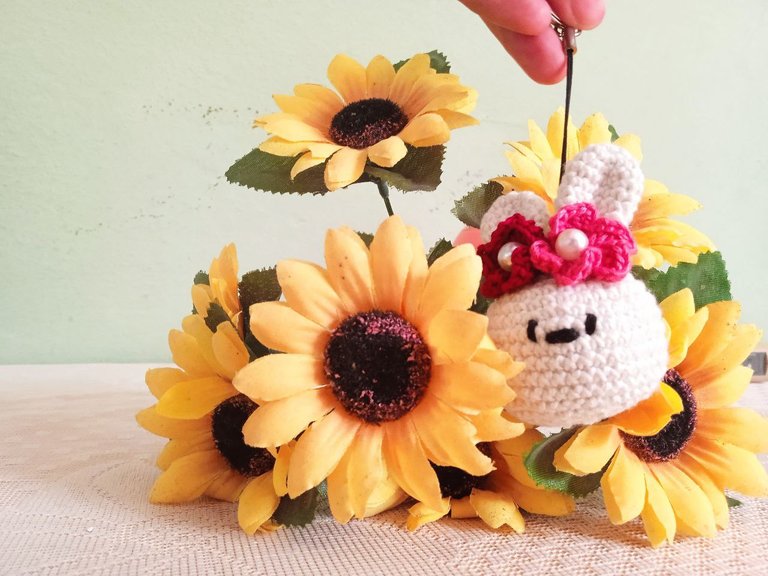
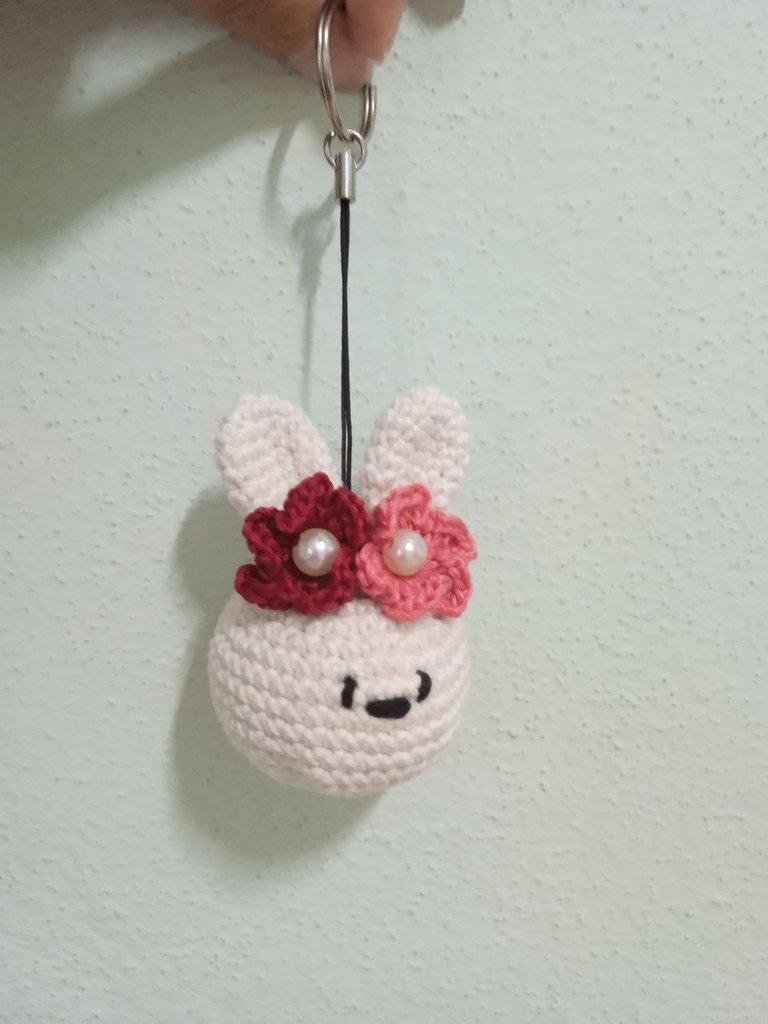
Hola a todos, hace poco una amiga estuvo de cumpleaños y le decidí crear un pequeño regalo. A ella le encantan las cosas tejidas y, por lo tanto, le estuve haciendo un pequeño llavero tejido en forma de conejito adornado con flores.
En esta ocasión les estaré compartiendo el paso a paso de como lo estuve realizando para que también puedas hacerlo después.
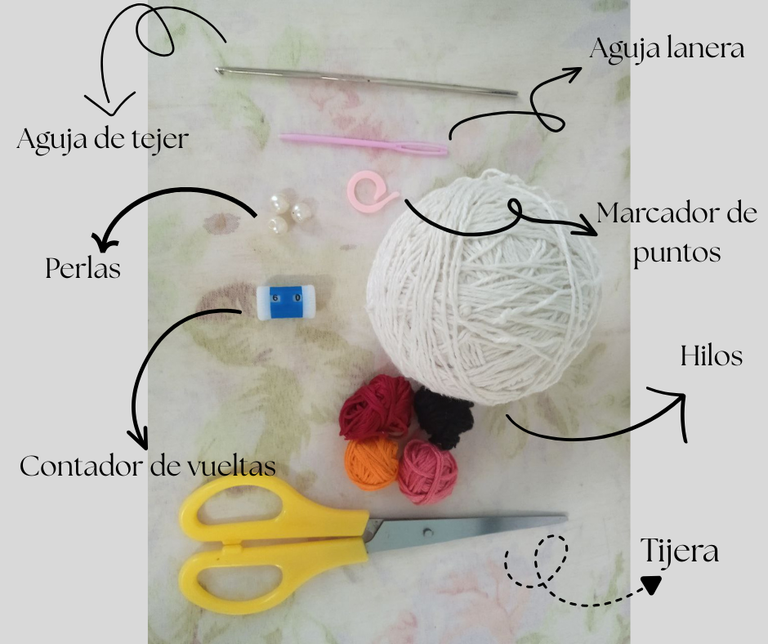
Primeramente, hay que buscar los materiales que se utilizarán:
🧶Hilo
🌸Para el cuerpo y las orejas del conejo yo usé hilo de estambre fino de color blanco, pero se puede usar cualquier tipo, grosor o color de hilo que prefieras.
🌸Para las flores usé hilo de bordar grueso de color rosa y rojo, igualmente puede ser de cualquier tipo o color
🌸Para bordar los ojos usé hilo fino negro, o si tienes ojos para amigurumis puedes usarlos igual.
🪡Aguja o crochet
Aguja de tejer o crochet de 2.10 mm, puedes usar la aguja que más se adapte al hilo que se está utilizando
✂️Tijeras
🪡Aguja lanera
✔️Marcador de puntos (o algo para marcar los puntos)
🧮Contador de vueltas (si no tienes usar algo para escribir las vueltas que vas tejiendo)
⚪Perlas (opcional)
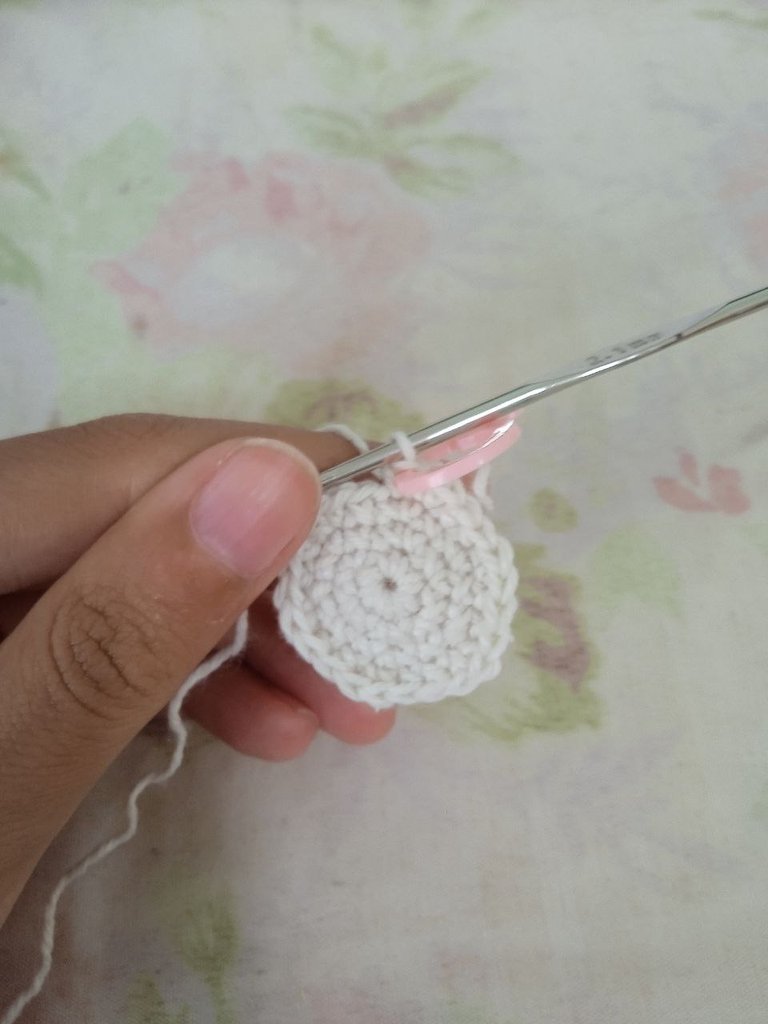
V2 - En la siguiente vuelta realizaremos aumentos por cada puto bajo disponible, para realizar un aumento se tejen dos puntos bajos por cada un punto bajo, al concluir debe quedar 12 putos bajos marcamos el final con un marcador de puntos y usamos el contador de putos para indicar que estamos en la vuelta 2.
V3- Para la tercera vuelta corresponde hacer un punto bajo y luego un aumento por cada punto disponible, al finalizar la vuelta deben quedar 18 puntos bajos, en cada final de vuelta marcamos con el marcador de puntos y aumentamos el número en el contador para no perder la continuidad de las vueltas.
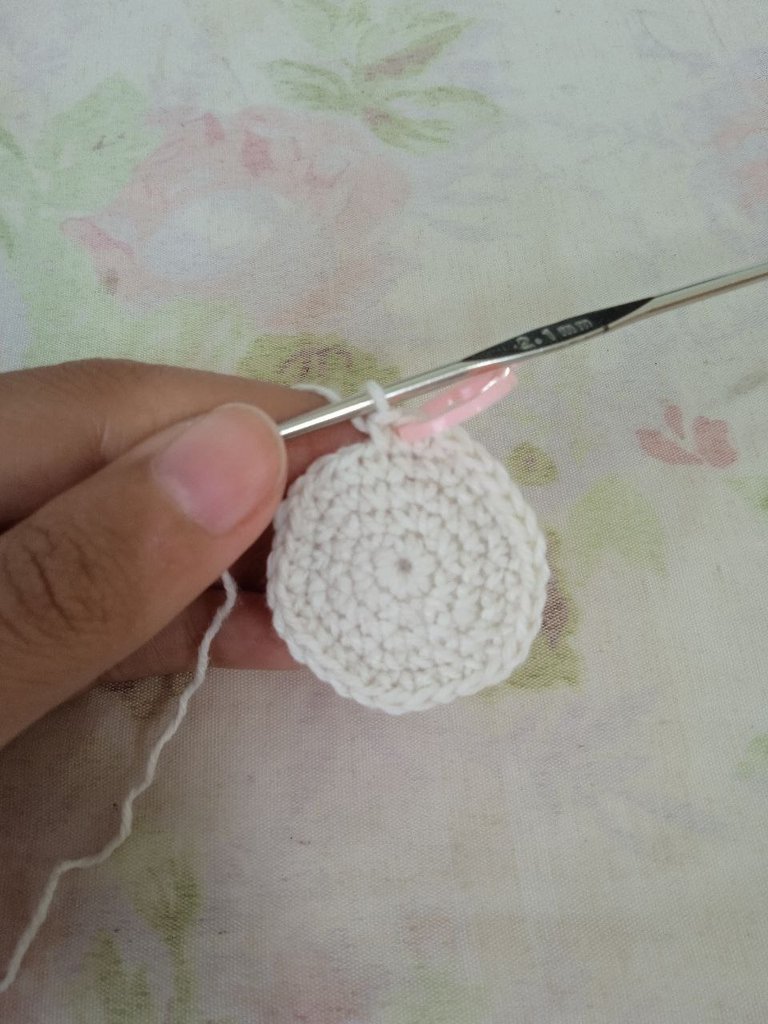
V4 - Luego en vuelta 4 se tejen 1 punto bajo, un aumento y un punto bajo por cada punto disponible, siguiendo esta secuencia 6 veces, al finalizar deben quedar 24 puntos bajos.
V5 - En la vuelta 5 se tejen 3 puntos bajos y luego un aumento por cada punto bajo disponible, al concluir la vuelta deben quedar 30 puntos bajos.
V6 - En esta vuelta se tejen 2 puntos bajos, 1 aumento y 2 puntos bajos por cada punto bajo disponible, siguiendo esta secuencia 6 veces, al final deben quedar 36 puntos bajos.
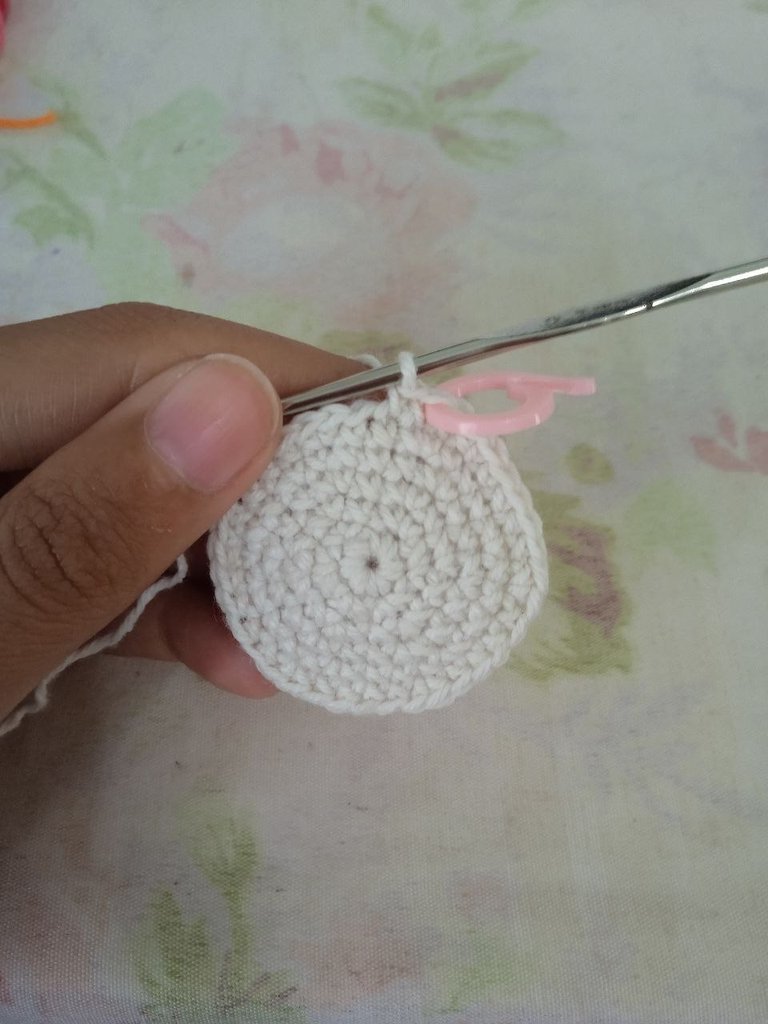
V7 - En esta vuelta se tejen 5 puntos bajos y 1 aumento por cada punto bajo disponible, quedando al final 42 puntos bajos.

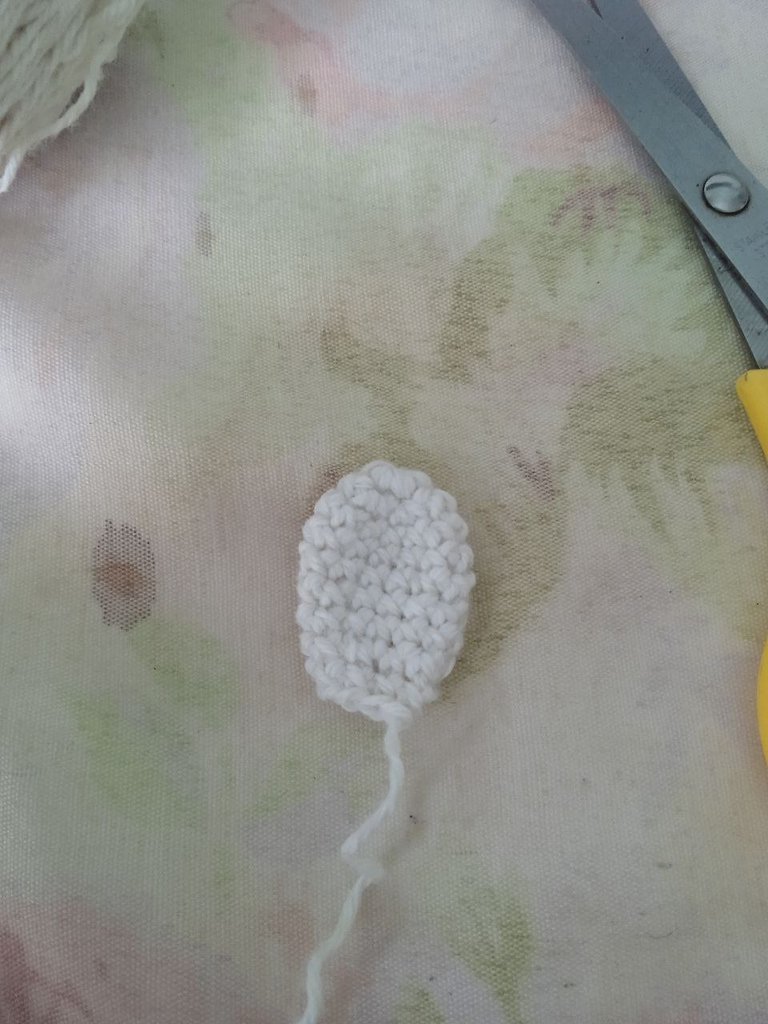
V8 - V10 - Desde la vuelta 8 hasta la 10 se tejen 1 punto bajo en cada punto disponible manteniendo la cantidad de 42 puntos bajos, en esta parte, como en todas, es muy importante llevar el conteo de las vueltas que se estén realizando y marcar correctamente el final de la vuelta.
V11 - En esta vuelta se tejen primero 10 puntos bajos y luego se teje 3 veces la secuencia 1 punto bajo y 1 aumento, al finalizar esta secuencia se teje nuevamente 10 puntos bajos, luego se teje 3 veces la secuencia 1 aumento y luego 1 punto bajo, finalizando con 10 puntos bajos. Al final se realizaron 48 puntos bajos en esta vuelta.
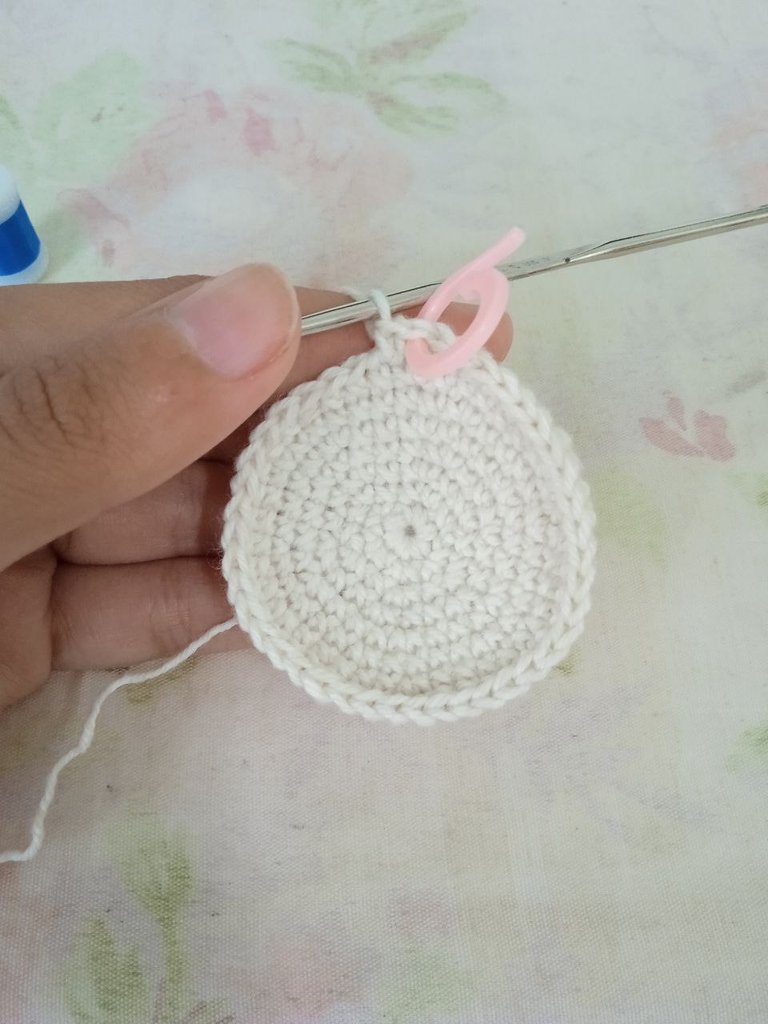
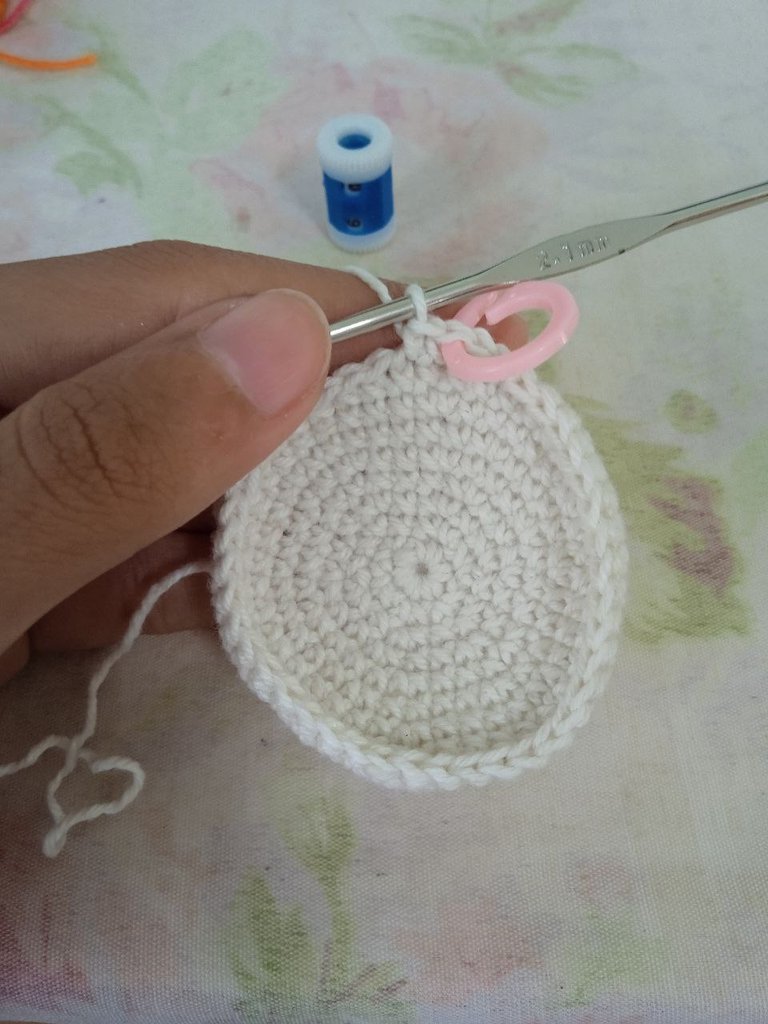
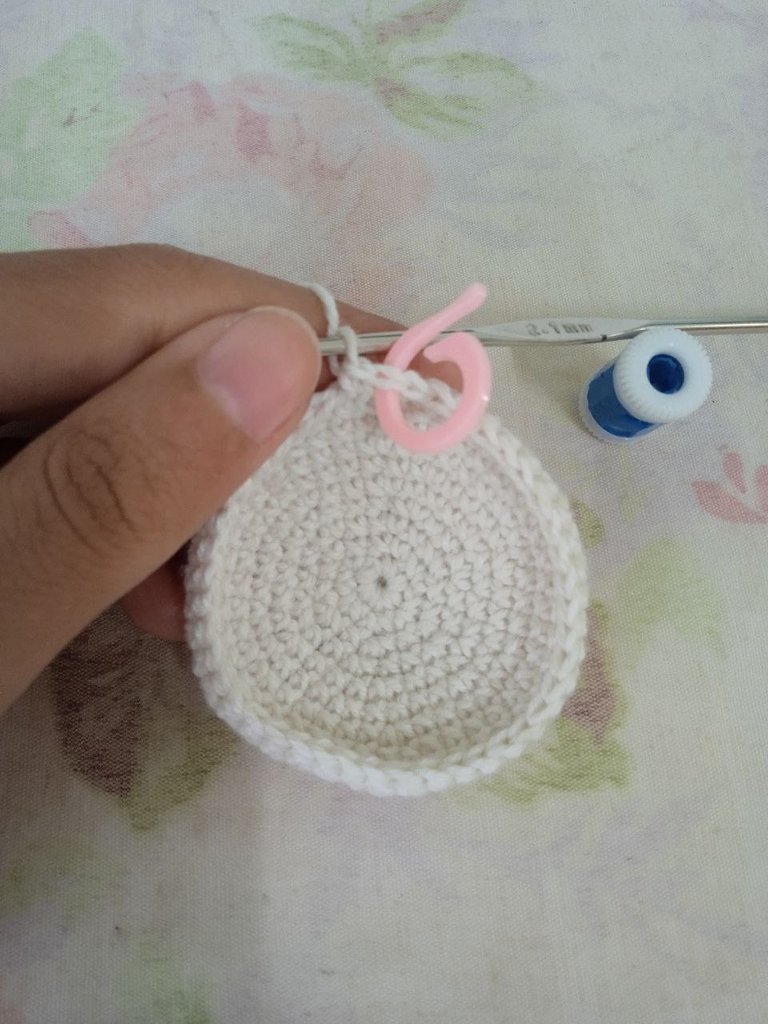
V12 - Ahora se tejen 48 puntos bajos por cada punto disponible.
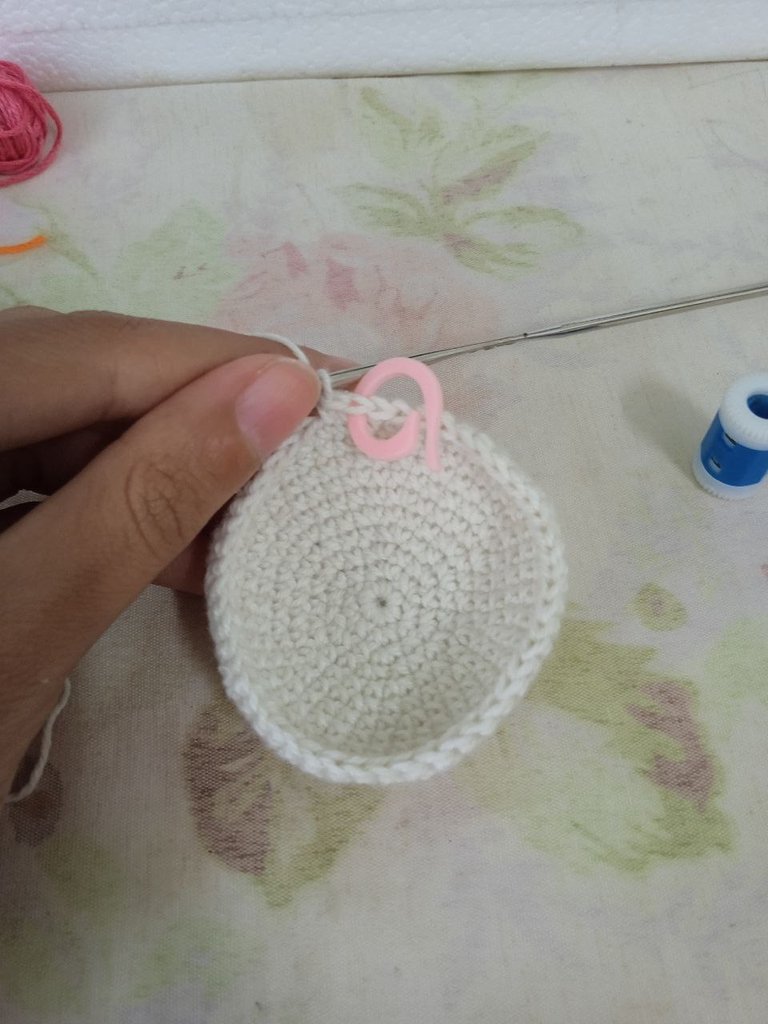
A partir de esta vuelta se tejen disminuciones en vez de aumentos.
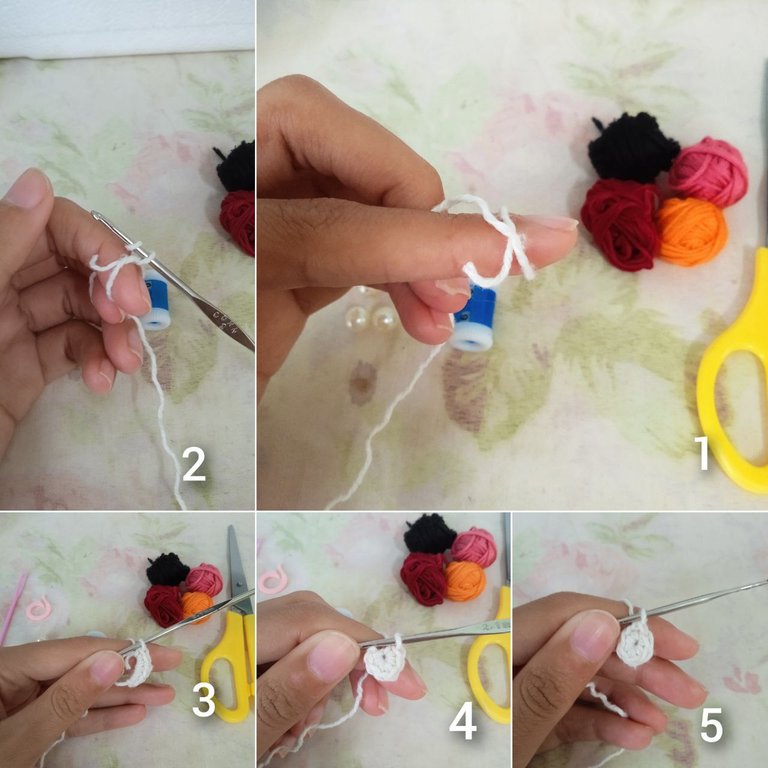
¿Cómo hacer las disminuciones?
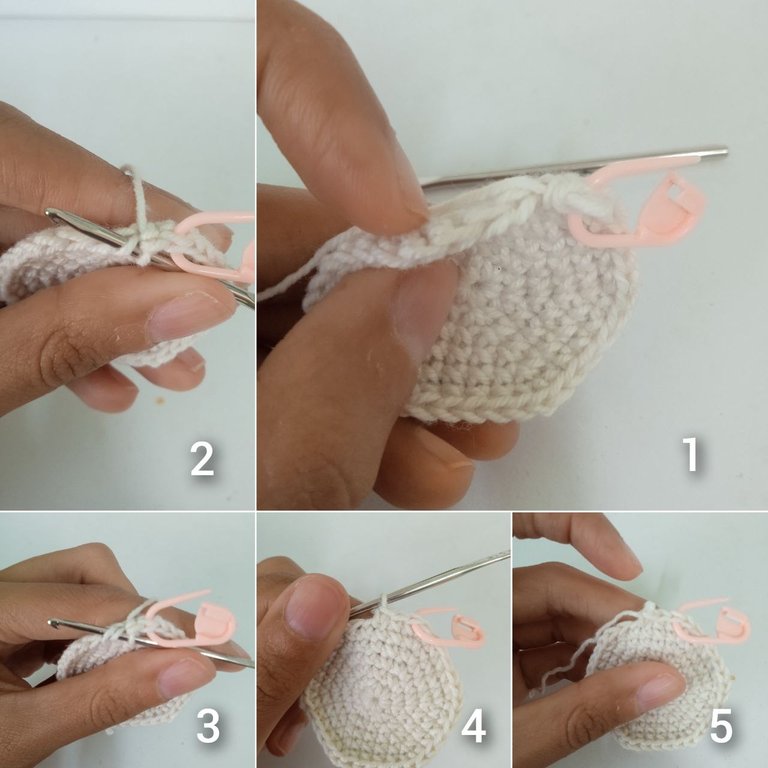
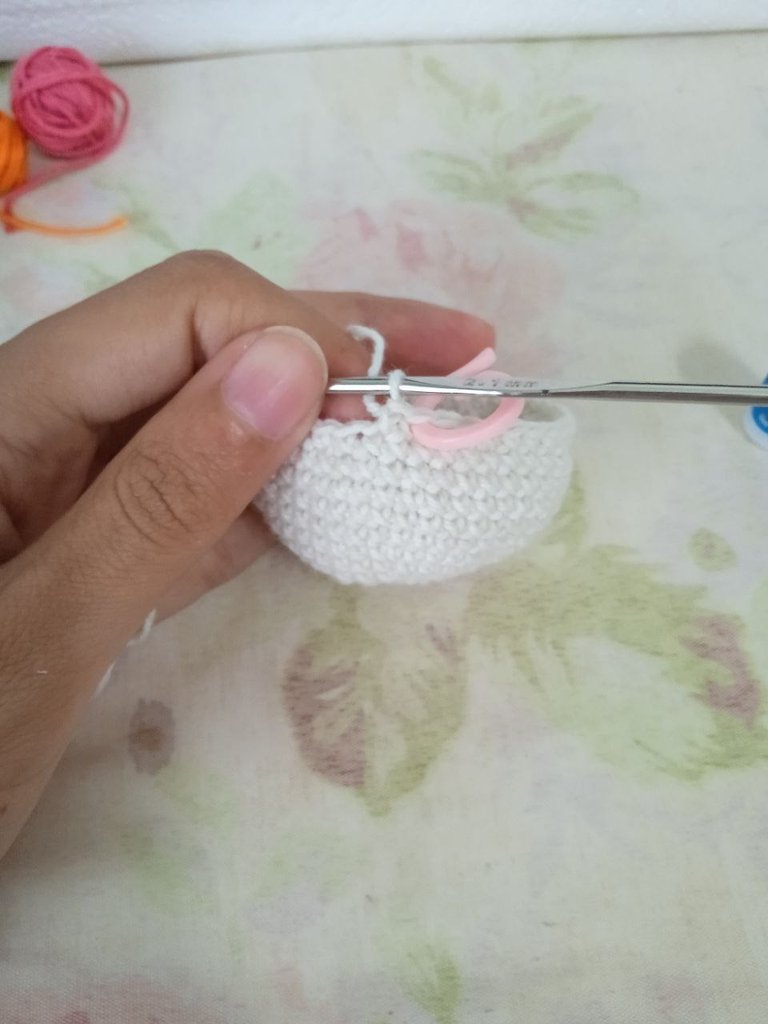
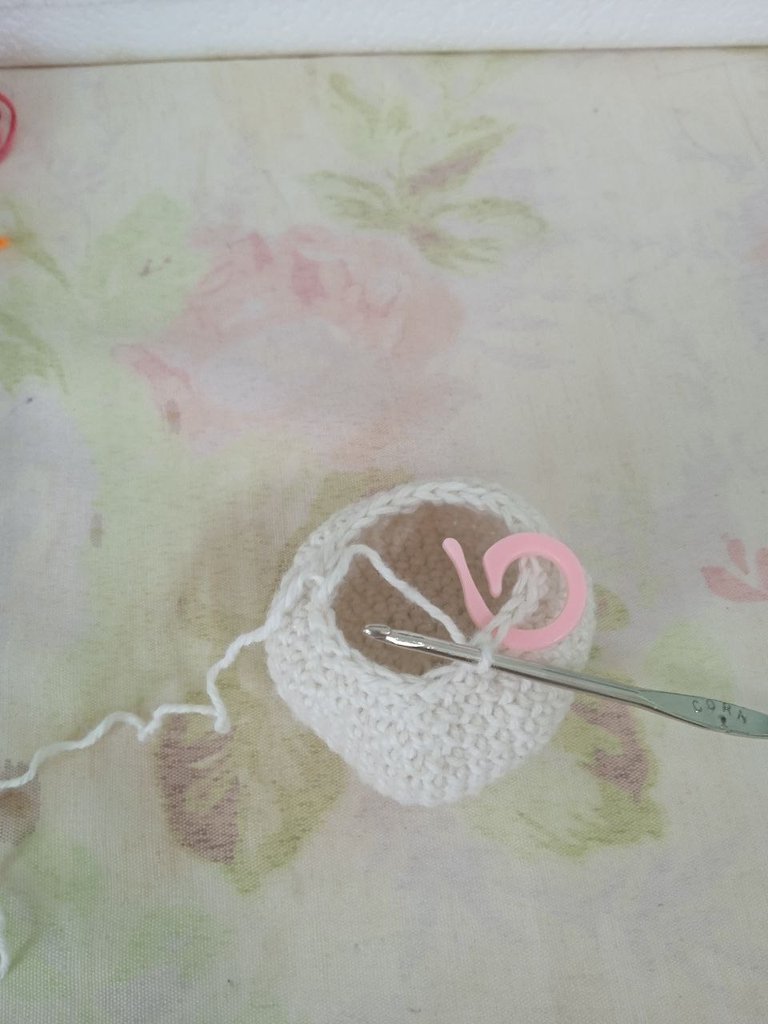
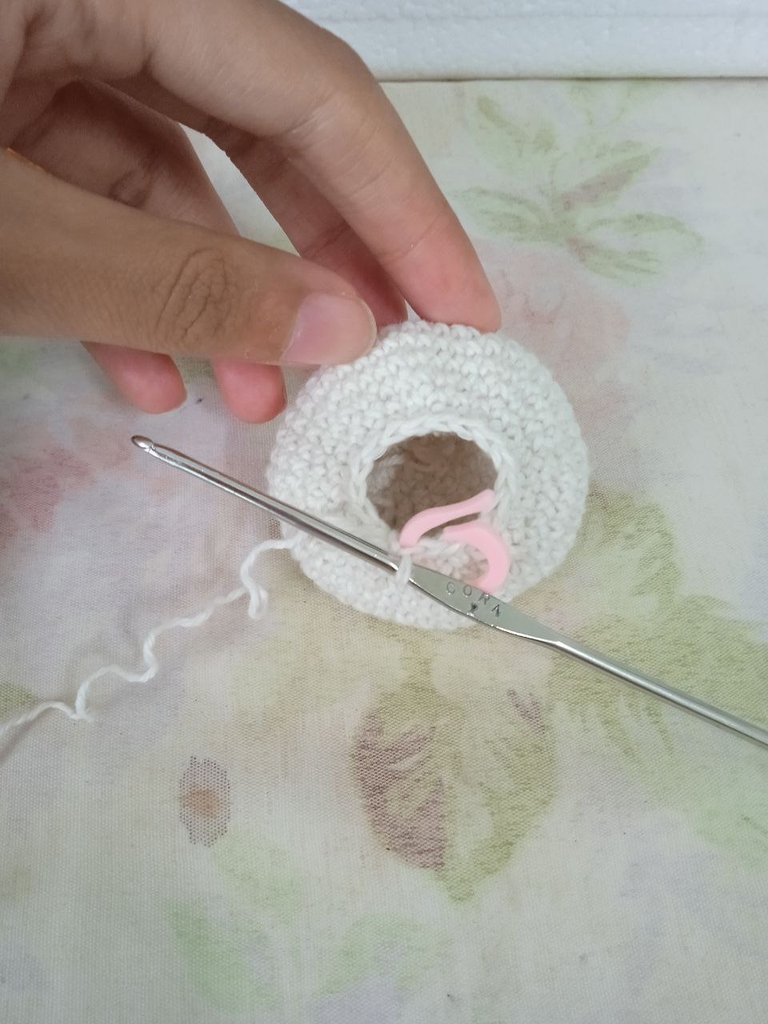
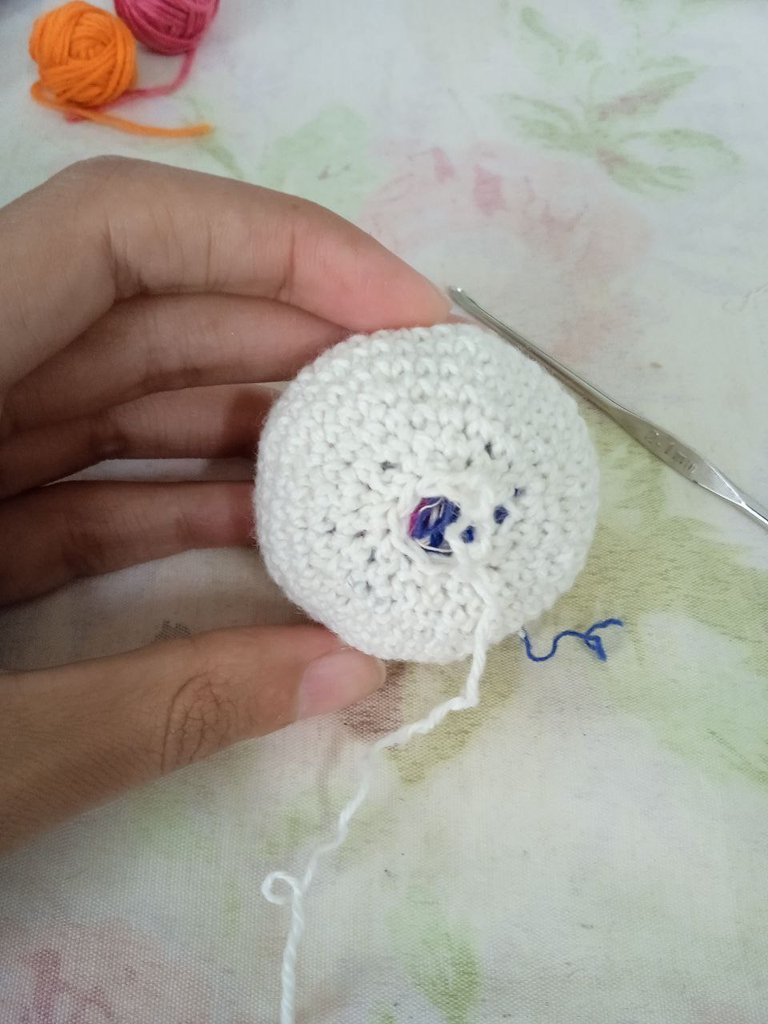
Las disminuciones pueden ser difíciles de realizar, primero nos damos cuenta de que un punto bajo está compuesto por una cadena que posee dos hilos, uno que da para el frente y otro para atrás(1).
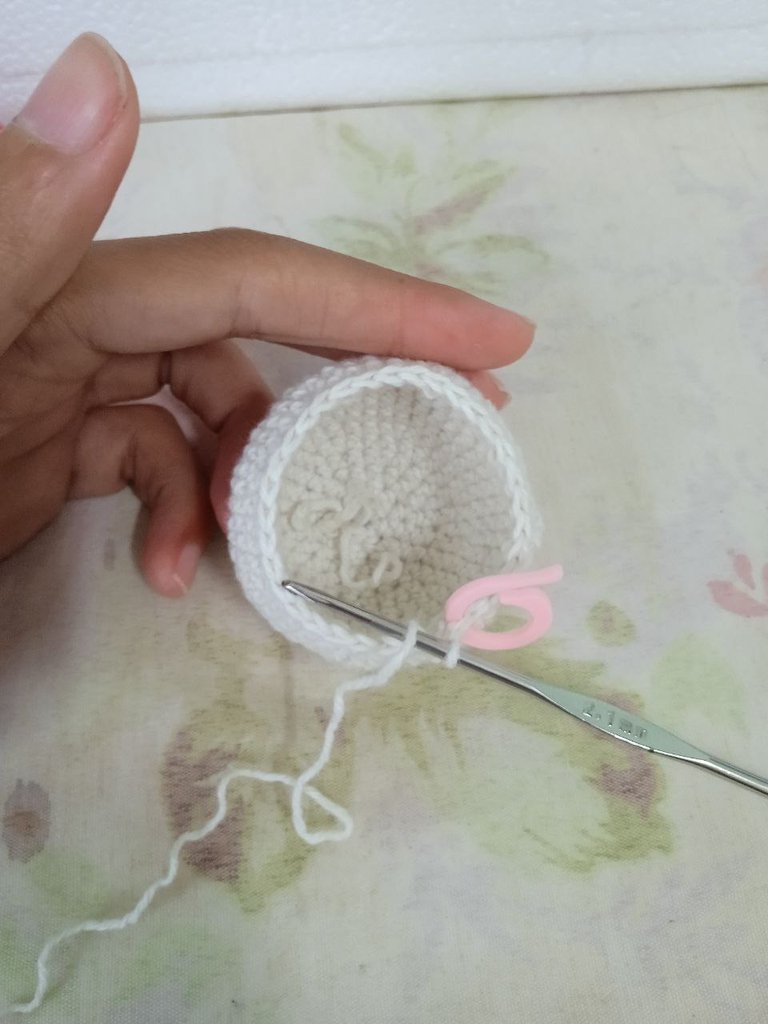
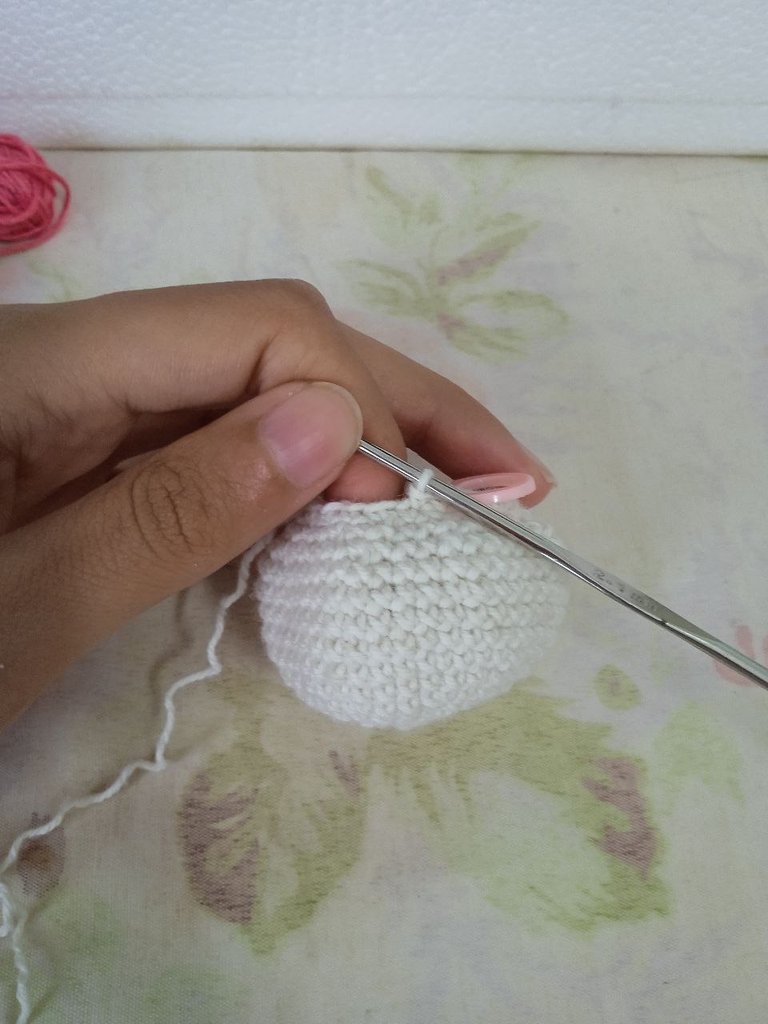
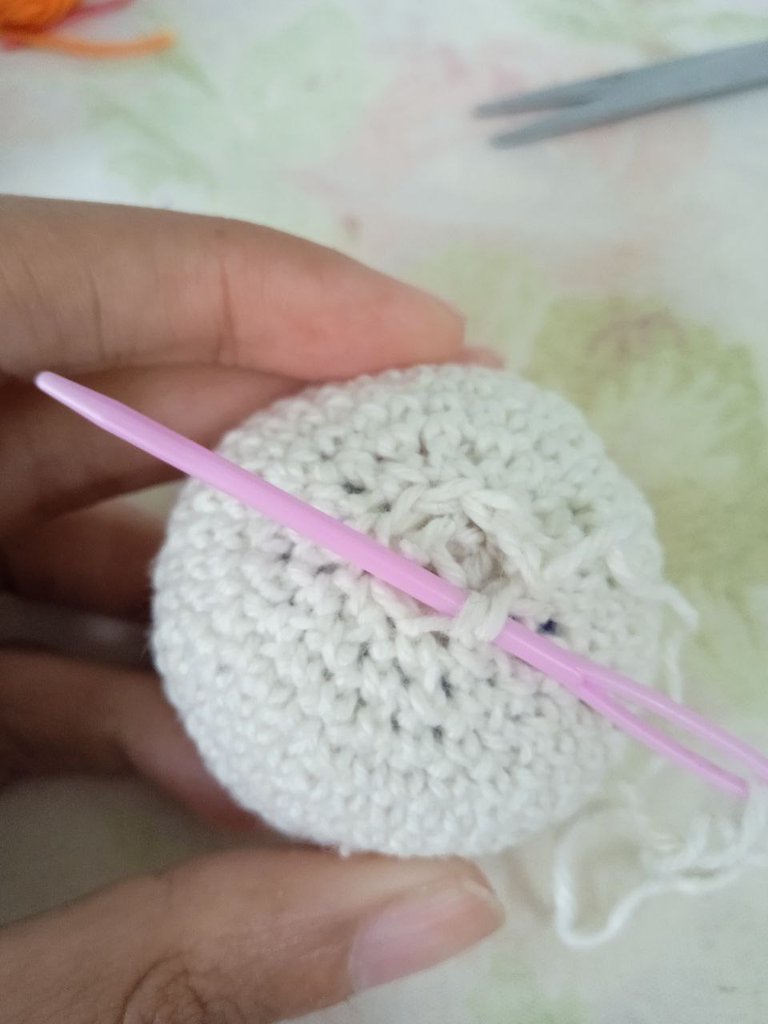
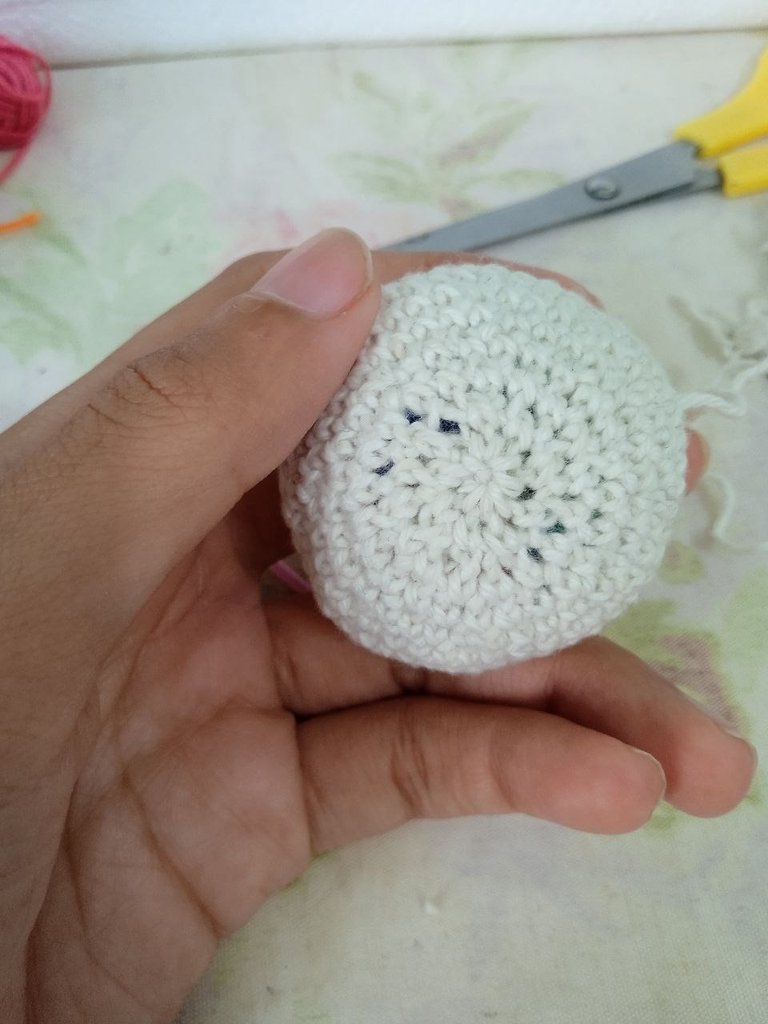
Para ello se toma con el crochet o la aguja de tejer desde el hilo que está al frente(2). Luego se vuelve a introducir la aguja por el hilo del frente del siguiente punto bajo(3). Una vez realizado esto se hace el punto bajo pasando el hilo por ambos aros del punto(4)(5).
V13 - En esta vuelta se tejen primero 2 puntos bajos y luego 1 disminución y luego 2 puntos bajos, siguiendo esta secuencia 8 veces. Al final quedan 36 puntos bajos en total.
V14 - En esta vuelta se tejen primero 3 puntos bajos y luego 1 disminución, siguiendo esta secuencia 8 veces, para un total de 30 puntos bajos al finalizar esta vuelta.
V15 - Ahora se tejen 1 punto bajo, 1 disminución y 1 punto bajo, siguiendo esta secuencia 8 veces, para un total de 24 puntos bajos.
V16 - En esta vuelta se tejen 1 punto bajo y 1 disminución, repitiendo esto 8 veces, para un total de 18 puntos bajo.
Rellenar
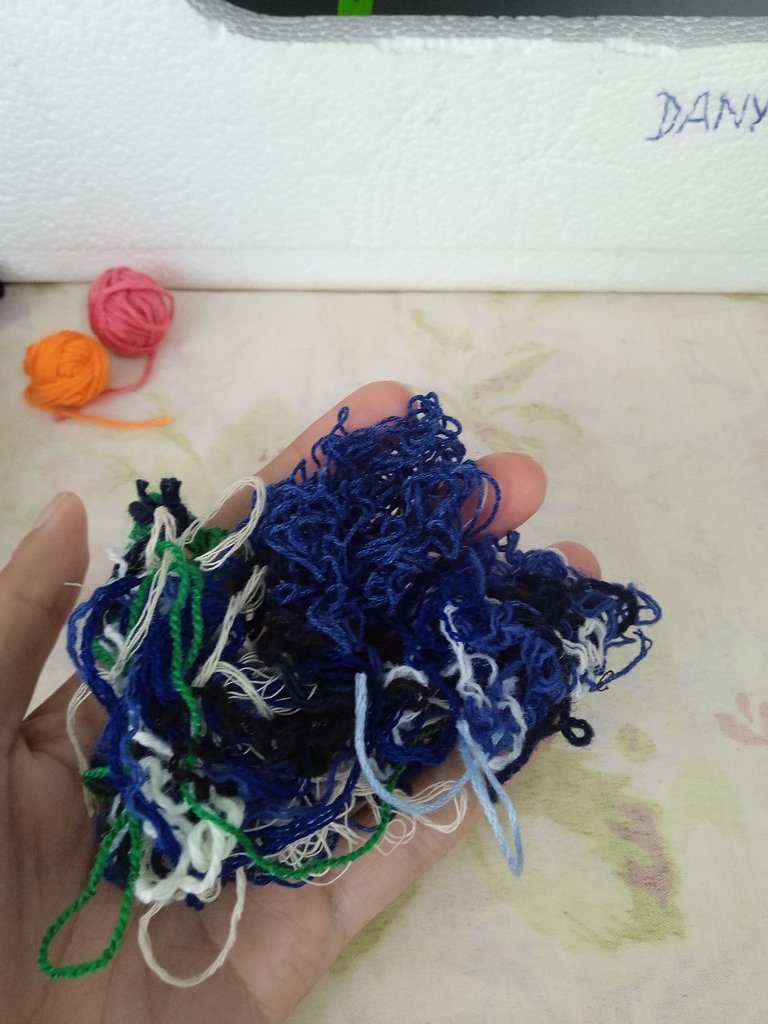
Al concluir esta vuelta se debe rellenar el cuerpo del conejo, se puede usar para hacerlo retrasos de hilo de antiguas creaciones, como hice en mi caso, o puede ser con algodón y pedazos de tela cortado, bien finos, tener en cuenta que se debe rellenar bien para que le dé firmeza al amigurumi.
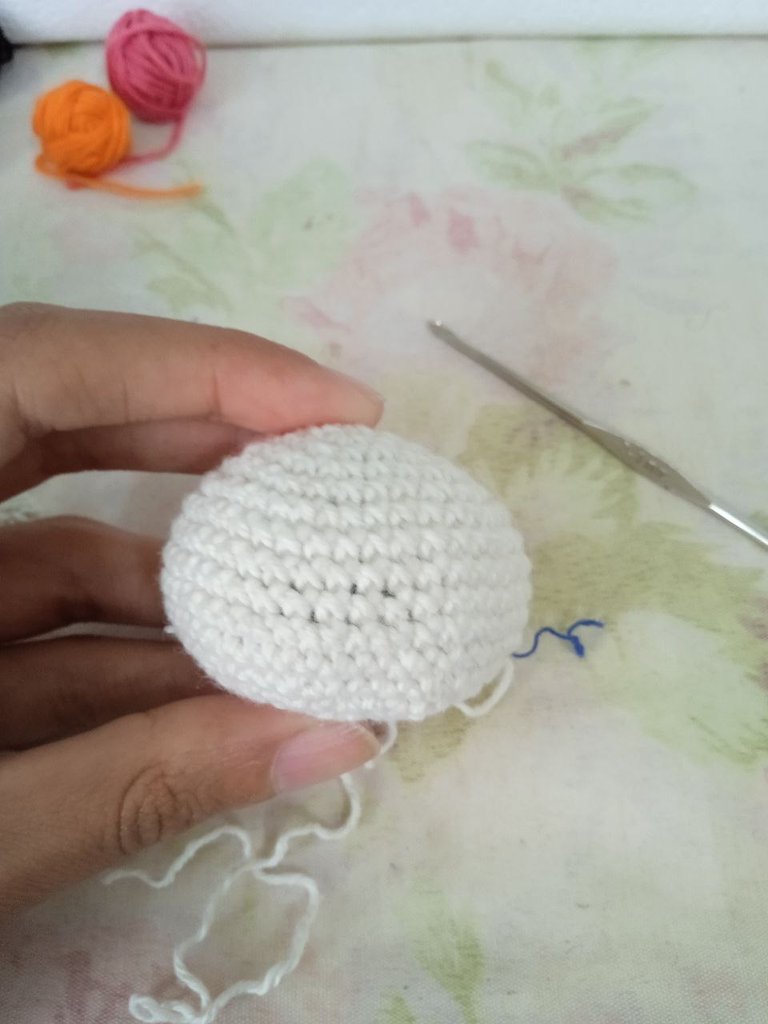
V17 - Ahora se tejen 8 disminuciones para un total de 12 puntos bajos al concluir esta vuelta.
V18 - En la última vuelta es más fácil realizarla con una aguja lanera, te debe tejer como lo hiciéramos con la aguja de tejer y cociéramos algo 4 disminuciones, quedando al final 6 puntos bajos.
Orejas
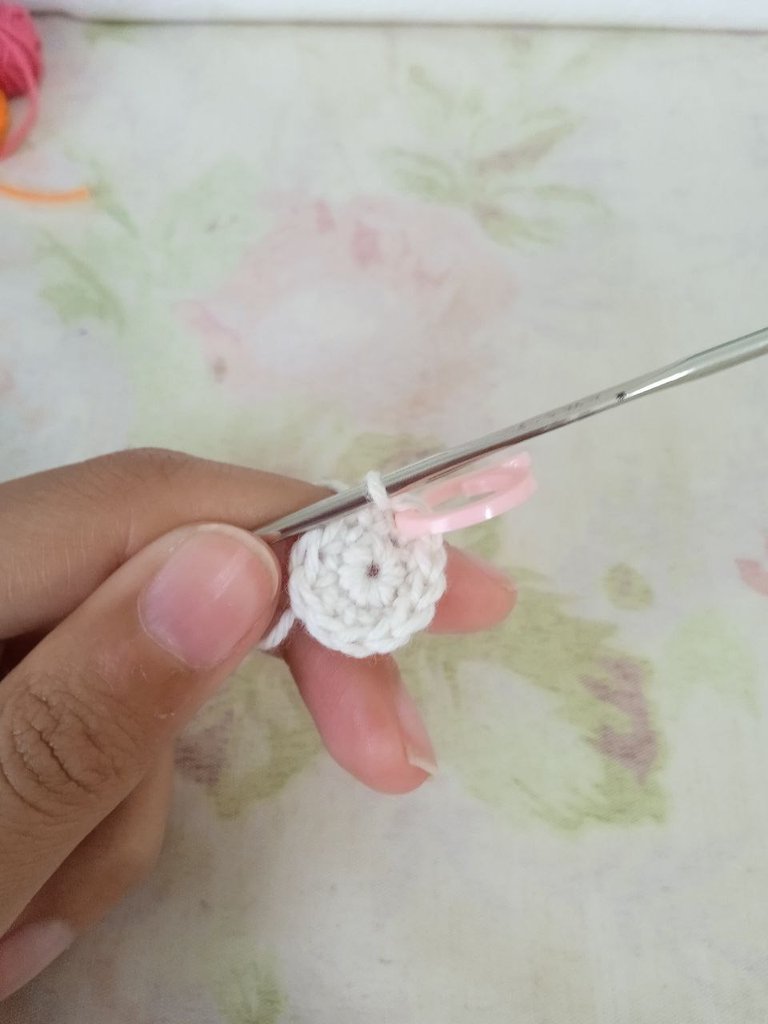
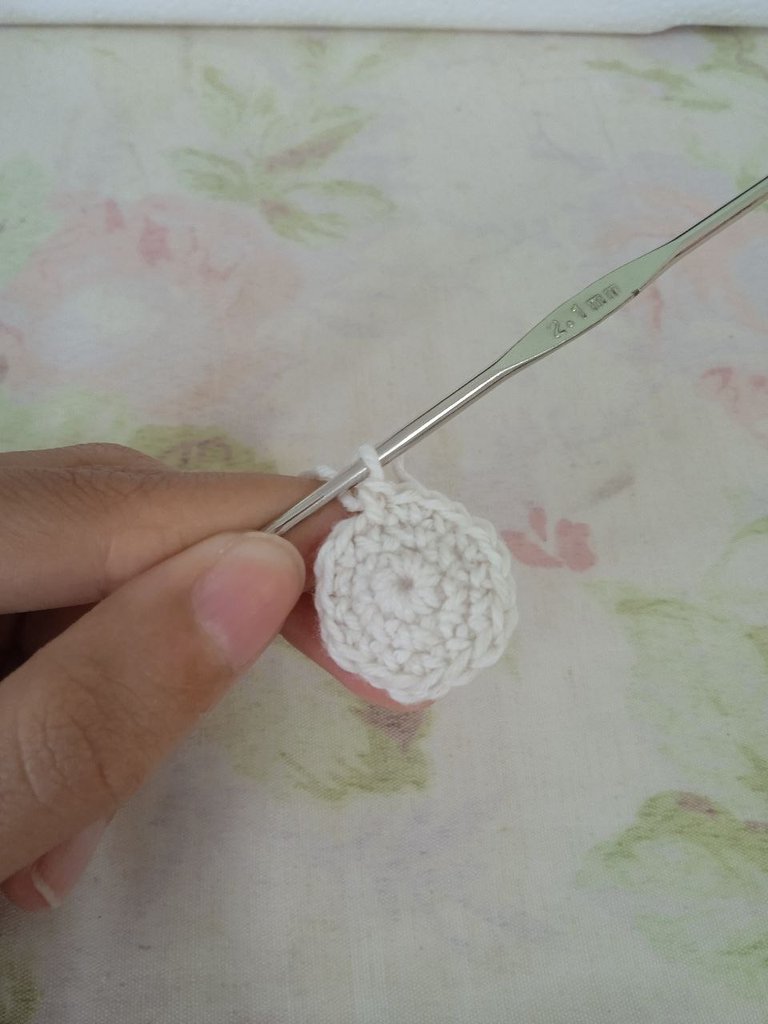
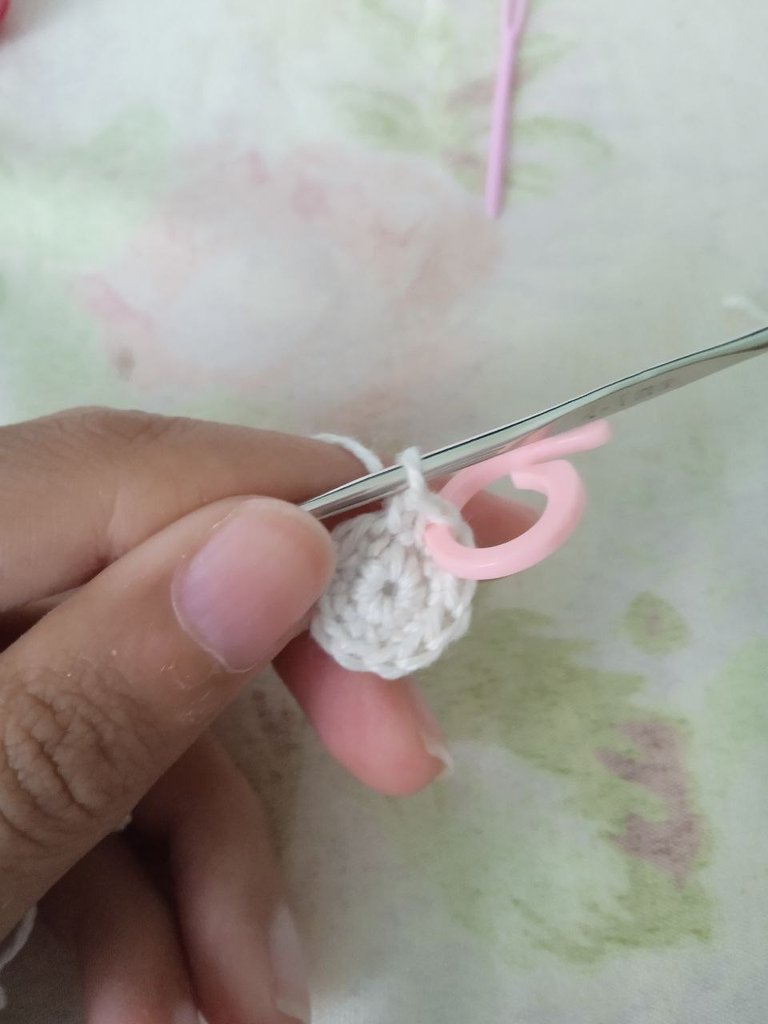
V1 - En la primera vuelta se teje un anillo mágico sobre el cual se tejen 6 puntos bajos y unir con punto deslizado al primero.
V2 - En esta vuelta se tejen 1 aumento en cada punto disponible, quedando al final 12 puntos bajos.
V3-V7 - Ahora se teje 1 punto bajo en cada punto disponible, quedando un total de 12 puntos bajos.
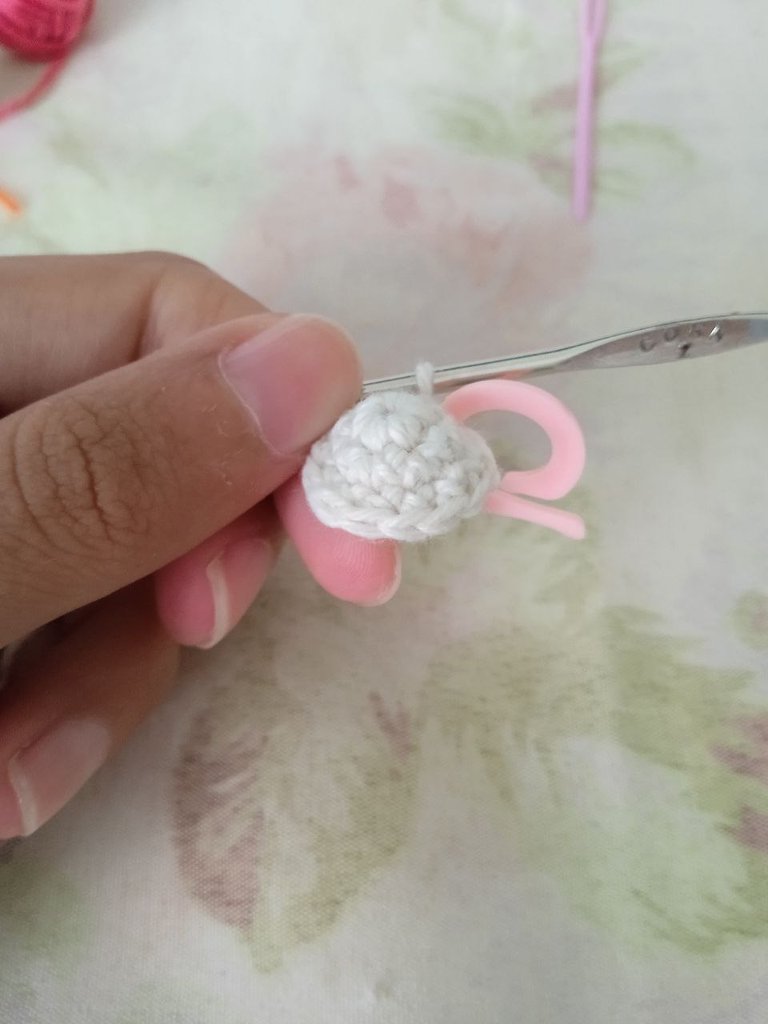
V8 - En esta vuelta se teje en secuencia de 3, 2 puntos bajos y 1 disminución para un total de 9 puntos bajo.
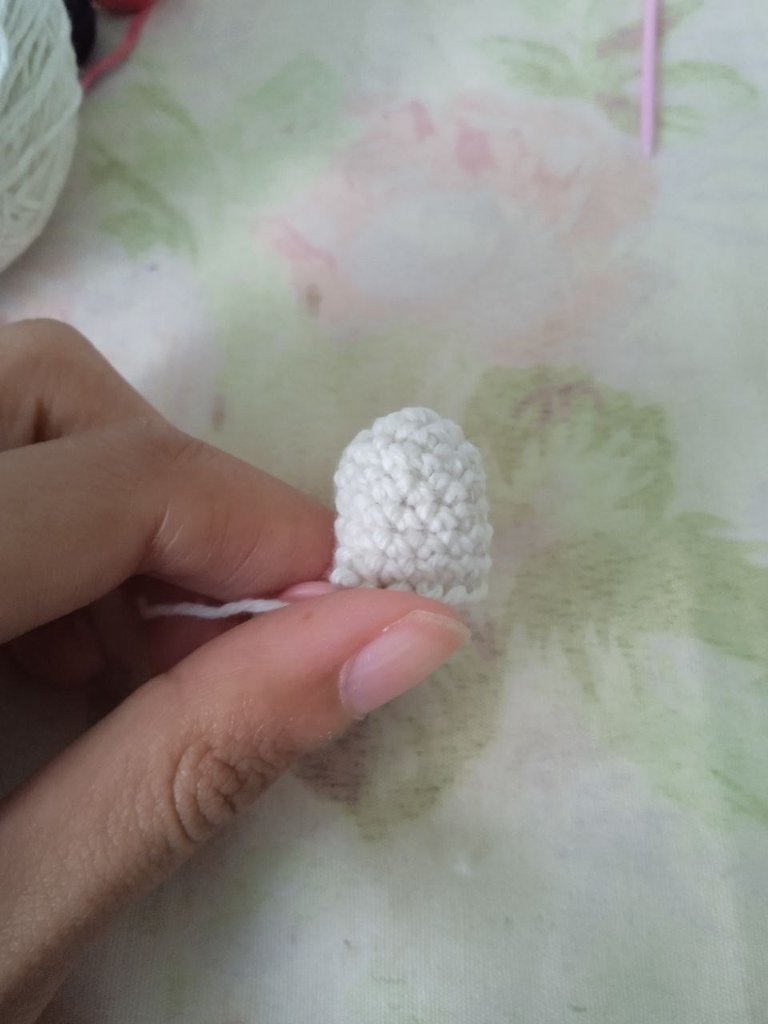
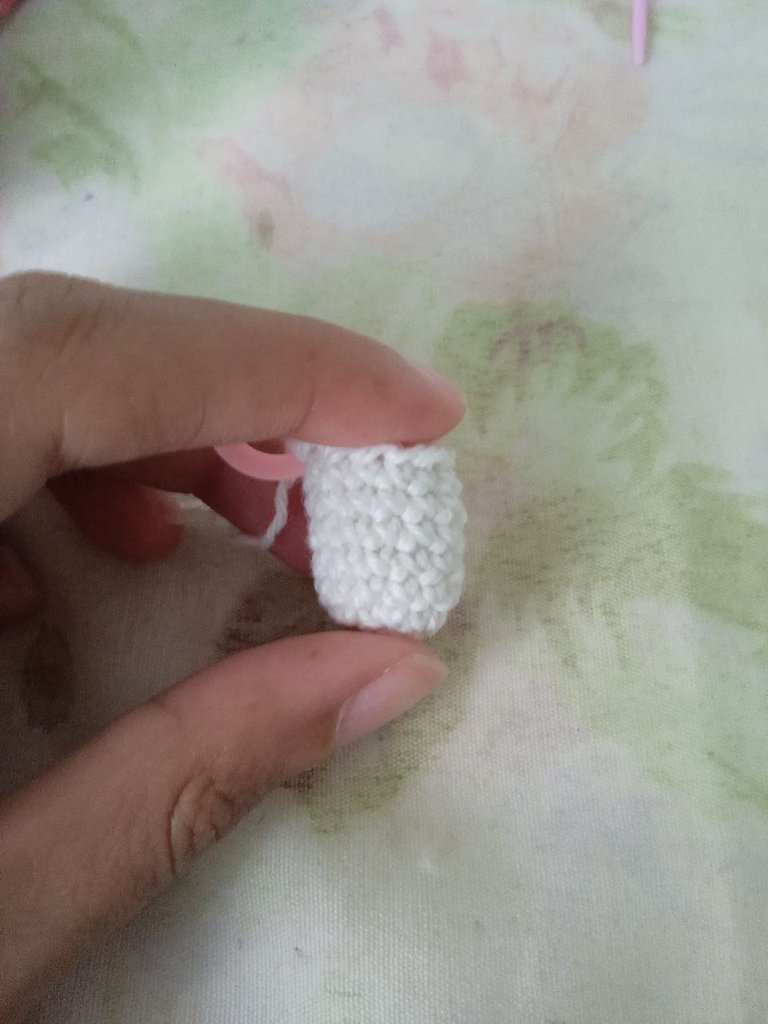
V9-V10 - En estas vueltas se tejen 1 punto bajo sobre cada punto disponible, al final quedando 9 puntos bajos.
Se deben hacer dos orejas iguales.
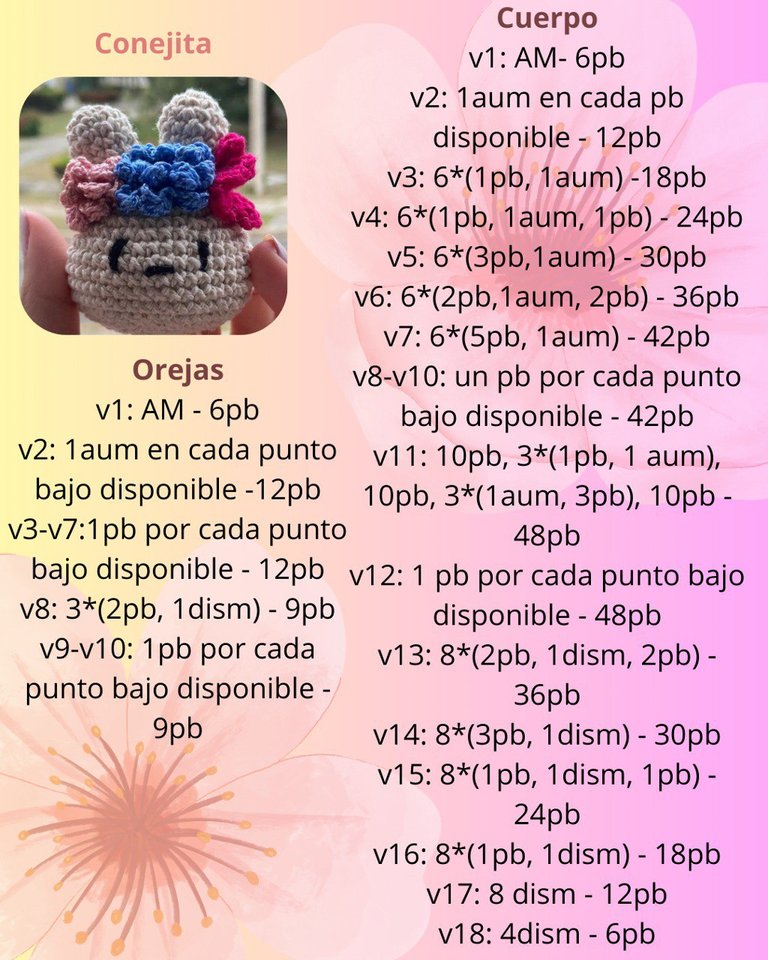
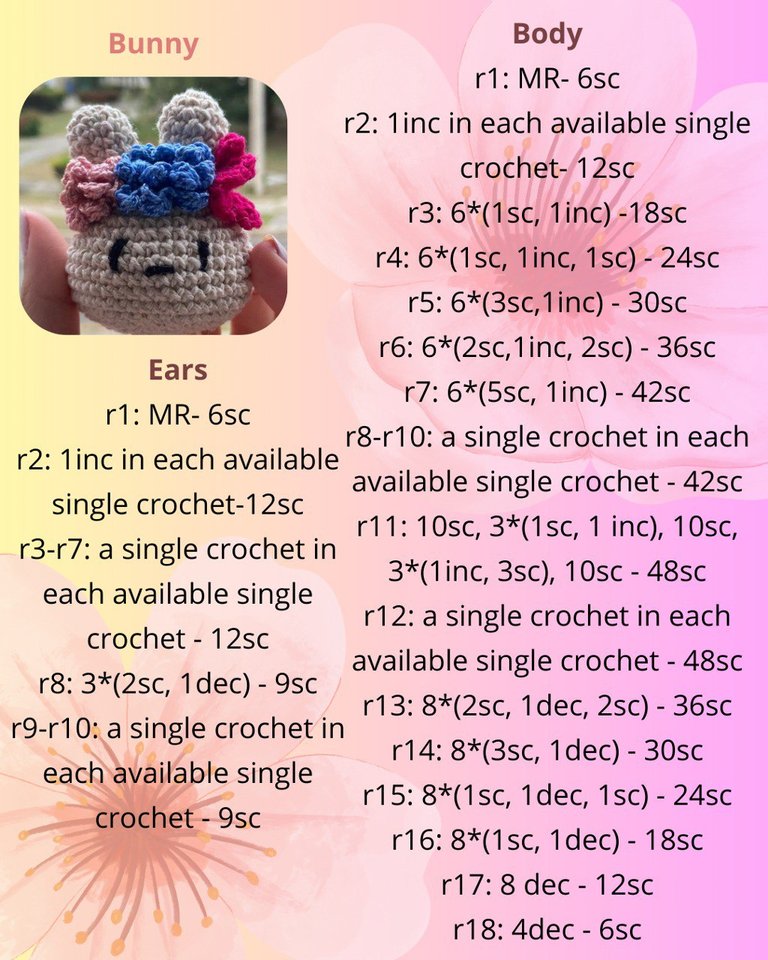
Para resumir los pasos generalmente se usan los patrones este es que use para hacerlo junto con las abreviaciones que aparecen en él.
Flor
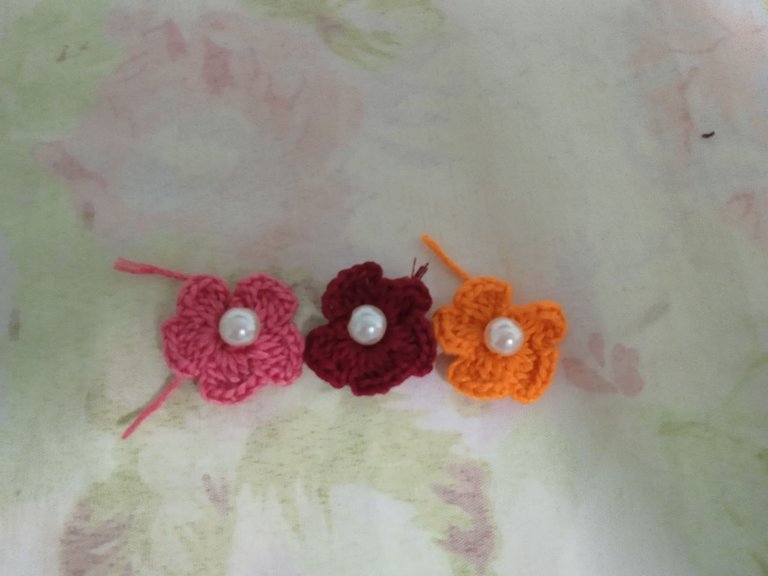
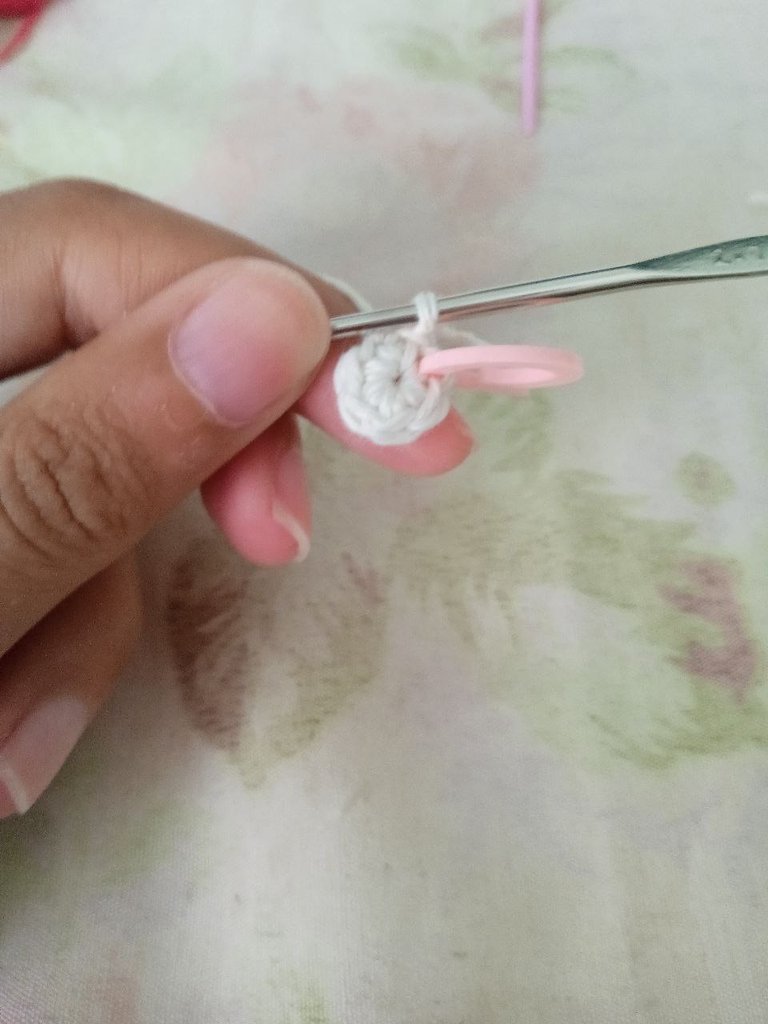
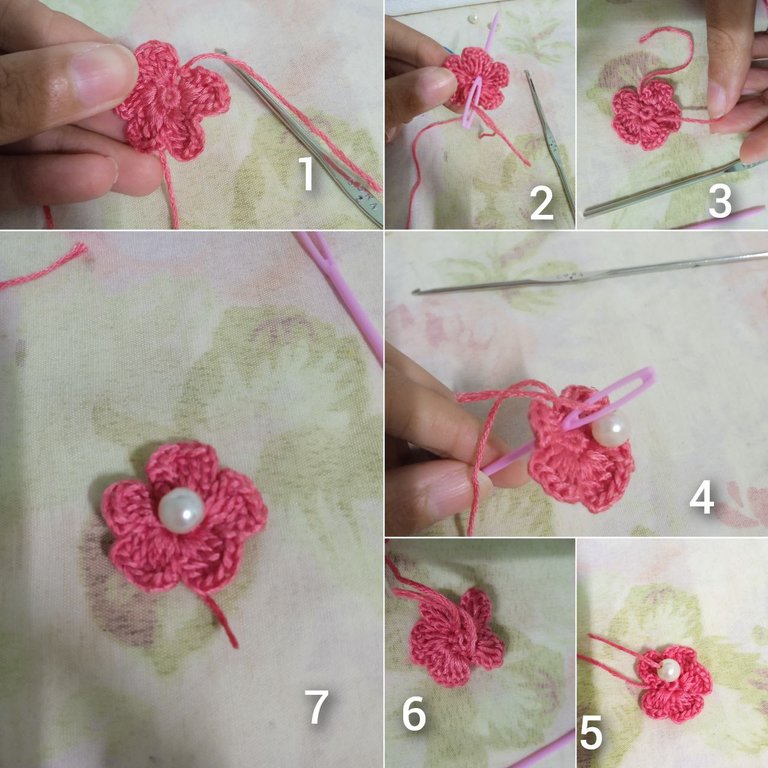
Para adornar el conejito yo usé florecitas que pondré en las orejas, para hacerlas primero hay que hacer un anillo mágico como en las anteriores creaciones(1). Luego se tejen 6 puntos bajos sobre el anillo mágico (2). Después se tejen tres cadenas(3), luego tres puntos altos en el mismo punto(4), después tres cadenas(5), unir al siguiente punto(6) y repetir 5 veces por cada punto disponible y unir al final con punto deslizado(7), cortar dejando un hilo largo para unirlos a la cabeza del conejo.
Hacer 2 o 3.

Poner las perlas en la flor
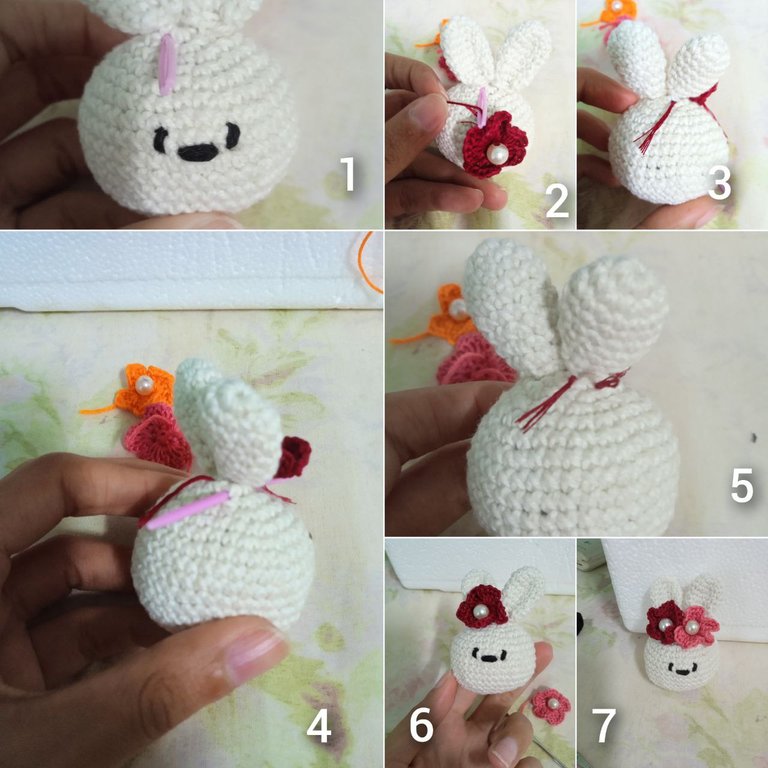
Tomar uno de los hilos y pasarlo con una aguja lanera para el frente(1)(2)(3), pasar por el agujero de una perla(4) y con la aguja pasarlo para atrás(5)(6), hacer lo mismo con el otro hilo que queda(7).
Dejar los hilos para unirlos a la cabeza del conejo.
Unir las orejas a la cabeza
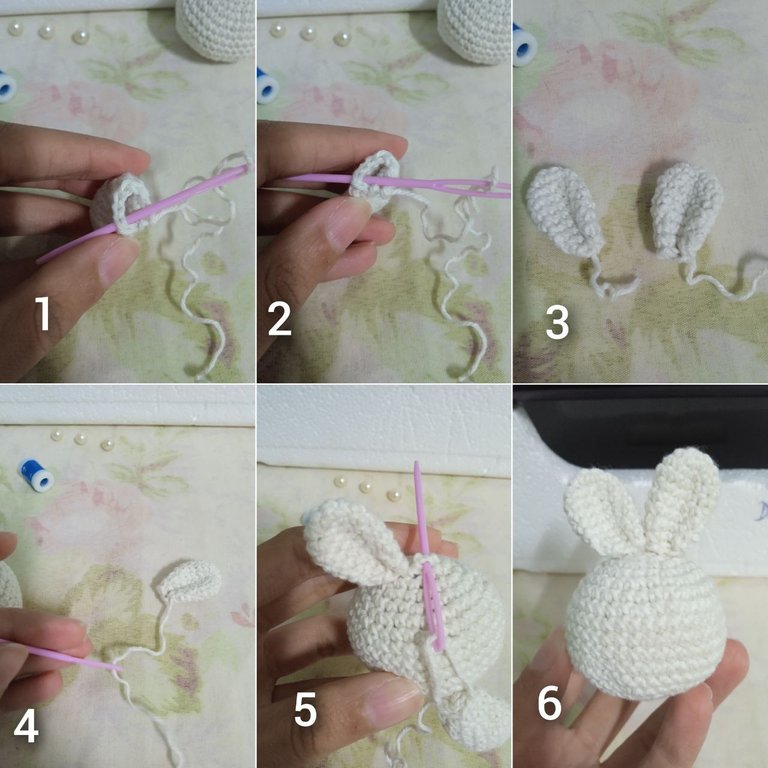
Para unirlas primero hay que cerrar las orejas, para hacerlo se cosen los bordes y luego los lados con la aguja lanera(1)(2), quedando así (3). Ahora se unen cociéndolas a la cabeza del conejo por la parte superior(4)(5). Quedando de esta forma (6). Hacer esto con ambas orejas
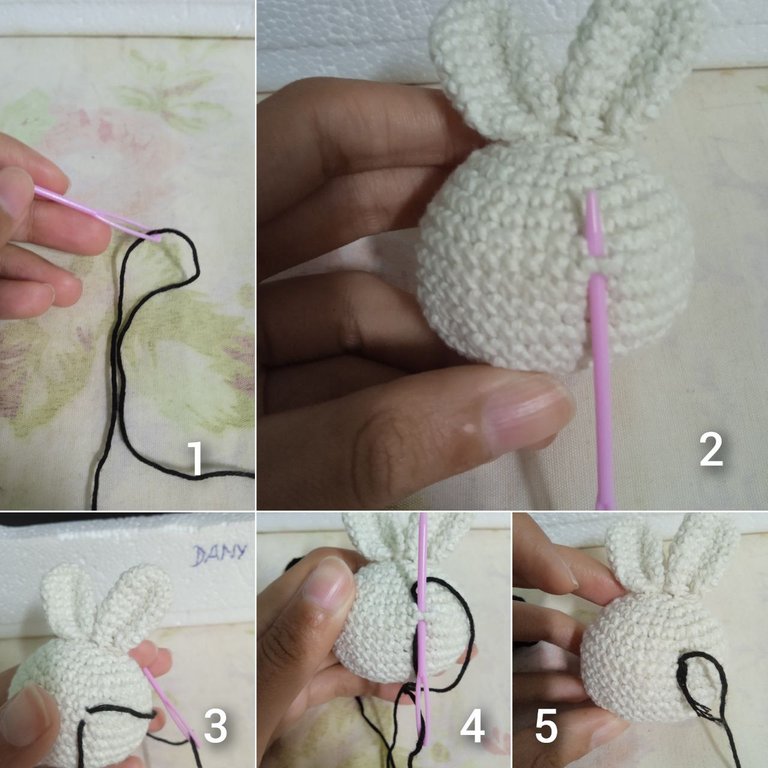
Bordar los ojos
Enhebrar la aguja (1)y ubicarnos en la 8 vuelta contando desde el inicio ubicarnos dos puntos más de la mitad de la cabeza, pasar la aguja entre dos puntos(2). Atravesar con la aguja y dejar una pequeña parte del hilo afuera(3), volviendo a pasar por el mismo lugar al menos 2 veces más, sin apretar demasiado(4)(5).
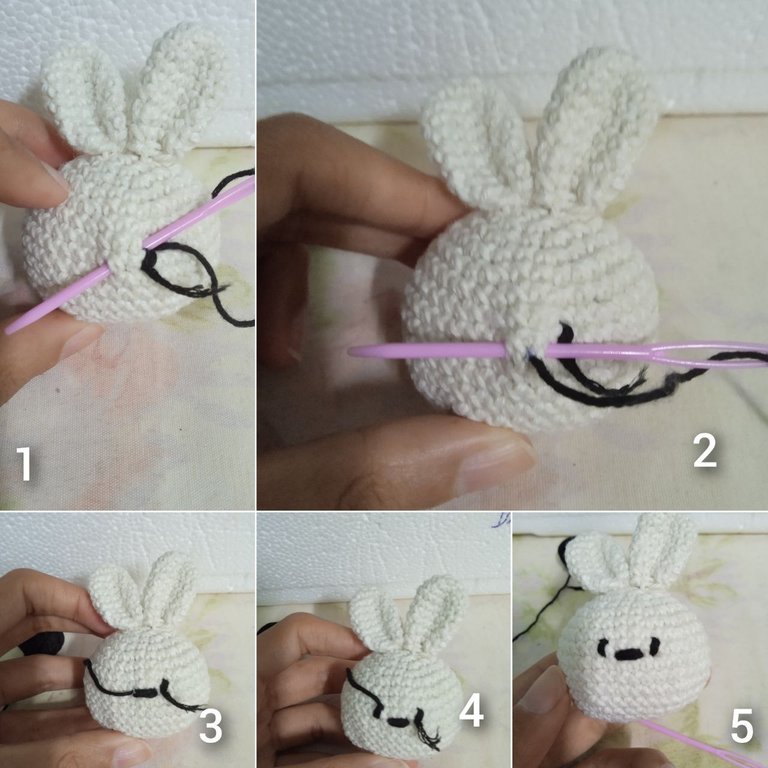
Ajustar el relleno para que no se vea feo, presionando la parte donde se bordó el ojo. En el mismo lugar donde se terminó el ojo pasando dos puntos más de donde estamos hacia abajo(1) Ajustar siempre presionando después de cada pasada de la aguja lanera. Pasar la aguja desde el próximo punto hasta el anterior desde donde estamos(2) pasar desde dos puntos hasta donde estamos al menos 2 veces más(3). Hacer el otro ojo ubicando nos desde abajo un punto más desde donde estamos(4). Cortar todos los hilos restantes(5)
Unir las flores a la cabeza por las orejas
Pasamos la aguja desde un punto por delante de la oreja derecha o izquierda la que prefieras(1) y pasar uno de los hilos de la flor(2)(3), hacer lo mismo con el otro hilo pero pasándolo desde el principio en el mismo punto pero un punto más hacia el lado en la parte de atrás(4)(5), atar los dos hilos, cortar y guardar el excedente entre el relleno(6). Hacer lo mismo con las otras dos flores(7).
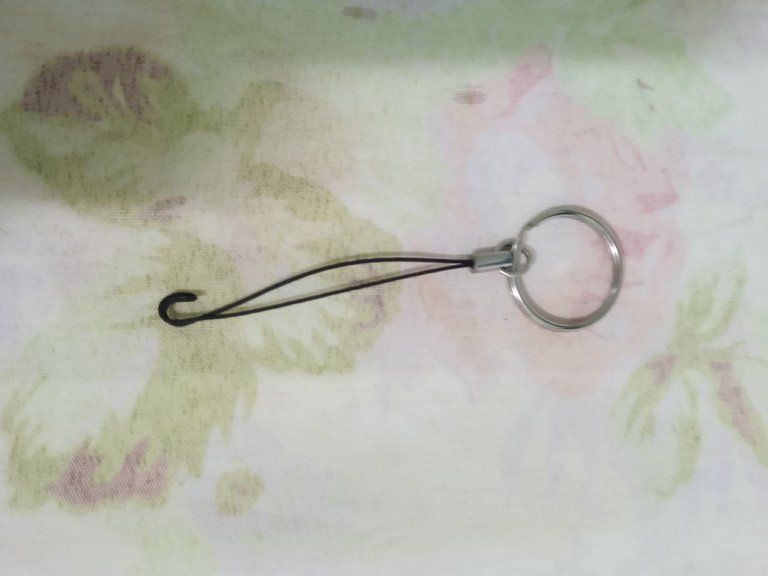
Para usarlo como llavero puedes ponerle un aro de llavero
Una vez hecho todos los pasos quedaría completado el llavero-amigrumi-conejo, a mi amiga le encantó mucho su regalo, espero que también les guste a ustedes, gracias por su atención.

Hi everyone, a friend recently had a birthday, and I decided to make her a little gift. She loves knitted items, so I made her a little knitted bunny keychain adorned with flowers.
This time, I'll be sharing the step-by-step instructions so you can do the same later.

First, you need to find the materials you'll be using:
🧶Yarn
🌸For the bunny's body and ears, I used fine white worsted weight yarn, but you can use any type, thickness, or color of yarn you prefer.
🌸For the flowers, I used thick pink and red embroidery thread; they can also be any type or color.
🌸To embroider the eyes, I used fine black thread, or if you have amigurumi eyes, you can use them as well.
🪡Needle or crochet hook
2.10 mm knitting or crochet hook, you can use the needle that best suits the yarn you are using
✂️Scissors
🪡Wool needle
✔️Stitch marker (or something to mark the stitches)
🧮Lap counter (if you don't have one, use something to write down the rows you are knitting)
⚪Pearls (optional)
V2 - On the next round, we will increase for each available single crochet stitch. To make an increase, work two single crochet stitches for every single crochet stitch. At the end, there should be 12 single crochet stitches. We mark the end with a stitch marker and use the stitch counter to indicate that we are on round 2.
V3 - For the third round, we make one single crochet and then one increase for each available stitch. At the end of the round, there should be 18 single crochet stitches. At the end of each round, we mark with the stitch marker and increase the number on the stitch counter to maintain the continuity of the rows.
V4 - Then, on round 4, work 1 single crochet, one increase, and one single crochet for each available stitch. Continue this sequence 6 times. At the end, there should be 24 single crochet stitches.
V5 - On round 5, work 3 single crochet stitches and then one increase for each available single crochet stitch. At the end of the round, there should be 30 single crochet stitches.
R6 - On this round, work 2 single crochets, 1 increase, and 2 single crochets for each available single crochet, continuing this sequence 6 times. You should end up with 36 single crochets.
R7 - On this round, work 5 single crochets and 1 increase for each available single crochet, leaving a final total of 42 single crochets.
R8 - R10 - From rounds 8 to 10, work 1 single crochet in each available stitch, maintaining a total of 42 single crochets. In this section, as in all rounds, it is very important to keep track of the rows being worked and correctly mark the end of the row.
R11 - On this round, first work 10 single crochets, then work the sequence 3 times: 1 single crochet and 1 increase. At the end of this sequence, work 10 single crochets again, then work the sequence 3 times: 1 increase, then 1 single crochet, finishing with 10 single crochets. In the end, 48 single crochets were made on this row.
R12 - Now, 48 single crochets are made for each available stitch.
From this row on, decreases are made instead of increases.
How to make decreases?
Decreases can be difficult to make. First, we need to understand that a single crochet is made up of a chain with two threads, one for the front and one for the back (1).
To do this, we use the crochet hook or knitting needle to start from the front thread (2). Then, we reinsert the needle through the front thread of the next single crochet (3). Once this is done, we make the single crochet by passing the thread through both loops of the stitch (4)(5).
R13 - On this row, we first make 2 single crochets, then 1 decrease, and then 2 single crochets, continuing this sequence 8 times. The final result is 36 single crochets in total.
R14 - On this round, first work 3 single crochet stitches and then 1 decrease, following this sequence 8 times, for a total of 30 single crochet stitches at the end of this round.
R15 - Now work 1 single crochet, 1 decrease, and 1 single crochet, following this sequence 8 times, for a total of 24 single crochet stitches.
R16 - On this round, work 1 single crochet and 1 decrease, repeating this 8 times, for a total of 18 single crochet stitches.
Stuffing
At the end of this round, stuff the bunny's body. You can use yarn retainers from old creations, as I did in my case, or you can stuff it with cotton and very thin pieces of cut fabric. Keep in mind that it must be stuffed well to give the amigurumi firmness.
R17 - Now work 8 decreases for a total of 12 single crochet stitches at the end of this row.
R18 - The last row is easier to work with a yarn needle. You should knit the same way you did with a knitting needle, and you should sew 4 decreases, leaving 6 single crochet stitches at the end.
Ears
R1 - On the first row, work a magic ring around which you work 6 single crochet stitches and join with a slip stitch to the first one.
R2 - On this row, work 1 increase in each available stitch, leaving 12 single crochet stitches at the end.
R3-R7 - Now work 1 single crochet in each available stitch, leaving a total of 12 single crochet stitches.
R8 - On this row, work in a sequence of 3, 2 single crochet stitches, and 1 decrease for a total of 9 single crochet stitches.
R9-R10 - In these rows, work 1 single crochet over each available stitch, leaving 9 single crochets.
You should make two identical ears.
To summarize the steps, patterns are generally used. This is the one I used to make them, along with the abbreviations that appear on it.
Flower
To decorate the bunny, I used little flowers that I will place on the ears. To make them, first make a magic ring like in the previous creations (1). Then, work 6 single crochets over the magic ring (2). Then, work three chains (3), then three double crochets in the same stitch (4), then three chains (5), join to the next stitch (6), and repeat 5 times for each available stitch. Finally, join with a slip stitch (7). Cut the thread, leaving a long thread to join them to the bunny's head.
Make 2 or 3.
Attach the pearls to the flower
Take one of the threads and thread it through a yarn needle to the front (1)(2)(3), pass it through the hole in a pearl (4), and thread it through the back with the needle (5)(6). Do the same with the remaining thread (7).
Leave the threads to attach them to the bunny's head.
Attach the ears to the head
To attach them, first close the ears. To do this, sew the edges and then the sides with the yarn needle (1)(2), creating the following shape: (3). Now attach them to the bunny's head by sewing them at the top (4)(5). Creating the following shape: (6). Do this with both ears.
Embroider the eyes
Thread the needle (1) and position yourself on the 8th row, counting from the beginning. Position yourself two stitches closer to the middle of the head. Pass the needle between the two stitches. (2). Pass the needle through and leave a small portion of the thread out (3), passing through the same place at least twice more, without tightening too much (4) (5).
Adjust the filling so it doesn't look unsightly by pressing the part where the eye was embroidered. In the same place where the eye was finished, pass two stitches further down from where you are (1). Always adjust by pressing after each pass of the tapestry needle. Pass the needle from the next stitch to the previous one from where you are (2). Pass two stitches back to where you are at least twice more (3). Make the other eye by placing us one stitch further down from where you are (4). Cut all the remaining threads (5)
Attach the flowers to the head by the ears
Pass the needle from a point in front of the right or left ear (whichever you prefer) and pass one of the flower threads (2) (3). Do the same with the other thread, but pass it from the beginning in the same point, one point further to the side at the back (4) (5). Tie the two threads together, cut, and store the excess in the stuffing (6). Do the same with the other two flowers (7).
To use it as a keychain, you can add a key ring.
Once all the steps are completed, the amigrumi-bunny keychain is complete. My friend loved her gift very much. I hope you like it too. Thank you for your attention.
Posted Using INLEO
Wow, your knitting is so beautiful. Every detail looks very neat, the shape is also beautiful with adorable expressions.
This keychain turned out to be so cute and perfect for someone who loves crocheted items. Great tutorial, well done and keep up the good work.
selected by @ibbtammy
Congratulations @danypeacok! You have completed the following achievement on the Hive blockchain And have been rewarded with New badge(s)
Your next target is to reach 500 upvotes.
You can view your badges on your board and compare yourself to others in the Ranking
If you no longer want to receive notifications, reply to this comment with the word
STOPBellisimo. No tengo paciencia para tejer y lo he intentado pero no me llama la atención.
Saludos @danypeacok