Making an Eternal Rose As a Gift [Eng - Esp]

English
Hiiii, friends of the HiveDiy community, how are you today? I hope you are doing great!
I know I'm running a little late, but it's better late than never, right? I'm here to share with you this fabric rose I made for Mother's Day.
Likewise, I'm actually one of those people who thinks that Mother's Day is every day, so it's never too early or too late to give a gift made from the heart. You always have to remember that for a detail you don't need money, but love.
Blue is a color that I like very much because it represents calm and confidence. In general, it represents many beautiful things. So I decided to use this color for today's craft. Without further ado, join me in this process; let's go!
Materials
Dark blue satin ribbon 72x5 cm long.
Light green ribbon 28x2,8 cm long.
Blue muslin fabric 30x20 cm long.
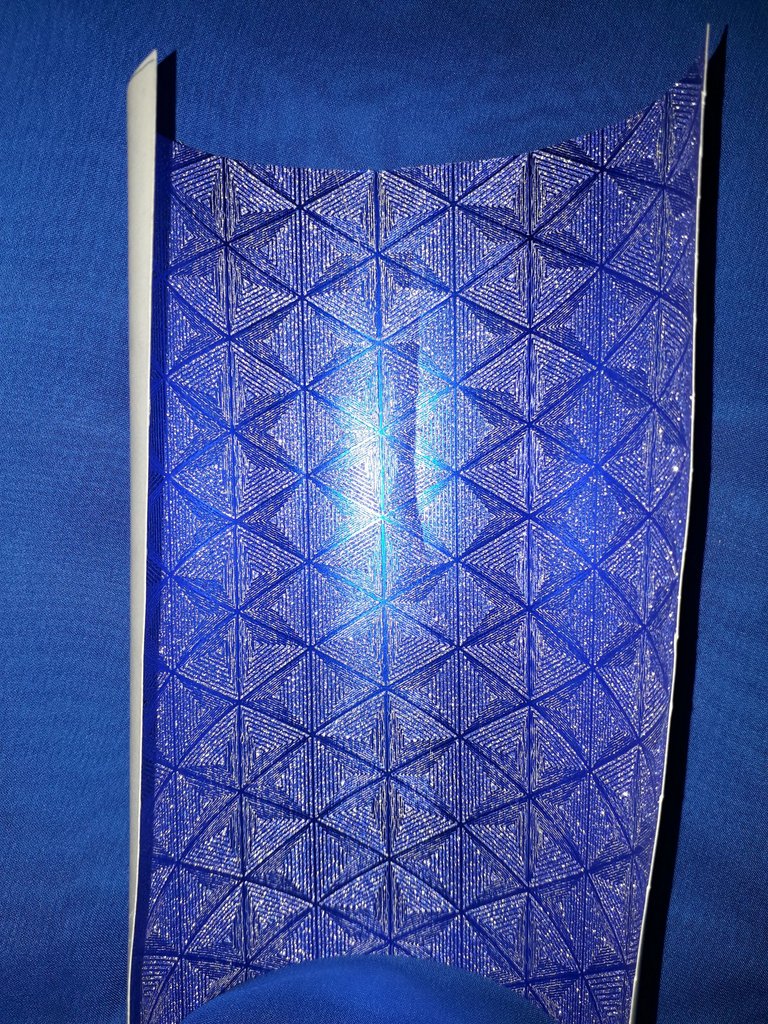
Cardboard with blue pattern ornament, 25x25 cm long.
Bamboo Skewer.
Hot silicone gun.
Lighter.
Scissors.
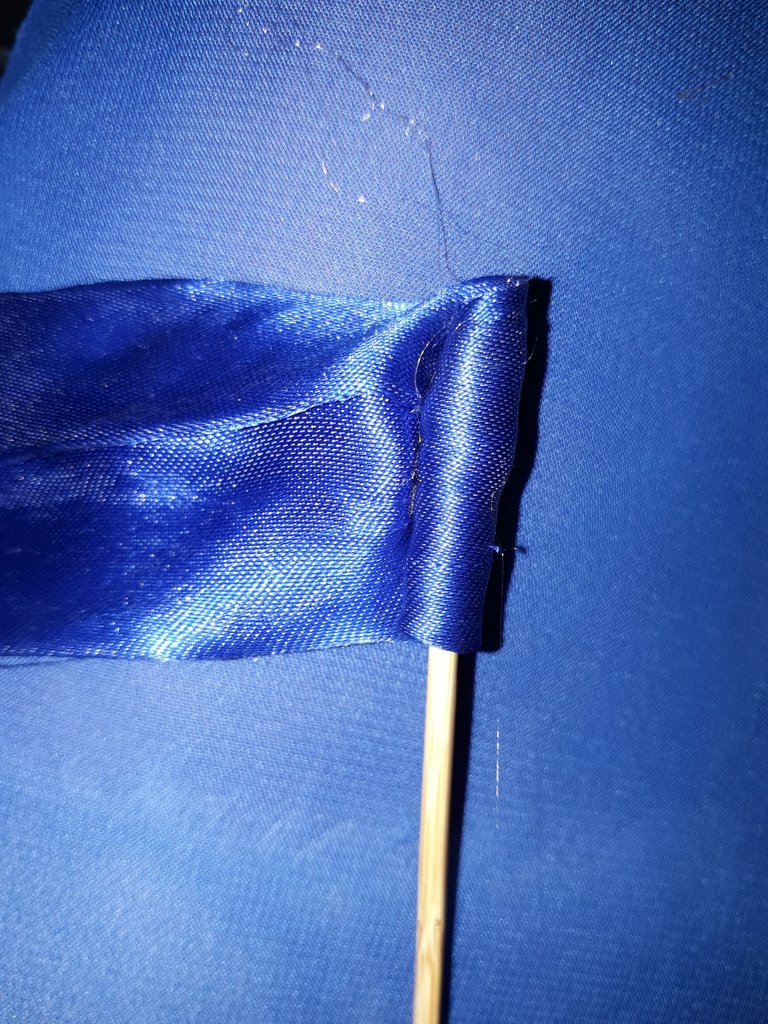
The first thing I did was to cut the tall stick in half, since I didn't want a rose with such a long stem.
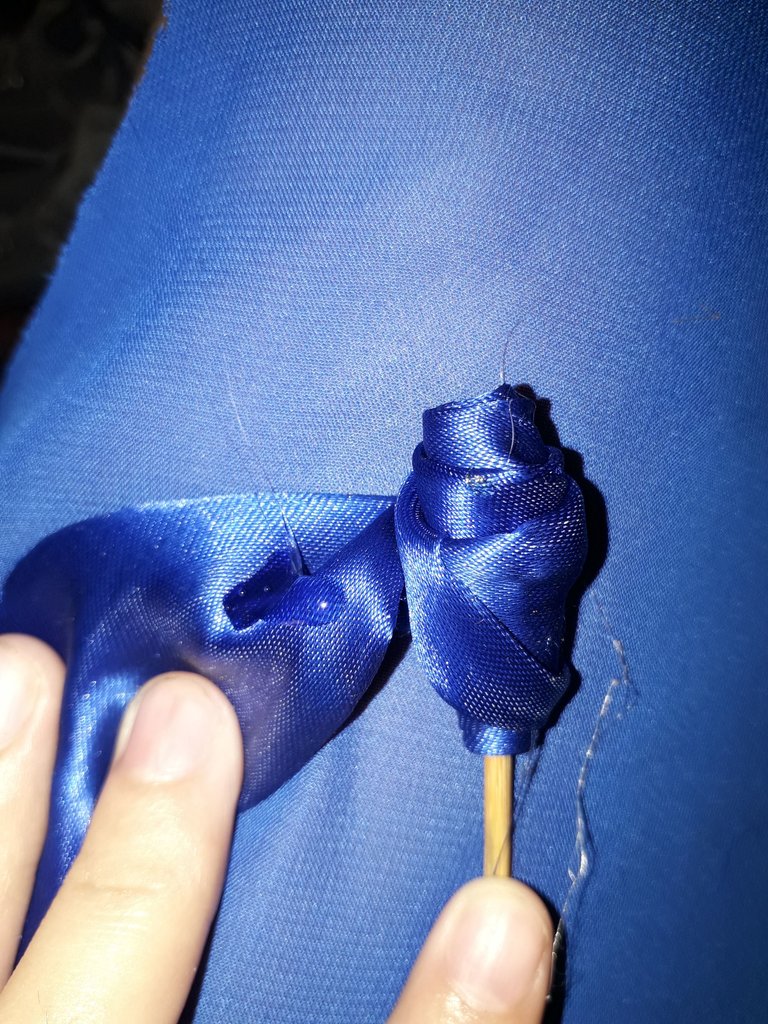
And now I started by wrapping the ribbon around the tip of the tall stick after pouring hot silicone on it. I wrapped it around three times, more or less, so that the center of the rose could be seen.
 |  |
|---|
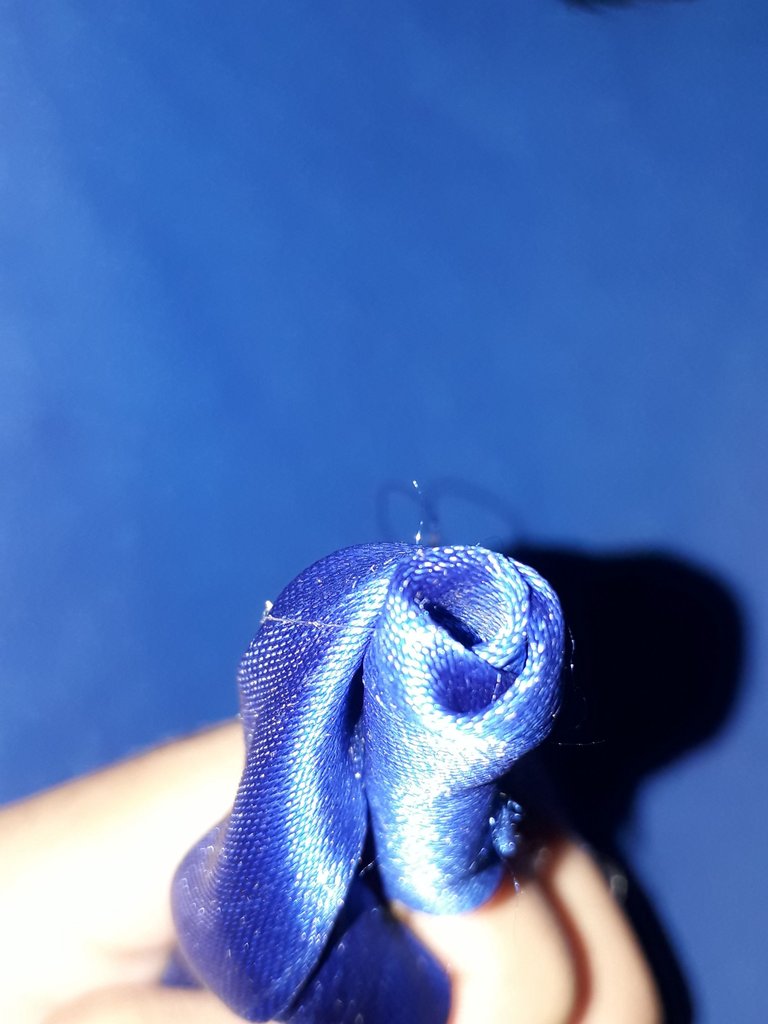
The next thing to do was to curl the ribbon downward and give it a twist, while placing a dot of hot silicone on each twist to secure the rose well. The twisting of the ribbon is done, more or less, to simulate the petals.
 |  |
|---|
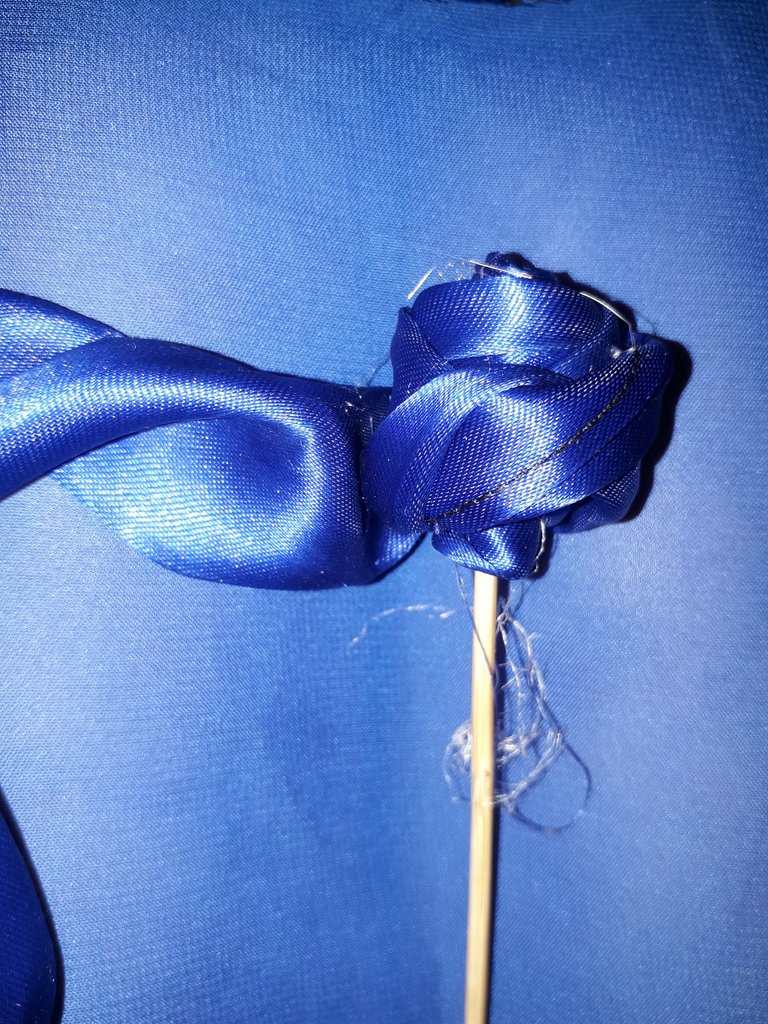
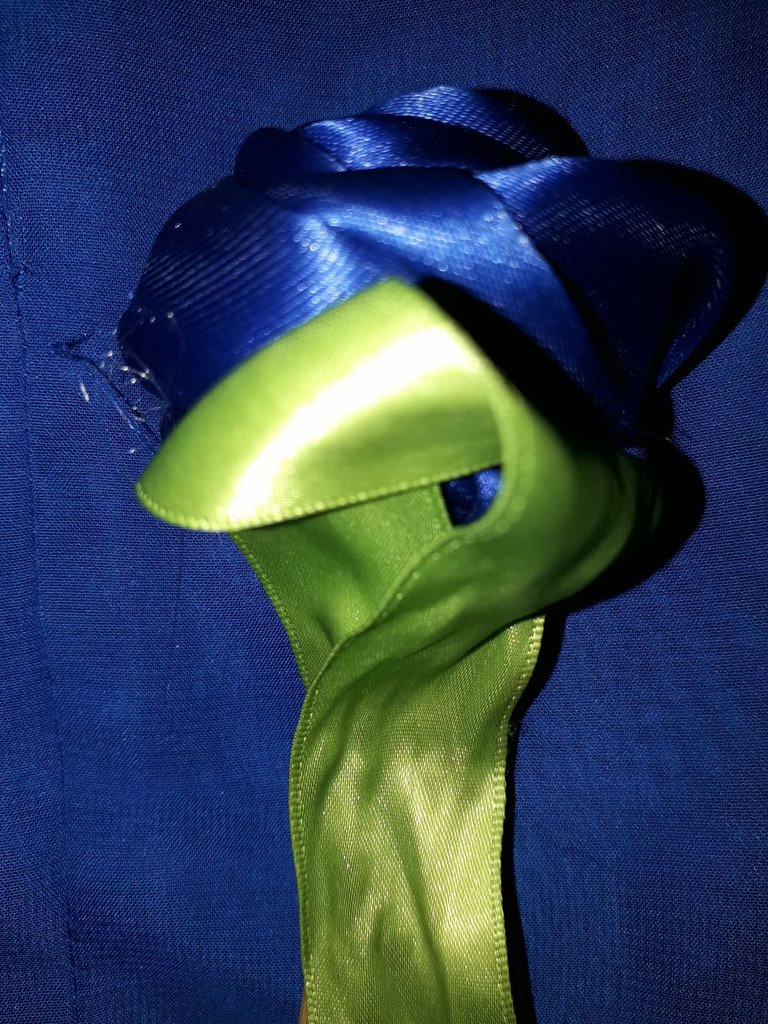
I kept repeating the process of twisting once on each turn until I felt that the rose was already considerably large, and I had about 20 cm of ribbon remaining. Then, I started twisting several times, about three times, before each twist. This was so that the rose would look more voluminous and the petals would look bigger, just like real roses, whose petals look more open compared to their center.
Here I was a little worried that the rose wouldn't look perfect as a rose, but it made me think that no flower is perfect, at least not if you see it up close. An example of this is peonies. To me, peonies look like little dumplings that God created, gently crushing them with his hand. I don't know; I feel that their disorder of petals (at least in my opinion) are much more beautiful than a flower that seems artificial with so much perfection.
Likewise, I feel the same way about our mothers. They are not perfect; they are far from perfect because they are human beings. But I think it is beautiful that, in spite of all their defects, they take care of raising a child with love. Not all of them do it; some are not perfect, but they are not good either. It is sad that there are people who, in the randomness of life, have been given mothers who could be anything but a mother. I am so sorry for all of you who have had that happen to you. Still, I believe that in life we can choose our own family, even if it's not by blood.
Anyway, I just wanted to leave that little reflection; we continue with the tutorial.
 |  |
|---|
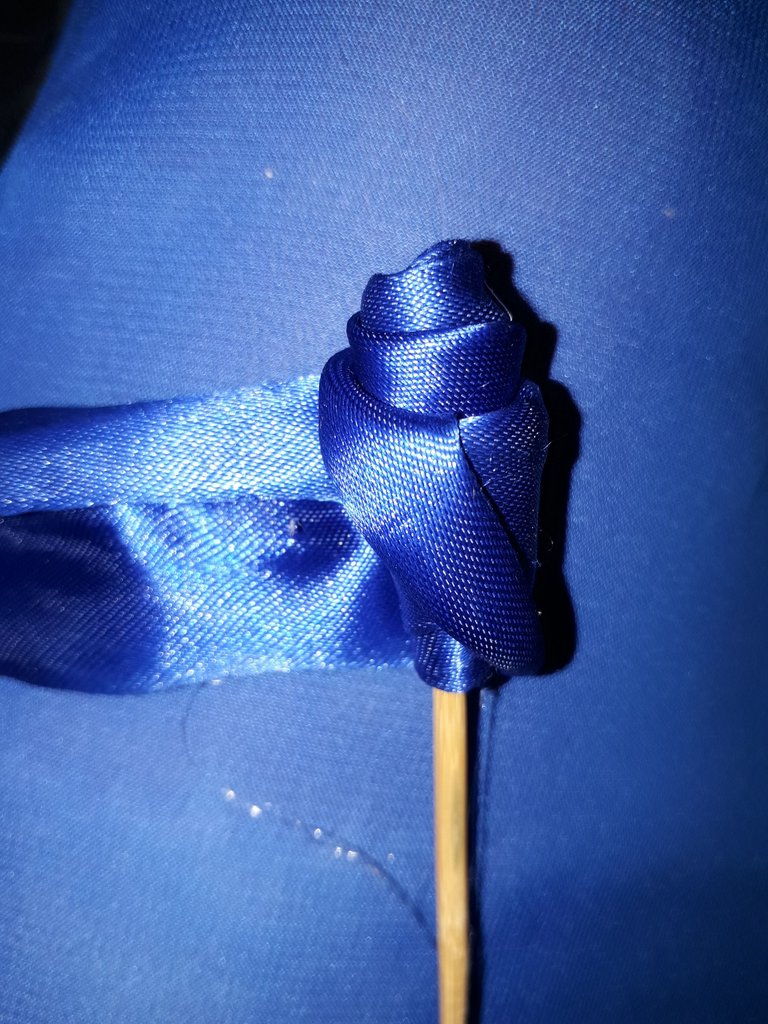
After turning the ribbon several times, I realized that the rose looked a bit tilted down. Also, I didn't know how to close the rose, i.e., I didn't know what to do when I had very little ribbon left.
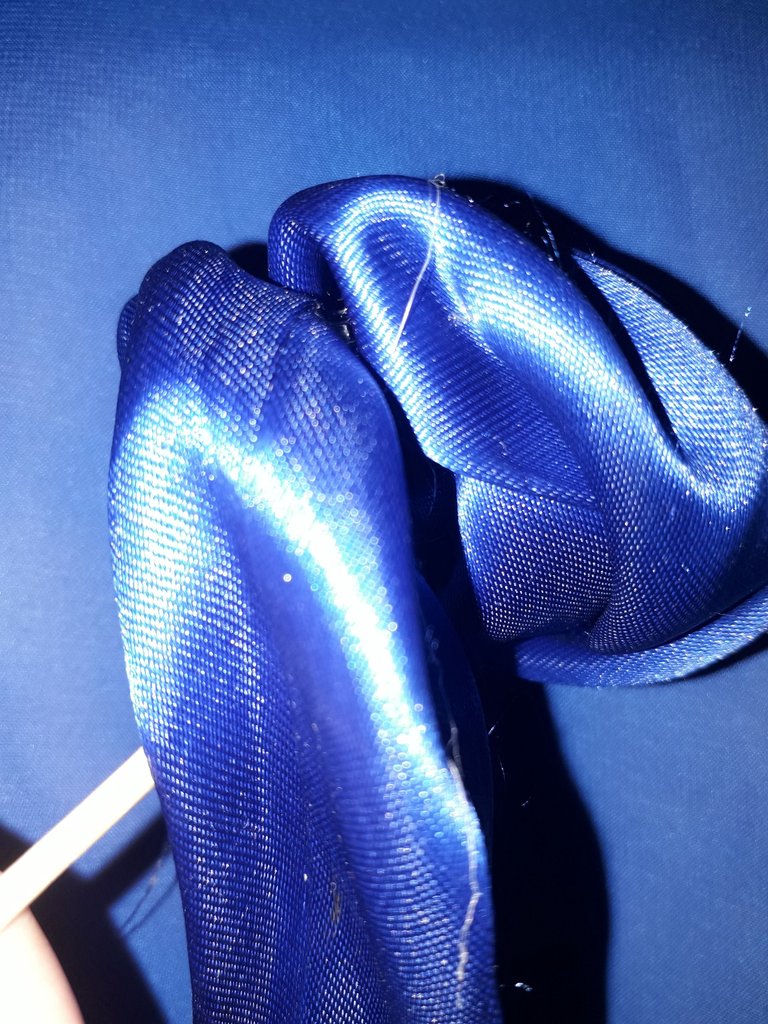
So I decided to start folding it down to compensate for the imbalance and also to start closing the rose. I always put a little hot silicone on each turn, just to make sure.
 |  |
|---|
Here I started twirling the rest of the ribbon on the bamboo skewer, which would be the stem of the rose. I continued twisting and twirling until I reached the tip of the ribbon.
 |  |
|---|
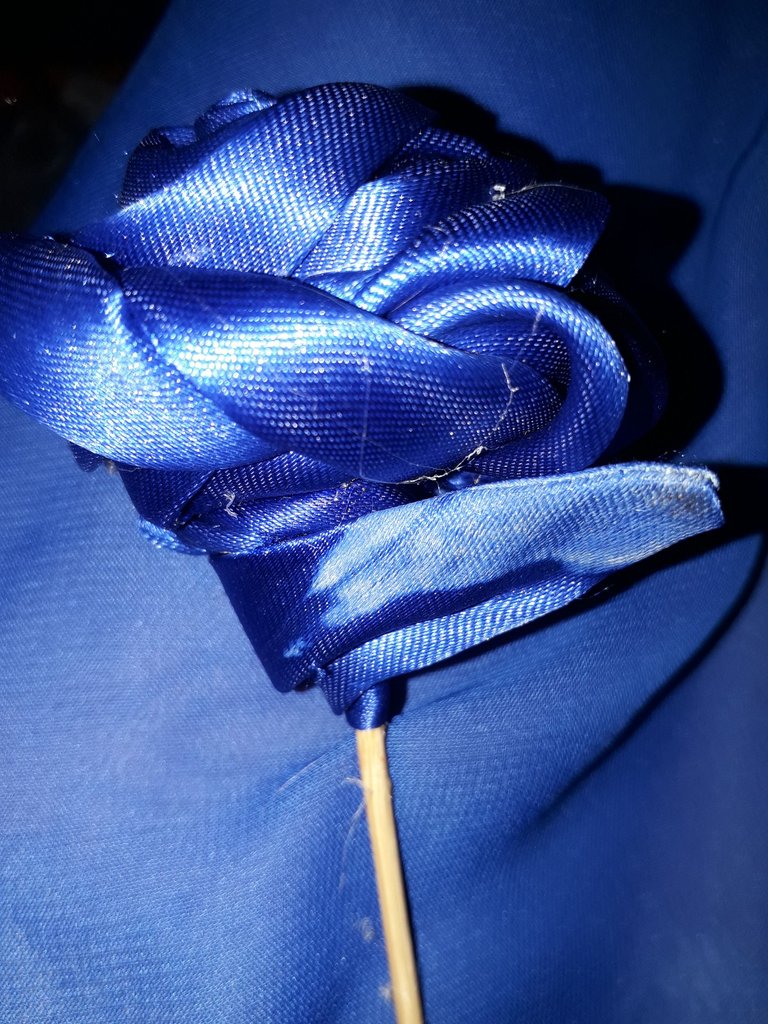
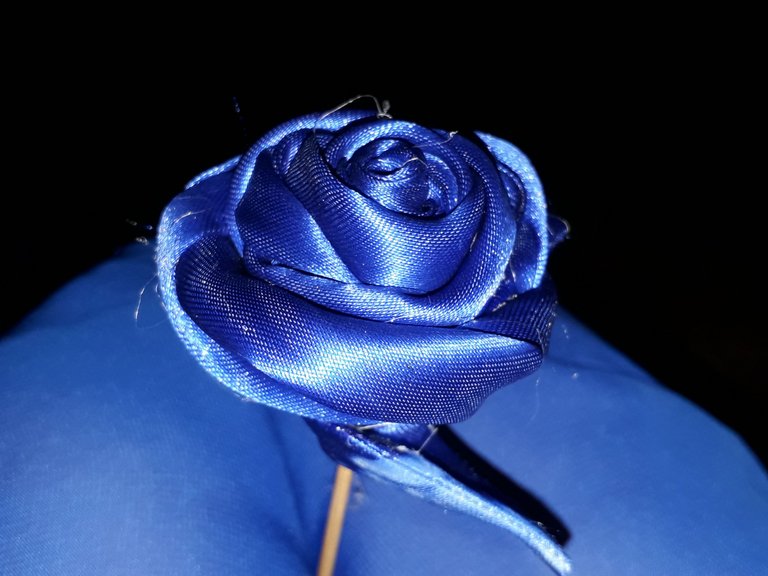
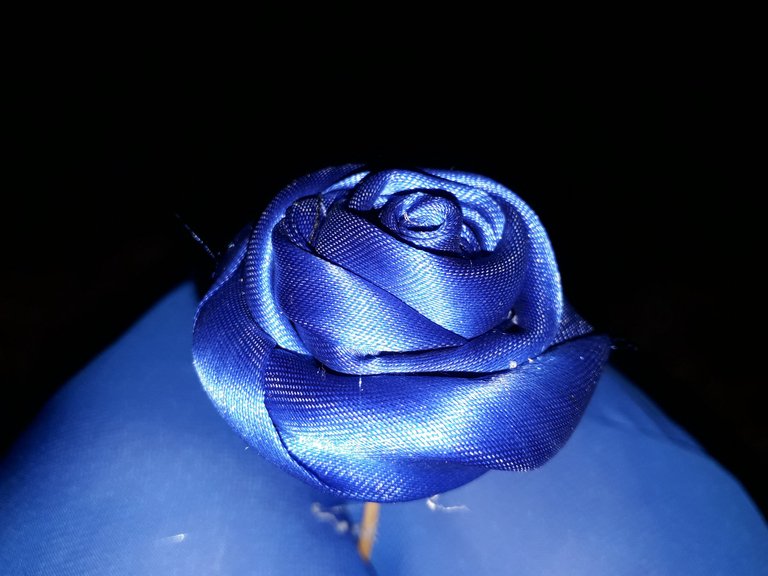
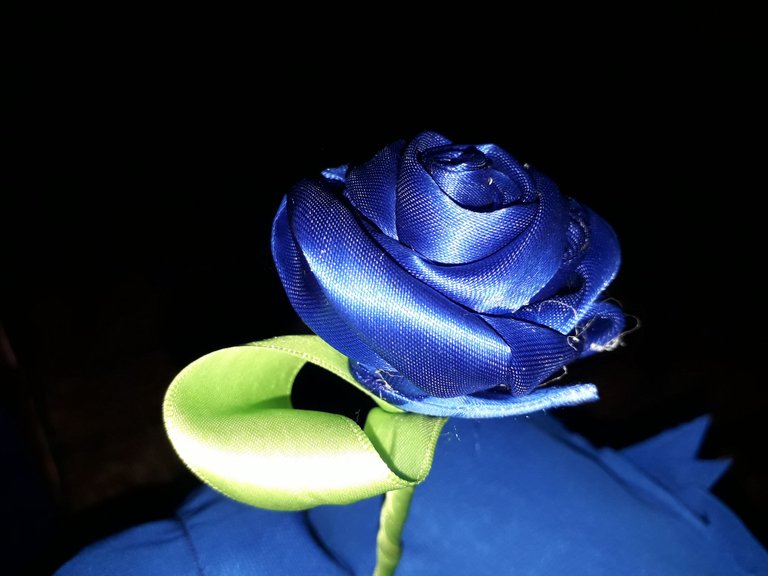
This is what our beautiful rose would look like from above, by the way. I glued the tip of the ribbon to the rest of the rose with a little hot silicone. And the rose would be ready.
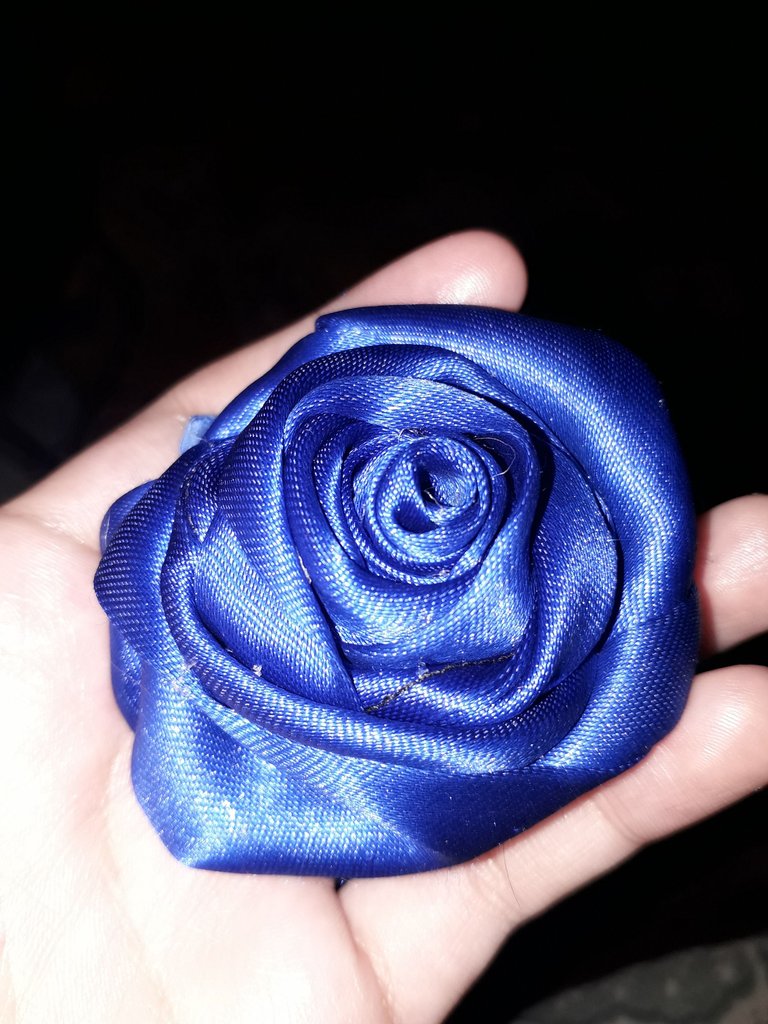
Rose appreciation from above: how did it look? Isn't it beautiful? I love that the ribbon is satin; it adds an elegant touch to the rose. Also, this way of making it is quite easy and looks very beautiful.
But there's more; don't go away. Keep reading, pls, hehe.
 |  |
|---|
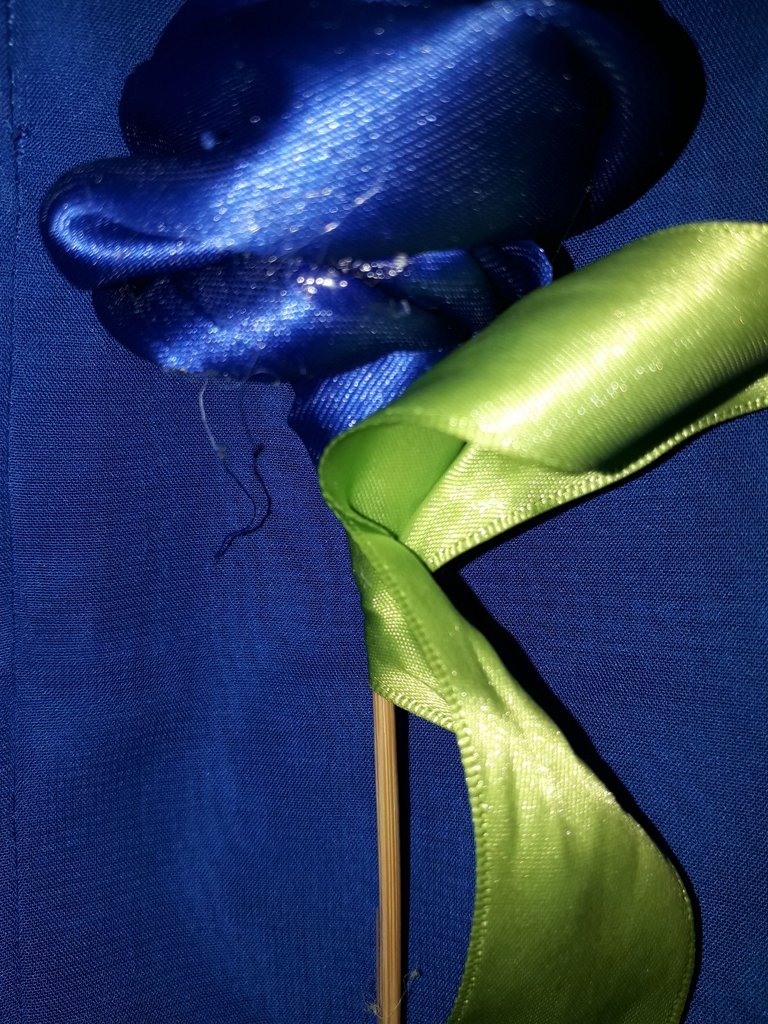
I glued the green ribbon tip to the tall stick, as seen in the picture on the left, right where the blue ribbon ends. Then I folded the ribbon a bit and glued the rest just above where I had previously glued it. I hope you can understand.
 |  |
|---|
I wrapped the rest of the ribbon around the bamboo skewer and glued it with silicone.
Next, I started wrapping the rest of the ribbon around the bamboo skewer, applying dots of silicone from time to time to secure.
Once I got to the tip of the stick, I applied hot silicone to glue and cut off the remaining tape, which wasn't much. With a lighter, I burned a little where I cut to seal the ribbon so it wouldn't fray.
With this, the rose would be ready; now it's time to make the wrapper.
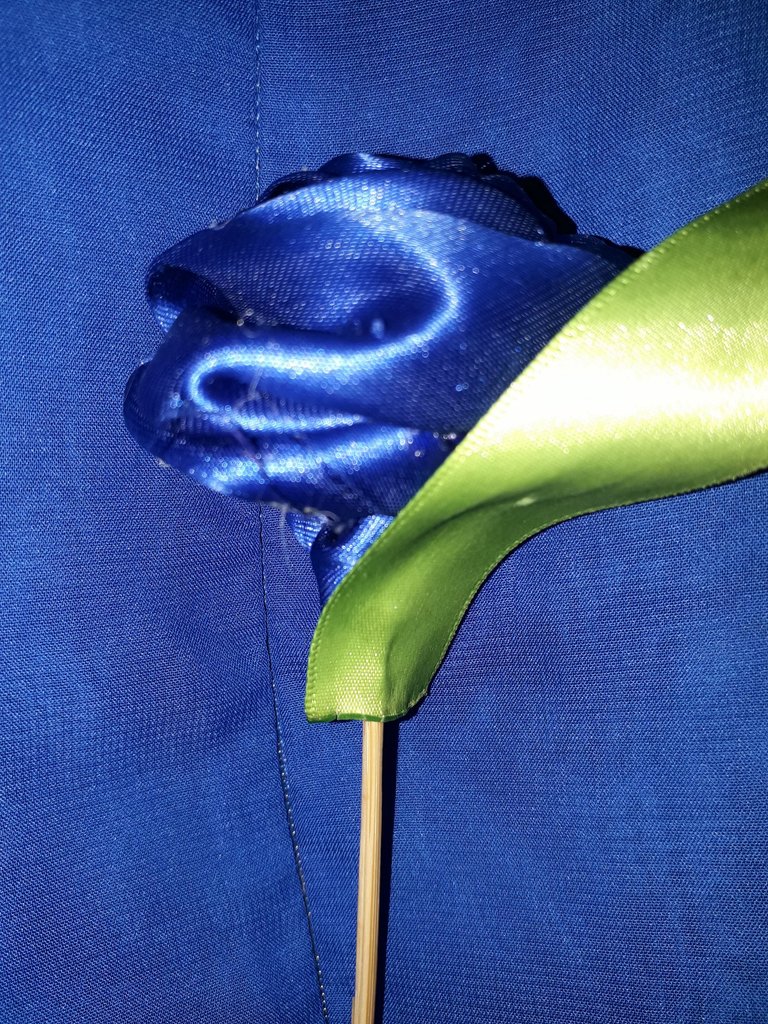
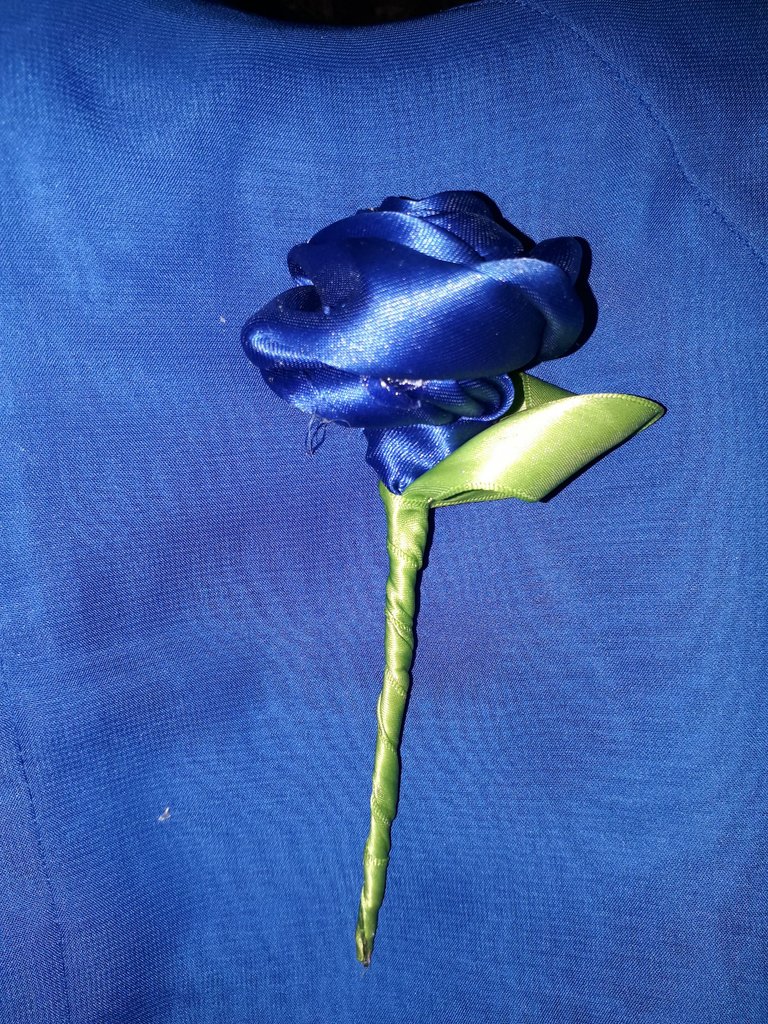
A little photo of appreciation for the rose with its little green leaf, hehehe. I would have liked to do the leaf with an olive green, but I didn't have any olive green ribbon. I certainly feel that a darker green would have given a more sober look to the rose.
But hey, it's what it is; I don't totally dislike it either; it looks prettier that way than without anything.
 |  |
|---|
Here I don't really know what I was doing, I admit, since I have never done anything similar, but I had to improvise.
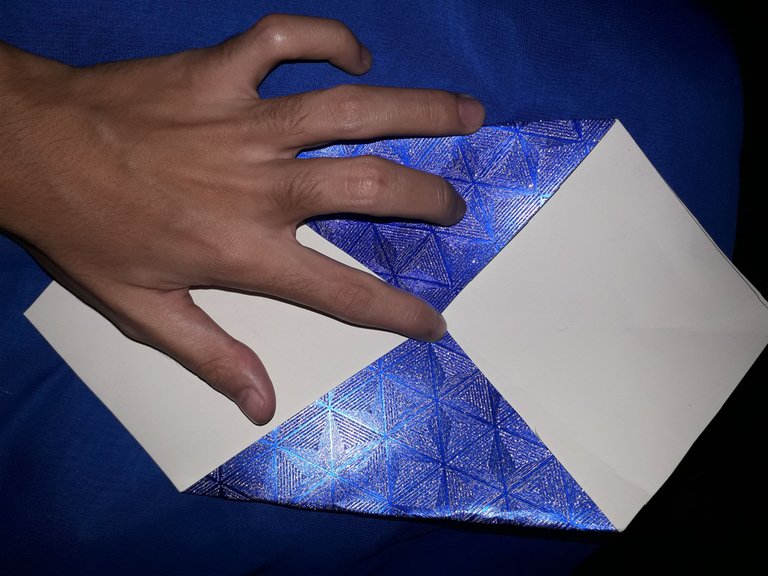
The first thing I did was to take the cardboard and place it so that the white side was facing up. I folded the ends of the square inwards so that they both touched the center, as shown in the second image.
 |  |
|---|
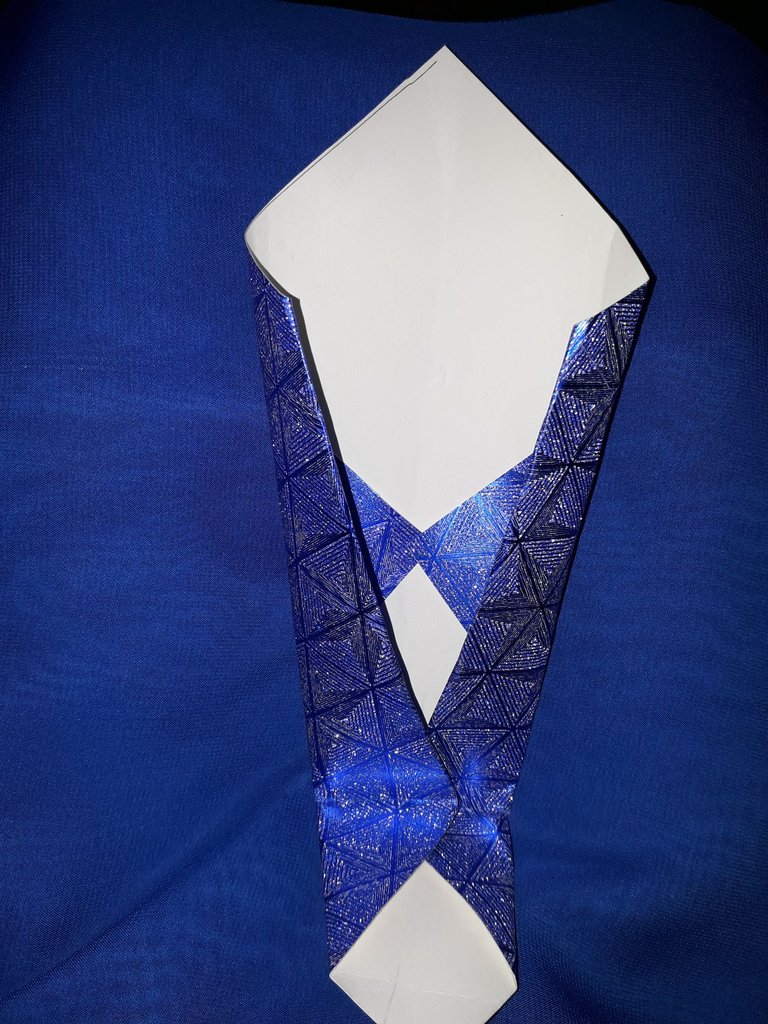
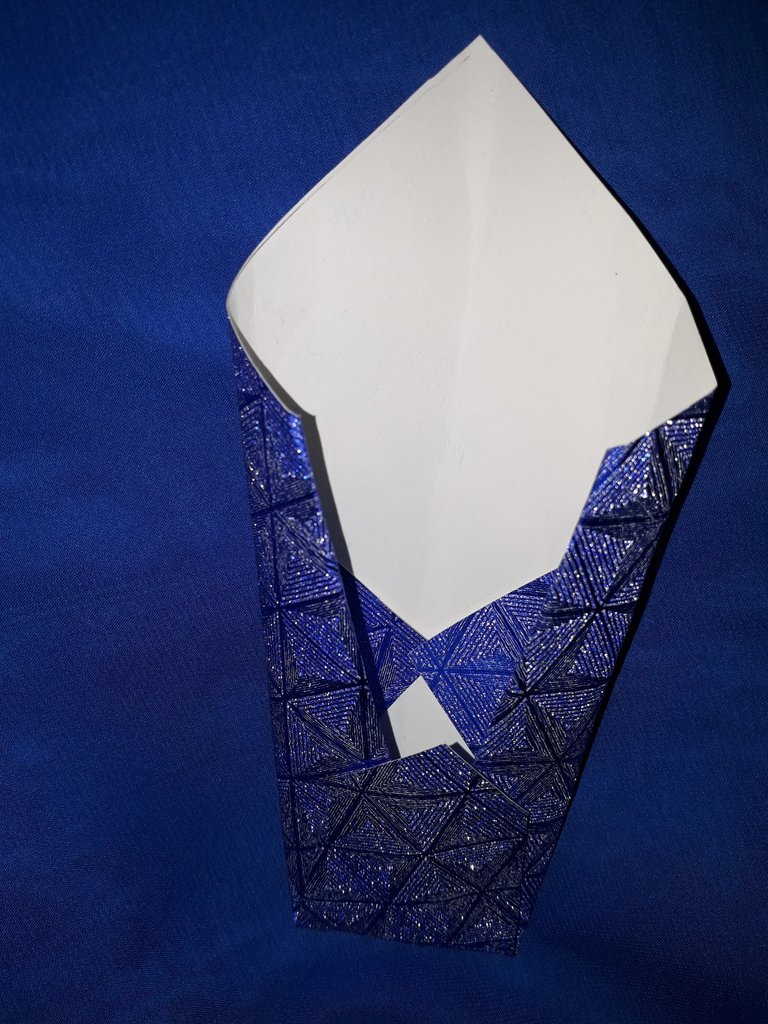
Now I folded the edges inward again, but at a slant, so that only the bottom ends were touching and the top ends were as far apart as possible.
Then, I folded the bottom remainder up to close the wrapper. There, where the lower part joined the rest of the bouquet, I put hot silicone to glue it all together. With this, the wrapping was ready.
 |  |
|---|
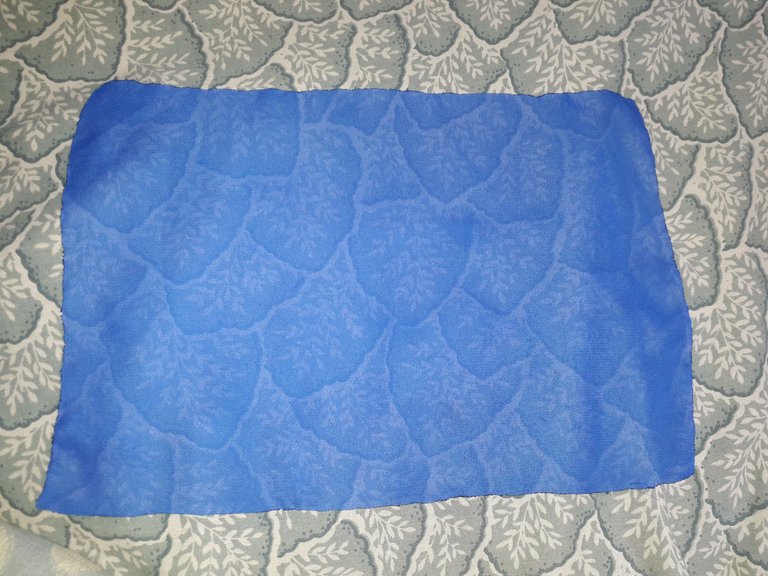
I put the rose in its wrapping, but I felt that something was missing. Then, I remembered that I had a blue cloth, somewhat transparent.
I cut a 20×30 cm rectangle of fabric and burned the edges with a lighter so they wouldn't fray.
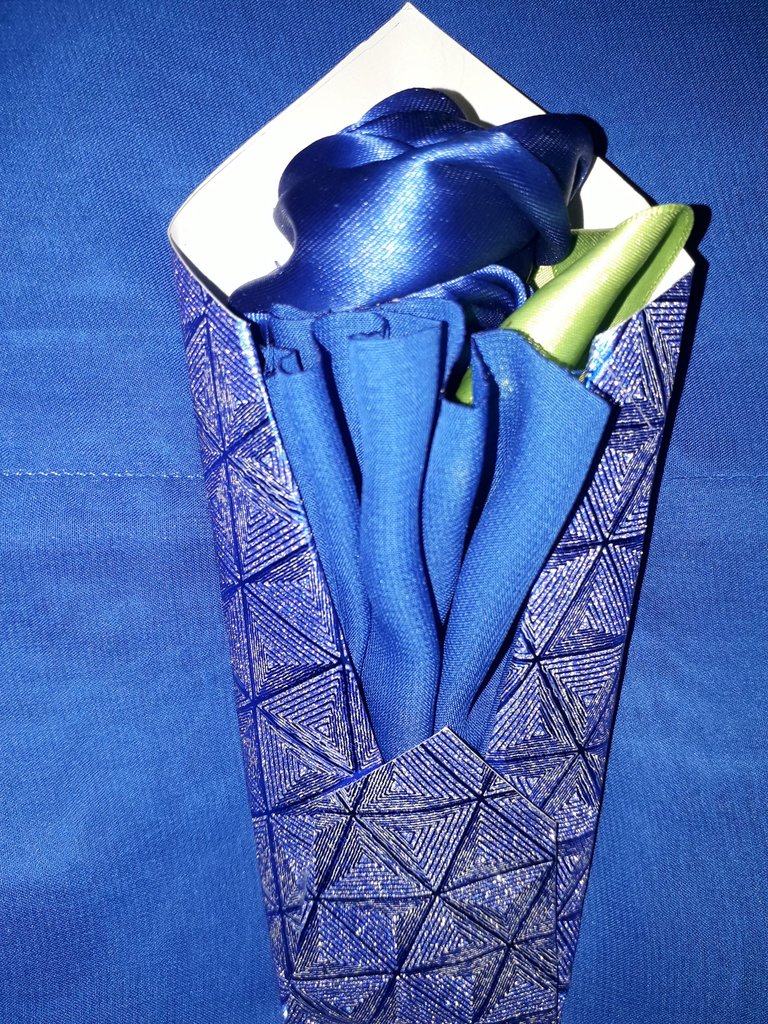
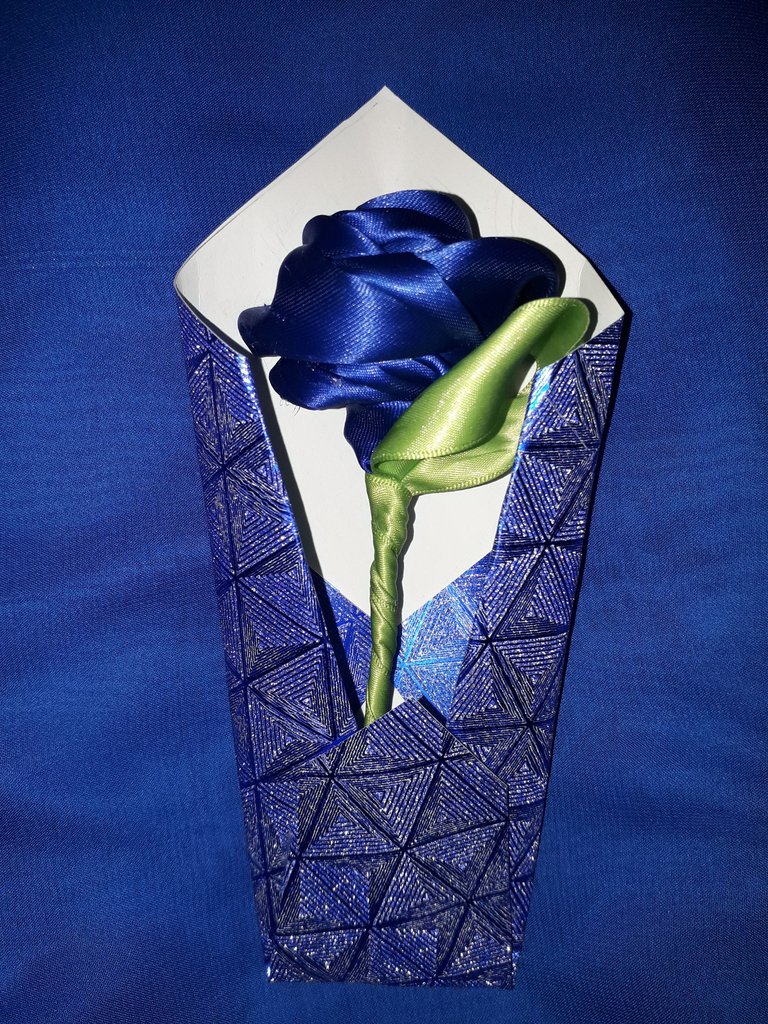
Finally, I took care of folding the fabric nicely and tucked it inside the wrapper, as seen in the image above. How does it look?
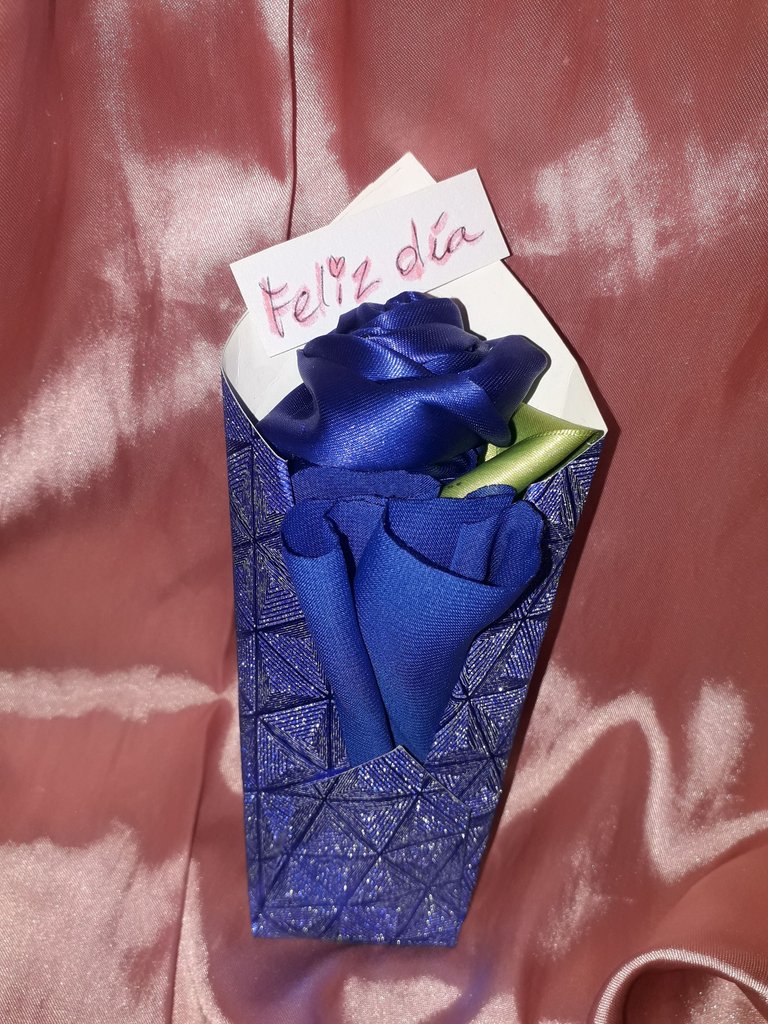
Finally, on a little piece of cardboard of 2×5 cm, I wrote “Happy Day”. Haha, I know it might seem a bit cold, but I'm not a person who usually shows affection with words; I'm not used to it. Still, I hope this detail manages to show him everything I can't say.
And that would be it; maybe I'll buy some small candy and add that too. But that's not part of this tutorial, hehehe.
I must confess that I wasn't planning to upload anything related to Mother's Day on Hive. Well, due to personal issues, I wasn't going to give away anything Mother's Day. However, when I was tagged to be part of this initiative, I decided to give something to a lady whom I admire, love, and respect equally: my boyfriend's mother. She is a very sweet and gentle lady. I would like to thank her for raising such a wonderful person as my boyfriend, who is a reflection of the good values that were instilled in her. Anyway, I am glad that life has given me the opportunity to know what motherly love really is, at least as a spectator.
Anyway, I'm not participating in the initiative as such, since I don't have anyone to invite, but I'm still happy to share this tutorial with you. No matter the occasion, it's a nice gift for someone. And thanks to this beautiful community for always providing a space.
Hope you liked my post!
Without anything else to add… Take care, drink water, and don't forget to smile. Love you! See you in the next post, bye!
Español
Holiii, amigos de la comunidad de HiveDiy, ¿cómo se encuentran el día de hoy?, ¡espero que muy bien!
Sé que estoy llegando un poco tarde, pero es mejor tarde que nunca, ¿no? Estoy aquí para compartir con ustedes esta rosa de tela que hice para el Día de la Madre.
De hecho, yo soy de las personas que piensan que el día de las madres es todos los días, por lo que nunca es muy temprano o muy tarde para dar un regalo hecho con el corazón. Siempre hay que recordar que para un detalle no se necesita dinero, sino cariño.
El azul es un color que me gusta mucho, pues representa calma y confianza. En general, representa muchas cosas bonitas. Así que decidí usar este color para la manualidad de hoy. Sin más que añadir, acompáñenme en este proceso, ¡vamos allá!
Materiales
Cinta satinada color azul oscuro de 72x5 cm de longitud.
Cinta de color verde claro de 28x2,8 cm de longitud.
Tela muselina color azul de 30x20cm de longitud.
Cartulina con adorno de patrones color azul de 25x25 cm de longitud.
Palito de altura.
Pistola de silicona caliente.
Encendedor.
Tijeras.
Lo primero fue cortar el palito de altura a la mitad, ya que no quería una rosa con el tallo tan largo.
Y ahora sí, comencé por darle vueltas a la cinta alrededor de la punta del palito de altura, después de echarle silicona caliente. Di tres vueltas, más o menos, para que se viera bien el centro de la rosa.
| |
|---|
Lo siguiente fue torcer la cinta hacia abajo y dar una vuelta, mientras colocaba un puntito de silicona caliente en cada vuelta, para asegurar bien la rosa. Los torcidos de la cinta se hacen, más o menos, para simular los pétalos.
| |
|---|
Seguí repitiendo el proceso de torcer una vez en cada vuelta hasta que sentí que la rosa ya estaba considerablemente grande, y ya me quedaban aprox. unos 20 cm restantes de cinta. Entonces, comencé a torcer varias veces, como unas tres veces, antes de dar cada vuelta. Esto con la finalidad de que la rosa se viera más voluminosa y se notaran más grandes los pétalos, tal como ocurre con las rosas reales, cuyos pétalos se ven más abiertos en comparación a su centro.
Acá estaba un poco preocupada de que la rosa no se viera perfecta como una rosa, pero me hizo pensar en que ninguna flor es perfecta, al menos no si la vez de cerca… Un ejemplo de esto, son las peonias. Para mí, las peonias parecen unos pequeños bollitos que Dios creó, aplastándolas suavemente con su mano. No lo sé, siento que su desorden de pétalos (al menos a mi parecer), son mucho más hermosas que una flor que parece artificial de tanta perfección.
Así mismo, pienso igual de nuestras madres. No son perfectas, están lejos de serlo, pues son seres humanos. Pero me parece hermoso que, a pesar de todos sus defectos, se encarguen de criar con amor a un hijo. No todas lo hacen, algunas no son perfectas, pero tampoco son buenas, y es triste que existamos personas que, en el azar de la vida, nos hayan tocado madres que podrían ser cualquier cosa menos una madre. Lo siento mucho por todos los que les pasó. Aun así, creo que en la vida podemos elegir nuestra propia familia, aunque no sea de sangre.
En fin, solo quería dejar esa pequeña reflexión, seguimos con el tutorial.
| |
|---|
Después de dar varias vueltas a la cinta, me di cuenta de que la rosa se veía un poco inclinada hacia abajo. Además, no sabía cómo cerrar la rosa, es decir, no sabía qué hacer cuando ya me quedara poca cinta.
Así que decidí comenzar a doblarla hacia abajo para compensar el desequilibrio que había y, además, para comenzar a cerrar ya la rosa. Siempre poniendo un poco de silicona caliente en cada vuelta, para asegurar.
| |
|---|
Aquí ya comencé a dar vueltas sobre el resto del palito de altura, el cual vendría siendo el tallo de la rosa. Continué dando vueltas y torciendo hasta que llegué a la punta de la cinta.
| |
|---|
Así se vería nuestra hermosa rosa desde arriba, por cierto. Pegué la punta de la cinta al resto de la rosa, con un poco de silicona caliente. Y ya estaría la rosa lista.
Apreciación de la rosa desde arriba: ¿qué tal quedó?, ¿no es hermosa? Me encanta que la cinta sea satinada, le añade un toque elegante a la rosa. Además, esta forma de hacerla resulta bastante fácil y queda muy bella.
Pero aún hay más, no se vayan. Sigan leyendo, plis, jiji.
| |
|---|
Pegué la punta de cinta verde al palito de altura, tal como se ve en la imagen de la izquierda, justo donde termina la cinta azul. Luego doblé un poco la cinta y pegué el resto justo encima de donde la había pegado anteriormente. Espero que se entienda.
| |
|---|
Envolví el resto de la cinta alrededor del palo de altura y pegué con silicona.
Lo siguiente fue comenzar a dar vueltas al resto de la cinta alrededor del palo de altura, aplicando puntos de silicona de vez en cuando para asegurar.
Una vez llegué a la punta del palo, apliqué silicona caliente para pegar y corté el restante de la cinta, lo cual no era mucho. Con un encendedor, quemé un poco donde corté, para sellar la cinta y que no se deshilachara.
Con esto, ya estaría lista la rosa, ahora queda hacer el envoltorio.
Una fotito de apreciación a la rosa junto a su hojita verde, jiji. Me hubiera gustado hacer la hoja con un verde oliva, pero no tenía cinta de ese color. Sin duda, siento que un verde más oscuro le hubiera dado una apariencia más sobria a la rosa.
Pero bueno, es lo que hay, tampoco me disgusta totalmente, queda más bonito así, que sin nada.
| |
|---|
Aquí no sé muy bien lo que estaba haciendo, lo admito, pues nunca he hecho algo similar, pero me tocó improvisar.
Lo primero que hice fue tomar la cartulina y ponerla de manera que quedara con la parte blanca hacia arriba. Doblé las puntas del cuadrado hacia dentro, de manera que ambas tocaran el centro, tal como se ve en la segunda imagen.
| |
|---|
Ahora doblé nuevamente los bordes hacia dentro, pero de forma inclinada, de manera que solo las puntas inferiores se tocaran y las puntas superiores estuvieran lo más alejadas.
Entonces, doblé el resto inferior hacia arriba, para cerrar el envoltorio. Ahí, donde se unía la parte inferior con el resto del ramo, puse silicona caliente para pegarlo todo. Ya con esto estaría el envoltorio.
| |
|---|
Metí la rosa en su envoltorio, pero sentí que le faltaba algo. Entonces, recordé que tenía una tela azul, algo transparente.
Corté un rectángulo de tela de 20x30 cm y quemé los bordes con un encendedor para que no se deshilacharan.
Por último, me encargué de doblar la tela de forma bonita y la metí dentro del envoltorio, tal como se ve en la imagen de arriba. ¿Qué tal se ve?
Por último, en un pedacito de cartulina de 2x5 cm, escribí “Feliz Día”. Jaja, sé que quizá podrá parecer un poco seco, pero no soy una persona que suela demostrar afecto con palabras, no estoy acostumbrada. Aun así, espero que este detalle logre demostrarle todo lo que no puedo decir.
Y eso sería todo, quizá compre algún pequeño dulce y también lo añada. Pero eso no forma parte de este tutorial, jijiji.
Debo confesar que yo no tenía planeado subir nada referente al Día de la Madre en Hive. Pues, por cuestiones personales, no iba a regalar nada del Día de la Madre. Sin embargo, cuando me etiquetaron para que formara parte de esta iniciativa, decidí animarme a regalarle algo a una señora a la cual admiro mucho y le tengo cariño y respeto por igual: la madre de mi novio. Es una señora muy dulce y muy apacible. Quisiera agradecerle que haya criado a una persona tan maravillosa como mi novio, el cual es reflejo de los buenos valores que le inculcaron. En fin, me alegro de que la vida me haya dado la oportunidad de saber lo que es realmente el amor materno, al menos como espectadora.
En fin, no estoy participando en la iniciativa como tal, ya que yo no tengo a nadie a quien invitar, pero igual me complace compartirles este tutorial. Sin importar la ocasión, es un bonito regalo para alguien. Y gracias a esta bella comunidad por brindar siempre un espacio.
¡Espero que te haya gustado mi post!
Sin nada más que añadir… Cuídense, tomen agua, y no se olviden de sonreír. ¡Se les quiere! Nos vemos en el próximo post, ¡chau!
Credits | Créditos
- English translation DeepL (sorry for any mistakes, English is my second language)
- Traducción al inglés DeepL (lo siento por cualquier error, el inglés es mi segundo idioma.)
- Cover, dividers, and banners made in Canva
- Portada, separadores y banners hechos en Canva
- Photos used in the post were taken by me, using a Samsung Galaxy J6
- Las fotos usadas en el post fueron tomadas por mí, usando un Samsung Galaxy J6
Posted Using INLEO
https://x.com/Not_Celely/status/1922801573601612255
a stunning blue rose, l love the details it looks so beautiful.
Thanks! 🩷
Es una forma distinta y particular de hacer las flores con este material. Me encanta porque pienso que una vez que la aprendes, es muy rápido hacer y hacer mas.
Gracias por este Tutorial, lo guardaré para aprender con tu paso a paso.
Así es, es bastante fácil una vez le agarras el rollo, creo que lo más complicado es el detenerse a tomarle fotos al proceso, jajaja.
Gracias por pasar por mi post, espero que te queden muy bonitas. ✨
Que bella rosita, gracias por compartir 😉
Quedó preciosa la rosita 💕 es un lindo detalle para regalar , tu reflexión también fue muy buena a veces estás fechas pueden terminar siendo algo dolorosas por diversas razones, pero que bonito que le dieras un detalle a alguien especial para tí , me gustó esta forma de hacer una rosa , es diferente y original