Idea to Renew your Hoop Earrings | Tutorial |


English
Hiiii, friends of the DIYHub community, I'm back. How are you today? I hope you're doing great!
A few days ago I was going through my accessories and I found an earrings that I had for years, but I rarely used them. Now they were dusty, and their color was even duller than before. I definitely wouldn't devour if I wore these, haha.
But it got me thinking if there was any way to save them, since I'm a ring lover, but these are the only ones I have that aren't tiny.
So with a little ingenuity and using fabric (because I like to sew), let's see an idea to give a different touch to our earrings. Here we go!
Materials
- A pair of hoop earrings
- 2 rectangles of fabric, approx. 6×28 cm long
- Thread and needle.
Important note: The amount of fabric needed will depend on the measurements of your earrings. I made mine by taking into account the (almost) circumference of the earrings and their thickness, and doubling them. For example, the (almost) circumference of my earrings measured approx. 14 cm and their thickness approx. 2.5 cm. So I cut the fabric to 28 cm long and 6 cm wide (to leave a little room for the stitching and for the ring to slide easily through the fabric).
Let's keep going, hehehe.
Process
 |  |
|---|
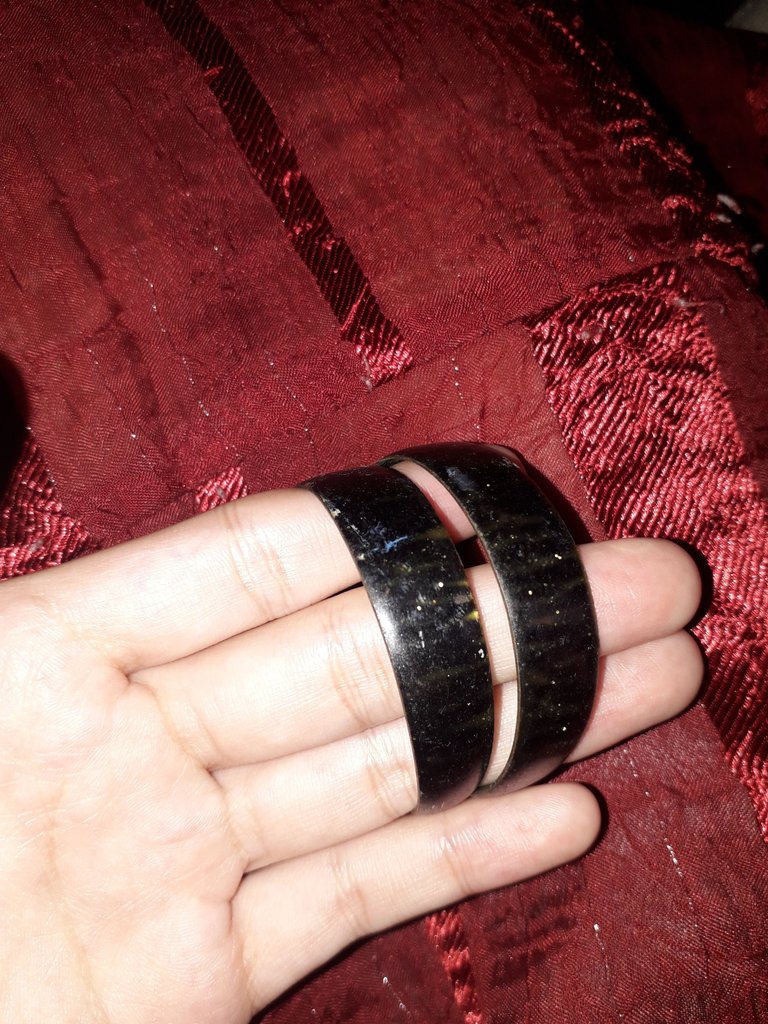
I present to you my earrings; these are going to be my victims today.
These earrings have a design, which consists of some sort of… stamped glue put on top of them. I must apologize, by the way, because despite being part of a crafting community, I have no idea what the names of some materials are. I'm just sure that this looked like some sort of colored silicone with glitter, and I'm sure of something else: I didn't like this design at all. Probably someone might have thought it was cute a few years ago, but I just didn't feel they were flashy enough. I'm sorry if anyone does like them; it's just a matter of preference, okay? But let's move on.
My first step was to, little by little, remove this glue stamped on top of the metal of the earrings. It was very satisfying to see the way the material peeled off smoothly, almost cleanly.
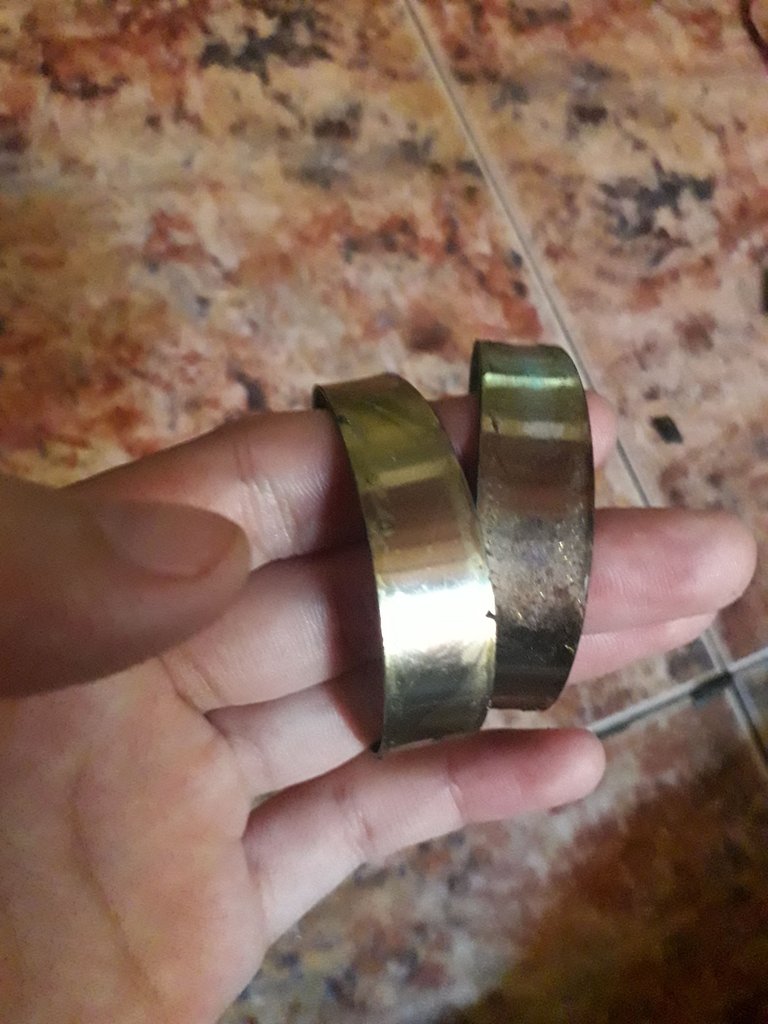
After removing all traces of the coating, we can see thick earrings made of fairly thin metal.
One of the reasons I had stopped wearing these earrings was because they were so heavy that they caused pain in my earlobe. But, as I got rid of their coating, I realized that they were now much lighter. So, yes, it was a good thing I got rid of the lining before renewing them.
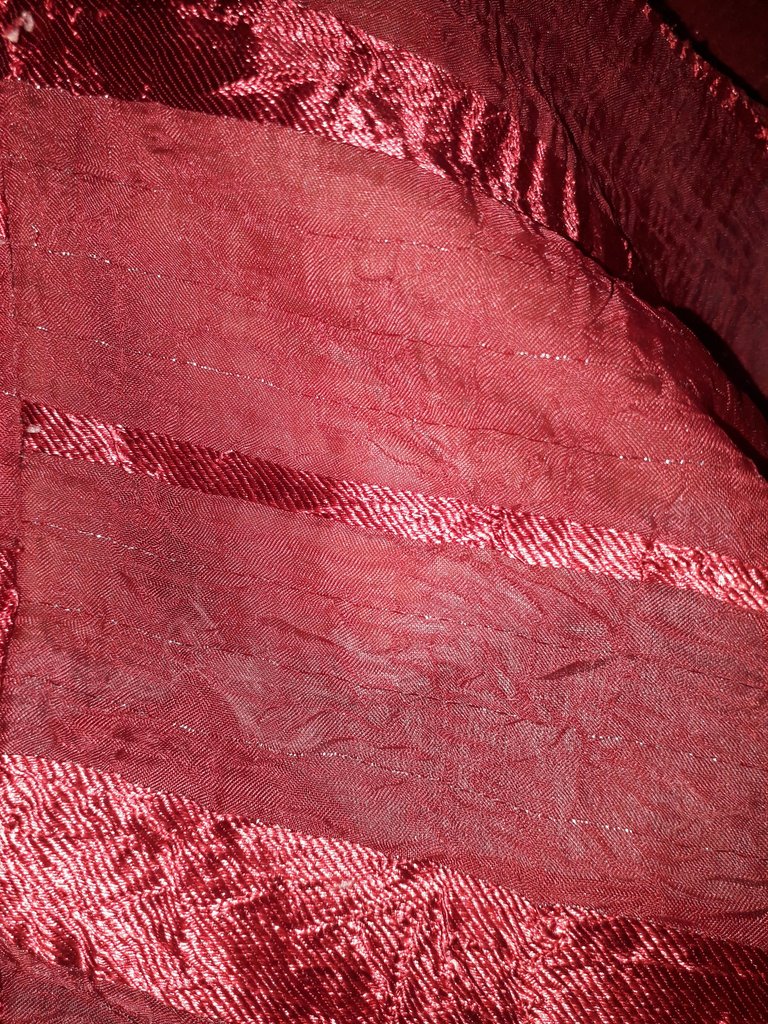
This is the fabric I will use for the work we will do today. I really like this fabric because of its color. Vino tint is a beautiful color. Plus, I love the transparency and the bright design lines it has.
This is a fabric that my mom had left over from something she made and then gave it to me. I'm a little embarrassed to admit that I work using leftover fabric, but it's also true that I use fabric that is in good shape and also would have ended up in the trash anyway. So I think we could look at using fabric scraps as recycling. The important thing is what we can do without spending, isn't it?
Anyway, now we start with the tutorial as such… But I warn you: it will be very easy.

So I cut the strips of fabric, trying to do it in an orientation where it would be an interesting design with some bright lines. Oh, at this point I was already starting to get excited, because I imagined how pretty it was going to be! But let's not get ahead of ourselves.
 |  |
|---|
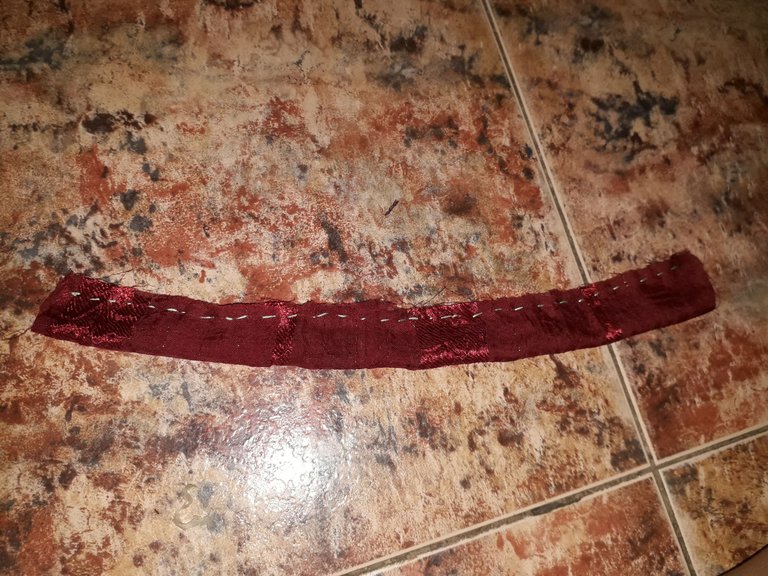
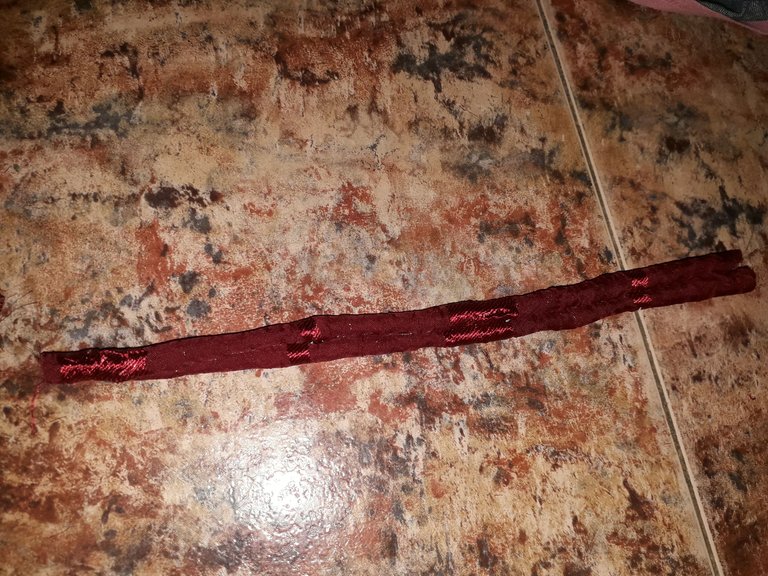
The first step is to fold the fabric in half so that we have a ribbon of approx. 3×28 cm. We are going to sew the entire edge of the ribbon, with the fabric inside out. Once the edge is sewn, I helped myself with a height stick to flip the ribbon so that the seam is on the inside. I flipped it over by first tucking a bit of fabric in and then pushing it further in with the height stick until our ribbon was already flipped over. I hope you understand. The important thing to know is that we sew the edges with the fabric inside out and then flip the fabric over so that the seam is on the inside.
Don't forget to burn each end of the ribbon with a lighter to seal the ends so it doesn't fray.
Now, can you see that this ribbon is hollow on the inside? Well…

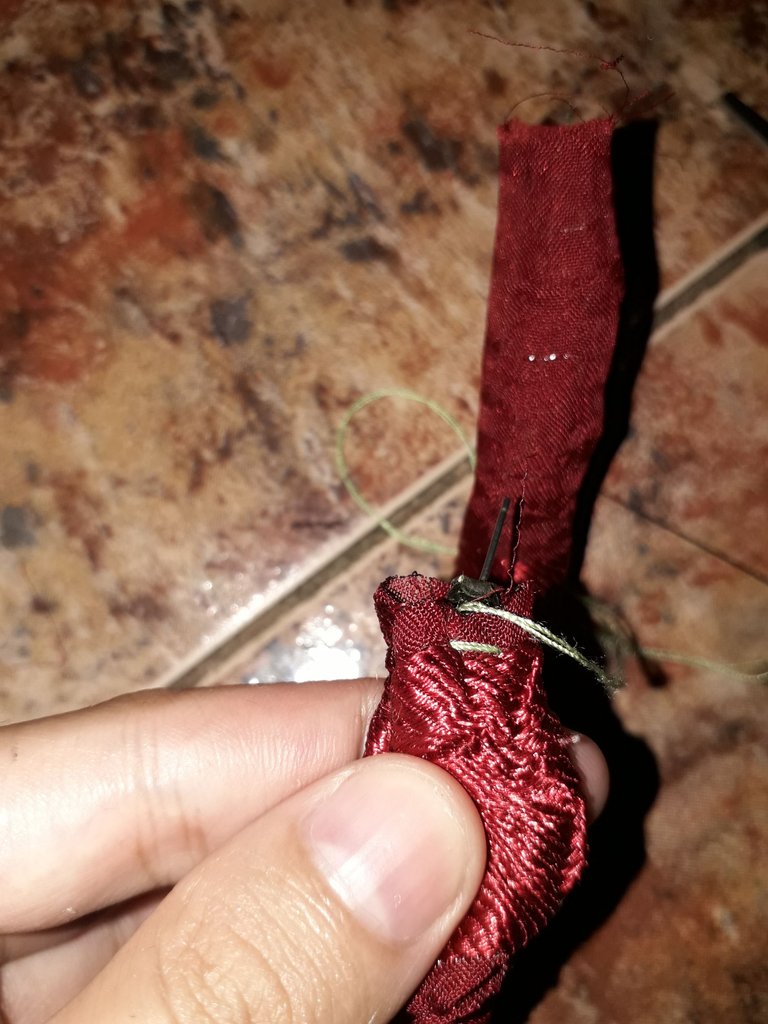
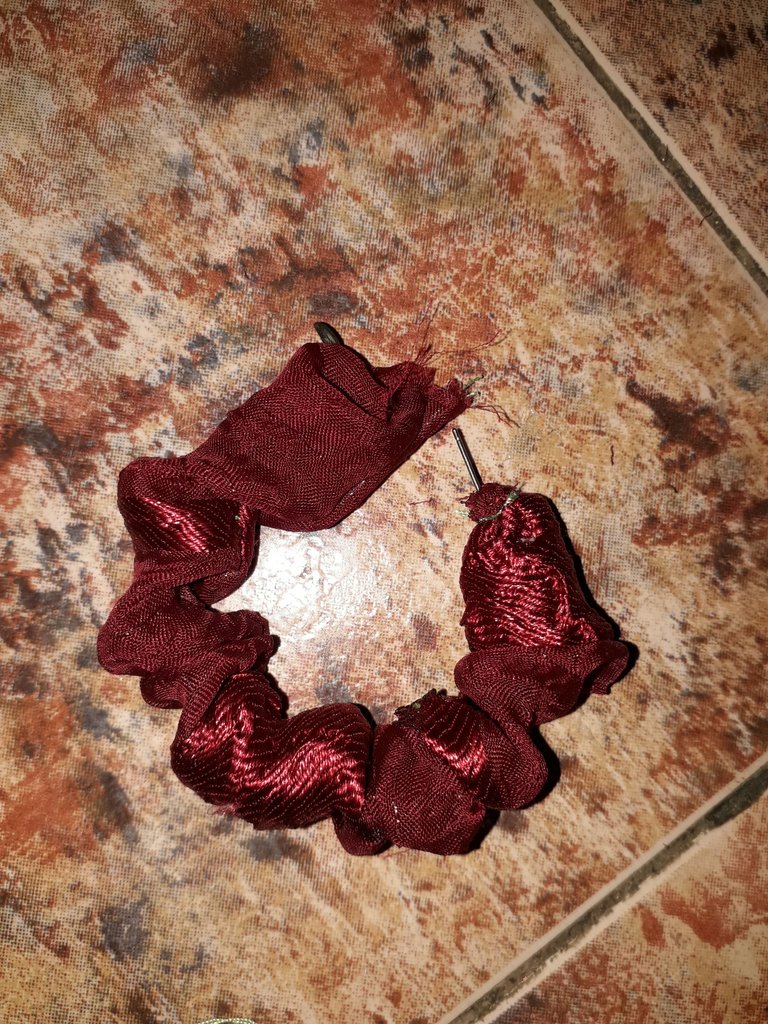
We take our ring and put one of its ends through the hole in the ribbon, until the opposite end of the ring coincides with the end of the ribbon. It will leave a scrunchie finish; that's the idea.
 |  |
|---|
With a needle and thread, I sewed and secured one end of the ribbon to the ring, making sure it is tight so that it does not slip.
And now we repeat the process on the other side. I know that the thread is visible, but I didn't have red. Besides, green and red are complementary, hehehe. They are little details.
Then we repeat the whole process again, now on the other ring.
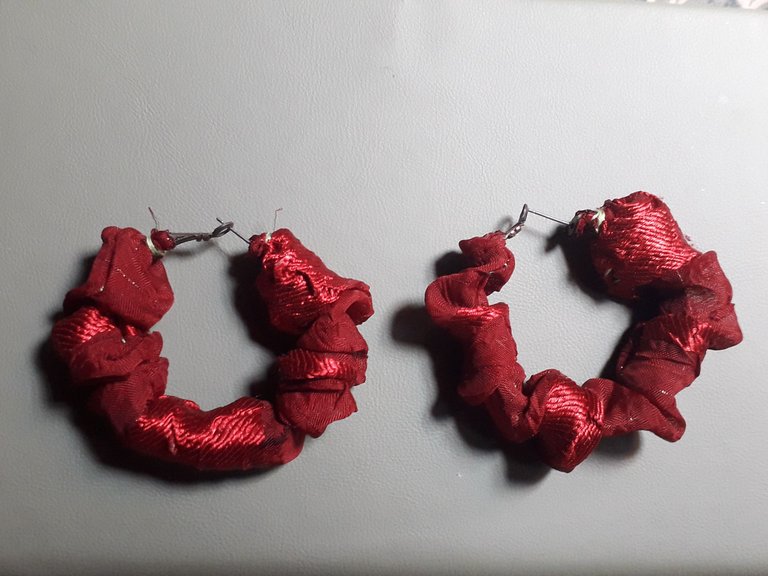
And that's it. I warned you, it is a very easy tutorial.
 |  |
|---|
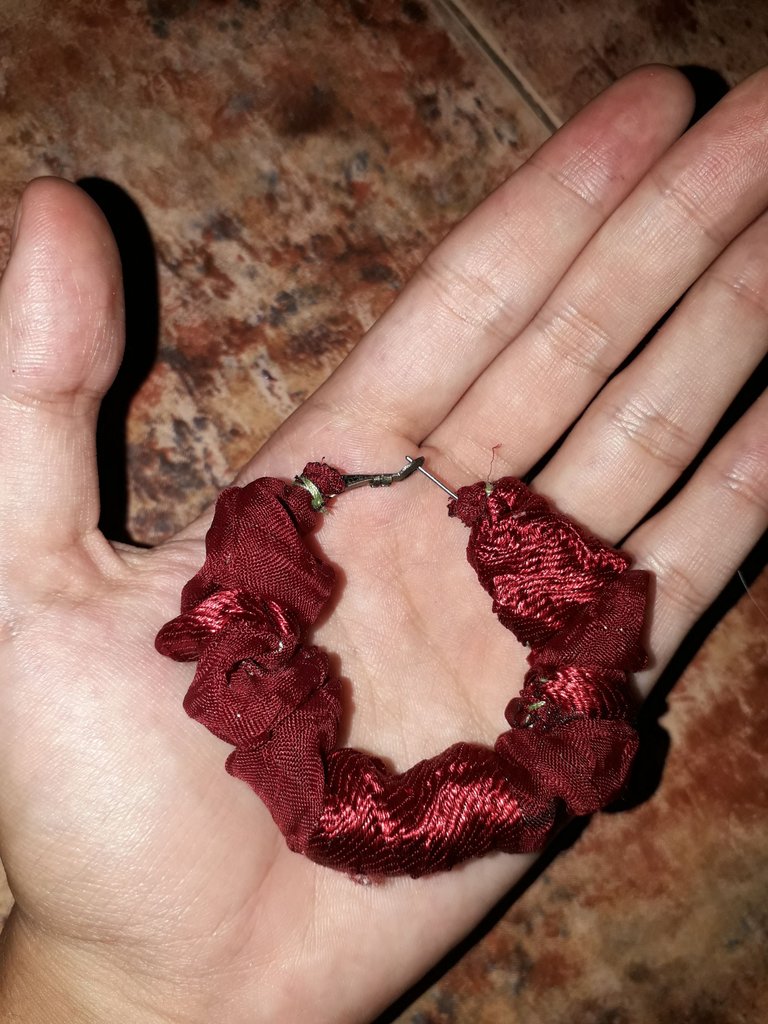
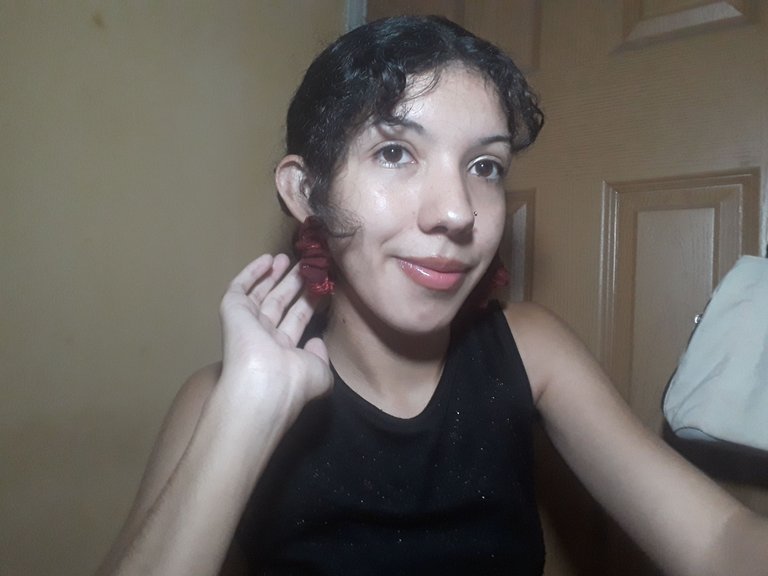
I really liked the scrunchie finish, plus now I really like the color. My only problem is that I don't know what to wear it with. The only thing I know, for some reason, is that it would look prettier if I wore them with pants and my hair up, but I'd also like to read suggestions. Would you guys do this idea with your earrings? I'd love to know how it would look in other colors, hehehe.
Hope you liked my post!
Without anything else to add… Take care, drink water, and don't forget to smile. Love you! See you in the next post, bye!
Español
Clic aquí!
Holiii, amigos de la comunidad de DIYHub, estoy de vuelta, ¿cómo se encuentran el día de hoy?, ¡espero que muy bien!
Hace unos días estaba revisando mis accesorios y encontré unas argollas que tenía desde hacía años, pero pocas veces las usé. Ahora, estaban empolvadas y su color era aún más opaco que antes. Definitivamente, no devoraría si usara estos, jajaja.
Pero, me hizo pensar en si existía alguna manera de salvarlas, ya que soy una amante de las argollas, pero estas son las únicas que tengo que no sean diminutas.
Así que con un poco de ingenio, y usando tela (porque me gusta coser), vamos a ver una idea para darle un toque diferente a nuestras argollas. ¡Vamos allá!
Materiales
- Un par de argollas
- 2 rectángulos de tela de aprox. 6x28 cm de longitud
- Hilo y aguja.
Nota importante: La cantidad de tela necesaria va a depender de las medidas de tus argollas. Yo las mías las hice tomando en cuenta la (casi) circunferencia de las argollas y su grosor, y duplicarlas. Por ejemplo, la (casi) circunferencia de mis argollas medía aprox. 14 cm y su grosor aprox. 2,5 cm. Por lo cual yo corté la tela de 28 cm de largo y 6 de ancho (para que quedara un poco de espacio para la costura y para que la argolla se deslizara fácilmente por la tela).
Sigamos, jiji.
Proceso
| |
|---|
Les presento a mis aretes, estas van a ser mis víctimas del día de hoy.
Estos aretes tienen un diseño, que consiste en una especie de… pegamento estampado, puesto encima de ellos. Debo disculparme, por cierto, pues a pesar de formar parte de una comunidad de artesanos, no tengo idea de cuál es el nombre de algunos materiales. Solo estoy segura de que esto parecía una especie de silicona coloreada con brillitos; y estoy segura de otra cosa: no me gustaba este diseño para nada. Probablemente, a alguien podría parecerle bonito hace algunos años, pero lo cierto es que yo sentía que no eran lo suficientemente llamativos. Lo siento si a alguien sí le gustan, simplemente se trata de cuestión de preferencias, ¿ok? Pero, sigamos.
Mi primer paso fue, poco a poco, ir retirando este pegamento estampado encima del metal de los aretes. Fue muy satisfactorio ver la manera en la que se despegaba suavemente el material, casi limpiamente.
Después de retirar todo vestigio del recubrimiento, podemos ver unos aretes gruesos, hechos de un metal bastante delgado.
Una de las razones por las que había dejado de usar estos aretes, era porque me resultaban tan pesados que llegaban a provocar dolor en el lóbulo de mi oreja. Pero, al deshacerme de su recubrimiento, me di cuenta de que ahora eran mucho más livianos. Por lo que, sí, fue un acierto deshacerme del recubrimiento antes de renovarlos.
Esta es la tela que usaré para el trabajo que haremos hoy. Me gusta mucho esta tela por su color. El vinotinto es un color precioso. Además, me encanta la transparencia y las líneas de diseño brillantes que tiene.
Esta es una tela que le sobró a mi mamá de algo que hizo y luego me la dio a mí. Me da un poco de vergüenza admitir que trabajo usando sobras de tela, pero también es cierto que uso tela que esté en buen estado y que además hubiera terminado en la basura de cualquier manera. Así que creo que podríamos ver el usar sobras de tela como reciclaje. Lo importante es lo que podemos hacer sin gastar, ¿no es así?
En fin, ahora sí comenzamos con el tutorial como tal… Pero les advierto: será muy fácil.
Así corté las tiras de tela, procurando hacerlo en una orientación donde quedara un diseño interesante, con algunas líneas brillantes. ¡Ay, a este punto ya comenzaba a emocionarme, porque me imaginaba lo bonita que iba a quedarme! Pero no nos adelantemos.
| |
|---|
El primer paso es doblar la tela a la mitad, de manera que nos quede una cinta de aprox. 3x28 cm. Vamos a coser toda la orilla de la cinta, con la tela al revés. Una vez cosida la orilla, me ayudé con un palito de altura para voltear la cinta, de manera que quedé la costura por dentro. Yo lo volteé primero metiendo un poco de tela hacia dentro y luego empujándola más hacia dentro con el palito de altura hasta que ya estuviera volteada nuestra cinta. Espero que se entienda, lo importante que deben saber es que: cosemos los bordes con la tela al revés y luego volteamos la tela para que la costura quede hacia dentro.
No olviden quemar cada extremo de la cinta, con un encendedor, para sellar las puntas y que no se deshilache.
Ahora, ¿se dan cuenta de que esta cinta está hueca por dentro? Pues…
Tomamos nuestra argolla y metemos uno de sus extremos por el hueco de la cinta, hasta que el extremo contrario de la argolla coincida con el extremo de la cinta. Nos va a dejar un acabado scrunchie, esa es la idea.
| |
|---|
Con un hilo y aguja, cosí y aseguré uno de los extremos de la cinta en la argolla, procurando que quede bien ajustado para que no se deslice.
Y ahora repetimos el proceso del otro lado. Sé que es visible el hilo, pero no tenía rojo. Además, el verde y el rojo son complementarios, jijiji. Son detallitos.
Luego repetimos todo el proceso de nuevo, ahora en la otra argolla.
Y ya estaría. Se los advertí, es un tutorial muy fácil.
| |
|---|
Me gustó mucho el acabado scrunchie, además de que ahora el color sí me gusta. Mi único problema es que no sé con qué ropa usarlo. Lo único que sé, por alguna razón, es que quedaría más bonito si los uso con pantalón y el cabello recogido, pero también me gustaría leer sugerencias. ¿Ustedes harían esta idea con sus argollas? Me gustaría saber cómo se vería en otros colores, jijiji.
¡Espero que te haya gustado mi post!
Sin nada más que añadir… Cuídense, tomen agua, y no se olviden de sonreír. ¡Se les quiere! Nos vemos en el próximo post, ¡chau!
Credits | Créditos
- English translation DeepL (sorry for any mistakes, English is my second language)
- Traducción al inglés DeepL (lo siento por cualquier error, el inglés es mi segundo idioma.)
- Cover, dividers, and banners made in Canva
- Portada, separadores y banners hechos en Canva
- Photos used in the post were taken by me, using a Samsung Galaxy J6
- Las fotos usadas en el post fueron tomadas por mí, usando un Samsung Galaxy J6
Posted Using INLEO
These earrings are beautiful and attractive. It looks amazing. It is great to see how you made this. Nice work! Thank you!
selected by @rezoanulvibes
Thank you very much for your support!
What a beautiful earing
Well explained
You did a nice earing and I love it
Thank you very much, I'm glad you liked it
Above all, you have created two extraordinary earrings using fabric and a necessary ring with great feeling. Thank you very much for illuminating this wonderful art world. This special new art will always be appreciated as a unique part of the art world.
Thank you very much, I am touched by your kind comment. I am glad to know that you like what I do. ✨
You are always welcome
I have seen this design in several accessories such as belts, headbands and in all cases they look great.
Yes, even in handbags, they always look beautiful!
Te quedo muy cuteee amigaaa 🤗💗
Muchas gracias bonitaaa 💖