Tutorial on how to make a beautiful embroidery. Tutorial de como realizar un bonito bordado [Eng/Esp]
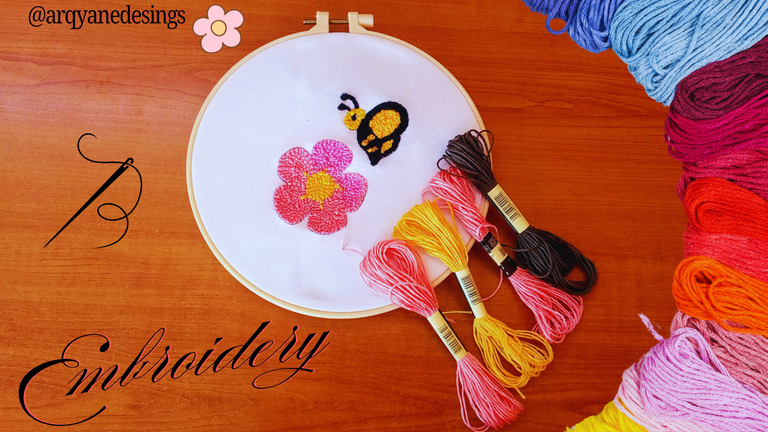
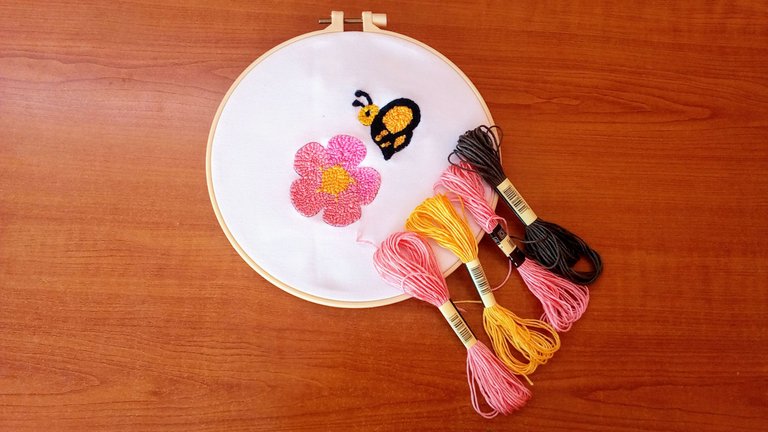
Hello my dear friends who love art and handicrafts, I hope you are well. Today I would like to share with you my first embroidery, because after several days practicing this technique of embroidery with magic needle and learning every detail of it, today I can show you the final result. If I am honest with you, it has not been very easy for me because it takes a lot of tricks and little things that when I'm starting it becomes a little complicated, but the truth is that it relaxes me a lot and I spend hours entertained and thinking about how to do the next step.
Hola mis queridos amigos amantes del arte y las manualidades, espero que se encuentren bien. En el día de hoy quisiera compartir con ustedes mi primer bordado, pues luego de varios días practicando esta técnica de bordado con aguja mágica y aprendiendo cada detalle de ella, hoy puedo mostrarles el resultado final. Si soy sincera con ustedes no me ha resultado muy fácil porque lleva muchos trucos y cositas que al estar comenzando se me tornan un poquito complicado, pero la verdad es que me relaja mucho y se me pasan las horas entretenida y pensando como hacer el siguiente paso.
I chose this design because it is something simple to start with, I am a lover of flowers and nature, besides it means a lot to me, because when I was a child I used to paint many flowers similar to these, something that was part of my daily life, and the bee reminds me of the moment I decided to enter this wonderful world of hive, so I wanted it to be part of my first embroidery. I will show you how I made it.
Escogí este diseño porque es algo sencillo para comenzar, soy amante de las flores y la naturaleza, además que significa mucho para mí, ya que de pequeña solía pintar muchas flores parecidas a estas, algo que formaba parte de mi día a día, y la abeja me recuerda el momento que decidí entrar en este maravilloso mundo de hive, por eso quise que formara parte de mi primer bordado. Enseguida les muestro como lo realicé.
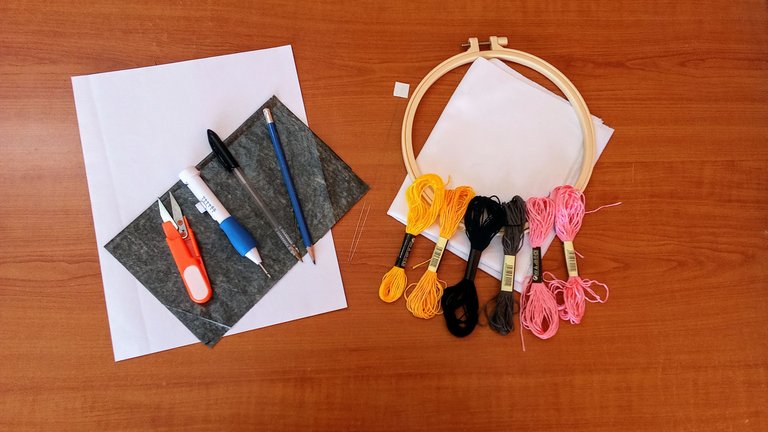
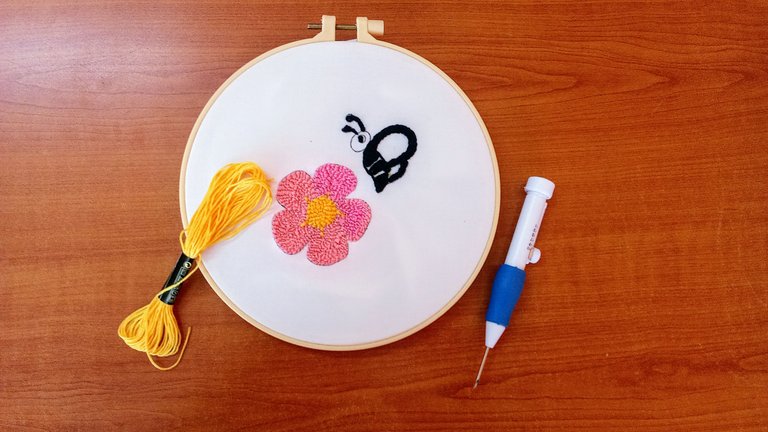
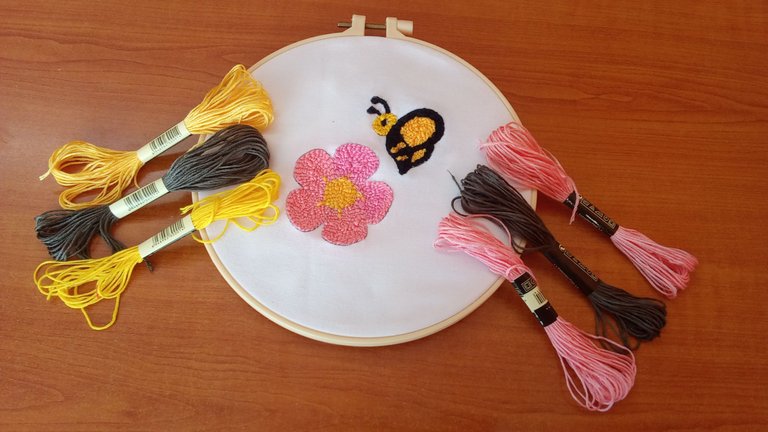
Materials//Materiales
Embroidery hoop//Aro para bordar
Cloth//Tela
Embroidery thread//Hilo de bordar
Threader//Enhebrador
Pencil//Lápiz
Pen//Bolígrafo
Magic needle//Aguja mágica
Scissors//Tijeras
White sheet//Hoja blanca
Carbon paper//Papel carbón
Step by step// Paso a paso
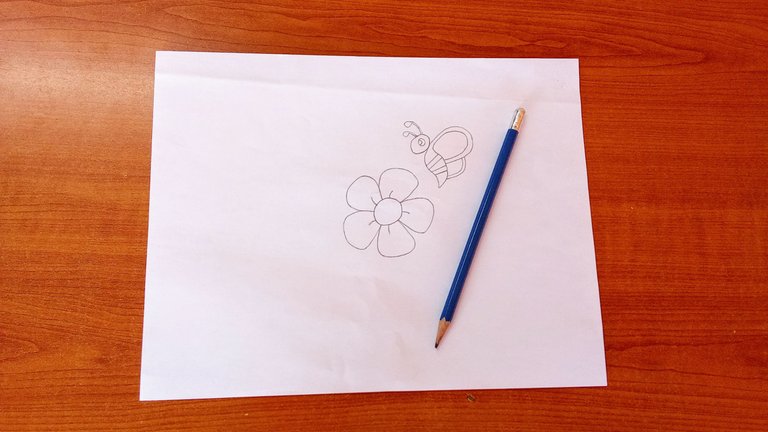
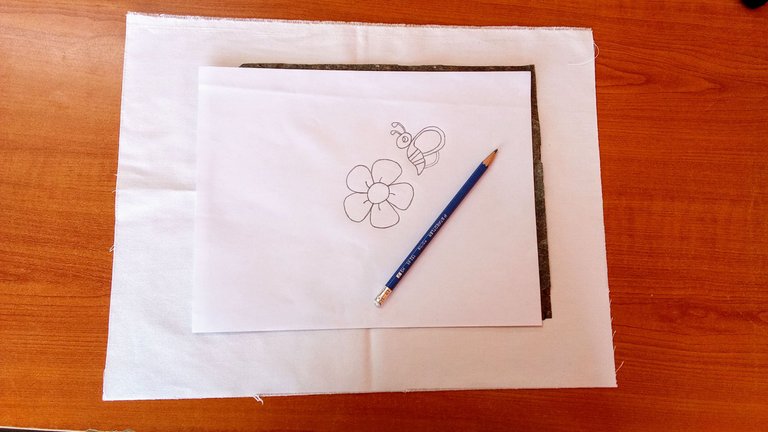
Step 1
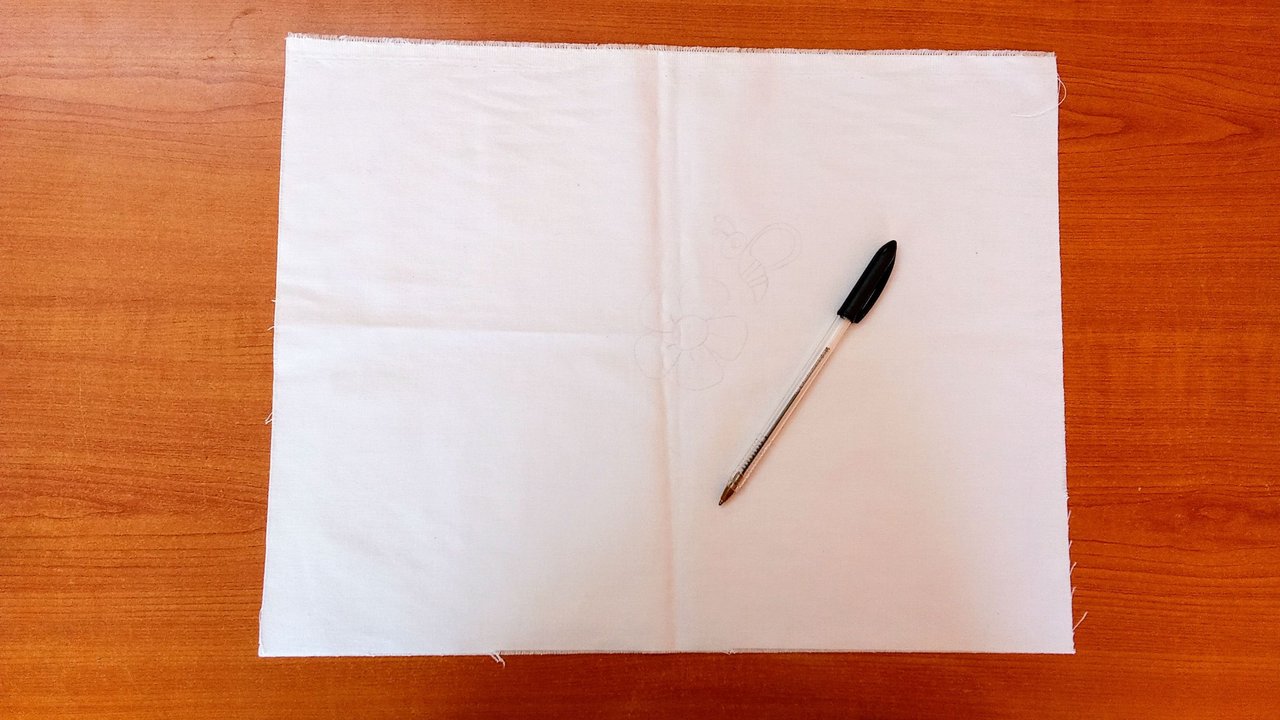
After choosing the design I am going to make, the first thing I do is to write it on a piece of paper with a pencil. Next, I put the fabric that I am going to use on the table, on which I place a carbon paper and on top of the drawing to take it to the fabric with the pencil. When finished you will notice that it is a little clear so you should pass over it with a pen to highlight it and make it look good, and then put the fabric in the hoop making sure it is well stretched.
Paso 1
Luego de escoger el diseño que voy a realizar lo primero que hago es plasmarlo en una hoja de papel con un lápiz. Seguidamente, pongo la tela que voy a utilizar encima de la mesa, sobre la cual coloco un papel carbón y encima el dibujo para con el lápiz llevarlo a la tela. Al terminar se darán cuenta que queda un poco claro por lo que se debe pasar con un bolígrafo por encima para resaltarlo y que se vea bien, para después poner la tela en el aro asegurándonos de que quede bien estirada.
 |  |
 |  |
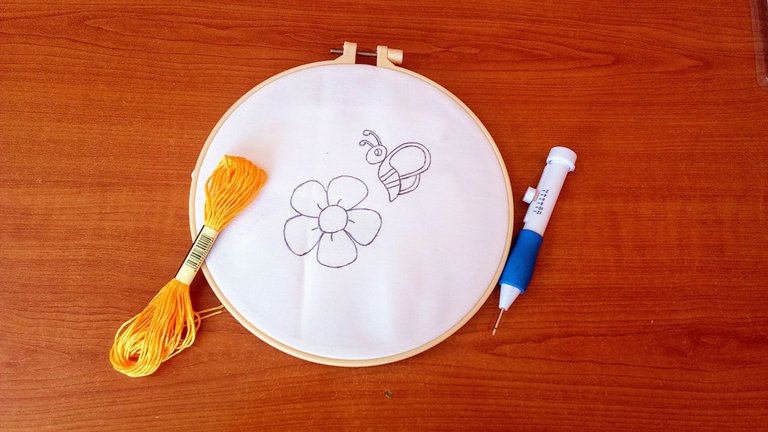
Step 2
The next step will be to thread the needle, we will start with the yellow thread for the center of the flower and start embroidering carefully from the outside to the inside, making sure that the stitches have more or less the same length. Once the center of the flower is finished, we will use the pink thread for its petals, using the same technique I mentioned before.
Paso 2
El siguiente paso será enhebrar la aguja, comenzaremos con el hilo color amarillo para el centro de la flor y comenzamos a bordar cuidadosamente de afuera hacia adentro teniendo en cuenta que las puntadas tengan más o menos el mismo largo. Una vez terminado el centro de la flor, utilizaremos el hilo rosado para sus pétalos, utilizando la misma técnica que les mencioné anteriormente.
 | 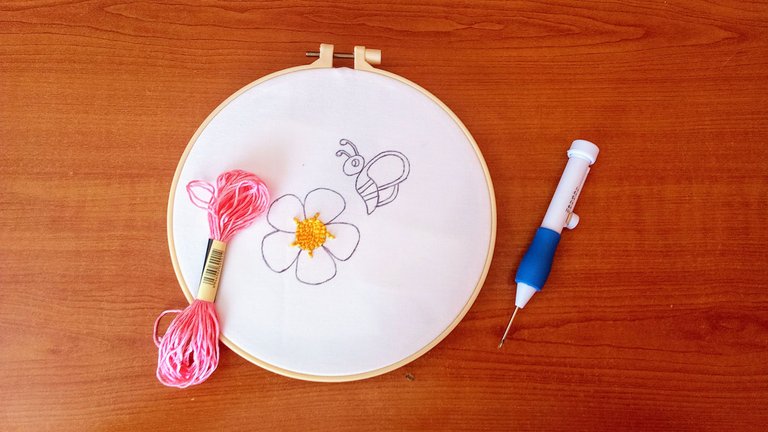 |
Step 3
Next, we use the black thread for the bee where we start embroidering its eyes, antennae until we finish with the outline of its body and wings.
Paso 3
Seguidamente, utilizamos el hilo negro para la abeja donde se comienza a bordar sus ojos, antenas hasta terminar con el contorno de su cuerpo y alas.
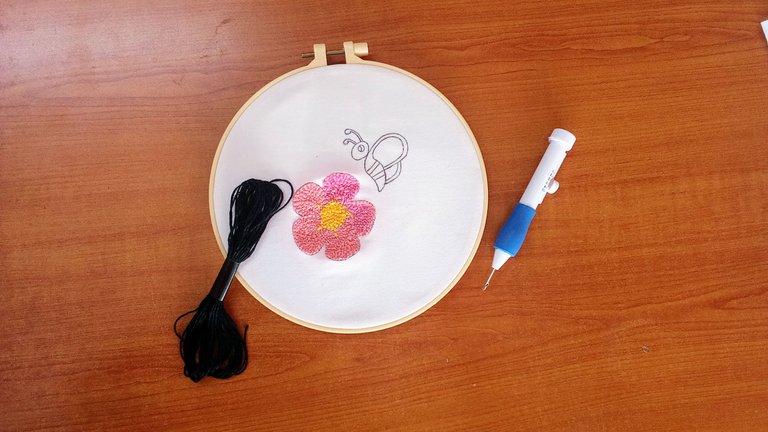 | 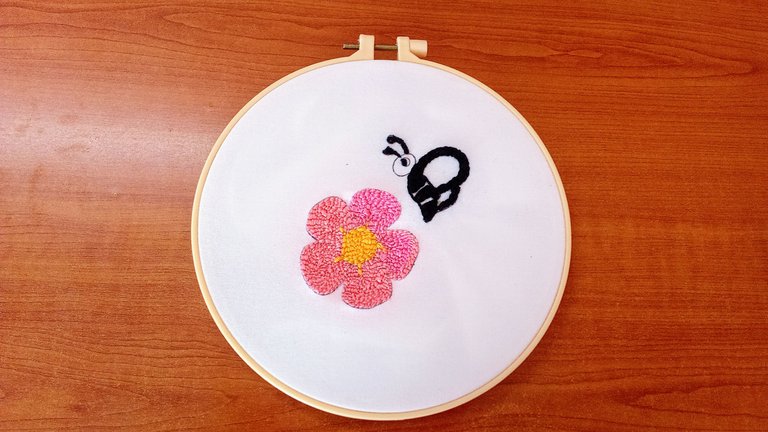 |
Step 4
Finally, we use yellow for the head of the bee and fill in its wings and part of the body. Always from the outside to the inside, trying to keep the length of the stitches the same. I chose this shade of yellow because it contrasts perfectly well with the black color and makes it look more eye-catching.
Paso 4
Por último, utilizamos amarillo para la cabeza de la abeja y rellenar sus alas y parte del cuerpo. Siempre desde afuera hacia adentro, tratando que el largo de las puntadas sea el mismo. Escogí esta tonalidad de amarillo porque con el color negro contrastan perfectamente bien y hace que se vea más llamativo.
 | 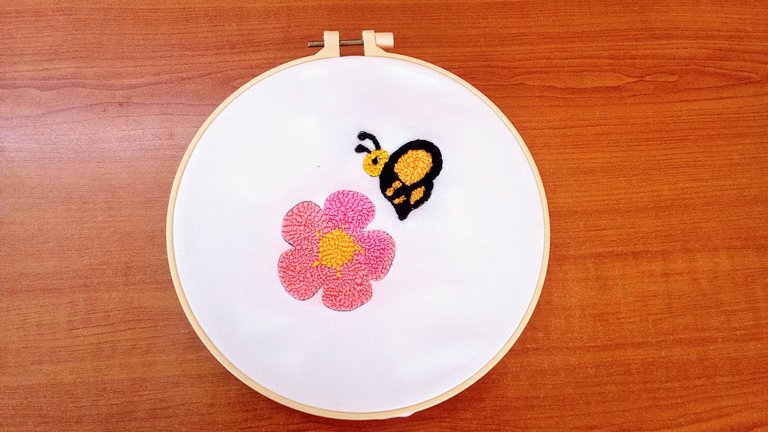 |
This way this embroidery is ready to be used either for a kitchen towel, sheet, bag or whatever you want to make your design more striking, also to give it to a special person as a souvenir. I hope you liked it, let me know what you think. I will be attentive to your comments.
De esta forma está listo este bordado que se puede utilizar ya sea para un pañito de cocina, sábana, bolso o lo que deseen para hacer más llamativo su diseño, también para regalárselo a alguna persona especial como recuerdo. Espero que les haya gustado, díganme que les parece. Estaré atenta a sus comentarios.
|  |
 |  |
Créditos y Recursos//Credits and Resources
Translated by DeepL
Cover page created in Canva Pro
Images captured with my Samsung Galaxy F13
Thanks for Visiting my Blog
Posted Using INLEO
Me alegro mucho que hayas comenzado a bordar, es una buena terapia para el estrés, y así aprovechamos y nos entretenemos el tiempo de los apagones 🫣😅
Así mismo es, un método de entretenimiento cuando no hay corriente jjjj.
Siiii 😂
This is absolutely stunning and the final result is a blast, well done and incredible creativity you have shared with us.
Thank you so much for stopping by, I'm glad to hear you liked it.
Que bonita tecnica, sigue asi que vas por buen camino, te quedo muy lindo tu primer bordado 😍
Muchas gracias, me alegro mucho que te haya gustado, los próximos espero que queden mejor.
Wow, it's very beautiful, the little bee and pink flowers look very sweet.
Thank you very much 🤗.
Yes, you're welcome♥️
You have made it very beautiful. If you take a closer look at the picture, it looks even more beautiful.
Thank you very much, it's good that you liked it. I put a lot of effort and dedication into making it.
Yane, te quedó cuqui-cuqui. Qué bueno que te animaste a compartir lo que has aprendido sobre el bordado. Espero próximamente ver más de tus creaciones por acá.
Muchas gracias, pues sí, después de tanto practicar me animé a compartirlo. Vamos a ver que se me ocurre para la próxima.
Trying new things can be pretty difficult but once we are able to find a way around it, we can do it. Great job friend.
selected by @ibbtammy