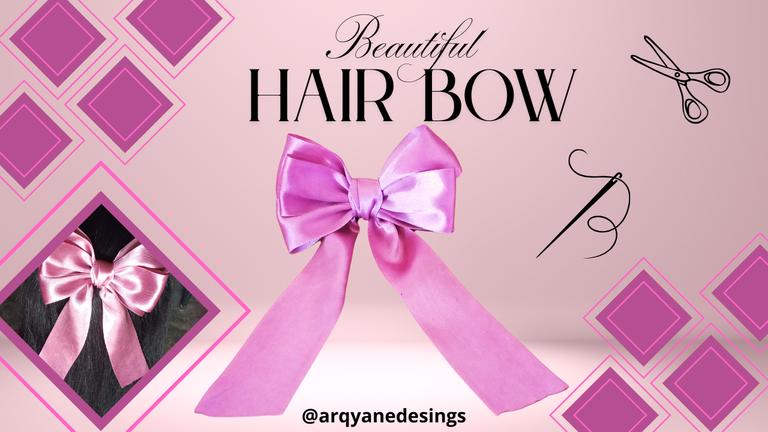
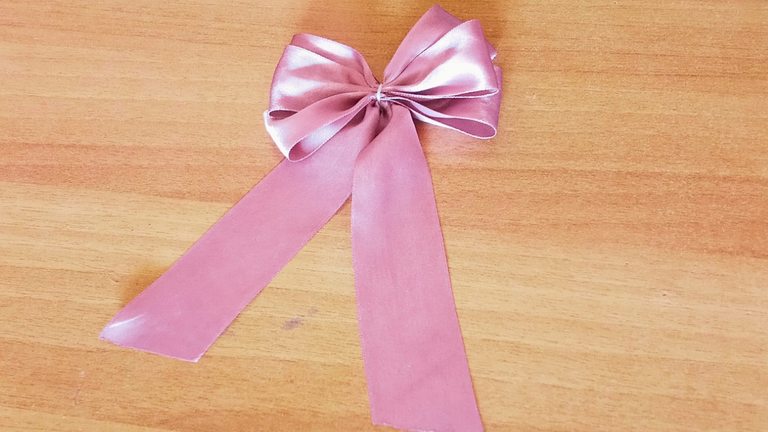
How to make a beautiful hair bow. Como realizar un hermoso lazo para el cabello [Eng/Esp].
Hello my dear friends who love art and crafts, I hope you are doing well today. This time I want to share with you a very easy way to create a hair bow, another nice and useful accessory, because my sister and I have always been fans of these decorations and nothing better than making it myself in a very simple way.
Hola mis queridos amigos amantes del arte y las manualidades, espero que se encuentren bien en el día de hoy. En esta ocasión quiero compartir con ustedes una manera muy fácil de crear un lazo para el cabello, otro accesorio bonito y útil, pues mi hermana y yo siempre hemos sido fanáticas a estas decoraciones y nada mejor que realizarla yo misma de una manera muy sencilla.
It turns out that this coming week is the 11th birthday of a little cousin of mine and it occurred to me to surprise her with this beautiful detail made with love and dedication. For several days I wanted to make this bow and that was the push I needed to do it. I will show you how I made it.
Resulta que esta semana próxima es el cumpleaños número 11 de una primita mía y se me ocurrió sorprenderla con este bonito detalle hecho con mucho amor y dedicación. Desde hace varios días quería realizar este lazo y ese fue el empujón que necesitaba para hacerlo. Enseguida les muestro como lo realicé.
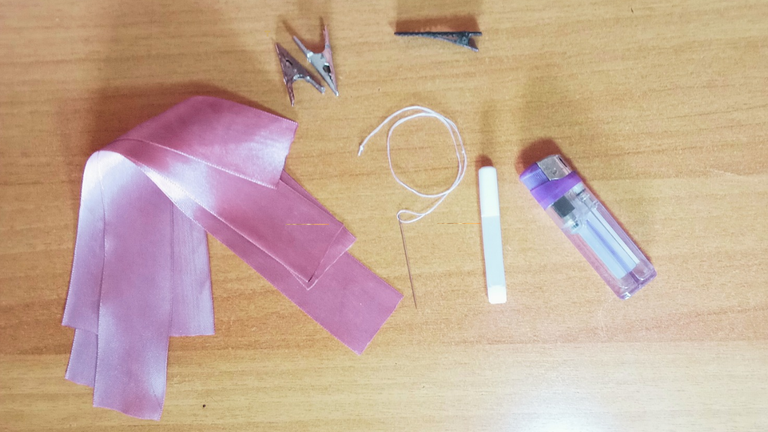
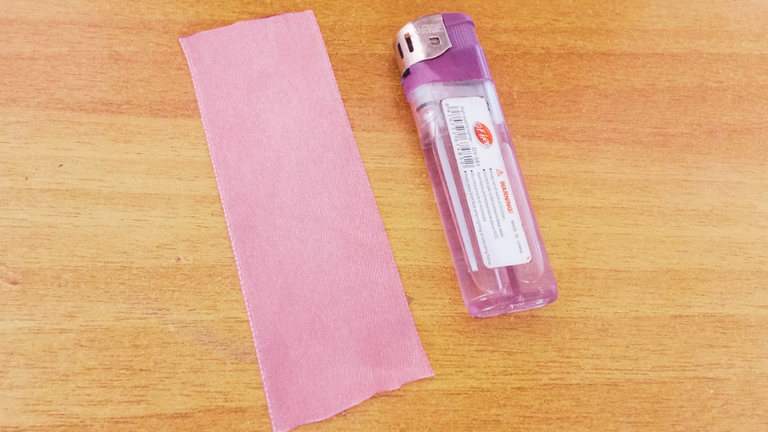
Materials//Materiales
1 ribbon 4 cm x 22 cm//1 cinta de 4 cm x 22 cm
2 ribbons of 4 cm x 24 cm//2 cintas de 4 cm x 24 cm
1 ribbon of 4 cm x 32 cm//1 cinta de 4 cm x 32 cm
1 ribbon 4 cm x 5 cm//1 cinta de 4 cm x 5 cm
Hair clip//Pinza para cabello
Thread and needle//Hilo y aguja
Glue//Pegamento
Lighter//Mechero
Step by step// Paso a paso
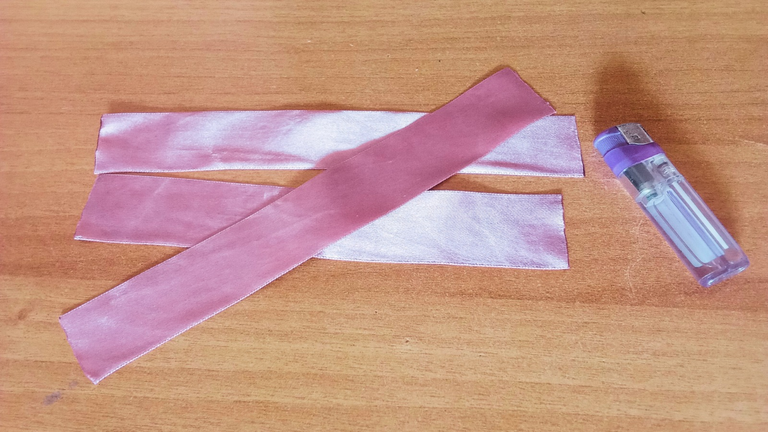
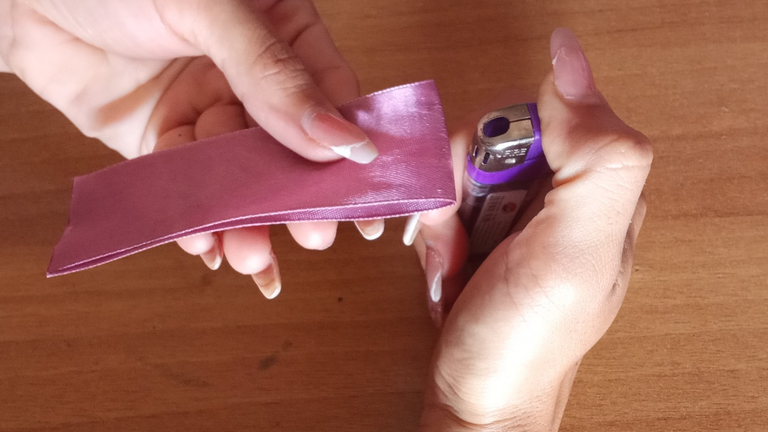
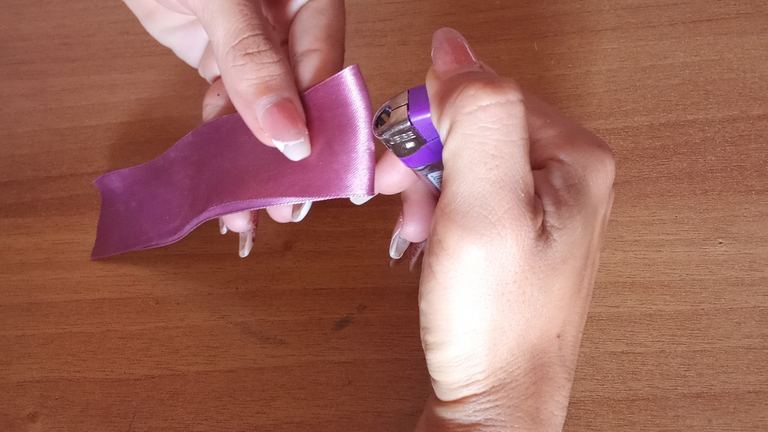
Step 1
The first thing to do is to fold the 22 cm ribbon in half and with the lighter give a little heat on the fold and apply pressure to maintain this mark. Repeat this process for the 24 cm ribbons as well.
Paso 1
Lo primero será doblar por la mitad la cinta de 22 cm y con el mechero darle un poco de calor en el doblez y hacer presión para mantener esta marca. Se debe repetir este proceso para las cintas de 24 cm también.
 | 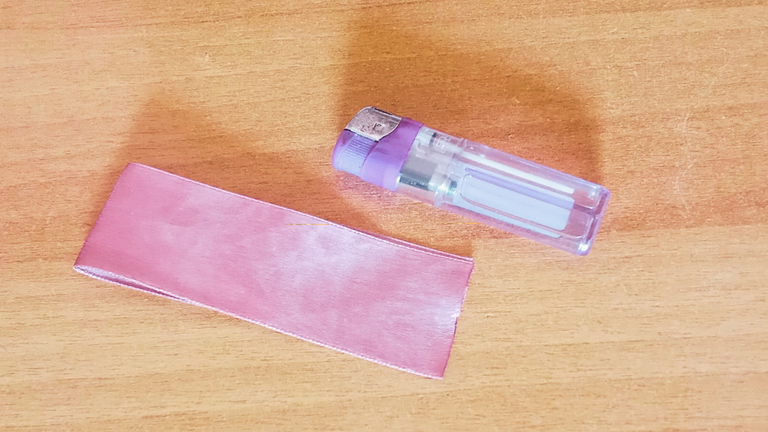 |  |
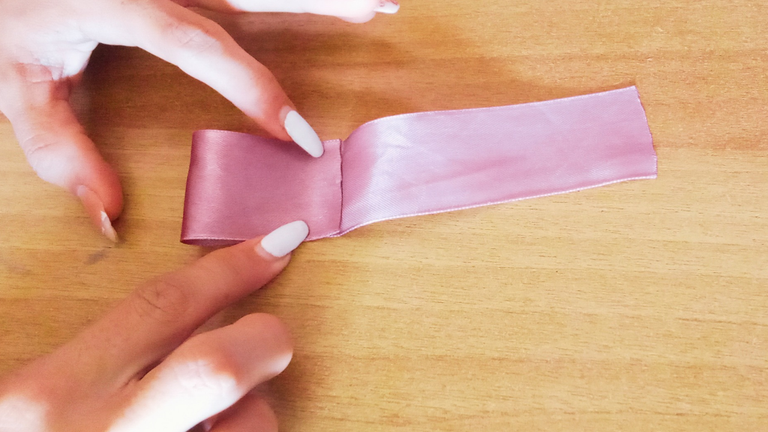
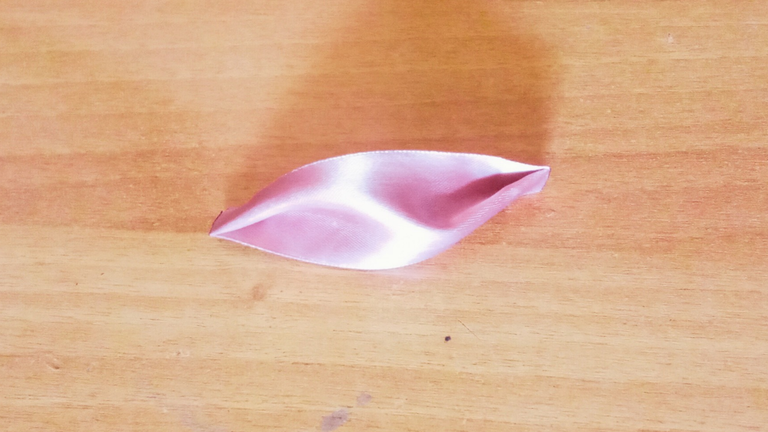
Step 2
Once this is done, fold each of the ends, gluing them to the center with the lighter by applying pressure, repeat in the same way for the 24 cm ribbons.
Paso 2
Una vez hecho esto se dobla cada uno de los extremos pegándolos al centro con el mechero haciendo presión, se debe repetir de igual manera para las cintas de 24 cm.
 |  |
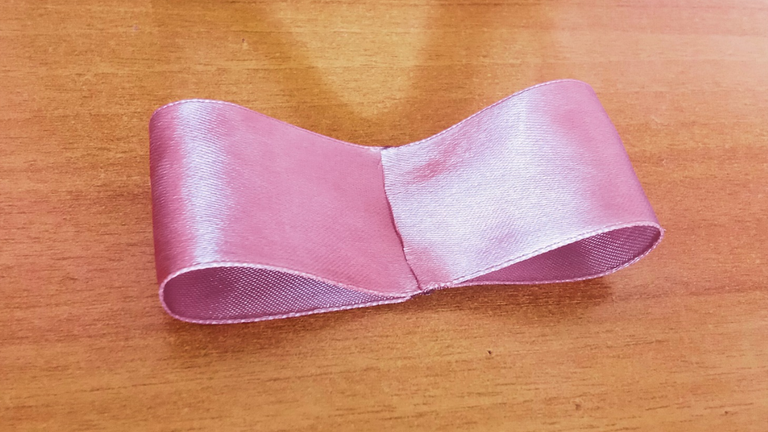 |  |
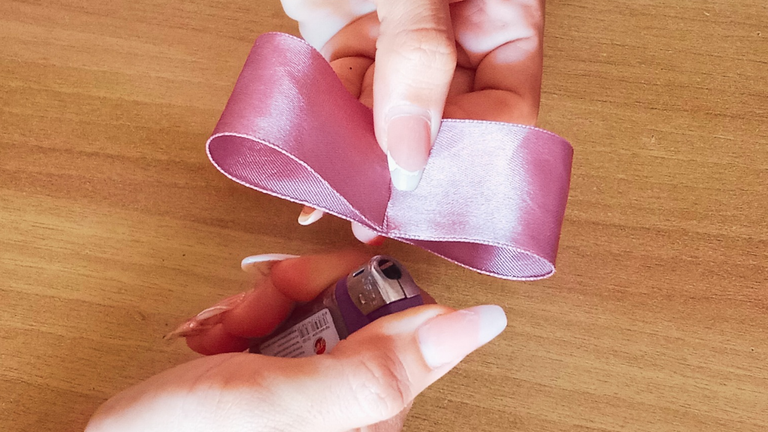
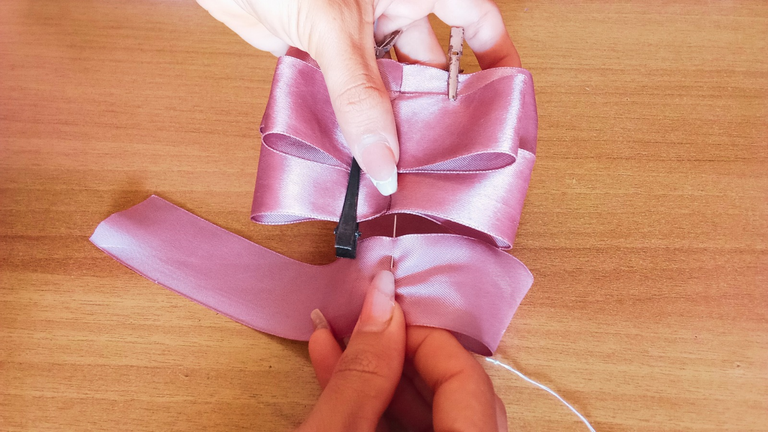
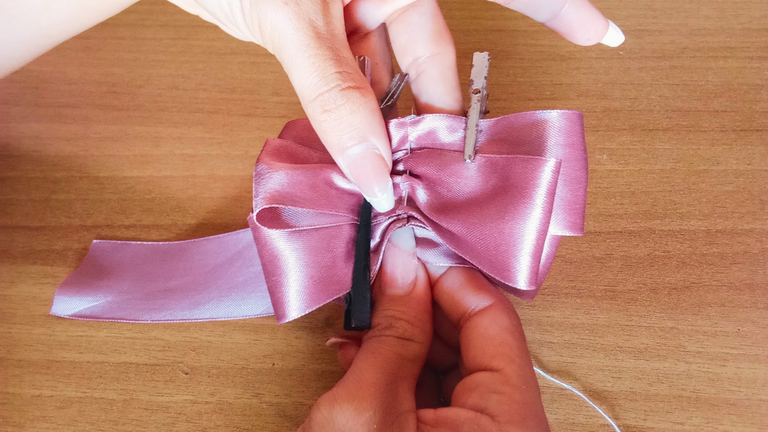
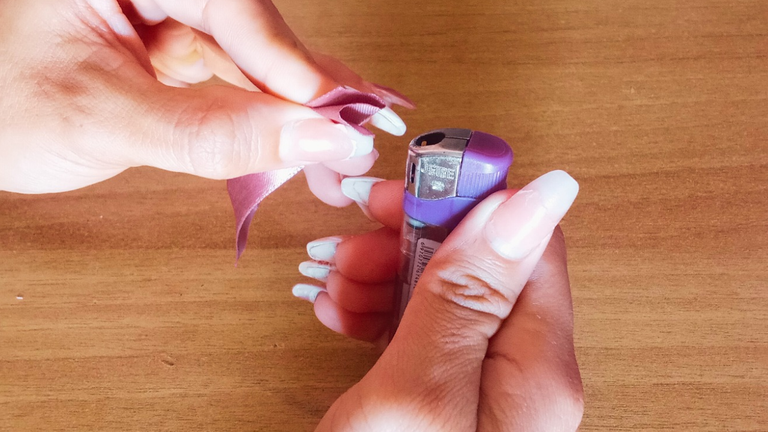
Step 3
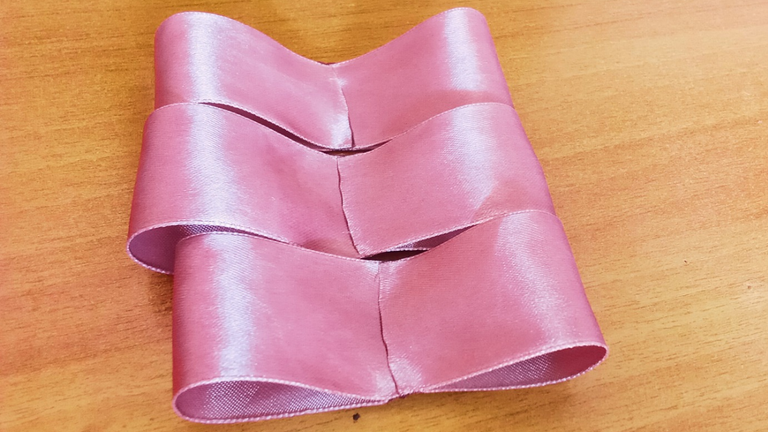
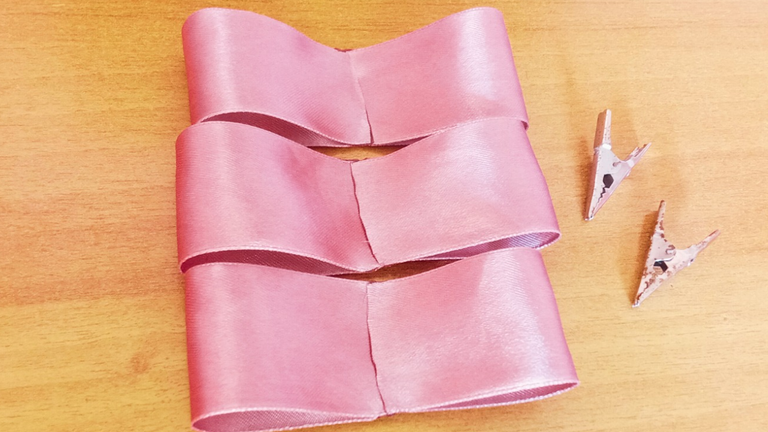
Now put the 24 cm ribbons next to each other and the 22 cm ribbon on top of the two, just in the center, fixing them with tweezers so that they do not move when fixing all the pieces.
Paso 3
Ahora se ponen las cintas de 24 cm una al lado de la otra y la de 22 cm encima de las dos, justamente en el centro fijándolas con pinzas para que no se muevan a la hora de fijar todas las piezas.
 |  |
Step 4
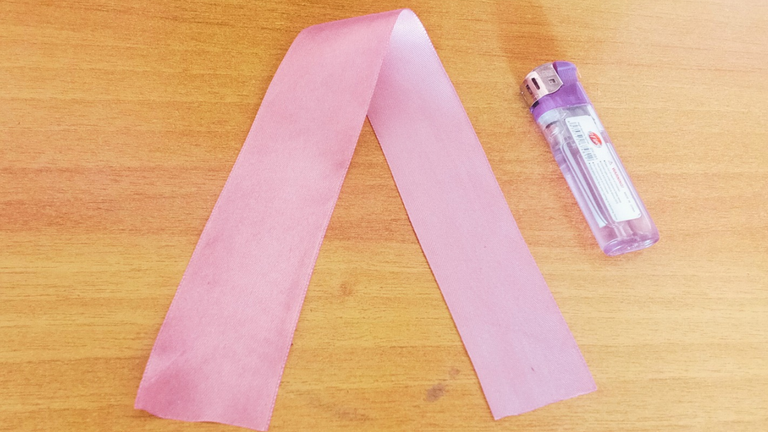
The next step is to take the larger 32 cm ribbon, fold it in half and heat it with the lighter to mark the center.
Paso 4
Lo siguiente será tomar la cinta más grande de 32 cm, doblarla por la mitad y darle calor con el mechero para marcar el centro.
 |  |
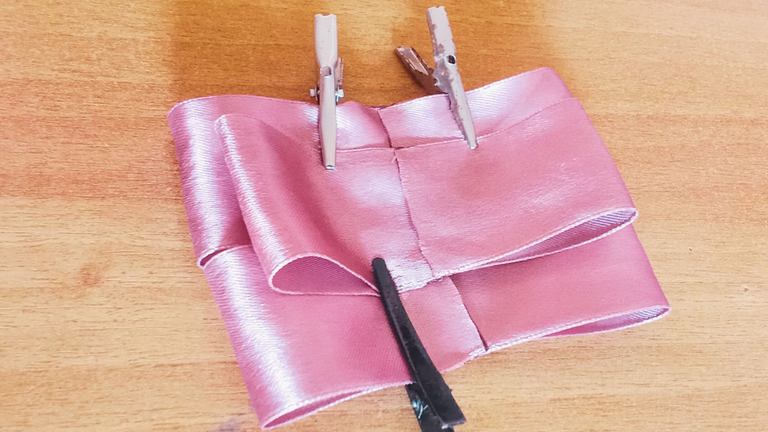
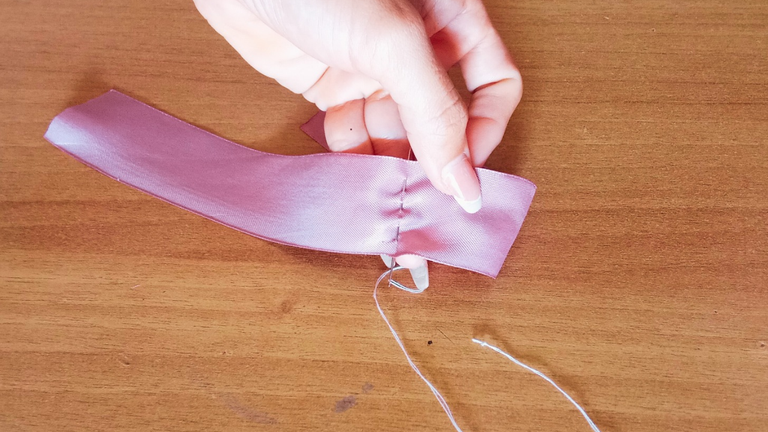
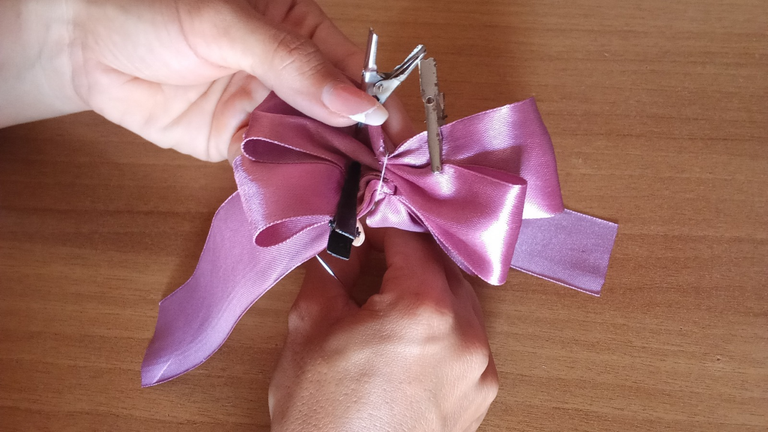
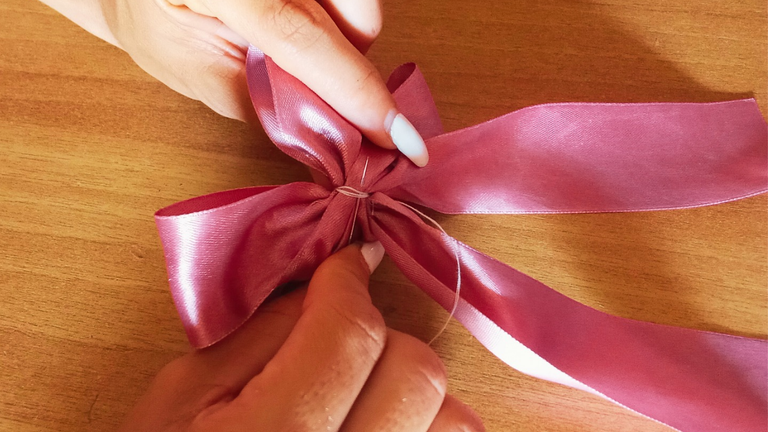
Step 5
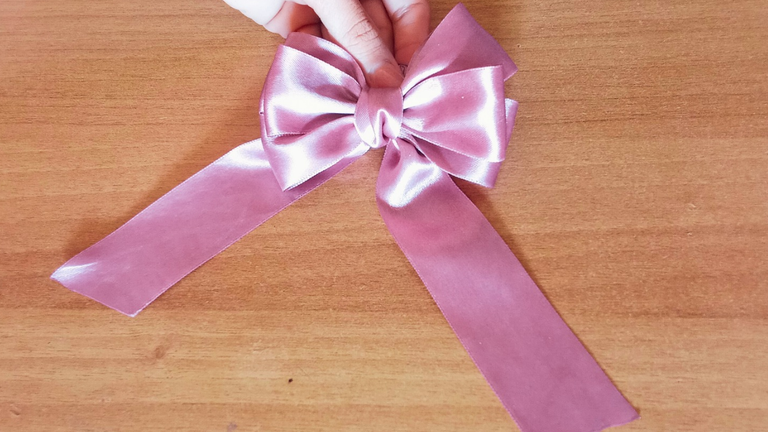
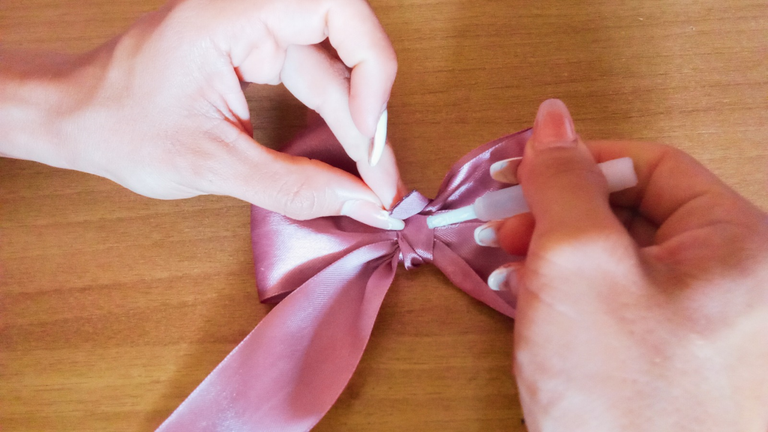
This is one of the most important steps and it is necessary to do it very calmly and carefully so that nothing goes wrong. Take the needle and thread and pass through the center of the 32 cm ribbon that we had previously marked as shown in the picture, and then pass the needle through the center of the other three ribbons previously fixed. Then the thread should be lengthened, arranging the ribbon little by little and turning it over with the thread several times until it is tight, tying a knot at the back of the ribbon so that it does not come undone.
Paso 5
Este es uno de los pasos más importantes y es necesario realizarlo con mucha calma y detenimiento para que no nos salga nada mal. Se debe coger la aguja e hilo y pasar por el centro de la cinta de 32 cm que habíamos marcado previamente como muestro en la imagen, para después ir pasando la aguja por el centro de las otras tres cintas fijadas anteriormente. Luego se debe alar el hilo, acomodando de a poco el lazo y se le da la vuelta con el hilo varias veces hasta que quede bien apretado realizando un nudo por la parte de atrás del lazo para que no se desate.
 |  |  |
 |  |  |
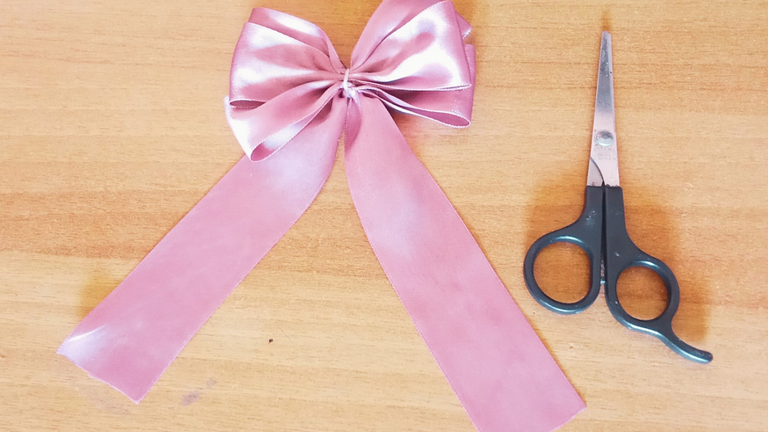
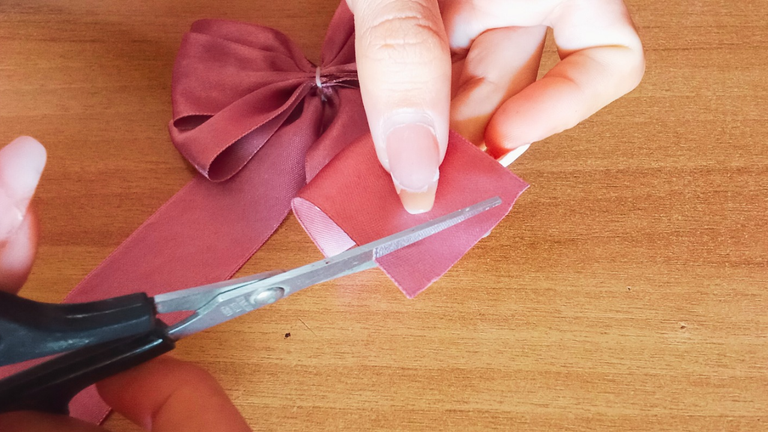
Step 6
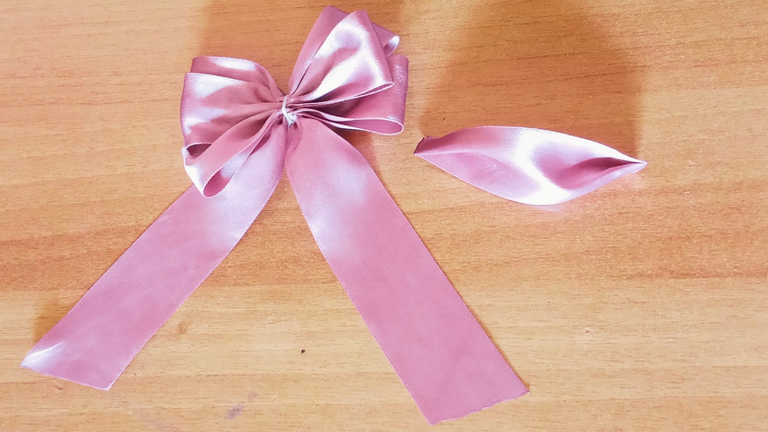
Take the ends of the loop and cut them at an angle and then pass the lighter to even out and seal the ends well.
Paso 6
Tomar los extremos del lazo y cortarlos de forma inclinada para luego pasarle el mechero emparejando y sellando bien los extremos.
 |  |
 |  |
Step 7
Take the smallest piece of ribbon and fold it into a z-shape, glue each end in this way and then place it in the center, turn it over and glue it to the back of the ribbon.
Paso 7
Tomar el pedazo de cinta más pequeño y doblar en forma de z pegando cada uno de los extremos de esta manera para después ponerlo en el centro, dar la vuelta y pegar en la parte posterior del lazo.
 |  |  |
 |  |  |
Step 8
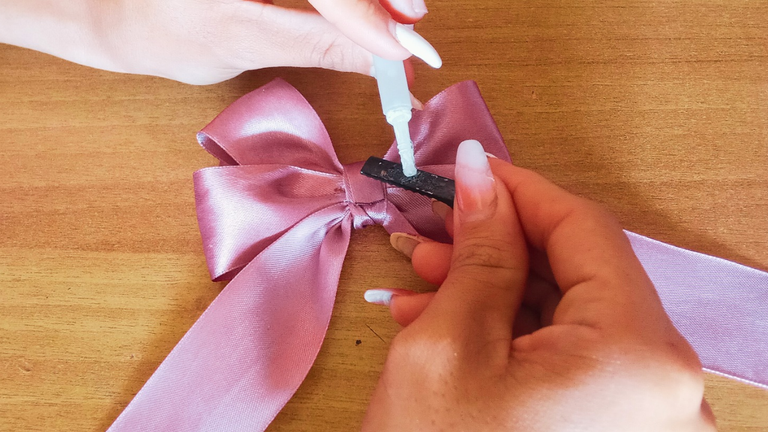
Now put glue on top of the clip and glue it to the back.
Paso 8
Ahora se le pone pegamento encima de la pinza y pegarla a la parte posterior.
 | 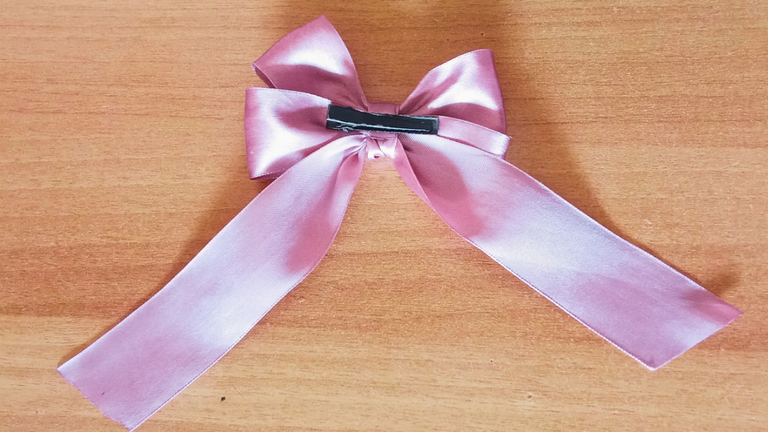 | 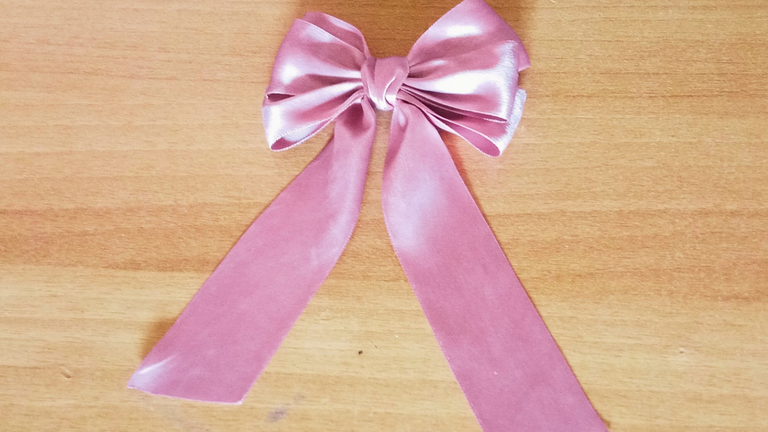 |
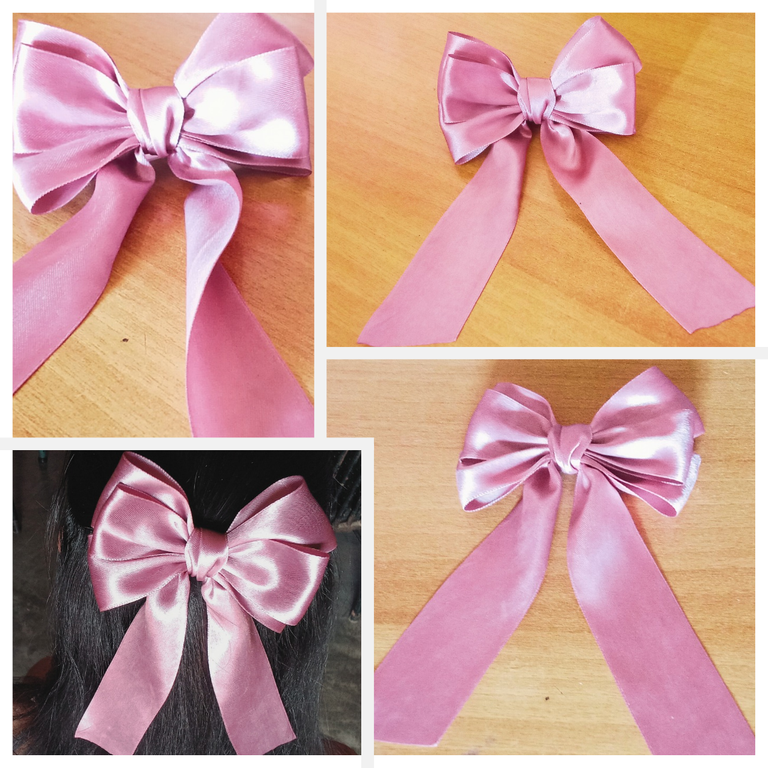
And this way our bow is ready for the little ones at home, I hope you liked it, let me know what you thought. I will be attentive to your comments.
Y de esta manera queda listo nuestro lazo para las más pequeñas de casa, espero que les haya gustado, díganme que les pareció. Estaré atenta a sus comentarios.
Créditos y Recursos//Credits and Resources
Translated by DeepL
Cover page created in Canva Pro
Images captured with my Samsung Galaxy F13
Thanks for Visiting my Blog
Posted Using INLEO
It is stylish, elegant, and beautiful. Love its design and color. You did a wonderful job! It looks great. Keep it up!
selected by @rezoanulvibes
I'm very happy to hear that you liked it. Thank you for all your support.
Te quedó precioso, el color que elegiste me ha encantado, tiene un diseño muy bonito y la cinta de satín hace que se vea muy elegante. 😍🎀
Muchas gracias que bueno que te haya gustado, como era para una niña escogí este color tan tierno.
Quedó lindo, el color es perfecto 🎀
Muchas gracias, a mi también me gusta mucho el color.
Es super elegante el color me gusto mucho hermoso
Muchas gracias 🤗
Congratulations @arqyanedesings! You have completed the following achievement on the Hive blockchain And have been rewarded with New badge(s)
Your next target is to reach 150 posts.
You can view your badges on your board and compare yourself to others in the Ranking
If you no longer want to receive notifications, reply to this comment with the word
STOPThank you very much, we hope to exceed this new goal soon.
Lindo lazo, siempre serán un adorno para el cabello que no pasa de moda.
Pues así mismo, a mi me gustan mucho.
beautiful, stylish, the colors are also pleasing to the eye at any time.
Muchas gracias 🤗
You're welcome, happy Easter friends.
https://www.reddit.com/r/somethingimade/comments/1l29dms/i_made_this_beautiful_hair_bow/
This post has been shared on Reddit by @arqyanedesings through the HivePosh initiative.